You’ve nurtured your Thunbergia vine, watching it climb and bloom, adding a splash of color to your garden. It’s a rewarding experience, isn’t it? But then, you notice the leaves starting to droop, even though you’ve been watering regularly. The vibrant green is fading, replaced by a sickly yellow. A sense of dread creeps in – could it be root rot? I understand that feeling of helplessness when a beloved plant shows signs of distress. I’ve been there myself. That’s why I’m here to help. This guide provides actionable steps on how to care for Pythium root rot on Thunbergia, helping you restore your vine to its former glory. You’ll learn how to identify, treat, and, most importantly, prevent this common problem, ensuring your Thunbergia thrives for years to come.
Pythium root rot is a common issue that can plague various plants, including the beautiful Thunbergia, also known as Black-Eyed Susan Vine or Clock Vine. It’s caused by a water mold (an oomycete), not a true fungus, that thrives in damp conditions. This pathogen attacks the delicate root systems of plants, hindering their ability to absorb water and nutrients. This leads to a cascade of visible symptoms, from wilting and yellowing leaves to stunted growth and, in severe cases, plant death.
I know how frustrating it can be to watch your plants suffer. It feels like all your hard work is going to waste. But don’t worry, with the right knowledge and care, you can effectively combat Pythium root rot and bring your Thunbergia back to life. This guide will equip you with the tools you need to identify the problem early, implement effective treatment strategies, and establish preventative measures to protect your plants in the future. We’ll delve into the specifics of Thunbergia care in relation to this disease, ensuring you have a comprehensive understanding of how to keep your vines healthy and thriving.
Understanding the nature of Pythium is the first step in effectively combating it. These microscopic organisms flourish in overly moist conditions, making proper watering and drainage crucial factors in preventing infection. We’ll explore these factors in detail, providing you with practical tips and techniques to create an environment where your Thunbergia can flourish without the threat of root rot. By the end of this guide, you’ll not only know how to care for Pythium root rot on Thunbergia, but you’ll also have a deeper understanding of plant health and disease prevention, empowering you to become a more confident and successful gardener.
I’m committed to providing you with clear, concise, and actionable advice. I’ll share my own experiences and insights, drawing on years of gardening and plant care. I want you to feel confident in your ability to tackle this problem and enjoy the beauty of your thriving Thunbergia.
Understanding the Enemy: What is Pythium Root Rot?
Pythium root rot, often mistaken for a fungal disease, is caused by a water mold, an oomycete. These microscopic pathogens thrive in moist conditions, making them a common enemy of gardeners, especially those of us who might be a little too enthusiastic with the watering can. I’ve learned over the years that understanding the enemy is half the battle, and with Pythium, it’s crucial to know it’s not a true fungus, as this affects treatment choices.
These pathogens are opportunistic, attacking the roots of your Thunbergia, hindering their vital functions of absorbing water and nutrients from the soil. This disruption leads to a cascade of problems for the plant, much like a blocked artery in a human body. The plant can’t get what it needs to survive, leading to visible symptoms we’ll discuss later.
Pythium is particularly fond of specific conditions:
- Overwatering: This is the most common culprit. I’ve seen many well-intentioned gardeners inadvertently create the perfect breeding ground for Pythium by watering too frequently.
- Poor Drainage: Soil that doesn’t drain well keeps the roots constantly wet, creating an ideal environment for Pythium to flourish.
- Cool, Wet Soil: These conditions slow down plant growth and make them more susceptible to infection.
Understanding these predisposing factors is crucial in preventing Pythium root rot. It’s about creating an environment where your Thunbergia can thrive, not one that favors these destructive pathogens.
Pythium spreads through several means:
- Infected Soil: This is a common way to introduce Pythium to your garden or containers.
- Contaminated Water: Splashing water can spread the pathogen from infected plants to healthy ones.
- Infected Tools: Unclean gardening tools can also harbor and transmit Pythium.
By understanding how Pythium operates and spreads, you’re better equipped to protect your Thunbergia. It’s about creating a healthy environment for your plants and being vigilant in your care.
Spotting the Trouble: Identifying Pythium Root Rot on Thunbergia
Early detection is crucial when dealing with Pythium root rot. The sooner you identify the problem, the better your chances of saving your Thunbergia. I’ve learned that being observant is one of the most valuable skills a gardener can possess. You need to become familiar with your plant’s normal appearance so you can quickly notice any deviations.
Here are some key symptoms to watch out for:
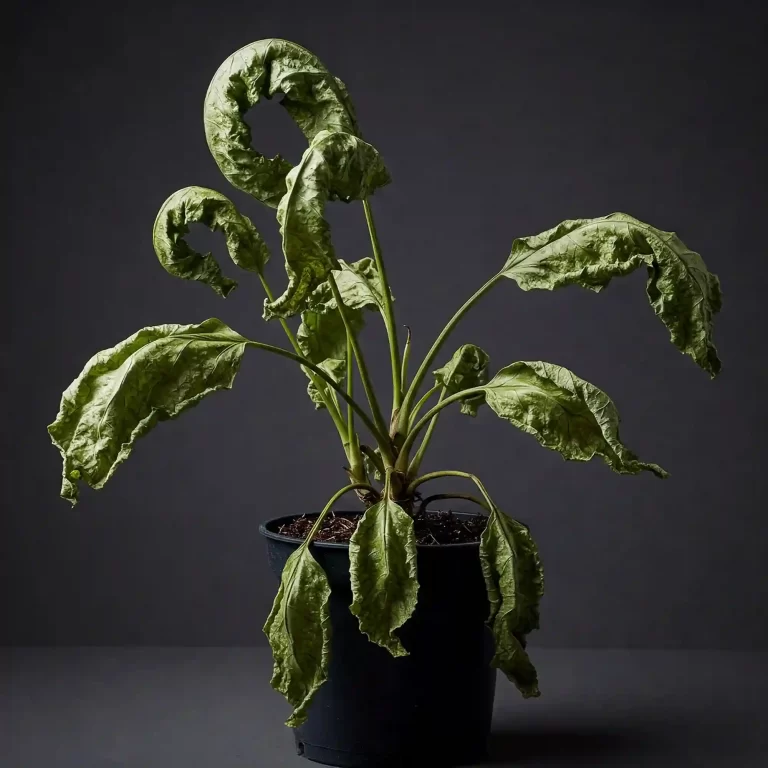
- Wilting Leaves: This is often the first sign you’ll notice. Even if you’ve been watering regularly, the leaves will start to droop as if the plant is thirsty. This happens because the damaged roots can’t transport water to the leaves effectively.
- Stunted Growth: If your Thunbergia isn’t growing as vigorously as it should be, or if new growth is weak and spindly, root rot could be the culprit.
- Yellowing or Browning Foliage: As the root system deteriorates, the leaves may start to turn yellow or brown, starting from the bottom of the plant and progressing upwards.
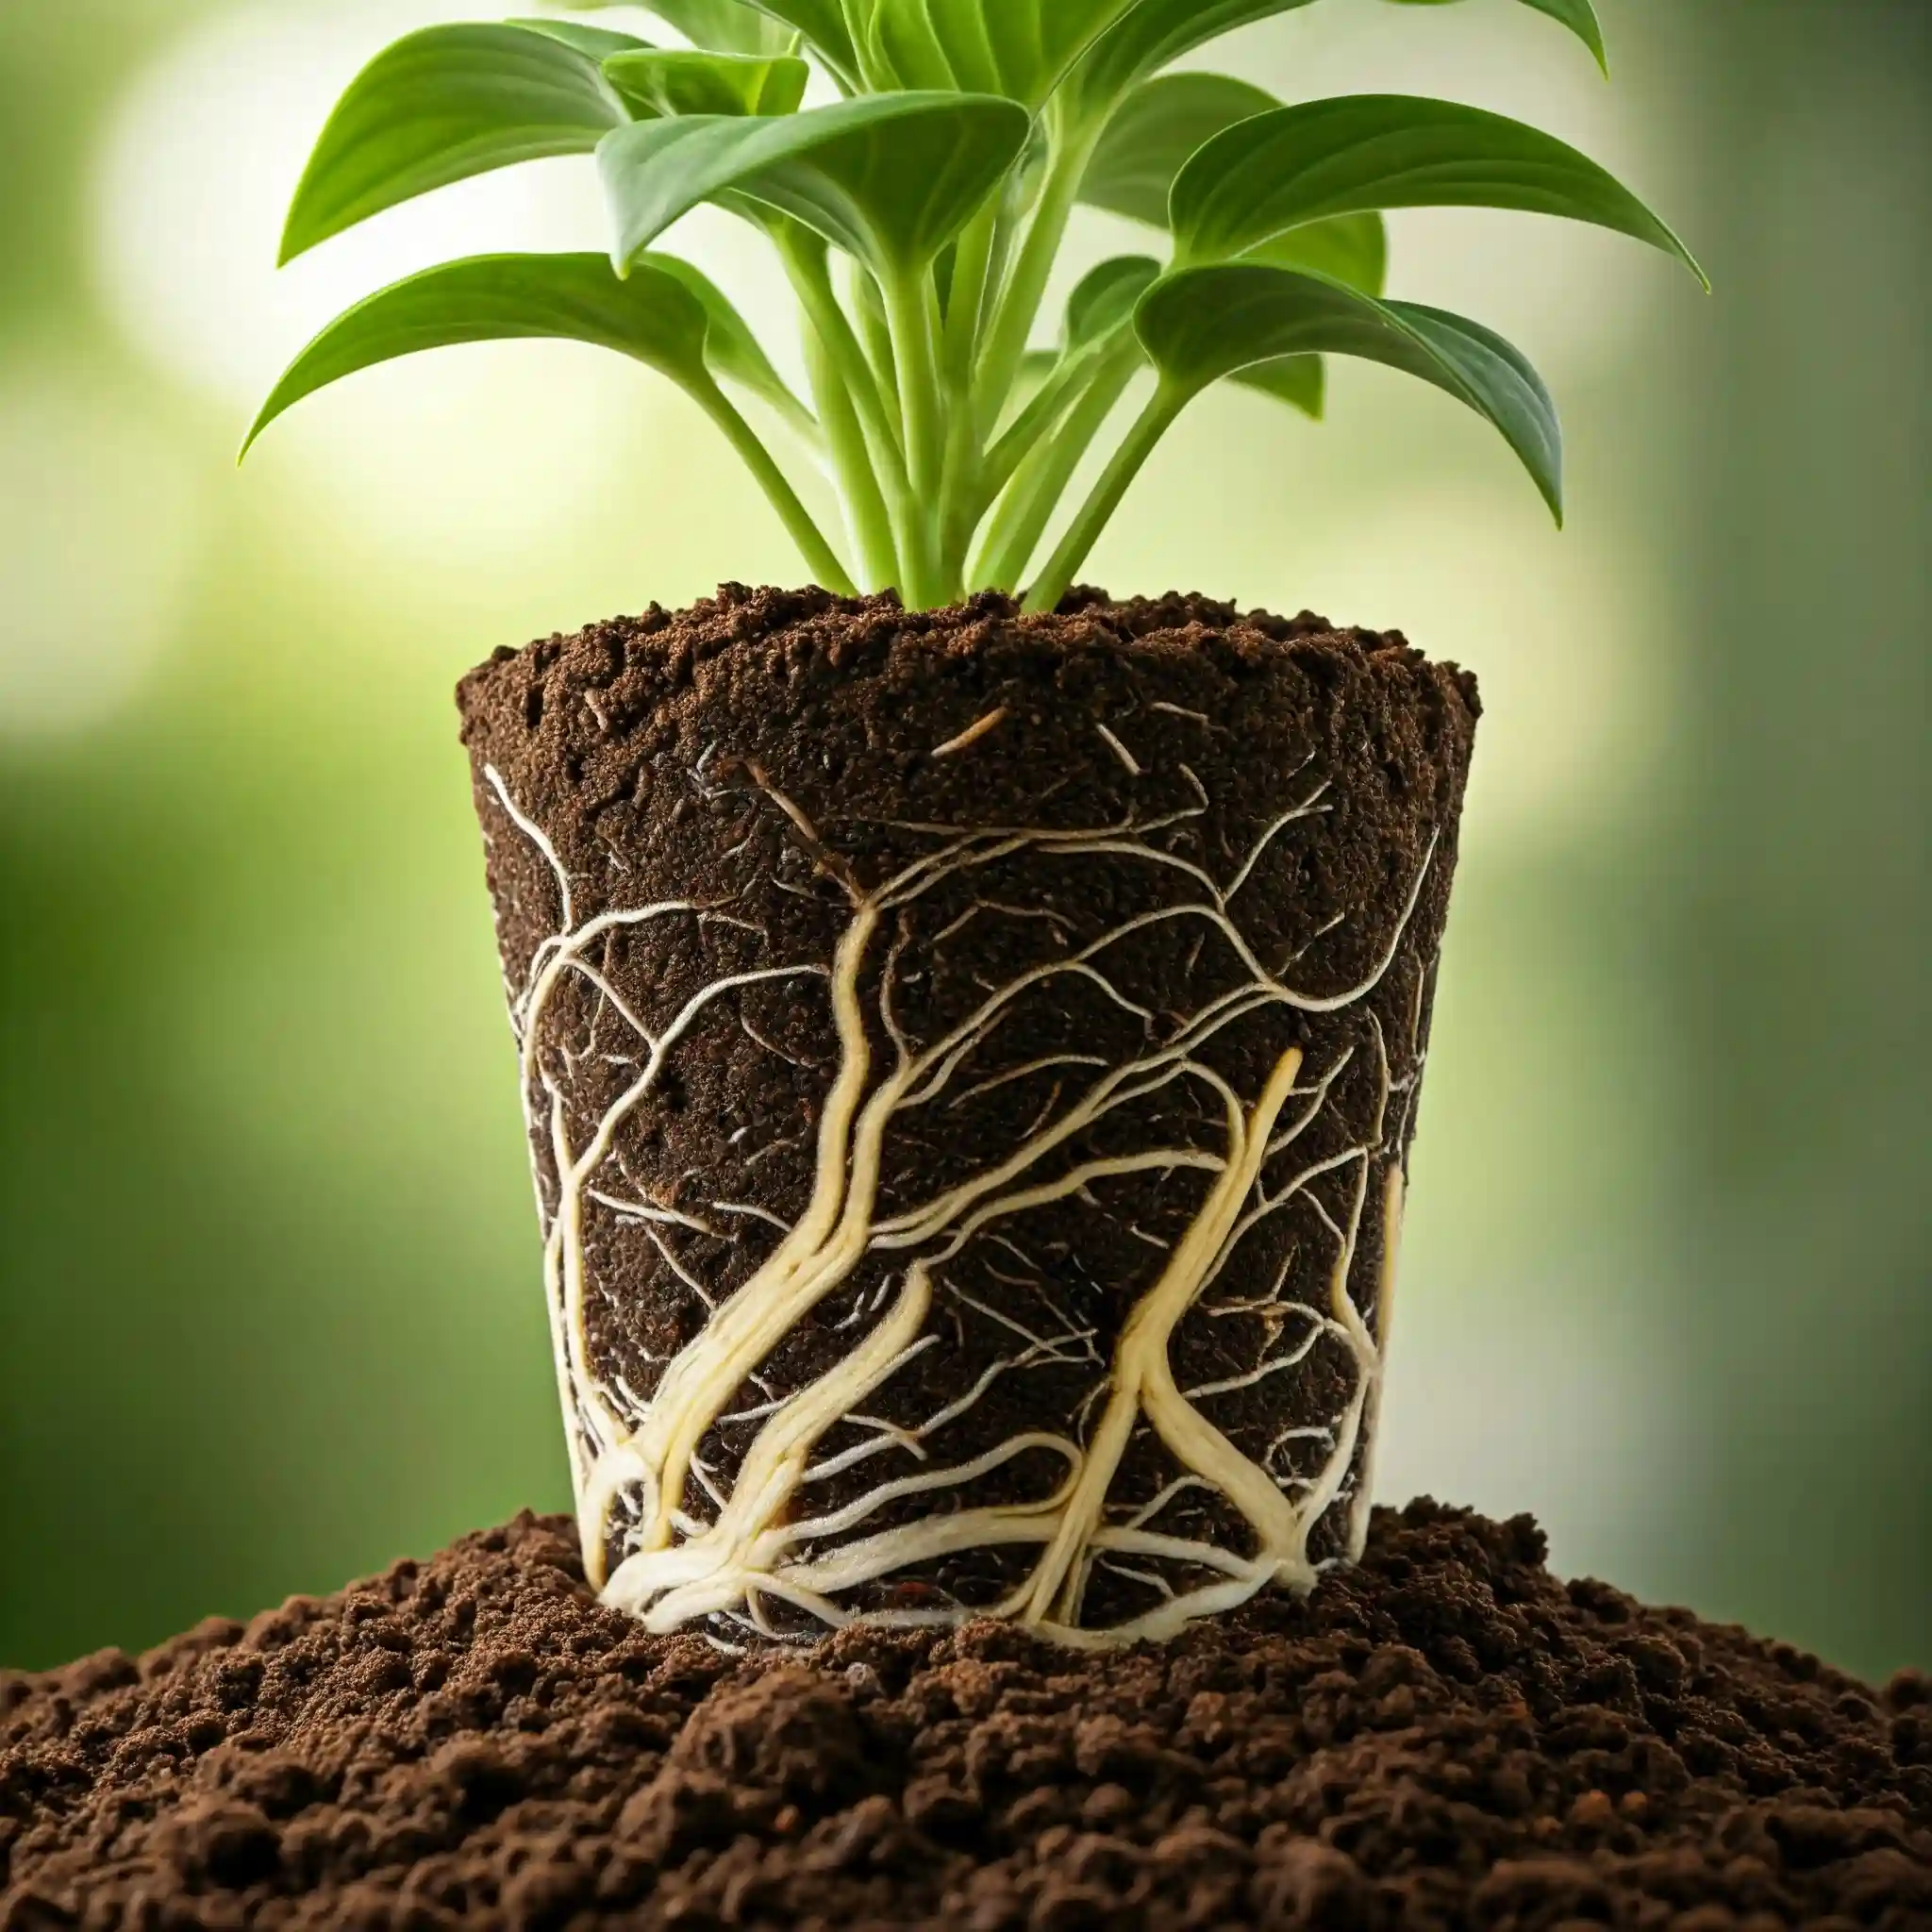
- Soft, Mushy, Brown Roots: This is the most definitive sign of Pythium root rot. Healthy roots are firm and white or light tan. Infected roots will be dark brown, soft, and mushy to the touch. They may even have a slimy texture.
- Dieback of Stems: In severe cases, the stems of the Thunbergia may start to die back from the tips.
To confirm your suspicions, you’ll need to check the roots. This is a delicate process, so be gentle:
- Carefully remove the plant from its pot.
- Gently remove as much soil as possible from the root ball.
- Inspect the roots for the characteristic signs of root rot: dark brown color, mushy texture, and a foul odor.
Remember, early detection is key. If you notice any of these symptoms, don’t hesitate to take action. The sooner you start treatment, the better the chances of saving your beloved Thunbergia.
The Care Plan: Treating Pythium Root Rot on Thunbergia
Now that you’ve identified the problem, it’s time to take action. I’ve found that a multi-pronged approach is often the most effective way to combat Pythium root rot. Here’s a step-by-step care plan I recommend:
Repotting:
This is often the most crucial step in treating root rot. By repotting your Thunbergia, you’re removing the infected soil, providing fresh growing medium, and giving the roots a chance to recover. Here’s how I approach it:
- Choose the Right Pot: Select a pot that is only slightly larger than the previous one. Too large a pot can hold excess moisture, exacerbating the problem. Ensure the pot has adequate drainage holes.
- Prepare the Potting Mix: Use a well-draining potting mix. I often create my own mix by combining equal parts of:
- Potting Soil: Provides essential nutrients.
- Perlite or Coarse Sand: Improves drainage and aeration.
- Compost or Well-Rotted Manure: Adds organic matter and beneficial microbes.
- Carefully Remove the Plant: Gently loosen the soil around the edges of the pot and carefully lift the plant out.
- Remove Infected Soil: Gently remove as much of the old, infected soil from the root ball as possible. You can use a gentle stream of water to help dislodge stubborn soil.
- Inspect and Trim Roots: Carefully inspect the roots and trim away any that are dark brown, mushy, or have a foul odor. Use clean, sharp pruning shears to prevent further infection.
- Repot the Thunbergia: Place a layer of fresh potting mix in the bottom of the new pot. Position the Thunbergia in the center and fill the pot with the remaining potting mix, ensuring the top of the root ball is level with the rim of the pot.
- Water Sparingly: Water the newly repotted Thunbergia sparingly, just enough to moisten the soil. Avoid overwatering, as this can create conditions that favor Pythium.
Fungicide Application (If Necessary):
In some cases, repotting alone may not be enough to completely eradicate the Pythium infection. If the infection is severe or if you’ve had recurring issues with root rot, you may need to use a fungicide.
- Choose the Right Fungicide: Look for fungicides that are specifically labeled for use against Pythium. Active ingredients like mefenoxam or propamocarb are often effective.
- Follow Instructions Carefully: Always follow the instructions on the fungicide label carefully. Use the recommended dosage and application method.
- Organic Alternatives: While less effective for established infections, some organic gardeners use hydrogen peroxide as a treatment for root rot. Dilute 3% hydrogen peroxide with water (a 1:4 ratio) and use it to drench the soil.
Improving Drainage:
Improving drainage is crucial for preventing future Pythium infections. Here are some tips:
- Ensure Adequate Drainage Holes: Make sure your pots have sufficient drainage holes. If not, you can drill additional holes.
- Use Well-Draining Potting Mix: As mentioned earlier, using a well-draining potting mix is essential.
- Elevate Pots: If your pots are sitting directly on the ground, elevate them slightly using pot feet or bricks. This will improve air circulation around the drainage holes and prevent water from pooling underneath.
By following these treatment strategies, you’ll give your Thunbergia the best chance to recover from Pythium root rot and thrive once again.
Prevention is Key: Avoiding Pythium Root Rot on Thunbergia
While treating Pythium root rot is possible, prevention is always the best approach. By creating a healthy environment for your Thunbergia, you can significantly reduce the risk of this disease. Here are some preventative measures I’ve found to be most effective:
Proper Watering Practices:
Overwatering is the primary cause of Pythium root rot. It’s crucial to water your Thunbergia correctly:
- Water Only When Necessary: Allow the top inch of soil to dry out before watering again. You can check this by inserting your finger into the soil. If it feels dry, it’s time to water.
- Water Deeply but Infrequently: When you do water, water thoroughly, ensuring the water reaches the roots. Allow excess water to drain out of the drainage holes.
- Avoid Overwatering: This is the golden rule. Soggy soil creates the perfect environment for Pythium to thrive.
Well-Draining Soil:
Using a well-draining potting mix is essential, especially for container-grown Thunbergia. This type of mix allows excess water to drain away quickly, preventing the roots from becoming waterlogged.
Proper Sunlight and Air Circulation:
Thunbergia thrives in sunny locations with good air circulation. These conditions help to keep the soil from becoming overly moist and prevent fungal diseases.
Healthy Plant Practices:
- Avoid Overcrowding: Give your Thunbergia enough space to grow. Overcrowding can restrict air circulation and create humid conditions that favor Pythium.
- Remove Dead or Decaying Plant Material: Promptly remove any dead leaves, flowers, or stems from your Thunbergia. This will help to prevent the spread of disease.
By following these preventative measures, you can create an environment where your Thunbergia can thrive, free from the threat of Pythium root rot.
Thunbergia Care: General Tips for Healthy Growth
Beyond preventing root rot, providing proper general care is essential for a thriving Thunbergia. These vines are relatively easy to care for, but understanding their basic needs will ensure they flourish in your garden or containers.
Sunlight Requirements:
Thunbergia loves the sun! For optimal growth and abundant blooms, I recommend providing at least six hours of direct sunlight per day. A south-facing location is ideal, but they can also tolerate some light shade, especially in hotter climates. However, too much shade can result in fewer flowers and weaker growth.
Watering Frequency (Outside of Root Rot Prevention):
While preventing root rot involves careful watering, established, healthy Thunbergia still need regular watering, especially during hot, dry periods. Here’s what I’ve found works well:
- Regular Watering During Growing Season: During the spring and summer, when Thunbergia is actively growing, water deeply whenever the top inch of soil feels dry.
- Reduce Watering in Winter: During the cooler months, Thunbergia’s growth slows down, and they require less water. Reduce watering frequency accordingly, allowing the soil to dry out more between waterings.
Fertilization:
To encourage vigorous growth and abundant blooms, I recommend fertilizing your Thunbergia regularly during the growing season.
- Balanced Liquid Fertilizer: Use a balanced liquid fertilizer (e.g., 10-10-10) diluted to half strength.
- Frequency: Fertilize every 2-4 weeks during the spring and summer.
- Stop Fertilizing in Winter: During the winter months, when growth slows down, stop fertilizing.
Pruning:
Pruning helps to keep your Thunbergia tidy, encourages bushier growth, and promotes more flowers.
- Deadheading: Regularly remove spent flowers to encourage continuous blooming.
- Pruning for Shape: You can prune your Thunbergia to control its size and shape. Prune after flowering to avoid removing developing buds.
- Hard Pruning (if needed): If your Thunbergia becomes overgrown, you can hard prune it back in late winter or early spring before new growth begins.
Support:
As a vine, Thunbergia needs support to climb. Provide a trellis, fence, or other structure for it to twine around. This not only keeps the plant tidy but also improves air circulation, which helps to prevent fungal diseases.
By providing proper sunlight, water, fertilizer, and support, you can create an environment where your Thunbergia can thrive and bring beauty to your garden for years to come. These general care practices, combined with the root rot prevention strategies discussed earlier, will ensure your vine stays healthy and vibrant.
FAQ
I’ve compiled a list of frequently asked questions to provide quick and concise answers to common concerns about Pythium root rot on Thunbergia:
The most effective treatment involves repotting the Thunbergia alata into a sterile pot with fresh, well-draining potting mix. Carefully trim away any infected roots and consider applying a fungicide labeled for Pythium control.
Prevention starts with using a sterile, well-draining potting mix and avoiding overwatering. Provide good air circulation and ensure the seedlings receive adequate sunlight.
Immediate action is crucial. Repot the Thunbergia into fresh potting mix, removing any infected roots. Apply a fungicide and provide optimal growing conditions to encourage recovery.
The earliest sign is often wilting leaves, even when the soil is moist. Other signs include stunted growth, yellowing or browning foliage, and soft, mushy roots.
Water only when the top inch of soil feels dry to the touch. Avoid overwatering and ensure the pot has adequate drainage to prevent waterlogging.
Conclusion
Thunbergia, with its vibrant blooms and vigorous growth, can be a stunning addition to any garden. However, like all plants, it’s susceptible to certain diseases, including Pythium root rot. By understanding the causes, symptoms, and treatment strategies for this common problem, you can effectively protect your Thunbergia and ensure its continued health and beauty.
Remember, prevention is always the best medicine. By implementing proper watering practices, providing well-draining soil, ensuring adequate sunlight and air circulation, and following general Thunbergia care guidelines, you can create an environment where your vine can thrive, free from the threat of root rot.
Early detection is also crucial. Regularly inspect your Thunbergia for any signs of stress, such as wilting leaves, stunted growth, or discoloration. If you suspect root rot, don’t hesitate to take action. Repotting, removing infected roots, and applying appropriate treatments can often save your plant.
Gardening is a journey of learning and discovery. There will be challenges along the way, but with patience, observation, and the right knowledge, you can overcome them and enjoy the rewards of a thriving garden. I hope this guide has provided you with the information and confidence you need to care for your Thunbergia and keep it healthy for years to come.
