

Are you tired of lackluster harvests and struggling to get your spring garden off to a strong start? You’ve spent hours planning, planting, and tending to your raised beds, yet the results are underwhelming. It’s frustrating to see your hard work not pay off, especially when spring’s fleeting window of opportunity is so precious. But what if you could unlock the secrets to a truly bountiful spring harvest? I’m here to guide you through 10 essential strategies that will transform your raised bed gardening experience, ensuring you reap the rewards you deserve.
1. Timing is Everything: Know Your Planting Window

When it comes to spring raised bed gardening, timing is absolutely crucial. You know, you can’t just throw seeds in the ground and hope for the best. Understanding your local climate and frost dates is the first step to a successful spring garden.
Understanding Your Local Frost Dates
I always recommend that you start by familiarizing yourself with your area’s average last frost date. This is the estimated date when the risk of frost drops significantly. You can usually find this information from your local agricultural extension office or online resources like the USDA Plant Hardiness Zone Map. Why is it important? Well, planting too early can expose your tender seedlings to frost damage, while planting too late can shorten your growing season and reduce your yield.
For instance, if your last frost date is mid-May, you’ll want to plan your seed starting and transplanting accordingly. I find it useful to create a calendar or spreadsheet with key planting dates for different crops. This helps me stay organized and ensures I don’t miss any critical planting windows.
Starting Seeds Indoors vs. Direct Sowing
You’ll need to decide which plants to start indoors and which to direct sow into your raised beds. Starting seeds indoors gives you a head start, especially for plants that require a longer growing season, like tomatoes or peppers. Direct sowing, on the other hand, is suitable for cool-season crops like radishes, carrots, and lettuce, which can tolerate cooler soil temperatures.
Here’s a simple guideline:
- Start Indoors (6-8 weeks before last frost): Tomatoes, peppers, eggplants, broccoli, cauliflower.
- Direct Sow (after last frost): Radishes, carrots, lettuce, spinach, peas.
Starting seeds indoors allows you to control the growing environment, providing warmth, light, and consistent moisture. I use seed starting trays and heat mats to ensure optimal germination. Once the seedlings have developed a few sets of true leaves, they can be transplanted into your raised beds.
Successive Planting for Continuous Harvest
To maximize your harvest, consider successive planting. This involves planting crops at intervals of a few weeks, rather than all at once. For example, I plant a row of lettuce every two weeks, ensuring a continuous supply of fresh greens throughout the spring. This technique is particularly effective for fast-growing crops like radishes and spinach.
Successive planting not only extends your harvest but also helps prevent a glut of produce all at once. You will find that you are able to harvest smaller amount over a longer period.
Here is a simple table showing examples of successive planting.
| Crop | Planting Interval | Benefit |
| Lettuce | Every 2 weeks | Continuous supply of fresh greens |
| Radishes | Every 2-3 weeks | Prevents a large harvest at once |
| Spinach | Every 3 weeks | Extends the harvest period |
Case Study:
I remember one year, I decided to plant all my lettuce seeds at once. I ended up with a massive harvest of lettuce that went to seed before I could eat it all. Since then, I’ve learned the value of successive planting. By planting smaller batches at regular intervals, I now enjoy a steady supply of fresh lettuce throughout the spring.
Quote:
“The best time to plant a tree was 20 years ago. The second best time is now.” – Chinese Proverb. This applies to gardening as well. The best time to start planning your spring garden is now.
Data:
According to a study by the National Gardening Association, 77% of gardeners who plan their planting schedule based on frost dates report higher yields.
Tips:
- Keep a gardening journal to track your planting dates and harvest times.
- Use a soil thermometer to monitor soil temperature before direct sowing.
- Consider using cold frames or hoop houses to extend your growing season.
2. Choosing the Right Soil Mix for Raised Beds

The quality of your soil directly impacts the health and productivity of your raised bed garden. Unlike in-ground gardens, raised beds provide you with greater control over the soil composition. This means you can create a custom soil mix that is ideal for your specific needs and the plants you intend to grow.
Understanding Soil Composition
Soil is a complex mixture of mineral particles, organic matter, water, and air. Each of these components plays a vital role in plant growth.
- Mineral particles: These provide structural support and hold water and nutrients. Different soil textures, such as sand, silt, and clay, have varying particle sizes and drainage properties.
- Organic matter: This includes decomposed plant and animal material, such as compost and manure. Organic matter improves soil structure, increases water retention, and provides essential nutrients for plants.
- Water: Water is essential for plant growth, transporting nutrients from the soil to the plant.
- Air: Air spaces in the soil allow for root respiration and gas exchange.
Ideal Soil Characteristics for Raised Beds
The ideal soil mix for raised beds should be:
- Well-draining: Excess water can suffocate plant roots. A well-draining soil allows water to move through the soil profile, preventing root rot.
- Nutrient-rich: Plants require a variety of nutrients to grow and thrive. A fertile soil mix provides the essential nutrients for healthy plant development.
- Loose and friable: A loose and friable soil allows for easy root penetration and promotes healthy root growth.
- Rich in organic matter: Organic matter improves soil structure, increases water retention, and provides a slow-release source of nutrients for plants.
Creating a Custom Soil Mix
You can create a custom soil mix for your raised beds by combining different components. Here are a few common ingredients:
- Compost: A well-rotted compost is an excellent source of organic matter and nutrients.
- Topsoil: Topsoil is the uppermost layer of soil, typically rich in organic matter.
- Perlite: Perlite is a lightweight volcanic rock that improves drainage and aeration.
- Vermiculite: Vermiculite is a mineral that helps retain moisture and provides a slow-release source of nutrients.
- Coir: Coir is a natural fiber derived from coconut husks that improves soil structure and water retention.
The specific ratio of these components will depend on the type of plants you are growing and the existing soil conditions. For example, if your soil is heavy clay, you may want to add more perlite or sand to improve drainage.
Testing Your Soil
Before filling your raised beds, it’s a good idea to test your soil. A soil test will provide you with valuable information about your soil’s pH, nutrient levels, and overall health. You can purchase a soil test kit from your local garden center or send a soil sample to a commercial soil testing laboratory.
Incorporating Soil Amendments
Once you have filled your raised beds with your chosen soil mix, you may want to incorporate some additional amendments to further improve soil quality. This might include:
- Adding additional compost: A layer of compost on top of the soil can help suppress weeds, retain moisture, and provide a slow-release source of nutrients.
- Applying fertilizer: You can apply a balanced fertilizer to provide your plants with the essential nutrients they need to grow.
- Incorporating beneficial microbes: Beneficial microbes, such as mycorrhizal fungi, can help plants absorb nutrients and improve soil health.
By carefully selecting and preparing your soil mix, you can create a healthy and productive environment for your spring raised bed garden. Remember, the quality of your soil directly impacts the quality of your harvest.
3. Cool-Season Crops for Early Spring Planting

Cool-season crops are your best friends for early spring planting. These hardy plants thrive in cooler temperatures and can tolerate light frosts, making them perfect for the unpredictable weather of early spring.
What are Cool-Season Crops?
Cool-season crops are vegetables that grow best in cool weather, typically between 40°F and 75°F (4°C and 24°C). They prefer shorter days and cooler nights, and they tend to bolt (go to seed) quickly in hot weather.
Benefits of Planting Cool-Season Crops in Spring:
- Early Harvest: Many cool-season crops mature quickly, allowing you to enjoy fresh produce early in the season.
- Frost Tolerance: These crops can withstand light frosts, reducing the risk of crop loss.
- Soil Preparation: Planting cool-season crops early in the spring helps prepare the soil for warmer-season crops. Their roots help break up compacted soil and add organic matter as they decompose.
Popular Cool-Season Crops for Spring Planting:
- Leafy Greens: Lettuce, spinach, kale, arugula, and Swiss chard are all excellent choices for early spring planting. They grow quickly and can be harvested continuously as you thin them.
- Root Vegetables: Radishes, carrots, and beets can also be planted early in the spring. These crops have relatively short growing seasons and can be harvested before the weather gets too hot.
- Peas: Peas are a cool-season favorite, producing sweet and delicious pods in a short amount of time.
- Onions: Onions can be started from seed early in the spring or transplanted as seedlings.
- Garlic: Garlic is typically planted in the fall, but early spring is a good time to harvest mature garlic bulbs.
Tips for Growing Cool-Season Crops in Spring:
- Plant as soon as the soil can be worked: Aim to plant as soon as the ground thaws and can be easily worked.
- Amend the soil: Incorporate compost or other organic matter into the soil to improve drainage and fertility.
- Provide adequate moisture: Cool-season crops require consistent moisture, especially during dry periods.
- Thin seedlings as needed: Thin seedlings to the appropriate spacing to prevent overcrowding and promote healthy growth.
- Protect from pests: Monitor for pests and diseases and take appropriate control measures.
By incorporating a variety of cool-season crops into your spring garden, you can enjoy a continuous harvest of fresh, homegrown produce throughout the early part of the season.
4. Mastering the Art of Seed Starting

Starting your own seeds indoors can be a rewarding experience, giving you greater control over the process and access to a wider variety of plants. However, it’s important to start with high-quality seeds to ensure healthy and vigorous seedlings.
What Makes a Seed High-Quality?
High-quality seeds are:
- Viable: They have a high germination rate, meaning they are likely to sprout and grow into healthy plants.
- Pure: They are free from contamination from other seed varieties or weeds.
- Fresh: Fresh seeds have the highest germination rates. Older seeds may have decreased viability.
- Disease-free: They are free from diseases that can harm your seedlings.
Choosing the Right Seeds
When selecting seeds, consider the following factors:
- Variety: Choose varieties that are well-suited to your climate and growing conditions. Look for disease-resistant varieties if available.
- Source: Purchase seeds from reputable seed companies or local garden centers. Avoid buying seeds from unknown sources, as their quality may be uncertain.
- Seed Saving: If you have access to high-quality seeds from previous years, you can save them for future planting. However, it’s important to store seeds properly to maintain their viability.
Tips for Storing Seeds:
- Cool, dry conditions: Store seeds in a cool, dry place, such as a refrigerator or freezer.
- Airtight containers: Use airtight containers to prevent moisture and pests from damaging the seeds.
- Labeling: Label your seed packets with the variety name, date of harvest or purchase, and any other relevant information.
By selecting high-quality seeds, you’re setting yourself up for success in your seed-starting endeavors. Remember, the quality of your seeds directly impacts the health and vigor of your seedlings, so choose wisely!
5. Protecting Your Garden from Spring Surprises: Frost Protection Techniques
The unpredictable nature of spring weather can pose a significant threat to your young seedlings. Sudden frosts can quickly damage or even kill tender plants, jeopardizing your entire harvest. Fortunately, there are several effective frost protection techniques you can employ to safeguard your spring garden.
Understanding the Impact of Frost
Frost occurs when the temperature drops below freezing (32°F or 0°C), causing water within plant cells to freeze and expand, rupturing cell walls. This damage can cause wilting, discoloration, and even death. Young seedlings are particularly vulnerable to frost damage due to their delicate tissues.
Frost Protection Techniques:
- Row Covers: Row covers are lightweight, non-woven fabric covers that create a protective microclimate around your plants. They trap heat from the sun during the day and release it slowly at night, helping to prevent frost damage. Row covers are relatively inexpensive and easy to use.
- Cloches: Cloches are bell-shaped covers made of glass or plastic that protect individual plants or small groups of plants. They create a mini-greenhouse effect, trapping heat and protecting plants from frost.
- Floating Row Covers: These lightweight, fabric covers float above your plants, creating an insulating air pocket between the cover and the plants. Floating row covers are ideal for protecting tall plants like tomatoes and peppers.
- Cold Frames: Cold frames are miniature greenhouses that provide a controlled environment for protecting seedlings from frost. They typically consist of a wooden frame covered with glass or plastic.
- Watering: Watering your plants thoroughly in the late afternoon can help protect them from frost. The water releases heat as it freezes, helping to moderate temperature fluctuations.
Tips for Effective Frost Protection:
- Choose the right material: Select frost protection materials that are appropriate for the size and type of plants you are protecting.
- Apply properly: Ensure that the frost protection material is securely in place and covers the plants completely.
- Remove during the day: Remove frost protection during the day to allow for adequate sunlight and ventilation.
- Monitor temperatures: Keep a close eye on the weather forecast and remove frost protection promptly when the threat of frost has passed.
By implementing these frost protection techniques, you can significantly reduce the risk of frost damage and increase your chances of a successful spring harvest. Remember, prevention is key when it comes to protecting your garden from the unpredictable whims of spring weather.
6. Mulching Magic: Benefits and Best Practices

Mulching is a valuable practice in raised bed gardening, offering numerous benefits for your plants and simplifying garden maintenance. Mulch is any material applied to the surface of the soil around your plants. It acts as a protective layer, helping to conserve moisture, suppress weeds, regulate soil temperature, and improve soil health.
Types of Mulch for Spring Raised Beds
Several different materials can be used as mulch in your spring raised beds, each with its own set of advantages and disadvantages:
- Organic Mulches:
- Straw: Straw is a readily available and affordable mulch that provides good weed suppression and moisture retention. It’s particularly well-suited for use with vegetables like strawberries and melons.
- Wood Chips: Wood chips are a visually appealing mulch that can add a decorative touch to your garden. They break down slowly, releasing nutrients into the soil over time. However, they can tie up nitrogen in the soil during the decomposition process, so it’s important to fertilize your plants accordingly.
- Compost: Compost is an excellent source of organic matter that improves soil fertility and provides a slow-release source of nutrients. It’s a good choice for use around most vegetables and flowers.
- Grass Clippings: Grass clippings can be used as mulch, but they should be applied in thin layers to prevent matting and avoid attracting pests.
- Straw: Straw is a readily available and affordable mulch that provides good weed suppression and moisture retention. It’s particularly well-suited for use with vegetables like strawberries and melons.
- Inorganic Mulches:
- Plastic Mulch: Plastic mulch, such as black or white polyethylene, helps to suppress weeds, retain moisture, and warm the soil. It’s particularly effective for heat-loving plants like tomatoes and peppers.
- Landscape Fabric: Landscape fabric is a woven material that allows water and air to penetrate while preventing weeds from germinating. It’s a good choice for pathways and areas where you don’t want to plant.
- Plastic Mulch: Plastic mulch, such as black or white polyethylene, helps to suppress weeds, retain moisture, and warm the soil. It’s particularly effective for heat-loving plants like tomatoes and peppers.
When choosing a mulch, consider factors such as the type of plants you are growing, your aesthetic preferences, and the availability of materials. Experiment with different types of mulch to find what works best for your garden.
7. Choosing the Right Fertilizer for Raised Beds

Fertilizing your raised beds provides essential nutrients to help your plants grow strong and produce bountiful harvests. However, choosing the right fertilizer is crucial to avoid over-fertilizing, which can harm your plants and pollute the environment.
Understanding Fertilizer Basics
Fertilizers are typically composed of three primary macronutrients:
- Nitrogen (N): Promotes leafy green growth.
- Phosphorus (P): Encourages root development and flowering.
- Potassium (K): Supports overall plant health and aids in disease resistance.
Fertilizers are often labeled with their N-P-K ratio, indicating the percentage of each nutrient. For example, a 10-10-10 fertilizer contains 10% nitrogen, 10% phosphorus, and 10% potassium.
Types of Fertilizer
- Organic Fertilizers: Organic fertilizers are derived from natural sources such as compost, manure, and bone meal. They release nutrients slowly, providing a steady supply to your plants. Popular organic fertilizers include:
- Compost: A rich source of organic matter and nutrients.
- Manure: Provides a slow-release source of nitrogen and other nutrients.
- Fish emulsion: A liquid fertilizer derived from fish parts, rich in nitrogen and phosphorus.
- Blood meal: A high-nitrogen fertilizer derived from dried blood.
- Bone meal: A slow-release phosphorus fertilizer.
- Inorganic Fertilizers: Inorganic fertilizers are synthetically produced and typically contain higher concentrations of nutrients than organic fertilizers. They provide a quick release of nutrients, but can be more prone to leaching and runoff. Popular inorganic fertilizers include:
- Ammonium nitrate: A high-nitrogen fertilizer.
- Triple superphosphate: A high-phosphorus fertilizer.
- Potassium sulfate: A high-potassium fertilizer.
Choosing the Right Fertilizer for Your Raised Beds
The best fertilizer for your raised beds will depend on several factors, including:
- The type of plants you are growing: Different plants have different nutrient requirements.
- The current nutrient status of your soil: A soil test can help you determine which nutrients your soil is lacking.
- Your personal preferences: Some gardeners prefer to use organic fertilizers, while others prefer inorganic fertilizers.
Tips for Fertilizing Your Raised Beds:
- Follow label instructions: Always follow the manufacturer’s instructions when applying fertilizer. Over-fertilizing can harm your plants and pollute the environment.
- Apply fertilizer evenly: Use a spreader or broadcast spreader to ensure even application of fertilizer.
- Water after fertilizing: Water your plants thoroughly after applying fertilizer to help it dissolve and reach the roots.
- Consider slow-release fertilizers: Slow-release fertilizers provide a steady supply of nutrients over time, reducing the risk of nutrient leaching.
By choosing the right fertilizer and applying it properly, you can provide your plants with the essential nutrients they need to thrive. Remember, a balanced approach to fertilization is key to a healthy and productive raised bed garden.
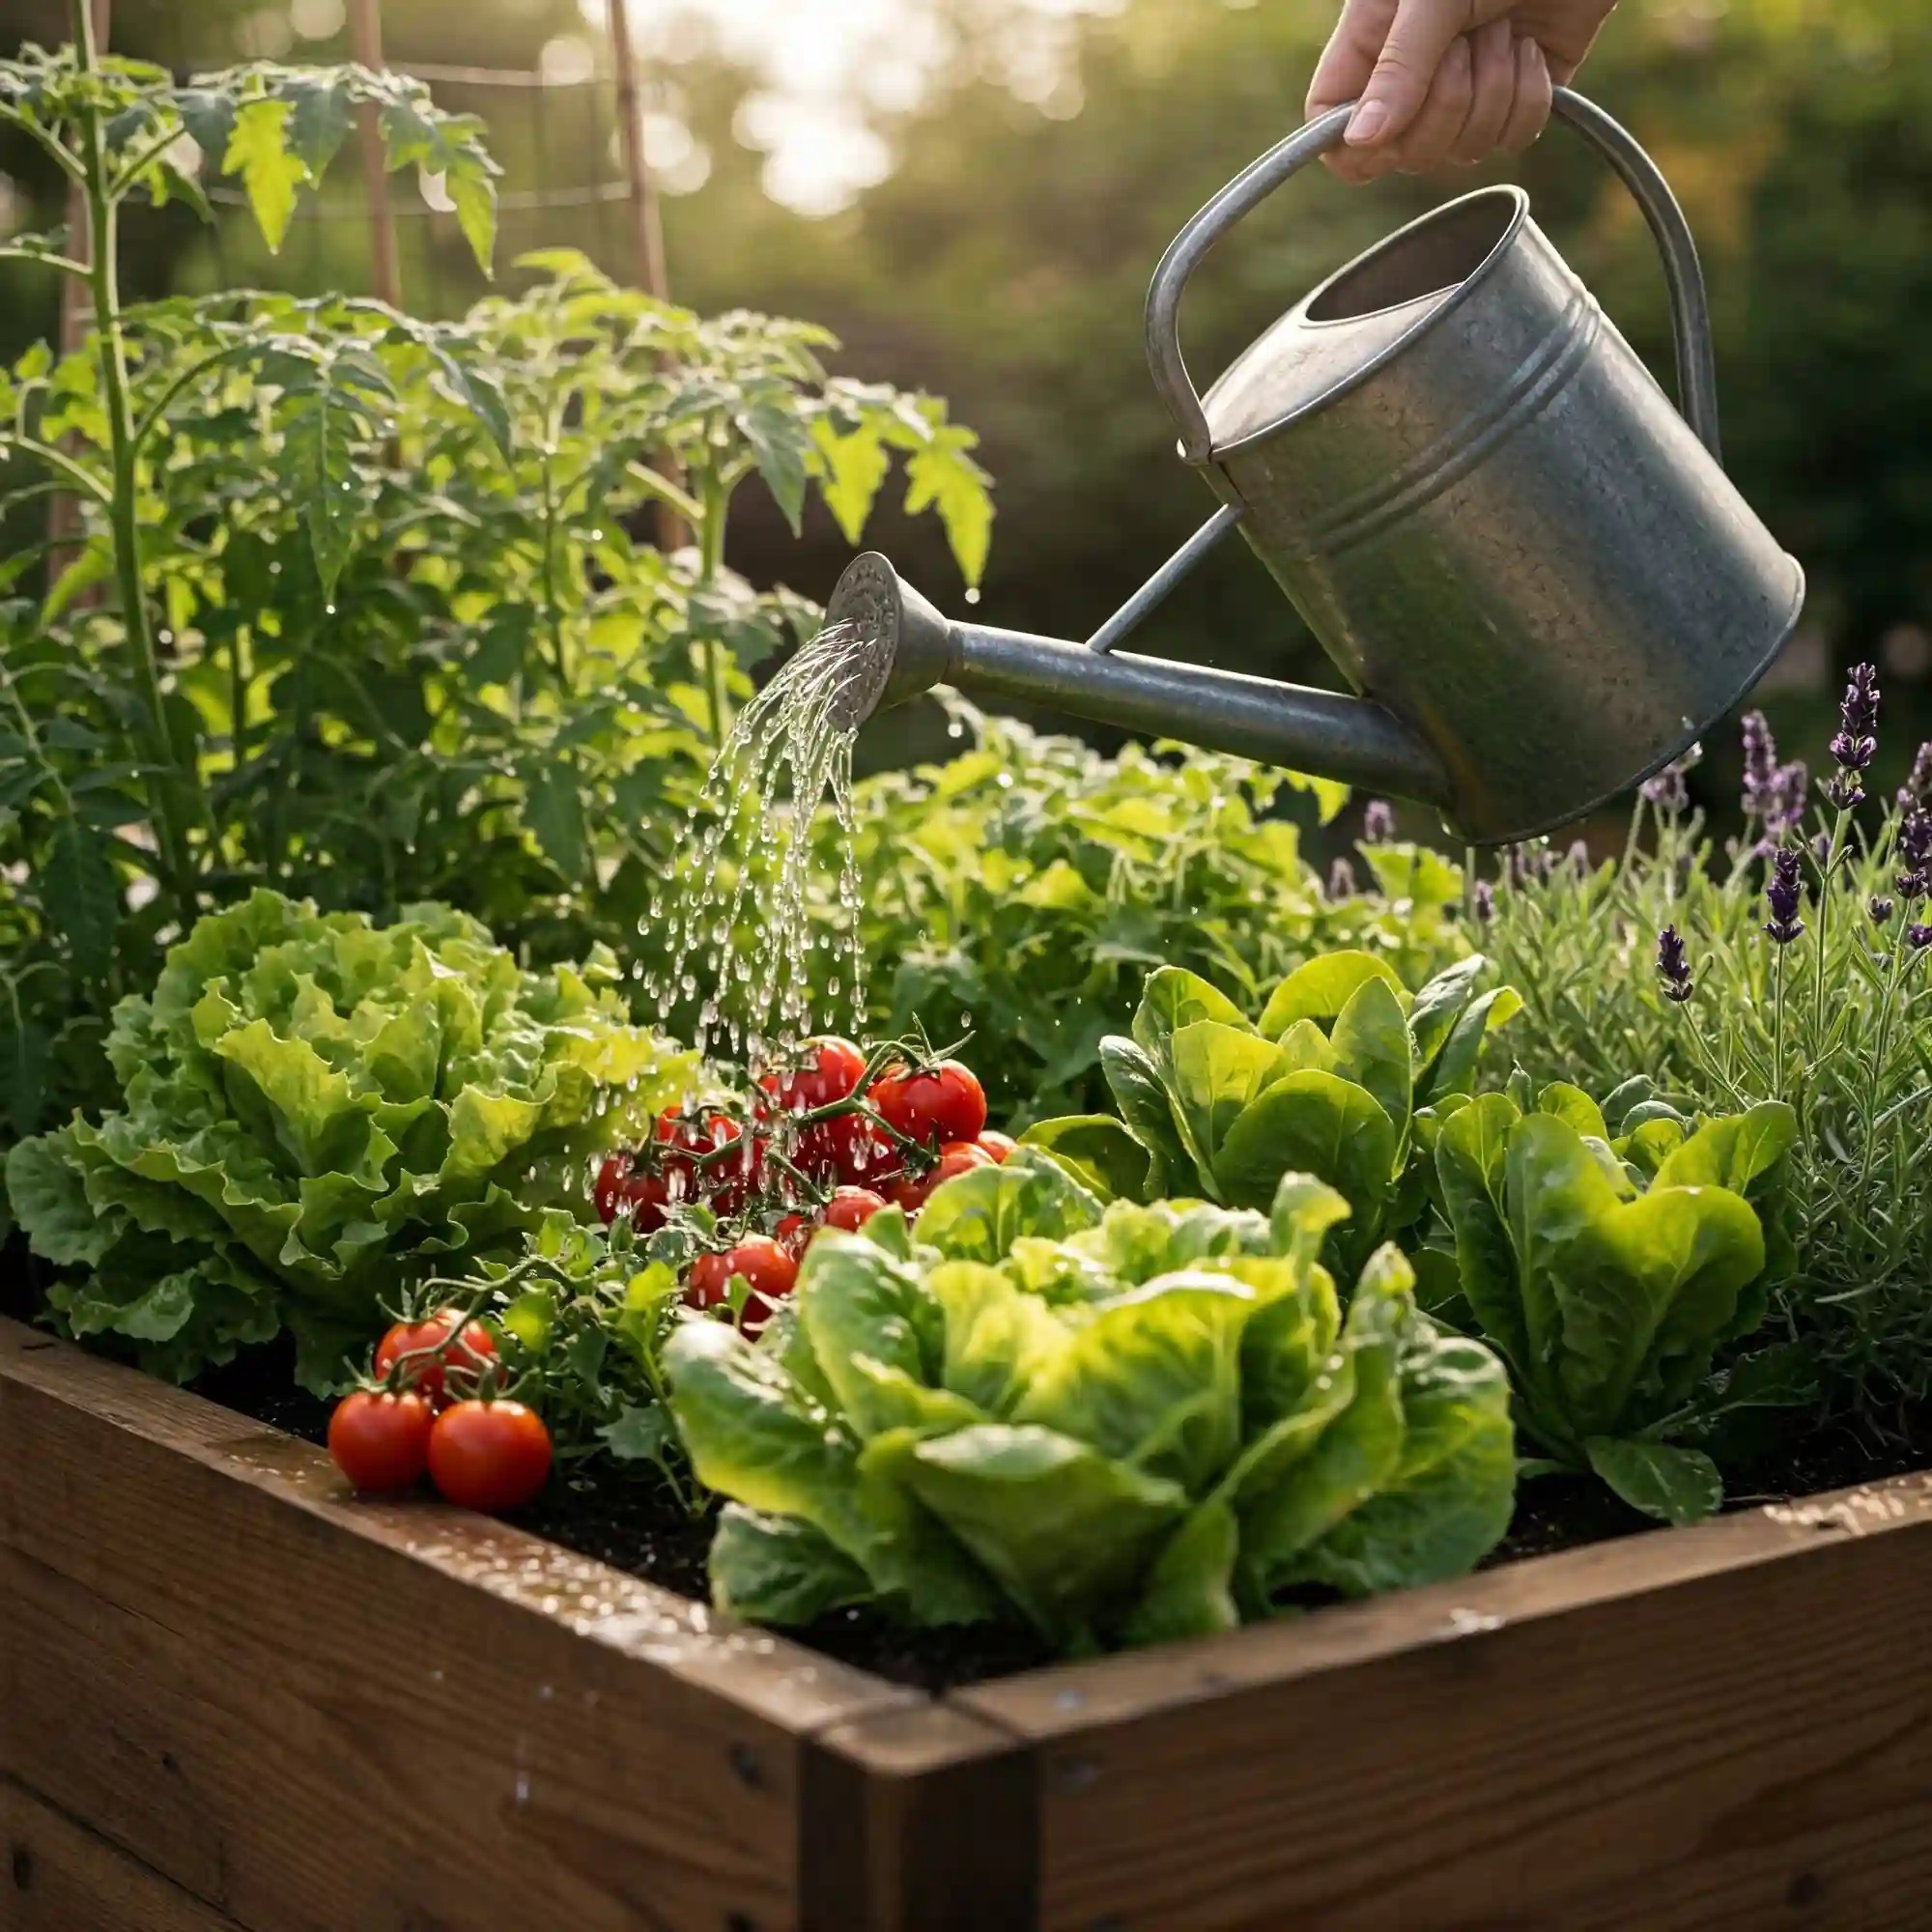
8. Deep Watering to Encourage Strong Root Growth

Water is essential for plant growth, but it’s not just about keeping the soil moist. The way you water your raised beds can significantly impact the health and productivity of your plants. Deep watering encourages strong root growth, which is crucial for drought resistance and overall plant vigor.
The Importance of Deep Watering
Shallow watering only wets the surface of the soil, encouraging roots to grow near the surface. These shallow roots are more susceptible to drought stress, as they are unable to reach deeper moisture reserves in the soil.
Deep watering, on the other hand, encourages roots to grow deep into the soil profile in search of moisture. This results in a stronger root system that is better able to withstand dry periods and access nutrients more effectively.
How to Deep Water Your Raised Beds
- Use a soaker hose or drip irrigation: These methods deliver water slowly and evenly to the base of the plants, encouraging deep root growth.
- Water deeply and infrequently: Instead of frequent, shallow watering, water deeply and less often. Allow the soil to dry out slightly between waterings to encourage deep root growth.
- Water in the morning or evening: Avoid watering during the hottest part of the day, as this can lead to water loss through evaporation. Watering in the morning or evening allows the water to soak into the soil slowly.
Benefits of Deep Watering
- Stronger root systems: Deep watering encourages roots to grow deep into the soil, improving drought resistance and nutrient uptake.
- Reduced water loss: Deep watering reduces water loss through evaporation, making your water usage more efficient.
- Improved soil health: Deep watering helps to leach out excess salts and improve soil drainage.
By practicing deep watering techniques, you can create a healthy root system for your plants, leading to increased vigor, drought resistance, and a more bountiful harvest.
9. Preventing Weeds with Proper Soil Preparation

One of the most effective ways to control weeds in your spring raised beds is to prevent them from germinating in the first place. Proper soil preparation plays a crucial role in weed prevention.
What are Weeds?
Weeds are unwanted plants that compete with your desired crops for water, nutrients, and sunlight. They can reduce yields, harbor pests and diseases, and detract from the aesthetic appeal of your garden.
How Proper Soil Preparation Prevents Weeds
- Removing Existing Weeds: Before planting, it’s essential to remove all existing weeds from your raised beds. This can be done by hand-pulling, hoeing, or using a tiller.
- Covering the Soil: Covering the soil with a layer of mulch or landscape fabric can prevent weed seeds from germinating.
- Adding Organic Matter: Incorporating organic matter, such as compost or well-rotted manure, into the soil can help suppress weeds by creating a less hospitable environment for weed seeds.
- Using Weed-Free Soil: If possible, use weed-free soil or potting mix to fill your raised beds. This will minimize the introduction of weed seeds.
Additional Tips for Weed Prevention:
- Water deeply and infrequently: Deep watering encourages your plants to develop deep roots, which can compete more effectively with weeds for water and nutrients.
- Mulch consistently: Maintain a consistent layer of mulch around your plants to suppress weed growth and conserve moisture.
- Hand-weed regularly: Regularly inspect your raised beds for weeds and remove them promptly before they go to seed.
- Use organic weed control methods: Consider using organic weed control methods, such as flame weeding or using corn gluten meal as a pre-emergent weed control.
By implementing these soil preparation techniques and practicing diligent weed control, you can create a weed-free environment for your spring raised bed garden, allowing your plants to thrive and produce abundant harvests.
10. Enjoy the Harvest!

The culmination of all your hard work is finally here: harvest time! Harvesting your produce at its peak ripeness ensures the best flavor and quality. Here are some tips to help you enjoy the fruits (and vegetables) of your labor:
- Know When to Harvest: Familiarize yourself with the ideal harvest time for each crop. Some crops, like lettuce and spinach, can be harvested continuously as they mature. Others, like tomatoes and cucumbers, should be harvested when they reach full size and ripeness.
- Harvest in the Morning: Early morning is the ideal time to harvest, as the produce is cooler and less likely to wilt.
- Use the Right Tools: Use sharp scissors or pruning shears to avoid damaging the plants. For root vegetables, use a garden fork to gently lift them from the soil.
- Handle Produce Gently: Handle your harvested produce with care to avoid bruising or damaging it.
- Enjoy Immediately or Store Properly: Enjoy your fresh produce immediately or store it properly to extend its shelf life. Different types of produce have different storage requirements.
Tips for Storing Fresh Produce:
- Refrigerate: Most vegetables should be stored in the refrigerator in a crisper drawer.
- Keep it cool and dry: Store fruits and vegetables in a cool, dry place away from direct sunlight.
- Separate produce: Store fruits and vegetables separately, as some fruits release ethylene gas, which can cause other produce to ripen too quickly.
- Use airtight containers: Store produce in airtight containers to prevent moisture loss and spoilage.
Preserving Your Harvest
If you have a surplus of produce, consider preserving it for later use. Common preservation methods include:
- Canning: Canning is a method of preserving food by heating it in sealed jars.
- Freezing: Freezing is a simple way to preserve fruits and vegetables for later use.
- Dehydrating: Dehydrating removes moisture from food, extending its shelf life.
By following these tips, you can enjoy the bounty of your spring raised bed garden and savor the delicious flavors of fresh, homegrown produce. Happy harvesting!
Frequently Asked Questions
Q: When is the best time to start a spring raised bed garden in my area?
Determining the ideal start time for your spring raised bed garden hinges on understanding your region’s specific climatic conditions. Key factors to consider include your average last frost date, soil temperature, and the specific crops you plan to grow.
- Last Frost Date: This crucial date marks the average final occurrence of a freezing temperature. Planting before this date can expose tender seedlings to damaging frost. You can typically find your region’s last frost date by consulting the USDA Plant Hardiness Zone Map or contacting your local agricultural extension office.
- Soil Temperature: Many seeds require warm soil to germinate effectively. Use a soil thermometer to monitor soil temperatures. Aim for soil temperatures of at least 50°F (10°C) for most cool-season crops and warmer temperatures for warm-season crops.
- Crop-Specific Considerations: Different crops have varying temperature requirements. Cool-season crops like lettuce, spinach, and peas can be sown earlier than warm-season crops like tomatoes and peppers.
- Successive Planting: To extend your harvest season, consider successive plantings. Sow seeds for quick-maturing crops like radishes and lettuce at intervals of a few weeks.
By carefully considering these factors and consulting local resources, you can determine the optimal planting window for your spring raised bed garden and maximize your chances of success.
Q: What are some easy-to-grow vegetables for beginner spring gardeners?
Starting with easy-to-grow vegetables can boost your confidence and make your spring gardening experience more enjoyable. Here are a few excellent choices for beginner gardeners:
- Lettuce: Lettuce is a cool-season crop that is easy to grow from seed. It comes in a variety of colors and textures, offering a range of flavors to explore.
- Radishes: Radishes are fast-growing and easy to harvest, providing a quick reward for your efforts.
- Spinach: Spinach is another cool-season crop that is easy to grow and packed with nutrients.
- Peas: Peas are a rewarding crop to grow, producing delicious pods in a relatively short time.
- Zucchini: While technically a warm-season crop, zucchini is a prolific producer and relatively easy to grow, even for beginners.
These crops are relatively low-maintenance and can tolerate some beginner mistakes, making them ideal for those new to gardening.
Q: How do I protect my spring seedlings from late frosts?
Late frosts can pose a significant threat to young seedlings. Fortunately, there are several effective methods to protect your garden:
- Row Covers: These lightweight, non-woven fabric covers create a protective microclimate around your plants, trapping heat and moderating temperature fluctuations.
- Cloches: Cloches are bell-shaped covers that create a mini-greenhouse effect, protecting individual plants or small groups of plants from frost.
- Cold Frames: Cold frames are miniature greenhouses that provide a more controlled environment for protecting seedlings.
- Floating Row Covers: These lightweight, fabric covers float above your plants, creating an insulating air pocket.
- Watering: Watering your plants thoroughly in the late afternoon can help protect them from frost, as the water releases heat as it freezes.
By implementing these frost protection measures, you can safeguard your seedlings and increase your chances of a successful spring harvest.
Q: What type of soil is best for spring raised bed gardening?
The ideal soil for spring raised bed gardening is well-draining, nutrient-rich, and easy to work with. Here are some key characteristics to look for:
- Well-draining: Avoid heavy clay soils that tend to retain water, which can suffocate plant roots.
- Nutrient-rich: The soil should contain adequate levels of organic matter to provide essential nutrients for plant growth.
- Loose and friable: A loose and friable soil allows for easy root penetration and promotes healthy root growth.
You can improve your soil by:
- Adding compost: Compost is an excellent source of organic matter that improves soil structure, drainage, and nutrient content.
- Incorporating other organic matter: You can also add other organic materials, such as well-rotted manure or peat moss, to improve soil quality.
- Adjusting soil pH: If necessary, you can adjust the soil pH by adding lime to raise the pH or sulfur to lower it.
By creating a healthy and well-prepared soil environment, you can set the stage for a successful and productive spring raised bed garden.
Q: How often should I water my spring raised bed garden?
Watering frequency will vary depending on factors such as weather conditions, soil type, and the stage of plant growth. However, the key is to water deeply and infrequently.
- Deep Watering: Deep watering encourages roots to grow deep into the soil, making your plants more drought-resistant. Water slowly and deeply until the water reaches the bottom of the root zone.
- Avoid Frequent, Shallow Watering: Frequent, shallow watering encourages shallow root growth and can lead to waterlogging, which can suffocate plant roots.
- Monitor Soil Moisture: Check soil moisture regularly by sticking your finger into the soil. Water when the top few inches of soil feel dry.
- Consider Mulching: Mulching helps to retain soil moisture, reducing the need for frequent watering.
By practicing deep watering and monitoring soil moisture, you can ensure that your spring raised bed garden receives the water it needs to thrive.
Q: Can I grow flowers in my spring raised bed garden?
Absolutely! Many beautiful flowers can be grown successfully in spring raised beds. In fact, incorporating flowers into your garden can provide several benefits:
- Attracting pollinators: Flowers attract bees, butterflies, and other beneficial pollinators, which can help to pollinate your vegetable crops.
- Improving soil health: Some flowers, such as legumes, can help to fix nitrogen in the soil, improving its fertility.
- Adding beauty and visual interest: Flowers add color, texture, and visual interest to your garden.
Here are a few flower varieties that are well-suited for spring raised beds:
- Pansies: These cheerful flowers come in a wide range of colors and are relatively cold-tolerant.
- Violas: Similar to pansies, violas are small, colorful flowers that thrive in cool weather.
- Nasturtiums: These vibrant flowers are easy to grow and can also be eaten in salads.
- Snapdragons: These tall, colorful flowers add a touch of elegance to the garden.
By incorporating a variety of flowers into your spring raised bed garden, you can create a beautiful and productive space that benefits both you and the environment.

