
Are you tired of your garden feeling disjointed and lacking a clear flow? Do you long for a space that invites you to explore, especially as spring bursts forth with new life? It’s frustrating when your garden doesn’t reflect the vibrant season, and you miss out on the joy of a well-designed outdoor space. But what if you could easily transform your garden with beautiful, functional pathways? Let me guide you through 10 spring garden pathway ideas that will elevate your garden’s appeal and functionality, making every step a delight.
1. Opt for Natural Stone Stepping Stones for a Rustic Spring Path

I’ve always found that natural stone stepping stones bring a touch of timeless charm to any garden. As spring arrives, I love how they blend seamlessly with the emerging greenery and vibrant blooms. You, too, can create a rustic, inviting pathway by selecting the right stones and placing them thoughtfully.
Choosing the Right Natural Stone:
When choosing natural stone, consider the following:
- Type of Stone: Flagstone, slate, and limestone are excellent choices. Each has unique textures and colors that can complement your garden’s aesthetic.
- Size and Shape: Opt for stones that are large enough to provide a stable stepping surface. Irregular shapes add a natural feel, while uniform sizes create a more formal look.
- Durability: Ensure the stone is weather-resistant and can withstand foot traffic and seasonal changes.
Laying Out a Stepping Stone Pathway:
- Begin by planning your pathway’s route. Use garden markers or string to outline the path, ensuring it flows naturally through your garden.
- Prepare the ground by removing any grass or weeds and leveling the area.
- Place the stones, ensuring they are stable and level. Leave appropriate gaps between the stones for planting or filling with gravel.
- Spacing: A good rule of thumb is to space the stones about 6 to 8 inches apart, center to center. This allows for a comfortable stride.
Best Spring Plants for Between Stepping Stones:
- Creeping Thyme: This fragrant herb forms a dense mat and releases a pleasant aroma when stepped on.
- Chamomile: Known for its calming scent and delicate flowers, chamomile creates a soft, inviting surface.
- Irish Moss: This low-growing plant adds a lush, green carpet between stones, enhancing the pathway’s natural appeal.
- Dwarf Sedum: Succulent that thrives in dry conditions.
- Spring Bulbs: Small spring bulbs like crocuses and snowdrops can add pops of color.
Maintaining a Natural Stone Pathway:
- Regularly remove weeds and debris to keep the pathway clean and safe.
- Check for any loose stones and re-level them as needed.
- In spring, ensure that the plants between the stones are thriving and trim them as necessary.
Case Study:
I recall helping a friend who wanted to transform her backyard into a serene spring retreat. We used irregular flagstone pieces and planted creeping thyme between them. The result was a pathway that looked like it had been there for years, blending beautifully with her blooming tulips and daffodils. She loved how the thyme released its fragrance as she walked, creating a truly sensory experience.
Data and Facts:
- Natural stone pathways can last for decades with proper maintenance.
- Creeping thyme can tolerate light foot traffic and thrives in well-drained soil.
- Studies have shown that natural pathways can reduce stress and improve mental well-being.
Natural Stone Options for Spring Pathways
| Stone Type | Characteristics | Best Uses |
| Flagstone | Flat, irregular shapes, varied colors | Rustic pathways, patios |
| Slate | Smooth, layered texture, dark colors | Formal pathways, stepping stones |
| Limestone | Light-colored, porous, versatile | Garden paths, borders |
| Sandstone | Gritty texture, warm tones | Informal pathways, garden steps |
Benefits of Natural Stone Pathways
- Adds a natural, rustic aesthetic to the garden.
- Durable and long-lasting.
- Blends seamlessly with spring greenery.
- Provides a stable and safe walking surface.
2. Create a Vibrant Gravel Pathway with Spring Bulb Accents

Gravel pathways offer a versatile and affordable option for your spring garden. Their relaxed, natural look complements a wide range of garden styles, from cottage gardens to modern minimalist designs. By strategically incorporating spring-blooming bulbs, you can transform your gravel pathway into a vibrant and ever-changing spectacle.
Selecting the Right Type of Gravel:
The type of gravel you choose can significantly impact the look and feel of your pathway. Here are some popular options:
- Crushed Stone: This is a common and cost-effective choice. It comes in various sizes and colors, allowing you to customize the look of your pathway.
- Pea Gravel: Smaller than crushed stone, pea gravel creates a more refined and polished look. It’s also easier to walk on barefoot.
- River Rock: These smooth, rounded stones add a natural and organic feel to the pathway.
- Colored Gravel: Consider using colored gravel to add a pop of color to your pathway.
How to Plant Spring Bulbs Along a Gravel Pathway:
Planting spring bulbs along your gravel pathway is a simple and rewarding process:
- Plan your bulb placement: Consider the color scheme of your garden and choose bulbs that complement the surrounding plants.
- Prepare the planting area: Remove any weeds or debris from the gravel and loosen the soil beneath.
- Plant the bulbs: Follow the planting instructions on the bulb packaging, ensuring they are planted at the correct depth.
- Cover the bulbs with a thin layer of gravel: This will protect the bulbs from frost and pests.
- Water the area thoroughly: Ensure the bulbs receive adequate moisture to encourage root growth.
Designing a Gravel Pathway that Complements Spring Bloom Colors:
- Create a color palette: Choose spring bulbs that complement the colors of your surrounding plants and garden structures. Consider using a combination of cool and warm colors for a visually appealing effect.
- Incorporate a variety of bloom times: Plant bulbs with different bloom times to ensure a continuous display of color throughout the spring season.
- Use bulbs in drifts and clusters: Planting bulbs in groups creates a more dramatic and eye-catching display.
How to Prevent Gravel Pathways from Shifting or Eroding:
- Create a stable base: Before laying the gravel, ensure the ground is level and well-compacted.
- Use a landscape fabric: Placing a layer of landscape fabric beneath the gravel can help to prevent weeds and stabilize the pathway.
- Edge the pathway: Using landscape edging or bricks can help to contain the gravel and prevent it from spreading into surrounding areas.
- Regularly top up the gravel: Over time, some gravel may be displaced by foot traffic or weather. Periodically top up the pathway to maintain its depth and appearance.
By following these tips, you can create a beautiful and functional gravel pathway that will be a focal point of your spring garden.
3. Design a Brick Pathway to Add Classic Charm to Your Spring Garden

Brick pathways have a timeless appeal that exudes classic charm and elegance. They add a touch of sophistication to any garden, especially during the vibrant spring season. By carefully selecting brick types, designing patterns, and integrating complementary plants, you can create a stunning brick pathway that will be the envy of your neighbors.
Choosing Brick Patterns that Enhance Spring Garden Aesthetics:
The pattern you choose for your brick pathway can significantly impact its overall appearance. Here are a few popular options:
- Running Bond: This is the simplest pattern, with bricks laid end-to-end in a straight line. It’s a classic and versatile choice that suits a variety of garden styles.
- Basketweave: This pattern creates a more intricate and textured look, resembling a woven basket. It’s ideal for adding visual interest to your pathway.
- Herringbone: This pattern creates a diagonal, zigzag effect, adding a dynamic element to your pathway.
- Basketweave with a Header: This pattern combines the basketweave pattern with a row of bricks laid perpendicularly, creating a more defined border.
When selecting a brick pattern, consider the overall style of your garden and the surrounding landscape. Choose a pattern that complements the existing elements and creates a cohesive look.
How to Lay a Brick Pathway for Durability and Visual Appeal:
- Prepare the ground: Clear the area of any weeds or debris and level the ground to ensure a stable base.
- Add a layer of sand: Spread a layer of sand over the prepared ground and level it carefully. This will help to create a stable base for the bricks and ensure proper drainage.
- Lay the bricks: Start by laying the first row of bricks, ensuring they are level and aligned. Use a rubber mallet to gently tap the bricks into place.
- Fill the gaps with sand: As you lay the bricks, fill the gaps between them with sand. Use a broom to sweep the sand into the joints and create a firm, level surface.
- Compact the sand: Once the bricks are in place, use a plate compactor or a hand tamper to compact the sand, ensuring a stable and durable pathway.
Integrating Spring Flowering Shrubs Along a Brick Pathway:
Adding spring-flowering shrubs along your brick pathway can create a breathtaking display of color and fragrance. Here are a few excellent choices:
- Azaleas: These vibrant shrubs offer a profusion of colorful blooms in early spring.
- Rhododendrons: Known for their large, showy flowers, rhododendrons add a touch of elegance to any garden.
- Forsythia: One of the earliest spring bloomers, forsythia offers a burst of cheerful yellow flowers.
- Lilacs: These fragrant shrubs add a touch of romance to your garden with their beautiful, fragrant blooms.
When planting shrubs along your brick pathway, ensure they have enough space to grow and thrive. Consider the mature size of the shrubs and space them accordingly.
Maintaining Brick Pathways During the Spring Season:
- Regularly sweep the pathway to remove leaves, debris, and any loose sand.
- Check for any loose bricks and re-level them as needed.
- Weed the areas around the pathway to prevent weeds from encroaching on the bricks.
- Water the pathway during dry periods to prevent the bricks from drying out and cracking.
- Consider applying a sealant to the bricks to protect them from moisture and stains.
By following these tips, you can create a stunning brick pathway that adds classic charm and elegance to your spring garden. Enjoy the beauty and functionality of your new pathway as you stroll through your garden, taking in the sights and scents of the season.
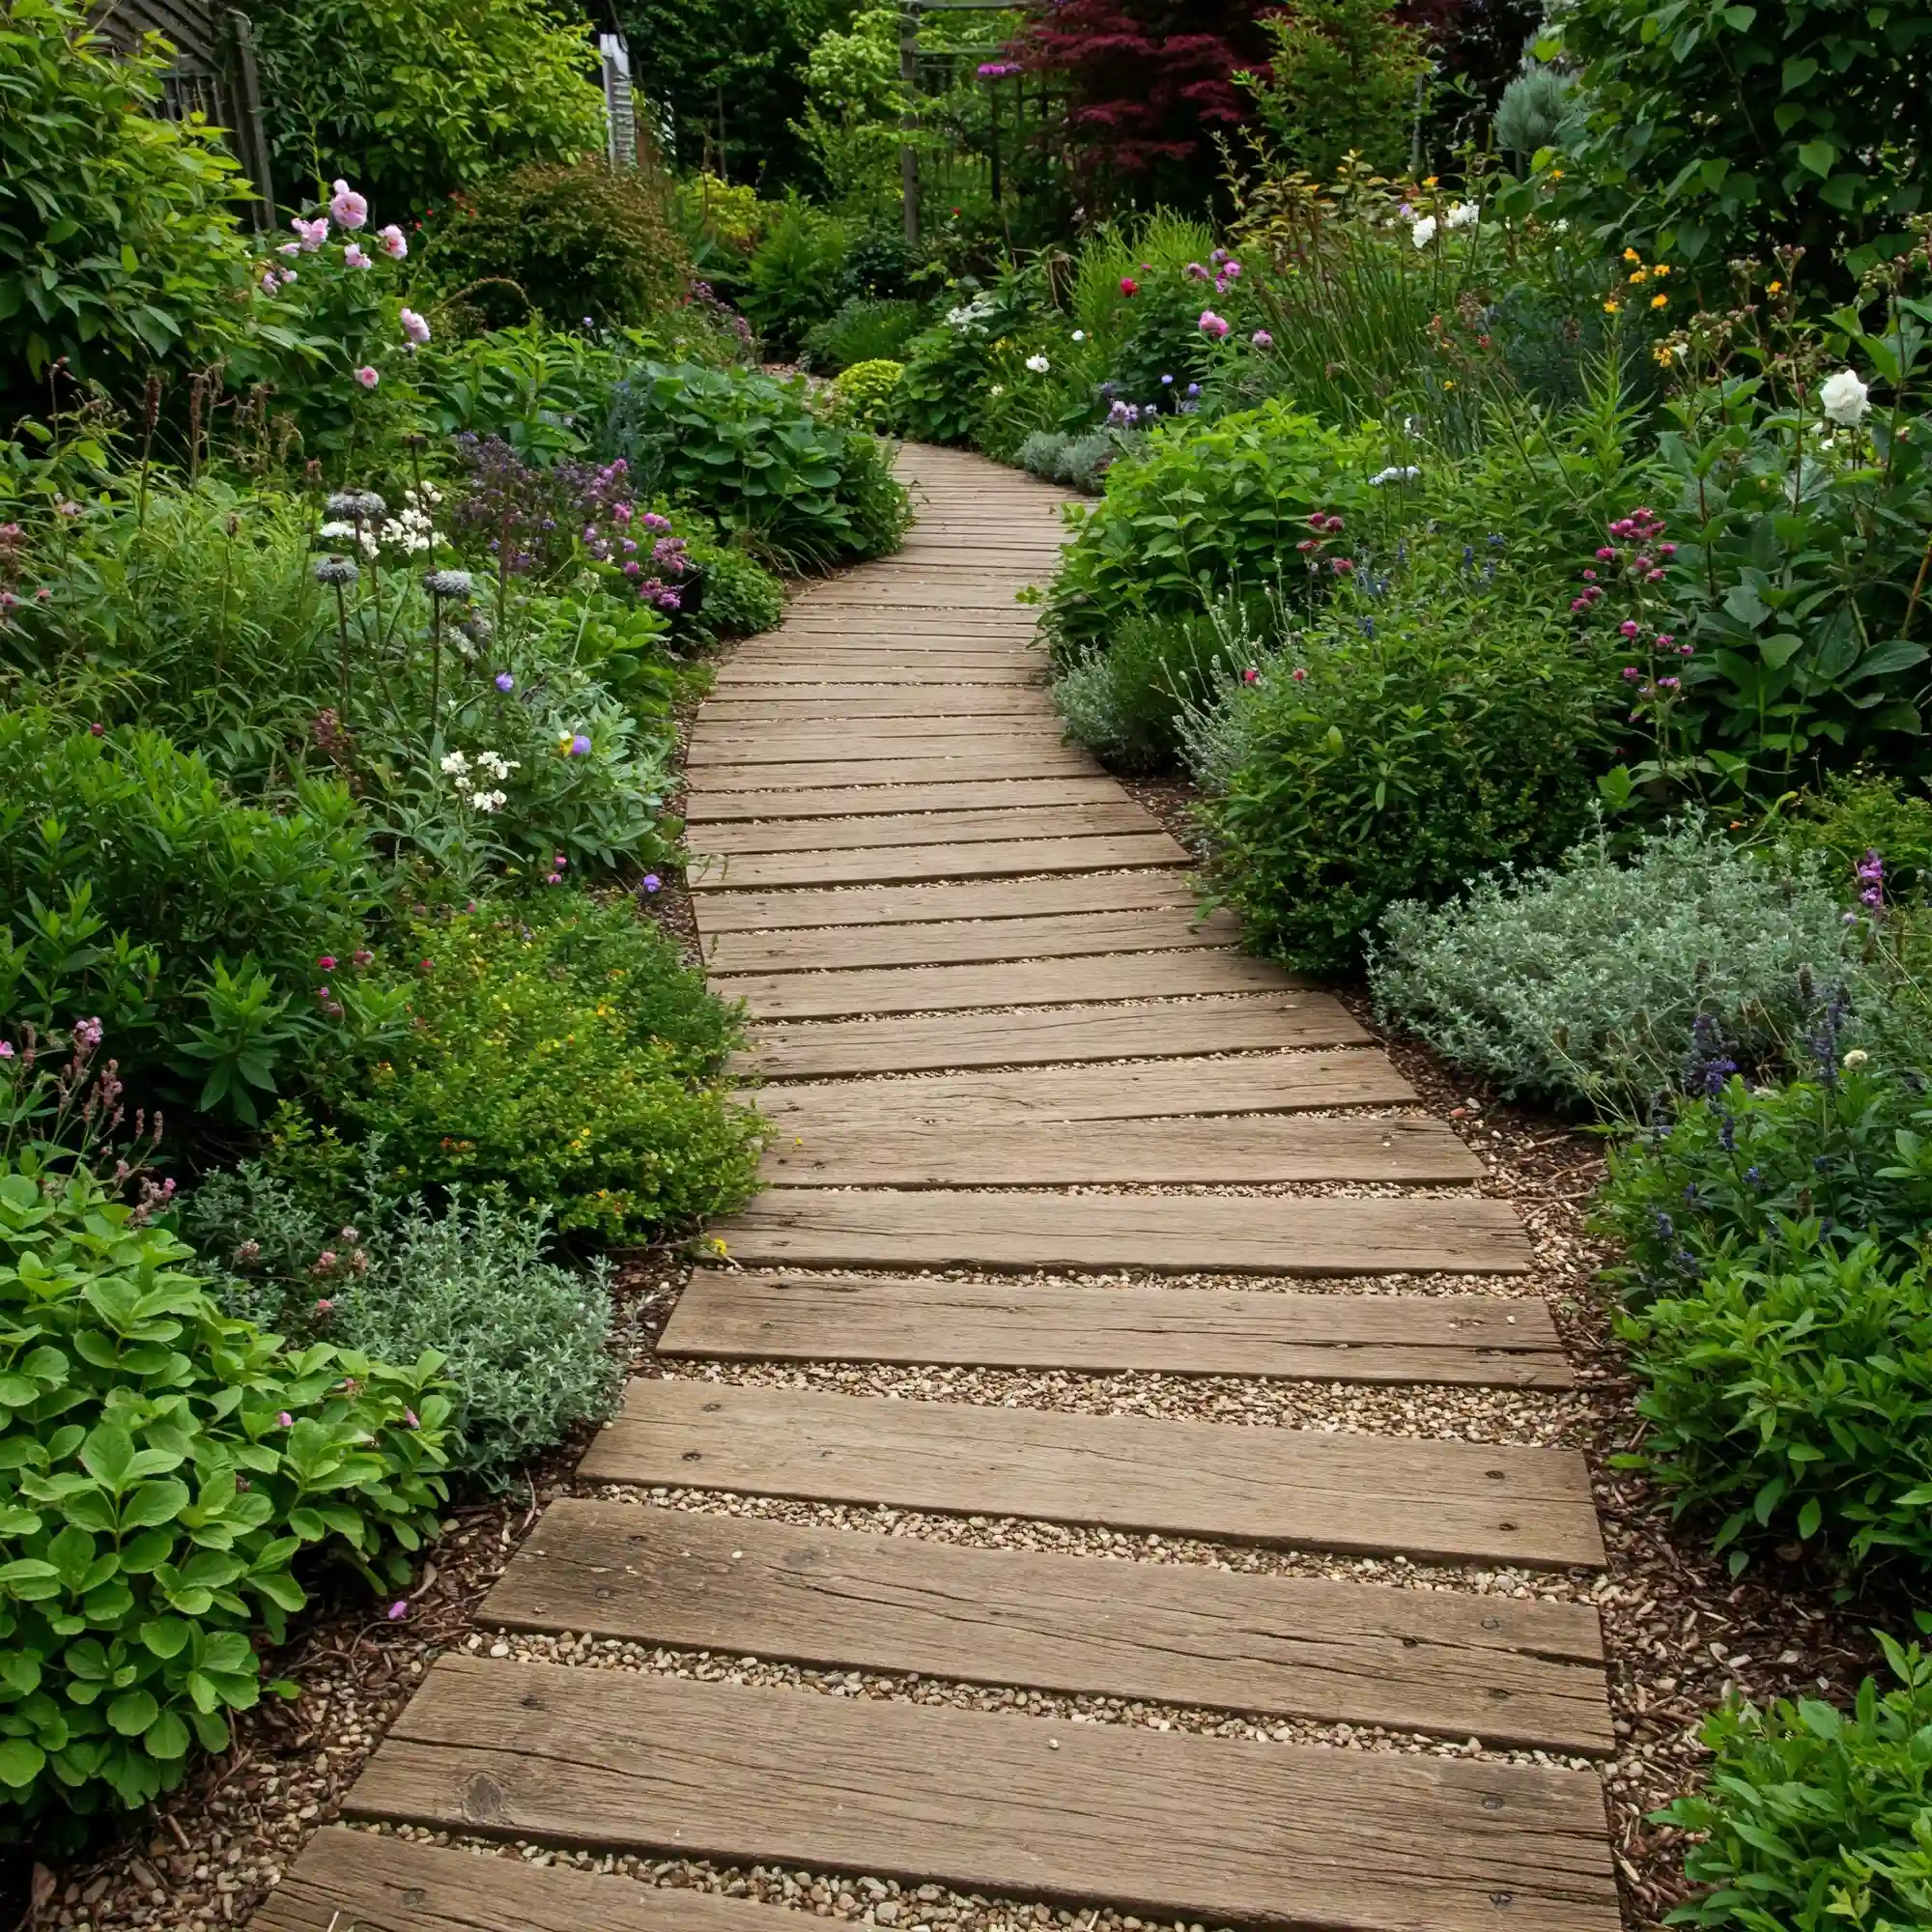
4. Construct a Wooden Plank Pathway for a Natural Woodland Feel

Wooden plank pathways evoke a sense of rustic charm and bring a touch of the woodlands into your garden. They are particularly well-suited for gardens with a natural, informal style. By carefully selecting the wood and constructing the pathway correctly, you can create a durable and visually appealing feature that complements the spring landscape.
Selecting Weather-Resistant Wood for Outdoor Pathways:
Choosing the right type of wood is crucial for ensuring the longevity of your wooden plank pathway. Opt for species known for their durability and resistance to rot and decay:
- Cedar: A popular choice for outdoor projects, cedar is naturally resistant to rot and insects.
- Redwood: Another excellent option, redwood is known for its rich color and long lifespan.
- Cypress: Cypress is highly resistant to rot and insects, making it a durable choice for outdoor use.
- Pressure-Treated Wood: This wood is treated with chemicals to protect it from rot, insects, and moisture.
How to Build a Stable and Safe Wooden Plank Pathway:
- Prepare the ground: Clear the area of any weeds or debris and level the ground to ensure a stable base.
- Lay down a weed barrier: This will prevent weeds from growing through the planks and help to stabilize the pathway.
- Space the planks: Place the planks side-by-side, leaving a small gap between each one to allow for drainage.
- Secure the planks: Use landscape staples or screws to secure the planks to the ground.
- Fill the gaps: Fill the gaps between the planks with gravel or crushed stone to prevent weeds and improve drainage.
Best Spring Groundcover Plants to Surround a Wooden Pathway:
- Creeping Thyme: This fragrant herb thrives between the planks and adds a soft, green carpet.
- Vinca Minor: This evergreen groundcover provides a lush, green backdrop for the wooden planks.
- Sweet Woodruff: This delicate plant adds a touch of woodland charm and produces fragrant white flowers in spring.
- Moss: Certain types of moss can thrive in shady areas and create a natural, moss-covered pathway.
Protecting Wooden Pathways from Moisture and Decay in Spring:
- Regularly inspect the pathway: Check for any loose planks or signs of rot or decay.
- Repair or replace any damaged planks: Promptly address any issues to prevent further damage.
- Apply a sealant or stain: This will help to protect the wood from moisture and prolong its lifespan.
- Avoid overwatering: Excessive moisture can lead to rot and decay, so water the surrounding plants carefully.
By following these guidelines, you can create a beautiful and functional wooden plank pathway that adds a touch of rustic charm to your spring garden. Enjoy the natural beauty and tranquility of your woodland-inspired pathway as you stroll through your garden.
5. Edge Your Pathways with Spring Flowering Borders for Visual Appeal

One of the most visually appealing ways to enhance your spring garden pathways is by edging them with vibrant borders of flowering plants. These borders not only add a touch of color and fragrance but also create a sense of enclosure and guide the eye through your garden.
How to Choose the Right Spring Flowering Plants for Pathway Borders:
When selecting plants for your pathway borders, consider the following factors:
- Height and Spread: Choose plants that are appropriate for the width of your pathway. Taller plants can create a more enclosed feel, while shorter plants can add a delicate touch.
- Bloom Time: Select plants with different bloom times to ensure a continuous display of color throughout the spring season.
- Color Combinations: Consider the color palette of your garden and choose plants that complement the existing colors.
- Maintenance Requirements: Select plants that are relatively low-maintenance and can thrive in the conditions of your garden.
Designing Borders that Complement Pathway Materials and Garden Style:
- Natural Stone Pathways: Pair natural stone pathways with soft, flowing borders of perennials like hostas, ferns, and creeping phlox.
- Brick Pathways: Complement brick pathways with vibrant annuals like petunias, geraniums, and marigolds.
- Gravel Pathways: Gravel pathways look stunning when edged with drought-tolerant plants like sedums, succulents, and ornamental grasses.
- Wooden Plank Pathways: Wooden pathways are beautifully complemented by a mix of ferns, wildflowers, and low-growing shrubs.
Best Practices for Planting and Maintaining Spring Flowering Borders:
- Prepare the soil: Ensure the soil is well-drained and amended with compost or other organic matter.
- Space plants appropriately: Allow enough space for plants to grow and mature.
- Water regularly: Keep the soil consistently moist, especially during dry periods.
- Mulch the borders: Apply a layer of mulch to help retain moisture, suppress weeds, and regulate soil temperature.
- Deadhead spent blooms: This will encourage continuous flowering and prevent the plants from going to seed.
- Prune and divide plants as needed: This will help to maintain their health and vigor.
How to Create a Layered Border for Continuous Spring Blooms:
- Combine plants with different heights: Use tall plants at the back of the border, medium-sized plants in the middle, and low-growing plants at the front.
- Select plants with staggered bloom times: This will ensure a continuous display of color throughout the spring season.
- Incorporate bulbs: Plant spring bulbs like tulips, daffodils, and hyacinths to add early color to the border.
- Use a variety of textures: Combine plants with different leaf textures and colors to create a visually interesting border.
By following these tips, you can create stunning spring flowering borders that enhance the beauty and functionality of your garden pathways. Enjoy the vibrant colors and fragrant blooms as you stroll through your garden, taking in the sights and scents of the season.
6. Incorporate Spring Herbs Along Your Pathway for Fragrance and Function

Incorporating spring herbs along your garden pathway adds a delightful sensory dimension. Not only do they enhance the visual appeal, but they also infuse the air with fragrant aromas and provide a ready supply of fresh herbs for culinary use.
Choosing Spring Herbs that Thrive in Pathway Settings:
Select herbs that thrive in the specific conditions of your garden and complement the style of your pathway. Here are a few excellent choices:
- Thyme: This versatile herb forms a dense, low-growing mat that is perfect for pathways. It releases a fragrant aroma when stepped on and can tolerate light foot traffic.
- Rosemary: With its needle-like leaves and fragrant blossoms, rosemary adds a touch of Mediterranean charm to your pathway. It prefers well-drained soil and full sun.
- Chives: These delicate herbs add a pop of color with their vibrant purple flowers. They are easy to grow and require minimal maintenance.
- Mint: Mint is a vigorous grower and can add a refreshing fragrance to your pathway. However, be mindful of its tendency to spread, and consider planting it in a contained area.
- Oregano: This versatile herb is a favorite among culinary enthusiasts. It thrives in well-drained soil and adds a touch of rustic charm to your pathway.
How to Plant Herbs Along a Pathway for Easy Access and Aroma:
- Prepare the soil: Ensure the soil is well-drained and amended with compost or other organic matter.
- Space the plants appropriately: Allow enough space for the herbs to grow and mature.
- Water regularly: Keep the soil consistently moist, especially during dry periods.
- Mulch the area: Apply a layer of mulch to help retain moisture, suppress weeds, and regulate soil temperature.
- Harvest regularly: Regular harvesting will encourage bushier growth and prevent the herbs from becoming woody.
Designing Herb Placements that Enhance Pathway Aesthetics and Functionality:
- Create a herb garden: Plant a variety of herbs along one side of the pathway to create a fragrant herb garden.
- Incorporate herbs into the pathway design: Plant herbs between stepping stones or along the edges of the pathway.
- Use herbs as groundcover: Low-growing herbs like thyme and oregano can be used to create a soft, fragrant carpet between pavers.
- Combine herbs with other plants: Plant herbs alongside colorful flowers to create a visually appealing and fragrant border.
Maintaining Herb Pathways During the Spring Growing Season:
- Water regularly: Ensure the herbs receive adequate moisture, especially during dry periods.
- Weed regularly: Keep the area around the herbs free of weeds to prevent competition for water and nutrients.
- Pinch back the plants: This will encourage bushier growth and prevent the herbs from becoming leggy.
- Harvest regularly: Regular harvesting will keep the plants healthy and prevent them from flowering prematurely.
By incorporating herbs into your spring garden pathway, you can create a multi-sensory experience that delights both the eyes and the senses. Enjoy the fragrant aromas and the convenience of having fresh herbs readily available for culinary use.
7. Integrate Spring Garden Lighting to Illuminate Your Evening Pathway

As the sun begins to set, adding lighting to your garden pathways can create a magical ambiance and extend your enjoyment of your outdoor space well into the evening hours. Not only does pathway lighting enhance safety and visibility, but it also adds a touch of elegance and drama to your garden.
Selecting Appropriate Lighting Fixtures for Spring Garden Pathways:
There are a variety of lighting fixtures available for garden pathways, each with its own unique aesthetic and functionality:
- Solar-powered path lights: These are a popular and eco-friendly option, offering a soft, ambient glow. They are easy to install and require no wiring.
- Low-voltage path lights: These lights offer greater flexibility in terms of placement and brightness. They can be used to create a variety of lighting effects.
- Lanterns: Hanging lanterns can add a touch of charm and create a warm, inviting atmosphere.
- Uplighting: Uplighting trees and shrubs along the pathway can create a dramatic and enchanting effect.
How to Design a Lighting Plan that Enhances Pathway Safety and Beauty:
- Consider the overall ambiance: Choose lighting fixtures that complement the style of your garden and create the desired ambiance.
- Prioritize safety: Ensure that the pathway is well-lit to prevent accidents and provide safe passage at night.
- Highlight focal points: Use lighting to draw attention to specific features in your garden, such as flower beds, water features, or sculptures.
- Create a sense of depth: Use a combination of uplighting and downlighting to create a sense of depth and dimension.
Best Spring Blooming Plants to Highlight with Pathway Lighting:
- Tulips: The vibrant colors of tulips are beautifully illuminated by pathway lighting.
- Daffodils: The delicate blooms of daffodils shimmer in the soft glow of evening light.
- Hyacinths: The fragrant blooms of hyacinths are even more enchanting when illuminated at night.
- Azaleas: The vibrant colors of azaleas are beautifully highlighted by pathway lighting.
- Rhododendrons: The large, showy blooms of rhododendrons create a stunning display when illuminated at night.
Maintaining Pathway Lighting During Spring Weather Conditions:
- Clean the fixtures regularly: Remove dust and debris to ensure optimal light output.
- Check for any damaged bulbs or wiring: Replace any faulty components as needed.
- Adjust the lighting as needed: Adjust the brightness or angle of the lights to create the desired effect.
- Consider using timers: Program timers to turn the lights on and off automatically, saving energy and enhancing security.
By incorporating thoughtful lighting into your spring garden pathways, you can create a magical and inviting atmosphere that extends your enjoyment of your outdoor space well into the evening hours. As you stroll along your illuminated pathways, you’ll be captivated by the beauty of your garden in a whole new light.
8. Create a Low-Maintenance Pathway with Spring Groundcover Plants

For those seeking a low-maintenance yet visually appealing pathway option, spring groundcover plants offer a fantastic solution. These versatile plants not only create a soft, inviting surface but also require minimal upkeep, making them perfect for busy gardeners.
Choosing Groundcover Plants that Thrive in Spring and Require Minimal Care:
When selecting groundcover plants for your pathway, consider the following factors:
- Growth habit: Choose plants that spread readily to form a dense, continuous cover.
- Shade tolerance: Select plants that can thrive in the specific light conditions of your pathway.
- Drought tolerance: Choose plants that can withstand dry periods, especially if your pathway is in a sunny location.
- Foot traffic: Opt for plants that can withstand moderate foot traffic without becoming damaged.
Here are a few excellent choices for low-maintenance spring groundcover pathways:
- Creeping Thyme: This fragrant herb forms a dense, mat-like cover and can tolerate light foot traffic.
- Irish Moss: This low-growing plant adds a lush, green carpet to your pathway and thrives in shady areas.
- Vinca Minor: This evergreen groundcover provides a dense, attractive cover and is relatively drought-tolerant.
- Sedum: Various types of sedum offer a wide range of colors and textures, making them a versatile choice for pathways.
- Moss: Certain types of moss can create a natural, moss-covered pathway, especially in shady areas.
How to Plant Groundcover to Create a Seamless and Natural Pathway:
- Prepare the soil: Clear the area of any weeds and debris and amend the soil with compost or other organic matter.
- Plant in spring or fall: This allows the plants to establish themselves before the heat of summer or the cold of winter.
- Space the plants appropriately: Follow the recommended spacing guidelines for each plant variety.
- Water thoroughly: Water the plants deeply after planting and continue to water regularly until they are established.
- Mulch the area: Apply a layer of mulch to help retain moisture, suppress weeds, and regulate soil temperature.
Designing a Groundcover Pathway that Complements Spring Garden Colors:
- Consider the color palette: Choose groundcover plants that complement the colors of your surrounding plants and garden structures.
- Create a layered look: Combine different types of groundcover plants to create a visually interesting and textured pathway.
- Incorporate flowering groundcovers: Select plants that offer colorful blooms in spring, such as creeping phlox or creeping thyme.
- Use groundcover to define pathways: Plant groundcover along the edges of the pathway to create a clear and defined border.
Maintaining Groundcover Pathways Throughout the Spring Season:
- Water regularly: Keep the groundcover moist, especially during dry periods.
- Weed regularly: Remove any weeds that appear between the plants.
- Trim or shear as needed: This will help to maintain the shape and density of the groundcover.
- Fertilize lightly in spring: Apply a balanced fertilizer to encourage healthy growth.
By choosing the right groundcover plants and following these care tips, you can create a beautiful and low-maintenance pathway that adds a touch of natural beauty to your spring garden. Enjoy the soft, inviting feel of the groundcover beneath your feet as you stroll through your garden, taking in the sights and scents of the season.
9. Design Pathways That Enhance Small Spring Garden Spaces

If you have a small garden, don’t let its size limit your creativity when it comes to designing pathways. By employing a few clever design strategies, you can create pathways that enhance the space, making it feel larger and more inviting.
How to Maximize Space with Creative Pathway Designs in Small Gardens:
- Winding Pathways: Create a sense of depth and intrigue by using winding pathways. This will make the garden feel larger than it actually is.
- Diagonal Pathways: Diagonal pathways can make a small space appear wider and more open.
- Use Mirrors: Strategically placed mirrors can create the illusion of a larger space by reflecting the garden.
- Vertical Pathways: Consider using vertical elements like trellises or climbing plants to create a sense of height and draw the eye upward.
Choosing Pathway Materials and Plants that Suit Small Garden Aesthetics:
- Opt for lighter colors: Lighter-colored materials like gravel or light-colored stones can make a small space feel more open and airy.
- Use smaller plants: Choose smaller plants and shrubs to avoid overcrowding the space.
- Incorporate vertical elements: Use climbing plants or trellises to add height and visual interest without taking up valuable ground space.
- Create focal points: Use strategically placed garden ornaments or sculptures to draw the eye and create a sense of depth.
Designing Pathways that Create a Sense of Depth and Flow in Limited Spaces:
- Use perspective: Create a sense of depth by using a combination of plants and hardscaping elements. For example, you can use taller plants at the back of the garden and shorter plants in the foreground.
- Use curves and bends: Curves and bends in the pathway can create a sense of movement and draw the eye through the garden.
- Use contrasting colors: Use a combination of light and dark colors to create a sense of depth and dimension.
Best Practices for Maintaining Pathways in Small Spring Gardens:
- Regularly weed and maintain the pathway: This will help to keep the pathway looking its best and prevent it from becoming overgrown.
- Trim back any overhanging plants: This will ensure that the pathway remains clear and accessible.
- Repair any damaged areas: Promptly repair any loose stones or broken pavers to prevent further damage.
- Mulch the pathway: Apply a layer of mulch to help suppress weeds and retain moisture.
By employing these creative design strategies, you can transform your small spring garden into a beautiful and functional outdoor space. Enjoy the sense of openness and tranquility that well-designed pathways bring to your garden, no matter its size.
10. Address Drainage Issues for Spring Garden Pathways

Proper drainage is essential for maintaining healthy garden pathways and preventing erosion, especially during the spring season when rainfall is frequent. By addressing drainage issues proactively, you can ensure your pathways remain functional and attractive throughout the year.
How to Identify and Address Drainage Problems in Spring Garden Pathways:
- Observe water flow: After a rainfall, observe how water flows across your garden. Look for areas where water pools or flows excessively, indicating potential drainage problems.
- Check for signs of erosion: Look for signs of erosion, such as washed-out soil, exposed roots, or sunken areas along the pathway.
- Assess the slope: Ensure that the pathway has a slight slope to allow water to drain away from the path.
Choosing Pathway Materials and Designs that Promote Proper Drainage:
- Permeable materials: Opt for permeable materials like gravel, crushed stone, or permeable pavers that allow water to drain through.
- Create a slight slope: Ensure the pathway has a slight slope, typically around 1-2% grade, to allow water to drain away from the path.
- Install drainage channels: Consider installing drainage channels or swales along the sides of the pathway to collect and redirect excess water.
- Use a geotextile fabric: Place a layer of geotextile fabric beneath the pathway material to prevent soil erosion and improve drainage.
Best Practices for Preventing Erosion and Water Pooling Along Pathways:
- Plant groundcover: Groundcover plants can help to absorb excess water and prevent soil erosion.
- Mulch the pathway: A layer of mulch can help to absorb water and prevent soil compaction.
- Regularly clean the pathway: Remove leaves, debris, and other obstructions that can impede water flow.
- Maintain the slope: Regularly check the slope of the pathway and make adjustments as needed to ensure proper drainage.
Maintaining Pathway Drainage During Spring Rainfall:
- Monitor the pathway during heavy rainfall: Observe how water flows across the pathway and make adjustments as needed.
- Clear any obstructions: Remove any debris or leaves that may be blocking drainage.
- Repair any damaged areas: Promptly repair any areas where erosion has occurred.
- Consider installing a rain garden: A rain garden can help to collect and filter rainwater, reducing the amount of water that flows onto the pathway.
By addressing drainage issues proactively, you can ensure that your spring garden pathways remain functional and beautiful throughout the year. A well-drained pathway will not only enhance the aesthetics of your garden but also protect your plants and prevent damage to your property.
FAQ

To ensure you have all the information you need to create the perfect spring garden pathway, let’s address some frequently asked questions:
What are the best flowering plants for spring garden pathway borders?
When choosing plants for your pathway borders, consider their height, bloom time, and color combinations. Some excellent choices for spring include:
- Primroses: These cheerful flowers come in a variety of colors and bloom early in the spring.
- Pansies: Available in a wide range of colors and patterns, pansies add a cheerful touch to any garden.
- Tulips: These classic spring bulbs offer a vibrant display of color and come in a wide variety of shapes and sizes.
- Daffodils: These cheerful flowers are easy to grow and add a touch of sunshine to your garden.
- Hyacinths: Known for their sweet fragrance, hyacinths are a beautiful addition to any spring garden.
How to build a brick pathway in a spring vegetable garden?
Building a brick pathway in your vegetable garden can add a touch of elegance and make it easier to navigate. Here are some steps to follow:
- Prepare the ground: Clear the area of any weeds or debris and level the ground to ensure a stable base.
- Add a layer of sand: Spread a layer of sand over the prepared ground and level it carefully. This will help to create a stable base for the bricks and ensure proper drainage.
- Lay the bricks: Start by laying the first row of bricks, ensuring they are level and aligned. Use a rubber mallet to gently tap the bricks into place.
- Fill the gaps with sand: As you lay the bricks, fill the gaps between them with sand. Use a broom to sweep the sand into the joints and create a firm, level surface.
- Compact the sand: Once the bricks are in place, use a plate compactor or a hand tamper to compact the sand, ensuring a stable and durable pathway.
What are affordable gravel pathway designs for spring blooming gardens?
Gravel pathways are a cost-effective and attractive option for your spring garden. Here are some affordable design ideas:
- Crushed stone: This is a common and affordable option that comes in a variety of colors.
- Pea gravel: Smaller than crushed stone, pea gravel creates a more refined look and is easier to walk on.
- River rock: This natural option adds a rustic charm to your garden.
- Colored gravel: Consider using colored gravel to add a pop of color to your pathway.
What natural stone stepping stone pathway ideas for spring landscapes are best?
Natural stone stepping stones add a timeless and rustic charm to any garden. Here are some popular options:
- Flagstone: These flat, irregularly shaped stones come in a variety of colors and sizes.
- Slate: Slate is a smooth, layered stone that adds a touch of elegance to your garden.
- Limestone: This light-colored stone is durable and blends well with many garden styles.
- Sandstone: Sandstone adds a warm, earthy tone to your garden and is perfect for creating a rustic look.
How do I address drainage issues for spring garden gravel pathways?
Proper drainage is essential for maintaining a healthy gravel pathway. Here are some tips to address drainage issues:
- Ensure a slight slope: Create a slight slope in the pathway to allow water to drain away.
- Use a geotextile fabric: Place a layer of geotextile fabric beneath the gravel to prevent weeds and improve drainage.
- Install drainage channels: Consider installing drainage channels or swales along the sides of the pathway to collect and redirect excess water.
- Regularly clean the pathway: Remove any debris or leaves that may be blocking drainage.
What low maintenance pathway edging ideas for spring flower beds?
Edging your pathway can help to define the space and prevent weeds from encroaching. Here are some low-maintenance edging ideas:
- Metal edging: Metal edging is durable, easy to install, and comes in a variety of styles.
- Brick edging: Bricks can be used to create a classic and attractive border.
- Natural edging: Use rocks, boulders, or logs to create a natural and rustic look.
- Groundcover edging: Plant low-growing groundcovers like thyme or ivy to create a soft, natural edge.
What creative spring garden pathway decor ideas with bulbs and herbs are best?
Incorporate spring bulbs and herbs into your pathway design to add color, fragrance, and visual interest. Here are some creative ideas:
- Plant spring bulbs: Plant bulbs like tulips, daffodils, and hyacinths along the edges of your pathway for a vibrant display of color.
- Use herbs as groundcover: Plant low-growing herbs like thyme or oregano between the stones for a fragrant and aromatic pathway.
- Incorporate herb pots: Place pots of herbs like rosemary or lavender along the pathway for a touch of color and fragrance.
- Use decorative stones: Add decorative stones or pebbles to the pathway to create a mosaic or other design.
How do I design accessible spring garden pathways for elderly gardeners?
When designing pathways for elderly gardeners, consider the following:
- Create a smooth and level surface: Avoid using materials that are uneven or slippery.
- Provide adequate width: Ensure the pathway is wide enough to accommodate wheelchairs or walkers.
- Install handrails: Consider installing handrails along the sides of the pathway for added support.
- Minimize obstacles: Remove any obstacles that could impede movement, such as tree roots or rocks.
- Provide seating areas: Include benches or other seating areas along the pathway to allow for rest stops.
What are the best spring garden pathway lighting ideas for evening strolls?
Pathway lighting can enhance the beauty and safety of your garden at night. Here are some lighting ideas:
- Solar-powered path lights: These are a convenient and eco-friendly option that require no wiring.
- Low-voltage path lights: These lights offer greater flexibility in terms of placement and brightness.
- Lanterns: Hanging lanterns can add a touch of charm and create a warm, inviting atmosphere.
- Uplighting: Use uplighting to highlight trees, shrubs, and other features in your garden.
What are the best plants to place between stepping stones on a DIY stone pathway ideas for small spring gardens?
When choosing plants for between stepping stones, consider their size, growth habit, and ability to withstand foot traffic. Here are some excellent choices:
- Creeping Thyme: This fragrant herb forms a dense mat and can tolerate light foot traffic.
- Irish Moss: This low-growing plant adds a lush, green carpet between the stones.
- Sedum: Various types of sedum offer a wide range of colors and textures and are drought-tolerant.
- Small spring bulbs: Plant small bulbs like crocuses or snowdrops for a pop of color.
I hope these FAQs have provided you with valuable insights into creating the perfect spring garden pathway. Remember to consider your specific needs and preferences when making your design decisions. By combining creativity, careful planning, and a touch of personal style, you can transform your garden into a beautiful and inviting oasis.
Conclusion

Creating a beautiful and functional spring garden pathway is a rewarding project that can transform your outdoor space. By carefully considering the design elements, selecting appropriate materials, and incorporating thoughtful planting strategies, you can craft a pathway that celebrates the vibrancy of the season.
Remember, the key to success lies in prioritizing user experience and creating a pathway that is both aesthetically pleasing and practical. Whether you opt for the rustic charm of natural stone, the elegance of brick, or the simplicity of gravel, ensure that your chosen materials complement the overall style of your garden.
Don’t forget to address drainage issues proactively to prevent erosion and maintain a healthy pathway. By incorporating thoughtful drainage solutions, you can ensure that your pathway remains functional and beautiful throughout the year.
Finally, let your creativity shine! Experiment with different designs, colors, and textures to create a pathway that reflects your unique style and enhances the beauty of your spring garden. Enjoy the process of creating a pathway that invites you to explore and savor the beauty of the season.


