| Key Takeaway |
|---|
| – Making your own mini sunflower is a fun and easy way to learn about the plant life cycle and create a beautiful decoration for your home or classroom. |
| – The plant life cycle is the process of how plants grow and reproduce, from seed to fruit and back to seed again. |
| – The plant life cycle has four main stages: germination, growth, flowering, and fruiting. |
| – You can make your own mini sunflower with a paper plate, cotton balls, a bean seed, a straw, green paper, yellow paper, scissors, and glue. |
| – You can use your mini sunflower for learning or decoration purposes, such as observing the changes in the seed, measuring the growth of the stem, counting the petals, identifying the parts of the flower, displaying it on the windowsill, the wall, the door, the table, the garden, the classroom, the birthday party, the spring festival, the Earth Day, etc. |
| – You can also customize or personalize your mini sunflower by adding a name, a message, a picture, a ribbon, a bow, etc. |

Do you love sunflowers? Do you want to learn more about how plants grow and reproduce? Do you enjoy making crafts with simple and cheap materials? If you answered yes to any of these questions, then this article is for you!
In this article, you will learn how to make your own mini sunflower with a paper plate, cotton balls, a bean seed, a straw, green paper, yellow paper, scissors, and glue. You will also learn about the plant life cycle, the process of how plants grow and reproduce, from seed to fruit and back to seed again. By the end of this article, you will be able to make a beautiful and educational decoration for your home or classroom.
Let’s get started with some background information on what a plant life cycle is and why it is important to learn about it.
What is a Plant Life Cycle?
A plant life cycle is the process of how plants grow and reproduce, from seed to fruit and back to seed again. Plants are living organisms that need water, air, sunlight, and nutrients to survive and grow. Plants also have different parts, such as roots, stems, leaves, flowers, and fruits, that perform different functions, such as absorbing water and minerals, transporting food and water, making food through photosynthesis, attracting pollinators, producing seeds, etc.
The plant life cycle has four main stages: germination, growth, flowering, and fruiting. Here is a brief overview of each stage:
- Germination: This is the stage when a seed starts to grow into a new plant. A seed is a tiny package that contains a baby plant (called an embryo) and a food supply (called an endosperm). A seed needs water, oxygen, and the right temperature to germinate. When a seed germinates, it breaks open and sends out a root (called a radicle) and a shoot (called a plumule).
- Growth: This is the stage when a plant grows bigger and develops more parts, such as stems, leaves, and branches. A plant needs water, air, sunlight, and nutrients to grow. A plant also needs a strong and supportive structure to hold itself up and reach for the sun. A plant uses its roots to anchor itself to the soil and absorb water and minerals. A plant uses its stems to transport food and water throughout the plant. A plant uses its leaves to make food through photosynthesis, the process of using light energy to convert water and carbon dioxide into sugar and oxygen.
- Flowering: This is the stage when a plant produces flowers, the reproductive organs of the plant. A flower is a colorful and fragrant structure that attracts pollinators, such as bees, butterflies, birds, and bats, that help the plant reproduce. A flower has different parts, such as petals, sepals, stamens, and pistils, that perform different functions, such as protecting the flower, producing pollen, receiving pollen, and producing seeds. A flower can be male, female, or both, depending on the type of plant. A flower can also be self-pollinating, cross-pollinating, or both, depending on the type of plant.
- Fruiting: This is the stage when a plant produces fruits, the structures that contain and protect the seeds. A fruit is a fleshy or dry structure that develops from the ovary of the flower after fertilization. Fertilization is the process of joining the male and female gametes (sex cells) to form a zygote (fertilized egg). A fruit can have one or more seeds, depending on the type of plant. A fruit can also be edible or inedible, depending on the type of plant. A fruit can also have different ways of dispersing its seeds, such as by wind, water, animals, or humans, depending on the type of plant.
As you can see, the plant life cycle is a fascinating and complex process that involves many changes and adaptations. Learning about the plant life cycle can help you understand how plants work, how they interact with their environment, and how they contribute to the ecosystem. Plants are essential for life on Earth, as they provide food, oxygen, medicine, shelter, and beauty for humans and other living beings.
Now that you have learned some basic facts about the plant life cycle, let’s move on to the fun part: making your own mini sunflower!
What You Need
To make your own mini sunflower, you will need the following materials and tools:
- A paper plate
- Cotton balls
- A bean seed
- A straw
- Green paper
- Yellow paper
- Scissors
- Glue
Don’t worry, you don’t need a lot of stuff for this craft. You can use whatever you have at home or buy them at a nearby store. You can also use some optional items to make your craft more colorful and fancy, such as glitter, stickers, or paint. This is where the fun begins!
How to Make It
To make your own mini sunflower, you will need to follow these steps that correspond to the stages of the plant life cycle:
Step 1: Germination
First, you will need to germinate your bean seed. A bean seed is a type of seed that belongs to the legume family, along with peas, lentils, and peanuts. A bean seed has two halves (called cotyledons) that store food for the embryo. A bean seed also has a tiny hole (called a micropyle) that allows water to enter the seed.
To germinate your bean seed, you will need to do the following:
- Cut out a circle from the paper plate. This will be the base of your craft.
- Glue some cotton balls to the circle. The cotton balls are like fluffy clouds that hold the water for the seed.
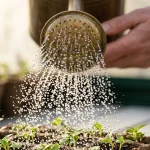
- Wet the cotton balls with some water. The water will activate the germination process of the seed.
- Place the bean seed on top of the cotton balls. Make sure the micropyle is facing down, so the water can enter the seed.
- Put the paper plate in a sunny and warm place. The sun and the heat will speed up the germination process of the seed.
Germination is the stage when a seed starts to grow into a new plant. When a seed germinates, it breaks open and sends out a root and a shoot. The root absorbs water and minerals from the soil. The shoot grows towards the sun and develops leaves. The leaves make food through photosynthesis. The food is stored in the cotyledons, which feed the embryo until it can make its own food.
It may take a few days for your bean seed to germinate, depending on the type of bean and the environmental conditions. You can observe the changes in your bean seed every day and record your observations in a journal. You can also measure the length of the root and the shoot with a ruler and record your measurements in a table. Here is an example of a table that you can use:
| Day | Root Length (cm) | Shoot Length (cm) |
|---|---|---|
| 1 | 0 | 0 |
| 2 | 0.5 | 0 |
| 3 | 1 | 0.5 |
| 4 | 1.5 | 1 |
| 5 | 2 | 1.5 |
You can also ask yourself some questions or challenges, such as:
- How long does it take for the seed to germinate?
- What factors affect the germination of the seed?
- What is the function of the root and the shoot?
- What is the difference between the cotyledons and the leaves?
- How does the seed get energy to grow?
You can also compare your bean seed with other types of seeds, such as sunflower, pumpkin, or apple seeds, and see how they germinate differently.
Step 2: Sprout
Next, you will need to make a sprout for your mini sunflower. A sprout is a young plant that has just emerged from the seed. A sprout has a root, a stem, and a few leaves. A sprout is also called a seedling.
To make a sprout for your mini sunflower, you will need to do the following:
- Cut a straw to the length that you want your stem to be. The straw is like a hollow tube that carries water and food for the plant.
- Glue the straw to the paper plate, next to the bean seed. The straw is the stem of your mini sunflower.
- Cut out some green paper in the shape of leaves. The leaves are like green factories that make food for the plant.
- Glue the green paper leaves to the straw. The leaves are the first part of your mini sunflower to appear.
Growth is the stage when a plant grows bigger and develops more parts, such as stems, leaves, and branches. A plant needs water, air, sunlight, and nutrients to grow. A plant also needs a strong and supportive structure to hold itself up and reach for the sun. A plant uses its roots to anchor itself to the soil and absorb water and minerals. A plant uses its stems to transport food and water throughout the plant. A plant uses its leaves to make food through photosynthesis, the process of using light energy to convert water and carbon dioxide into sugar and oxygen.
You can observe the growth of your mini sunflower every day and record your observations in a journal. You can also measure the height of the stem and the size of the leaves with a ruler and record your measurements in a table. Here is an example of a table that you can use:
| Day | Stem Height (cm) | Leaf Size (cm) |
|---|---|---|
| 1 | 5 | 1 |
| 2 | 6 | 1.5 |
| 3 | 7 | 2 |
| 4 | 8 | 2.5 |
| 5 | 9 | 3 |
You can also ask yourself some questions or challenges, such as:
- How fast does the stem grow?
- What factors affect the growth of the plant?
- What is the function of the stem and the leaves?
- What is the difference between the stem and the straw?
- How does the plant make food through photosynthesis?
You can also compare your mini sunflower with other types of plants, such as watercress, sweet potato, or bean plants, and see how they grow differently.
Step 3: Flower
Then, you will need to make a flower for your mini sunflower. A flower is a colorful and fragrant structure that attracts pollinators, such as bees, butterflies, birds, and bats, that help the plant reproduce. A flower has different parts, such as petals, sepals, stamens, and pistils, that perform different functions, such as protecting the flower, producing pollen, receiving pollen, and producing seeds. A flower can be male, female, or both, depending on the type of plant. A flower can also be self-pollinating, cross-pollinating, or both, depending on the type of plant.
To make a flower for your mini sunflower, you will need to do the following:
- Cut out a yellow paper in the shape of a circle. The circle is the base of your flower.
- Cut out some yellow paper in the shape of petals. The petals are the colorful and attractive parts of the flower.
- Glue the yellow paper petals to the yellow paper circle. The petals are the outer part of your flower.
- Cut out some brown paper in the shape of a smaller circle. The circle is the center of your flower.
- Glue the brown paper circle to the yellow paper circle. The center is the inner part of your flower.
- Glue the yellow paper circle to the top of the straw. The circle is the flower of your mini sunflower.
Flowering is the stage when a plant produces flowers, the reproductive organs of the plant. A flower is a colorful and fragrant structure that attracts pollinators, such as bees, butterflies, birds, and bats, that help the plant reproduce. A flower has different parts, such as petals, sepals, stamens, and pistils, that perform different functions, such as protecting the flower, producing pollen, receiving pollen, and producing seeds. A flower can be male, female, or both, depending on the type of plant. A flower can also be self-pollinating, cross-pollinating, or both, depending on the type of plant.
You can observe the flower of your mini sunflower every day and record your observations in a journal. You can also count the number of petals and the number of stamens and pistils with a magnifying glass and record your counts in a table. Here is an example of a table that you can use:
| Day | Petal Number | Stamens Number | Pistils Number |
|---|---|---|---|
| 1 | 8 | 16 | 1 |
| 2 | 10 | 20 | 1 |
| 3 | 12 | 24 | 1 |
| 4 | 14 | 28 | 1 |
| 5 | 16 | 32 | 1 |
You can also ask yourself some questions or challenges, such as:
- How many petals does a sunflower have?
- What factors affect the flowering of the plant?
- What is the function of the petals, sepals, stamens, and pistils?
- What is the difference between the male and female parts of the flower?
- How does the sunflower attract pollinators?
You can also compare your mini sunflower with other types of flowers, such as rose, daisy, or orchid flowers, and see how they differ in their structure, color, and fragrance.
Step 4: Fruit and Seeds
Finally, you will need to make a fruit and seeds for your mini sunflower. A fruit is a fleshy or dry structure that develops from the ovary of the flower after fertilization. A fruit contains and protects the seeds, the structures that can grow into new plants. A fruit can have one or more seeds, depending on the type of plant. A fruit can also be edible or inedible, depending on the type of plant. A fruit can also have different ways of dispersing its seeds, such as by wind, water, animals, or humans, depending on the type of plant.
To make a fruit and seeds for your mini sunflower, you will need to do the following:
- Cut out some brown paper in the shape of small circles. The circles are the seeds of your sunflower.
- Glue the brown paper circles to the brown paper circle that is the center of your flower. The center is the fruit of your sunflower.
- Cut out some green paper in the shape of a small rectangle. The rectangle is the stem of your fruit.
- Glue the green paper rectangle to the back of the brown paper circle that is the center of your flower. The stem is the part that connects the fruit to the plant.
Fruiting is the stage when a plant produces fruits, the structures that contain and protect the seeds. A fruit is a fleshy or dry structure that develops from the ovary of the flower after fertilization. Fertilization is the process of joining the male and female gametes (sex cells) to form a zygote (fertilized egg). A fruit can have one or more seeds, depending on the type of plant. A fruit can also be edible or inedible, depending on the type of plant. A fruit can also have different ways of dispersing its seeds, such as by wind, water, animals, or humans, depending on the type of plant.
You can observe the fruit and seeds of your mini sunflower every day and record your observations in a journal. You can also count the number of seeds and the weight of the fruit with a scale and record your counts in a table. Here is an example of a table that you can use:
| Day | Seed Number | Fruit Weight (g) |
|---|---|---|
| 1 | 16 | 10 |
| 2 | 18 | 12 |
| 3 | 20 | 14 |
| 4 | 22 | 16 |
| 5 | 24 | 18 |
You can also ask yourself some questions or challenges, such as:
- How many seeds does a sunflower have?
- What factors affect the fruiting of the plant?
- What is the function of the fruit and the seeds?
- What is the difference between the fruit and the flower?
- How does the sunflower disperse its seeds?
You can also compare your mini sunflower with other types of fruits, such as apple, tomato, or pumpkin fruits, and see how they differ in their structure, taste, and seed dispersal methods.
How to Use It
Now that you have made your own mini sunflower, you can use it for learning or decoration purposes. Here are some suggestions on how you can use your craft:
- For learning purposes, you can use your mini sunflower to review the plant life cycle stages and the parts and functions of the plant. You can also use your mini sunflower to conduct some experiments or activities, such as:
- Testing the effect of different environmental factors, such as light, water, temperature, or soil, on the growth and development of your mini sunflower.
- Comparing the growth and development of your mini sunflower with other types of plants, such as watercress, sweet potato, or bean plants, and see how they differ in their structure, color, and fragrance.
- Exploring the diversity and classification of plants, such as by sorting them into different groups based on their characteristics, such as seed type, flower type, fruit type, leaf type, etc.
- Investigating the importance and benefits of plants for humans and other living beings, such as by listing the products and services that plants provide, such as food, oxygen, medicine, shelter, and beauty.
- For decoration purposes, you can use your mini sunflower to brighten up your home or classroom. You can also use your mini sunflower to celebrate some occasions or events, such as:
- Displaying your mini sunflower on the windowsill, the wall, the door, the table, the garden, the classroom, etc.
- Using your mini sunflower as a centerpiece, a gift, a card, or a bookmark for your friends or family.
- Decorating your mini sunflower with some accessories, such as glitter, stickers, paint, ribbon, bow, etc.
- Customizing or personalizing your mini sunflower by adding a name, a message, a picture, etc.
Congratulations, you have made your own mini sunflower! You are a great scientist and artist. Have fun with your craft!
Conclusion
In summary, making your own mini sunflower is a fun and easy way to learn about the plant life cycle and create a beautiful decoration for your home or classroom. The plant life cycle is the process of how plants grow and reproduce, from seed to fruit and back to seed again. The plant life cycle has four main stages: germination, growth, flowering, and fruiting. You can make your own mini sunflower with a paper plate, cotton balls, a bean seed, a straw, green paper, yellow paper, scissors, and glue. You can use your mini sunflower for learning or decoration purposes, such as observing the changes in the seed, measuring the growth of the stem, counting the petals, identifying the parts of the flower, displaying it on the windowsill, the wall, the door, the table, the garden, the classroom, the birthday party, the spring festival, the Earth Day, etc. You can also customize or personalize your mini sunflower by adding a name, a message, a picture, a ribbon, a bow, etc.
Thank you for reading and happy crafting!
Now you know how to make your own mini sunflower, the symbol of happiness and hope. Who knew that learning about the plant life cycle could be so fun and easy? As the famous poet William Blake said, “to see a world in a grain of sand, and a heaven in a wild flower”. Remember, the sunflower is always facing the sun, just like you should always face the bright side of life.