| Key Takeaways |
| – Elderberries are a type of flowering shrub that produce edible berries with many health benefits |
| – Growing elderberries from seeds is a rewarding and economical way to start your own elderberry plants |
| – Elderberry seeds need stratification, germination, and transplanting before they can produce berries |
| – Elderberry plants need sun, water, fertilizer, and pruning to thrive and produce a good harvest |
| – Elderberries can be used for making syrup, wine, tea, and other products |
Have you ever wanted to grow your own elderberries? Elderberries are a type of flowering shrub that produce clusters of small dark purple or black berries. They are native to Europe, North America, and Asia, and have been used for centuries for their medicinal and culinary properties.
Elderberries are rich in antioxidants, vitamin C, and flavonoids, which can help boost your immune system, fight inflammation, and prevent infections. They are also delicious and versatile, as you can use them to make syrup, wine, tea, jam, pie, and more.
Growing elderberries from seeds is a great way to start your own elderberry plants. It is cheaper and more sustainable than buying cuttings or nursery plants, and it allows you to select the variety and quality of your seeds. Plus, it is fun and rewarding to watch your seeds grow into beautiful and productive elderberry bushes.
In this article, we will show you how to grow elderberries from seeds step by step. We will cover everything you need to know about stratifying, germinating, transplanting, and caring for your elderberry plants. We will also give you some tips on how to harvest and use your elderberries.
By the end of this article, you will be able to grow your own elderberries from seeds like a pro. Let’s get started!
How to Stratify Elderberry Seeds for Better Germination
The first step to growing elderberries from seeds is stratification. Stratification is a method of treating seeds to simulate natural conditions and break dormancy. Dormancy is a state in which seeds do not germinate until they receive certain environmental cues, such as temperature or moisture changes.
Elderberry seeds are naturally dormant and need stratification to germinate. Stratification helps them overcome their dormancy and increases their germination rate and speed. There are three main methods of stratification: cold, warm, and scarification.
Cold Stratification
Cold stratification is the most common and effective method of stratifying elderberry seeds. It involves exposing the seeds to cold temperatures for a period of time, usually between 30 to 90 days. This mimics the winter season and prepares the seeds for spring.
To cold stratify your elderberry seeds, you will need:
- A sealable plastic bag or container
- A moist medium such as peat moss, vermiculite, or sand
- A refrigerator
Here are the steps to cold stratify your elderberry seeds:
- Mix your moist medium with water until it is damp but not soggy.
- Place your elderberry seeds in the plastic bag or container and cover them with the moist medium.
- Seal the bag or container and label it with the date and the seed name.
- Place the bag or container in the refrigerator at a temperature between 2°C to 5°C (35°F to 41°F).
- Check the bag or container every week and make sure the medium is still moist. If it is dry, add some water.
- After 30 to 90 days, take out the bag or container from the refrigerator and check if the seeds have sprouted. If they have not, you can leave them for another week or two.
- Once the seeds have sprouted, you can move on to the next step: germination.
Warm Stratification
Warm stratification is another method of stratifying elderberry seeds. It involves exposing the seeds to warm temperatures for a period of time, usually between 10 to 30 days. This mimics the summer season and prepares the seeds for autumn.
To warm stratify your elderberry seeds, you will need:
- A sealable plastic bag or container
- A moist medium such as peat moss, vermiculite, or sand
- A warm place such as a windowsill or a greenhouse
Here are the steps to warm stratify your elderberry seeds:
- Mix your moist medium with water until it is damp but not soggy.
- Place your elderberry seeds in the plastic bag or container and cover them with the moist medium.
- Seal the bag or container and label it with the date and the seed name.
- Place the bag or container in a warm place at a temperature between 20°C to 30°C (68°F to 86°F).
- Check the bag or container every week and make sure the medium is still moist. If it is dry, add some water.
- After 10 to 30 days, take out the bag or container from the warm place and check if the seeds have sprouted. If they have not, you can leave them for another week or two.
- Once the seeds have sprouted, you can move on to the next step: germination.
Scarification
Scarification is another method of stratifying elderberry seeds. It involves damaging the seed coat to allow water and air to enter the seed. This breaks the physical barrier that prevents germination and stimulates the seed to sprout.
To scarify your elderberry seeds, you will need:
- A sharp tool such as a knife, a nail, or a file
- A bowl of water
Here are the steps to scarify your elderberry seeds:
- Carefully nick, scratch, or cut the seed coat of each elderberry seed with your sharp tool. Do not damage the embryo inside the seed.
- Soak the scarified seeds in a bowl of water for 24 hours.
- Drain the water and move on to the next step: germination.
How to Germinate Elderberry Seeds in Pots or Trays
The next step to growing elderberries from seeds is germination. Germination is the process of seeds sprouting and developing roots and shoots. Germination can take anywhere from a few days to a few weeks, depending on the seed quality, the stratification method, and the environmental conditions.
To germinate your elderberry seeds, you will need:
- Pots or trays with drainage holes
- Potting mix
- A spray bottle
- A plastic wrap or a dome
- A warm and bright place
Here are the steps to germinate your elderberry seeds in pots or trays:
- Fill your pots or trays with potting mix and moisten it with water. You can use any potting mix that is suitable for seed starting, such as peat-based or coco-based mixes.
- Sow your elderberry seeds on the surface of the potting mix, about 2 cm (0.8 inch) apart. Do not cover them with soil, as they need light to germinate.
- Mist the seeds and the potting mix with water using your spray bottle. Keep the potting mix moist but not soggy throughout the germination process.
- Cover your pots or trays with plastic wrap or a dome to create a humid environment for the seeds. Poke some holes in the cover to allow some air circulation.
- Place your pots or trays in a warm and bright place, such as a windowsill, a greenhouse, or under grow lights. The ideal temperature for germination is between 20°C to 25°C (68°F to 77°F). The ideal light exposure is about 16 hours per day.
- Check your pots or trays daily and remove the cover once you see some green sprouts. This can take anywhere from 7 to 21 days, depending on the seed quality and the stratification method.
- Continue to mist the seedlings and the potting mix with water as needed. Do not overwater or underwater them, as this can cause damping off, a fungal disease that kills seedlings.
- Once your seedlings have developed their first true leaves, you can move on to the next step: transplanting.
How to Care for Elderberry Seedlings until They Are Ready to Transplant
The next step to growing elderberries from seeds is caring for your elderberry seedlings until they are ready to transplant. This can take anywhere from 4 to 8 weeks, depending on the growth rate and the weather conditions.
To care for your elderberry seedlings, you will need:
- A fertilizer
- A pair of scissors
- A larger pot or container (optional)
Here are the steps to care for your elderberry seedlings until they are ready to transplant:
- Fertilize your elderberry seedlings once a week with a diluted liquid fertilizer. You can use any fertilizer that is suitable for seedlings, such as a balanced or a high-nitrogen fertilizer. Follow the instructions on the label and do not overfertilize them, as this can burn their roots and leaves.
- Thin your elderberry seedlings if they are too crowded in their pots or trays. You can either snip off the weaker ones with scissors or carefully transplant them to larger pots or containers. Leave about 10 cm (4 inches) of space between each seedling.
- Monitor your elderberry seedlings for any signs of pests or diseases and treat them accordingly. Some common pests that can attack elderberry seedlings are aphids, spider mites, and whiteflies. Some common diseases that can affect elderberry seedlings are powdery mildew, rust, and leaf spot. You can use organic or chemical methods to control them, such as neem oil, insecticidal soap, or fungicides.
- Harden off your elderberry seedlings before transplanting them outdoors. Hardening off is the process of acclimating your seedlings to the outdoor conditions gradually, such as temperature, wind, and sun exposure. This reduces the shock and stress that they might experience when moved from indoors to outdoors.
- To harden off your elderberry seedlings, start by placing them outside in a shaded and sheltered spot for a few hours per day, about a week before transplanting them. Gradually increase the time and exposure until they can stay outside for a full day without wilting or burning.
- Once your seedlings are hardened off, you can move on to the next step: transplanting.
How to Transplant Elderberry Seedlings in the Garden or Containers
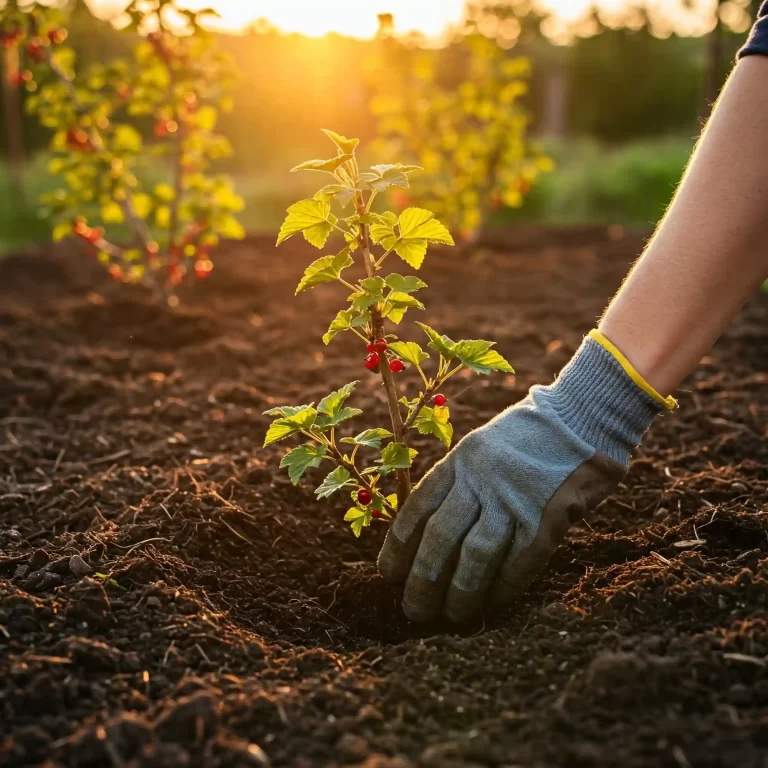
The final step to growing elderberries from seeds is transplanting your elderberry seedlings in the garden or containers. This can be done anytime from late spring to early summer, when the soil is warm and there is no risk of frost.
To transplant your elderberry seedlings, you will need:
- A shovel or a trowel
- A garden hose or a watering can
- A mulch
- A stake or a trellis (optional)
Here are the steps to transplant your elderberry seedlings in the garden or containers:
- Choose a location for your elderberry plants. Elderberry plants prefer full sun to partial shade, and well-drained, fertile, and slightly acidic soil. They can grow up to 3 m (10 feet) tall and wide, so make sure they have enough space to spread.
- Dig a hole for each elderberry plant, about twice as wide and deep as the root ball. If you are planting in containers, choose a large pot or container with drainage holes and fill it with potting mix.
- Carefully remove the elderberry plant from its pot or tray and gently loosen the roots. Place the plant in the hole or the container and adjust the depth so that the top of the root ball is level with the soil surface.
- Backfill the hole or the container with soil and press it firmly around the plant. Water the plant thoroughly and let the excess water drain.
- Mulch around the plant with organic matter such as straw, wood chips, or leaves. This will help retain moisture, suppress weeds, and regulate temperature.
- If your elderberry plant is tall or floppy, you can stake it or support it with a trellis. This will help prevent wind damage and improve air circulation.
- Congratulations! You have successfully transplanted your elderberry plant. Now you can move on to the next step: caring for your elderberry plant.
How to Prune, Harvest, and Use Elderberry Plants
The final step to growing elderberries from seeds is pruning, harvesting, and using your elderberry plants. This can be done anytime from late summer to early fall, when the berries are ripe and ready to pick.
To prune, harvest, and use your elderberry plants, you will need:
- A pair of pruning shears
- A basket or a bucket
- A colander or a sieve
- A pot or a pan
- A strainer or a cheesecloth
- A bottle or a jar
- A sugar or a honey
- A lemon juice or a citric acid
Here are the steps to prune, harvest, and use your elderberry plants:
- Prune your elderberry plants once a year in late winter or early spring, before they start growing new leaves. Pruning helps improve the shape, health, and productivity of your plants. Remove any dead, diseased, damaged, or crossing branches. Cut back any old or weak canes to the ground. Thin out any crowded or unwanted shoots. Leave about 6 to 10 healthy and strong canes per plant.
- Harvest your elderberries when they are fully ripe and dark purple or black in color. Do not eat them raw, as they contain cyanide-like compounds that can cause nausea, vomiting, and diarrhea. Wear gloves and use scissors to cut off the clusters of berries from the stems. Place them in a basket or a bucket and bring them indoors.
- Wash your elderberries under running water and drain them in a colander or a sieve. Remove any leaves, stems, bugs, or debris from the berries. You can use a fork or your fingers to separate the berries from the stems.
- Cook your elderberries in a pot or a pan over medium-high heat with some water and sugar or honey to taste. You can also add some lemon juice or citric acid to enhance the flavor and preserve the color. Bring the mixture to a boil and then reduce the heat and simmer for about 15 to 20 minutes, stirring occasionally.
- Strain your elderberry mixture through a strainer or a cheesecloth into a bowl or a pitcher. Squeeze out as much juice as possible from the pulp and discard it.
- Pour your elderberry juice into a bottle or a jar and seal it tightly. Store it in the refrigerator for up to a week or in the freezer for up to a year.
- Enjoy your elderberry juice as it is or use it to make syrup, wine, tea, jelly, jam, pie, muffins, smoothies, ice cream, or anything else you like.
Conclusion
In this article, we have shown you how to grow elderberries from seeds step by step. We have covered everything you need to know about stratifying, germinating, transplanting, and caring for your elderberry plants. We have also given you some tips on how to prune, harvest, and use your elderberries.
Growing elderberries from seeds is not difficult if you follow these instructions carefully. It is a rewarding and economical way to start your own elderberry plants and enjoy their delicious and healthy berries.


