

Have you ever dreamt of snipping fresh shallots from your own garden, adding a burst of flavor to your favorite dishes? I know I have! There’s nothing quite like the satisfaction of nurturing a plant from seed (or set!) to harvest. But sometimes, despite our best efforts, our shallots don’t thrive. Maybe they’re small, or perhaps they succumb to pests. It can be frustrating, especially when you’re investing time and energy. That’s why I’ve created this comprehensive guide – to share my knowledge and experience, empowering you to grow shallots successfully, no matter your gardening experience. I’ll walk you through every step, from choosing the right variety to troubleshooting common problems, so you can enjoy a plentiful harvest of these versatile bulbs.
Choosing the Right Shallot Variety
Selecting the right shallot variety is akin to choosing the perfect ingredient for a culinary masterpiece. Just as a skilled chef selects specific spices to enhance a dish, a discerning gardener chooses shallot varieties that will thrive in their unique environment and yield the desired flavor profile. The world of shallots is surprisingly diverse, with each variety offering distinct characteristics in terms of size, shape, flavor, and growing habits.
When embarking on your shallot-growing journey, consider these key factors:
- Climate: Different shallot varieties exhibit varying degrees of cold hardiness. If you reside in a region with harsh winters, opt for cold-tolerant varieties. Conversely, if you inhabit a warmer climate, choose varieties that can withstand heat and humidity.
- Garden Space: Shallot varieties vary in size and vigor. Some varieties produce larger bulbs and require more space, while others are more compact and suitable for smaller gardens or container growing. Assess the available space in your garden and select varieties that will thrive within those constraints.
- Culinary Preferences: The flavor profile of shallots can range from mild and delicate to pungent and assertive. Consider the types of dishes you enjoy cooking and choose varieties that will complement your culinary style. For instance, if you frequently use shallots in delicate sauces or salads, a mild-flavored variety like French shallots might be ideal. If you prefer a bolder flavor, you might opt for the more pungent Red shallots.
Here are a few popular shallot varieties to whet your appetite:
- French Shallots: Renowned for their elongated shape and mild, subtly sweet flavor, French shallots are a beloved choice among chefs and home cooks alike. They add a delicate touch to a wide array of dishes, from soups and stews to vinaigrettes and sauces.
- Dutch Shallots: These robust shallots produce larger bulbs and boast excellent storage qualities. Their slightly stronger flavor lends itself well to savory dishes like roasted vegetables, braises, and hearty stews.
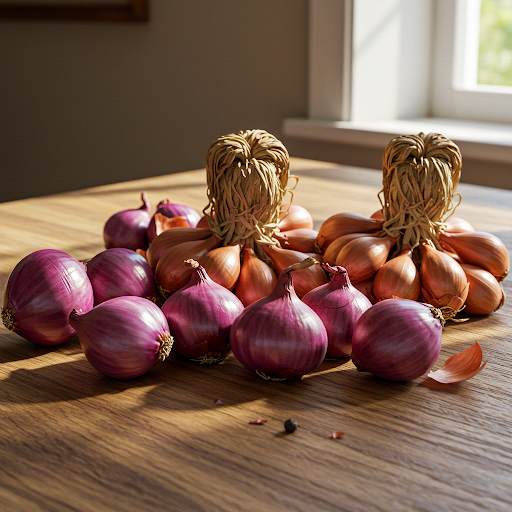
- Red Shallots: As the name suggests, Red shallots exhibit a deep burgundy hue and a slightly more pungent flavor compared to French or Dutch shallots. Their vibrant color adds a visual appeal to dishes, while their assertive flavor can stand up to robust ingredients like meats and heartier vegetables.
Beyond these popular varieties, a plethora of other options exist, each with its own unique characteristics. Exploring local seed catalogs or consulting with experienced gardeners can help you discover lesser-known varieties that might pique your interest. Remember, the beauty of gardening lies in experimentation and discovery. Don’t hesitate to try different varieties to find the perfect fit for your palate and your garden.
Preparing the Soil for Shallots
Just as a sturdy foundation is crucial for a strong building, well-prepared soil is essential for a thriving shallot harvest. Shallots, like most plants, thrive in a loose, fertile, and well-drained environment. Think of it as creating a cozy home for your shallot bulbs to flourish.
Here’s a breakdown of how I prepare the soil for my shallot garden:
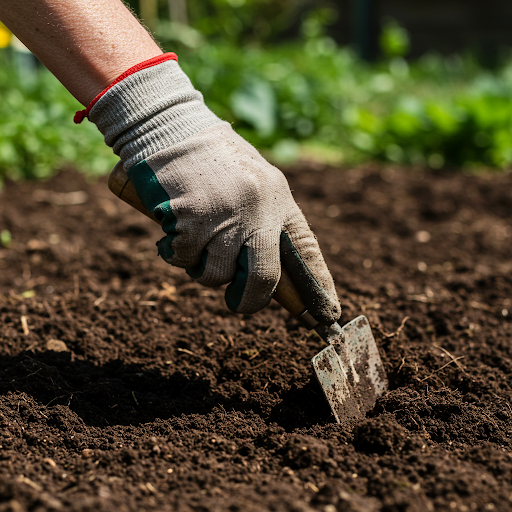
- Enriching the Soil: I start by amending the soil with a generous amount of organic matter. Compost, well-rotted manure, or even shredded leaves are excellent choices. These organic additions not only improve soil structure but also provide a steady supply of nutrients that shallots need to grow.
- Loosening the Soil: Shallots have a relatively shallow root system. To accommodate their growth, I ensure the soil is loose and well-aerated to a depth of at least 12 inches. This allows their roots to penetrate easily and access moisture and nutrients efficiently. I use a garden fork or tiller to achieve this, carefully turning the soil over to create a fine, crumbly texture.
- Checking Soil pH: Shallots prefer a slightly acidic to neutral soil pH, ideally between 6.0 and 7.0. A soil pH that is too acidic or alkaline can hinder nutrient uptake and stunt growth. I recommend using a simple soil test kit, readily available at most garden centers, to determine your soil’s pH. If your soil is too acidic, you can raise the pH by adding lime. Conversely, if the soil is too alkaline, you can lower the pH by adding sulfur.
By investing time and effort in preparing the soil, you create an optimal environment for your shallots to flourish. This foundation of healthy soil will directly translate into robust growth, larger bulbs, and a bountiful harvest.
Planting Shallots: Sets vs. Seeds

Now comes the exciting part – planting your shallots! You have a couple of options here: planting shallot sets or growing shallots from seed. Both methods have their own merits, and the best choice for you will depend on your preferences and gardening experience.
- Planting Shallot Sets: Shallot sets are essentially small, individual shallot bulbs. They offer several advantages, especially for beginner gardeners. Firstly, they are readily available from garden centers and nurseries. Secondly, they establish quickly and start producing a crop much sooner than shallots grown from seed.
When planting shallot sets, I recommend selecting firm, healthy bulbs that are free from any signs of disease or damage. Gently press the sets into the prepared soil, planting them about 1-2 inches deep and spacing them 6-8 inches apart. Ensure the pointed end of the set faces upwards, as this is where the new growth will emerge. - Planting Shallot Seeds: Growing shallots from seed can be a more rewarding experience, but it requires a bit more patience. Shallot seeds are tiny, so it’s important to handle them with care. I recommend starting the seeds indoors 6-8 weeks before the last expected frost in your area. Sow the seeds in seed starting trays filled with a well-draining seed starting mix. Keep the trays in a warm, sunny location and maintain consistent moisture. Once the seedlings have developed a few true leaves, you can transplant them outdoors after the danger of frost has passed.
While planting from seed offers the satisfaction of nurturing the entire growth cycle, shallot sets are generally a more straightforward and quicker option, especially for beginners. If you’re eager to enjoy a harvest of fresh shallots sooner rather than later, I recommend starting with sets. However, if you’re up for a bit of a challenge and want to experience the entire growing process, growing shallots from seed can be a rewarding endeavor.
Shallot Care: Watering, Fertilizing, and Weeding
Just as nurturing a child requires consistent care and attention, so too does nurturing a thriving shallot garden. Providing your shallots with the proper care ensures their healthy growth and development, ultimately leading to a bountiful harvest. This involves a balanced approach to watering, fertilizing, and weeding.
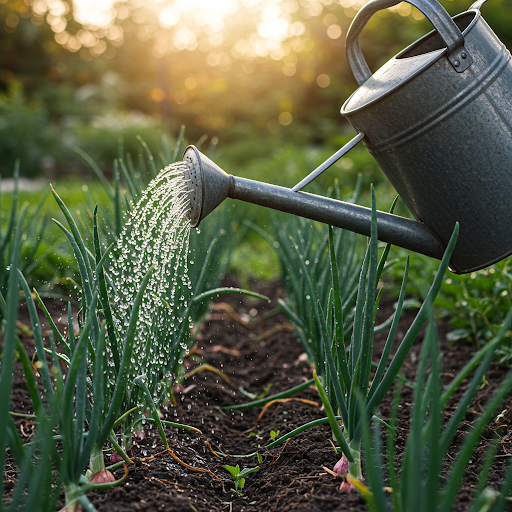
Watering Wisely: Shallots require consistent moisture to flourish, especially during periods of hot, dry weather. However, overwatering can be detrimental, leading to root rot and other fungal diseases. The key is to maintain a consistently moist soil without allowing it to become waterlogged.
I recommend watering your shallots deeply once a week, or more frequently during extended periods of dry weather. To determine if your shallots need water, stick your finger about an inch into the soil. If the soil feels dry, it’s time to water. During the growing season, I often water my shallots in the morning, allowing the water to soak into the soil slowly and reducing the risk of evaporation.
Nourishing Your Shallots: Shallots are considered heavy feeders, meaning they require a steady supply of nutrients to maximize their growth and bulb production. While you’ve already enriched the soil with compost or manure, providing additional fertilizer throughout the growing season can significantly enhance your harvest.
I recommend applying a balanced fertilizer, such as a 10-10-10 formulation, every few weeks. You can also use a slow-release fertilizer at the beginning of the growing season to provide a steady supply of nutrients over time. Avoid over-fertilizing, as this can lead to excessive foliage growth at the expense of bulb development.
Keeping Weeds at Bay: Weeds are unwelcome guests in any garden, and shallots are no exception. Weeds compete with shallots for water, nutrients, and sunlight, hindering their growth and potentially reducing your yield.
I employ a multi-pronged approach to weed control. Regularly hand-pulling weeds is essential, especially during the early stages of growth. Mulching around the base of your shallot plants can also help suppress weed growth. Mulch, such as straw or wood chips, not only helps to retain moisture but also prevents weeds from germinating.
By providing your shallots with consistent water, adequate nutrition, and a weed-free environment, you’ll create the ideal conditions for healthy growth and a bountiful harvest. Remember, consistent care and attention will reward you with a plentiful supply of fresh, flavorful shallots to enjoy throughout the year.
Protecting Shallots from Pests and Diseases
Just as we take precautions to protect our homes from unwelcome intruders, we must also safeguard our shallot plants from pests and diseases. These uninvited guests can significantly impact the health and productivity of your shallot plants, potentially jeopardizing your harvest. By staying vigilant and taking proactive measures, you can minimize the risk of infestation and ensure a healthy and bountiful yield.
Common Pests:
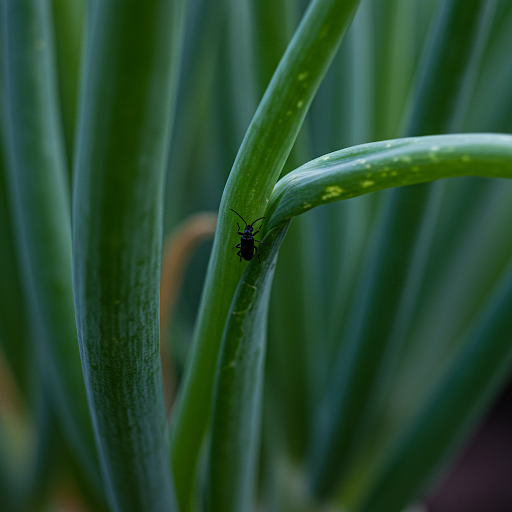
- Onion Maggots: These tiny, legless larvae are the offspring of onion flies. They burrow into the shallot bulbs, causing significant damage. Signs of onion maggot infestation include wilting, yellowing, and stunting of the plants.
- Thrips: These tiny, winged insects suck the sap from shallot leaves, causing them to become discolored and distorted. Heavy infestations can weaken the plants and reduce yield.
Common Diseases:
- Downy Mildew: This fungal disease thrives in cool, moist conditions. It causes yellow spots to appear on the leaves, which eventually turn brown and wither.
- White Rot: This soil-borne fungal disease attacks the shallot bulbs, causing them to rot and collapse.
Prevention and Control Strategies:
- Crop Rotation: Rotating your shallot planting location each year can help to break the life cycle of soil-borne pests and diseases.
- Pest-Resistant Varieties: Consider planting shallot varieties that are known to be more resistant to common pests and diseases.
- Organic Pest Control: Neem oil and insecticidal soap are effective organic options for controlling pests like onion maggots and thrips. Apply these treatments according to the product instructions.
- Disease Prevention: Ensure good air circulation between plants by spacing them adequately. Avoid overhead watering, as this can create conditions that favor the development of fungal diseases.
- Monitoring and Early Intervention: Regularly inspect your shallot plants for signs of pests and diseases. Early detection and intervention are crucial for effective control.
By implementing these preventive measures and promptly addressing any issues that arise, you can protect your shallot plants from pests and diseases, ensuring a healthy and successful harvest. Remember, a proactive approach to pest and disease management is key to cultivating a thriving shallot garden.
Harvesting Shallots at the Perfect Time
The moment of truth has arrived – harvest time! This is the culmination of all your hard work and dedication, the reward for nurturing your shallot plants from seedlings to maturity. Knowing when to harvest your shallots is crucial to ensure optimal flavor and storage life.
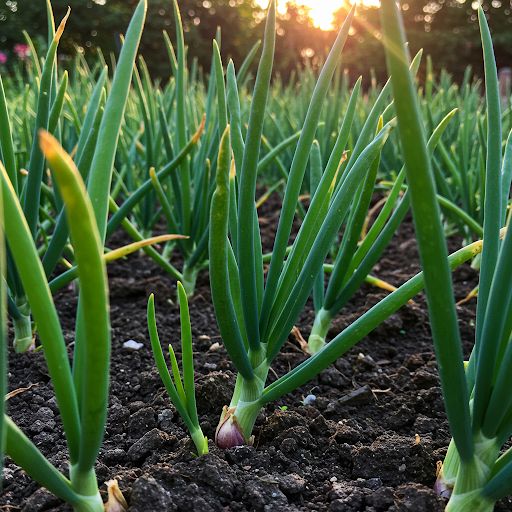
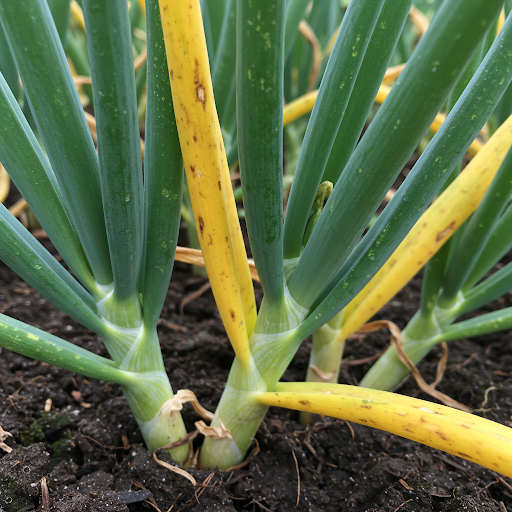
Shallots are typically ready for harvest when their leaves begin to turn yellow and wither. This natural process signals that the bulbs have reached their full maturity and have stored sufficient energy.
Here’s how I approach harvesting my shallots:
- Timing is Everything: I keep a close eye on my shallot plants throughout the growing season, observing the foliage for signs of maturity. Once the leaves begin to yellow and wither, I know it’s time to prepare for harvest.
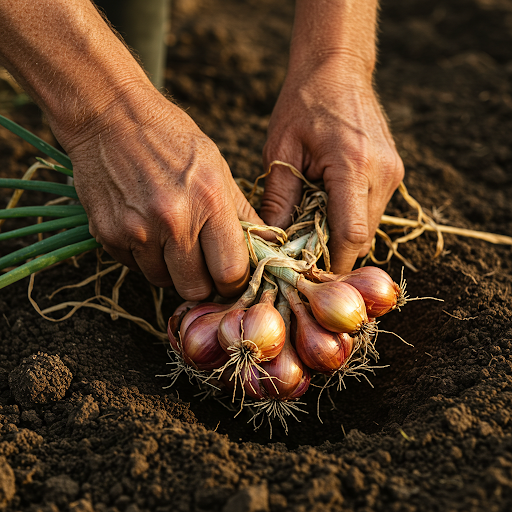
- Gentle Extraction: I use a garden fork to gently lift the shallots from the ground. This helps to minimize damage to the bulbs and their delicate root systems. Avoid yanking or pulling the shallots forcefully, as this can cause bruising or breakage.
- Cleaning the Bulbs: After harvesting, I gently brush off any excess soil from the bulbs. This helps to prevent the spread of soil-borne diseases during storage.
By carefully observing your shallot plants and harvesting them at the optimal time, you can ensure that you enjoy the best possible flavor and maximize their storage life. Harvesting at the right moment is a crucial step in the shallot-growing journey, allowing you to reap the rewards of your efforts.
Curing and Storing Shallots for Long-Term Use
Just as wine needs time to mature, freshly harvested shallots benefit from a curing process. Curing toughens the outer skins of the shallots, preventing moisture loss and promoting long-term storage. It’s a crucial step that ensures your hard work in the garden translates into a delicious and long-lasting harvest.
The Curing Process:
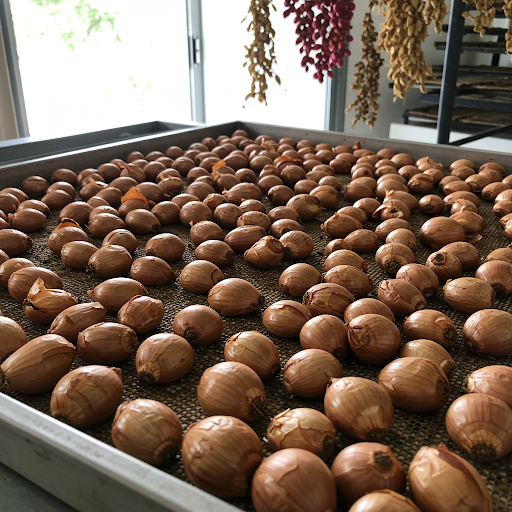
After harvesting, I gently brush off any excess soil from the shallots. Then, I lay them out in a single layer on a mesh tray or a screen in a warm, well-ventilated area. A sunny windowsill or a sheltered porch can work well. The key is to ensure good air circulation around the shallots.
The curing process typically takes a few weeks. During this time, the shallots will gradually lose moisture, and their outer skins will become papery and dry. Avoid stacking the shallots on top of each other, as this can lead to rot and spoilage.
Storage Tips:
Once the shallots are fully cured, it’s time to store them for long-term use. Here are a few tips to ensure optimal storage:
- Cool and Dry Location: The ideal storage location is a cool, dry, and well-ventilated area, such as a basement, root cellar, or a cool pantry. Avoid storing shallots in humid environments, as this can promote mold growth.
- Proper Containers: Store your shallots in mesh bags, paper bags, or baskets. Avoid using plastic bags, as they can trap moisture and lead to rot.
- Check Regularly: Periodically inspect your stored shallots for any signs of rot or spoilage. If you notice any signs of decay, remove the affected shallots immediately to prevent the spread of rot to other bulbs.
By following these simple steps, you can enjoy your homegrown shallots for months to come. Whether you’re using them to flavor your favorite dishes or adding them to homemade preserves, your carefully grown and properly stored shallots will add a touch of homegrown goodness to your culinary creations.
Troubleshooting Common Shallot Growing Problems
Even the most experienced gardeners can encounter challenges when cultivating shallots. However, by understanding common problems and implementing effective troubleshooting strategies, you can overcome these obstacles and ensure a successful harvest.
1. Yellowing Leaves:
One of the most common issues encountered when growing shallots is yellowing leaves. This can be a symptom of various underlying problems, including:
- Nutrient Deficiencies: Shallots require a balanced supply of nutrients to thrive. If the soil is deficient in essential nutrients like nitrogen, phosphorus, or potassium, the plants may exhibit yellowing leaves.
- Overwatering: Overwatering can lead to root rot, which can cause the leaves to turn yellow and wilt.
- Drought Stress: Conversely, insufficient watering can also cause leaves to yellow and droop.
- Pests and Diseases: Certain pests and diseases, such as thrips and downy mildew, can cause leaf yellowing.
2. Small Bulb Formation:
If your shallots are producing small bulbs, it could be due to several factors:
- Overcrowding: If the shallots are planted too close together, they will compete for resources, resulting in smaller bulbs.
- Poor Soil Quality: Shallots require well-drained, fertile soil. If the soil is compacted or lacking in nutrients, it can limit bulb development.
- Insufficient Sunlight: Shallots require at least 6-8 hours of direct sunlight per day. If they are not receiving enough sunlight, they may not produce large bulbs.
3. Pests and Diseases:
- Onion Maggots: These small, legless larvae can damage shallot bulbs, causing them to rot.
- Thrips: These tiny insects can suck the sap from shallot leaves, causing them to become discolored and stunted.
- Downy Mildew: This fungal disease can cause yellow spots on the leaves, which can eventually lead to leaf death.
Troubleshooting Strategies:
- Observe and Diagnose: Carefully observe your shallot plants for any signs of distress. Note the specific symptoms, such as the pattern of yellowing leaves, the presence of pests, or any unusual growth patterns.
- Address Nutrient Deficiencies: Conduct a soil test to determine the nutrient levels in your soil. If necessary, amend the soil with appropriate fertilizers to correct any deficiencies.
- Adjust Watering Practices: Ensure that your shallots are receiving adequate water, but avoid overwatering. Water deeply and infrequently, allowing the soil to dry slightly between waterings.
- Control Pests and Diseases: Implement appropriate pest control measures, such as using insecticidal soap or neem oil to control pests like thrips. Practice good garden hygiene to prevent the spread of diseases.
- Provide Optimal Growing Conditions: Ensure your shallots receive adequate sunlight and are planted in well-drained soil.
By understanding the potential challenges and implementing effective troubleshooting strategies, you can overcome common shallot growing problems and enjoy a bountiful harvest. Remember, patience and observation are key to identifying and addressing issues promptly.
FAQ: Answering Your Shallot Growing Questions

I understand that you may have some specific questions about growing shallots. Here are answers to some of the most frequently asked questions:
1. How long does it take for shallots to mature?
Shallots typically take 90-120 days to reach maturity, depending on the variety and growing conditions. This timeframe includes the time it takes for the bulbs to form and fully develop.
2. Can I grow shallots in containers?
Absolutely! Container gardening is a great option for those with limited space. Choose a container that is at least 6 inches deep and ensure it has adequate drainage. Fill the container with a well-draining potting mix and plant your shallot sets or seedlings as you would in a garden bed.
3. When is the best time to plant shallots?
The optimal planting time for shallots varies depending on your climate. In cooler climates, shallots are typically planted in early spring, while in warmer climates, fall planting is often preferred. Consult with your local garden center or extension office for specific planting recommendations for your region.
4. How often should I water shallots?
Shallots require consistent moisture but do not tolerate waterlogging. Water deeply once a week, or more frequently during dry periods. Check the soil moisture regularly by sticking your finger about an inch into the ground. If the soil feels dry, it’s time to water.
5. How do I know when shallots are ready to harvest?
Shallots are ready for harvest when the leaves begin to turn yellow and wither. This indicates that the bulbs have reached maturity and have stored sufficient energy. You can gently lift a few bulbs to check if they are firm and well-developed.
I hope this FAQ section addresses some of your common questions about growing shallots. If you have any further questions, feel free to leave a comment below, and I’ll do my best to assist you. Remember, growing shallots is a rewarding experience, and with a little care and attention, you can enjoy a bountiful harvest of these flavorful bulbs.


")

