
Have you ever found yourself reaching for scallions in the grocery store, wishing you could just pluck them fresh from your own garden? It’s frustrating, isn’t it, to pay for something you know you could grow yourself? The cost adds up, and let’s be honest, store-bought scallions just don’t have that same vibrant flavor. You crave that fresh, crisp taste in your dishes, but the thought of starting a garden might seem overwhelming. Well, I’m here to tell you that growing scallions is one of the easiest and most rewarding gardening projects you can undertake. You can have a continuous supply of fresh scallions right at your fingertips, adding that perfect touch to your meals. Let’s get started.
1. Choosing the Right Scallion Variety
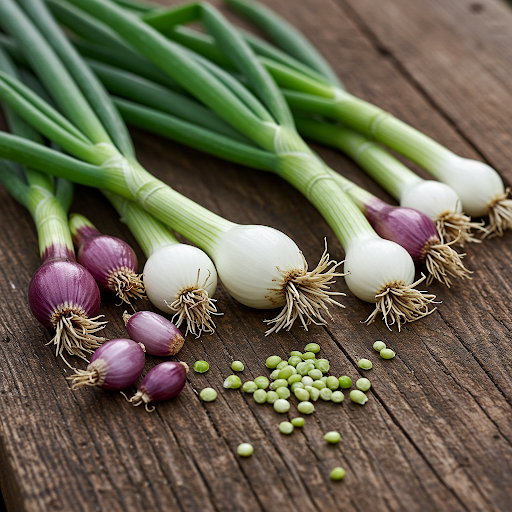
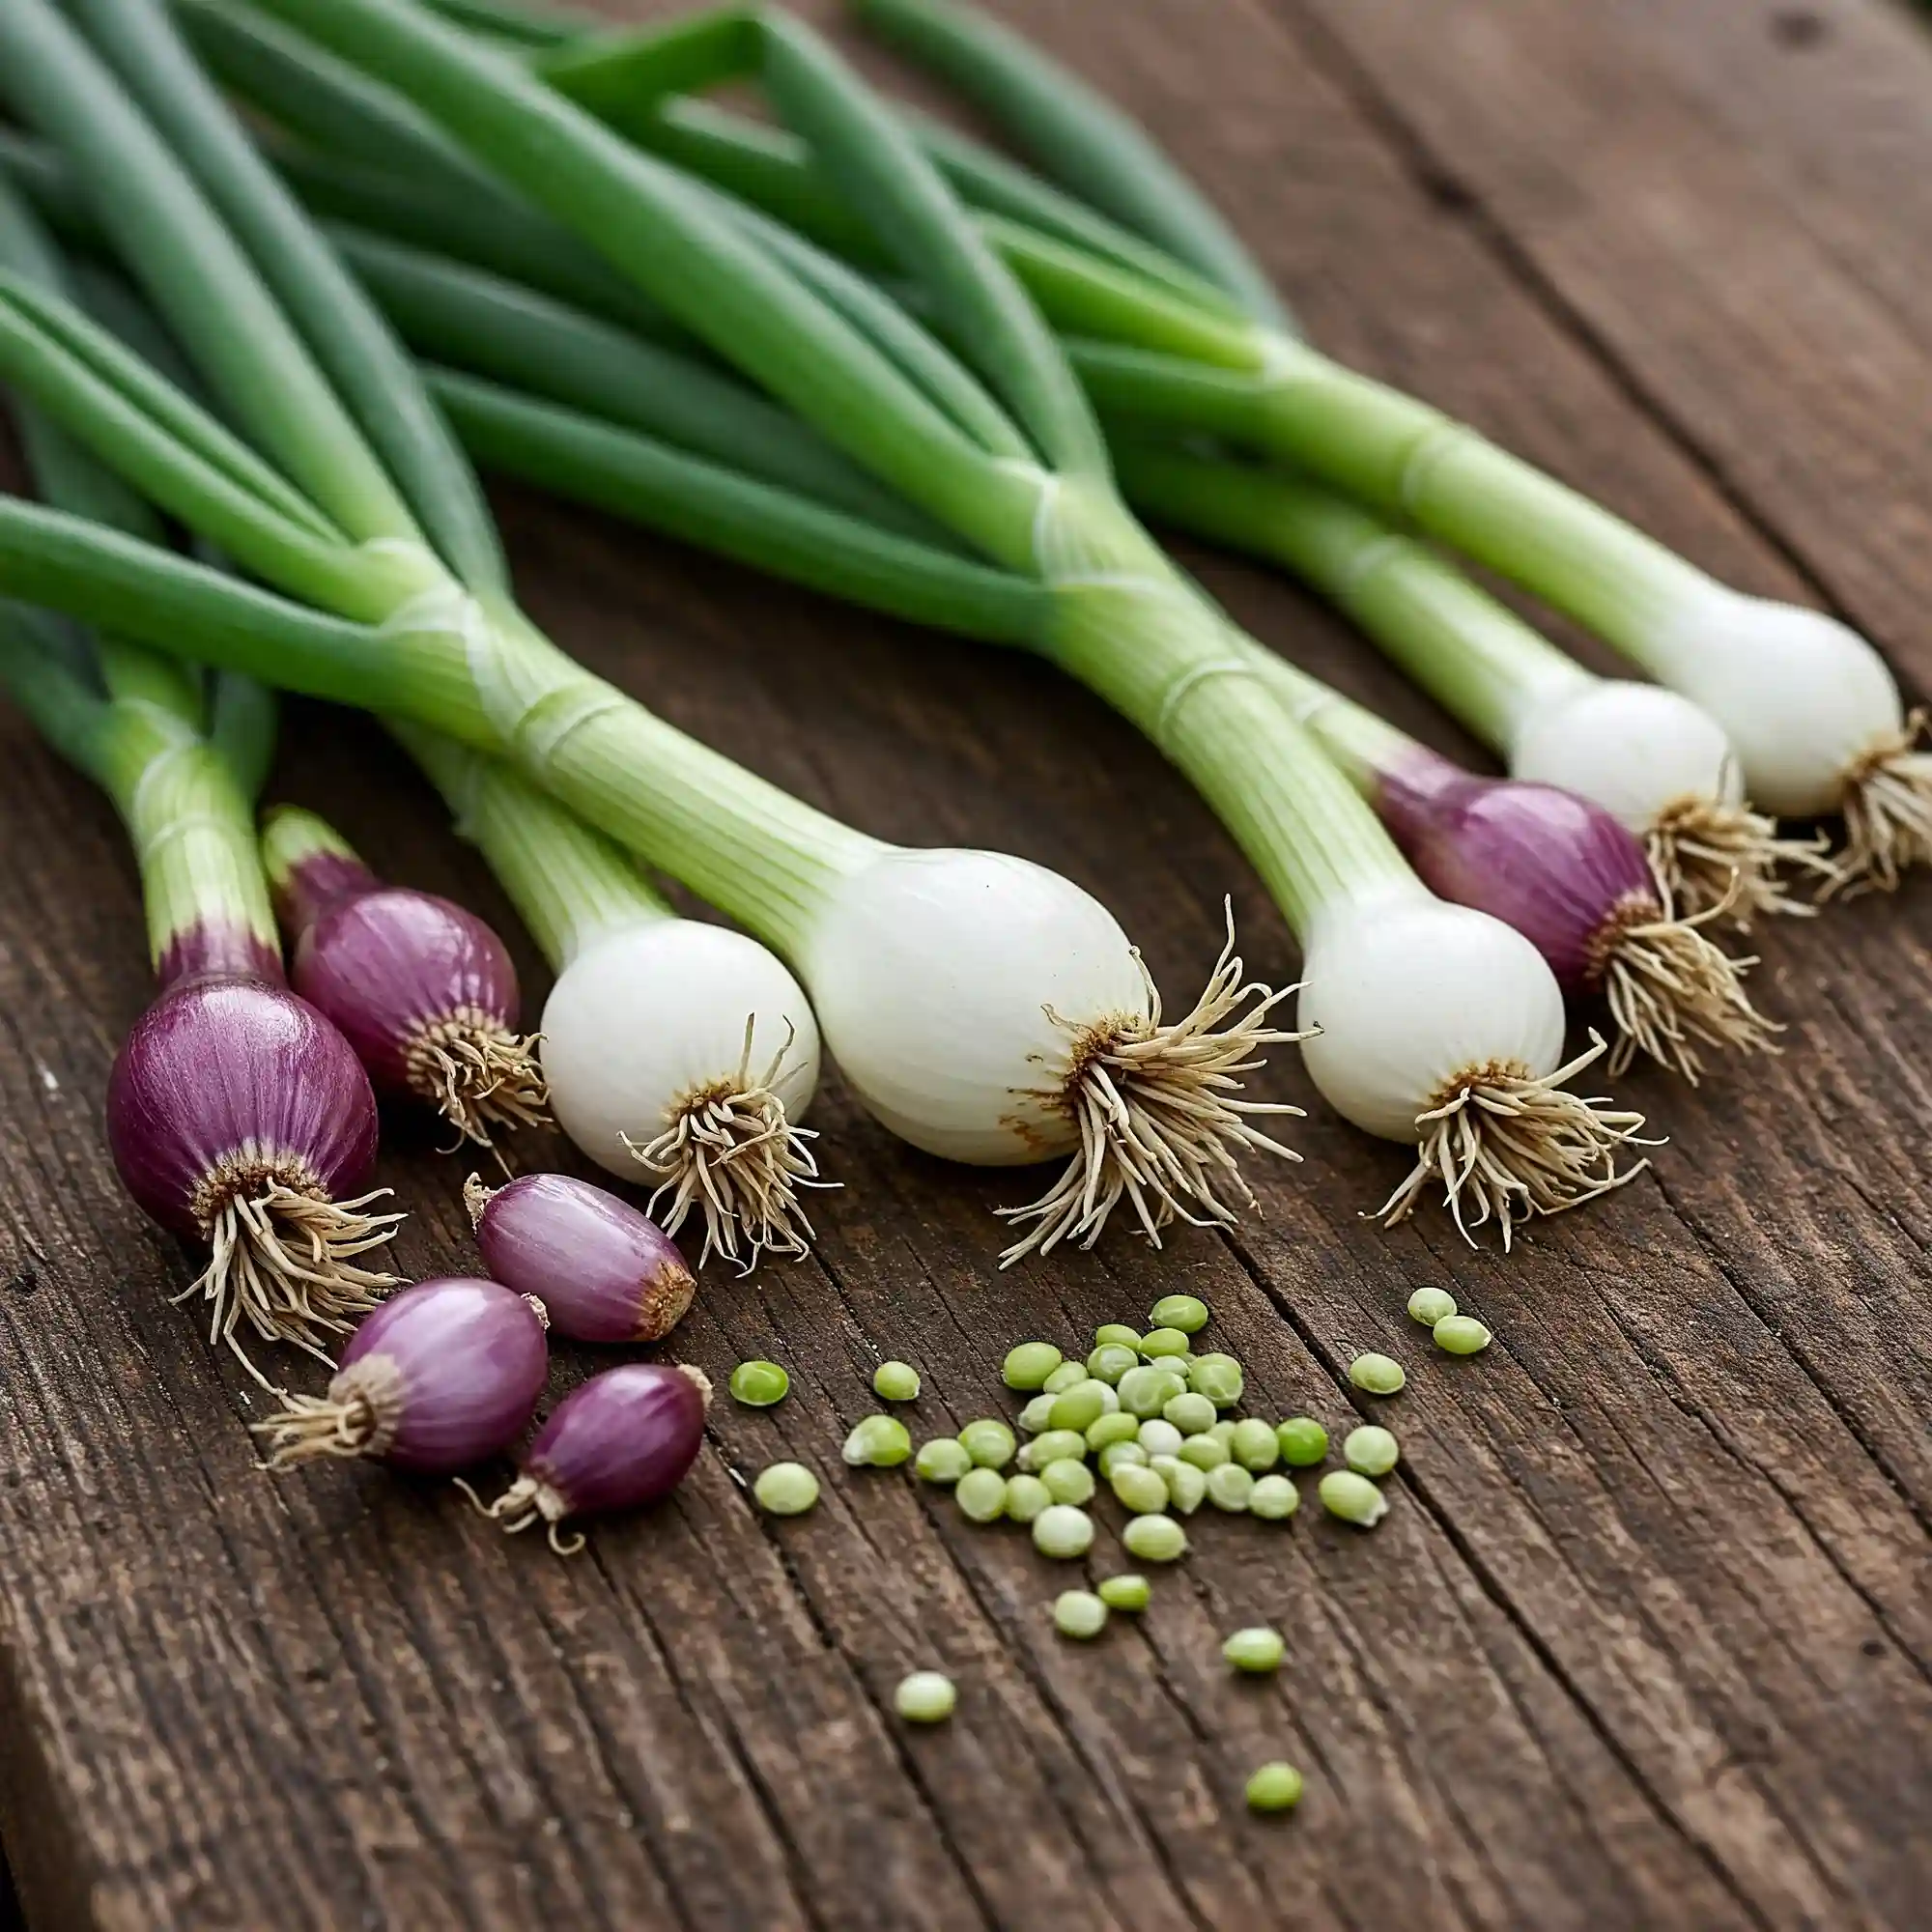
When embarking on your scallion-growing journey, understanding the diverse world of scallion varieties is crucial. Just like people, scallions have distinct personalities, each with unique flavors, growth habits, and adaptability to different climates.
A World of Scallions
- Evergreen Hardy White: As the name suggests, this variety is known for its resilience in colder climates. It boasts a strong, robust flavor, adding a pungent kick to your dishes.
- White Lisbon: A popular choice for its mild flavor and quick growth. This versatile variety is well-suited for both beginner and experienced gardeners.
- Tokyo Long White: This variety produces long, slender stalks with a mild flavor. It’s perfect for stir-fries and other dishes where you want long, elegant scallion pieces.
- Red Beard: This unique variety features reddish-purple stalks, adding a touch of visual interest to your garden. It offers a mild, slightly sweet flavor.
Flavor Profiles
The flavor of scallions can range from mild and delicate to pungent and sharp. Some varieties, like the White Lisbon, have a mild, onion-like flavor, while others, such as the Evergreen Hardy White, exhibit a stronger, more pungent taste. Consider your culinary preferences when selecting a variety. Do you prefer a milder flavor for salads and garnishes, or a stronger flavor for stir-fries and soups?
Climate Considerations
Scallion varieties have varying degrees of cold tolerance. If you live in a region with cold winters, choose varieties like Evergreen Hardy White that can withstand freezing temperatures. Conversely, if you reside in a warmer climate, opt for varieties that thrive in heat and humidity.
Where to Find Your Perfect Scallion
- Local Garden Centers: Visit your local garden center and speak with knowledgeable staff. They can provide valuable insights into the best varieties for your specific region and climate.
- Online Seed Suppliers: Many online seed suppliers offer a wide selection of scallion varieties, along with detailed descriptions and customer reviews.
- Cooperative Extension Offices: These valuable resources can provide expert advice on the most suitable scallion varieties for your local area.
Beyond the Basics
Experimenting with different varieties is a fun and rewarding aspect of gardening. You might discover a new favorite that perfectly complements your culinary style. Don’t be afraid to try something new each season and expand your scallion repertoire.
By carefully selecting the right scallion variety, you’re laying the foundation for a successful and flavorful harvest. So, take your time, do your research, and choose varieties that align with your gardening goals and culinary preferences.
2. Preparing the Ideal Soil
Just as a chef selects the finest ingredients for a delicious meal, a gardener must provide the perfect foundation for their plants to thrive. For scallions, this foundation is healthy, well-prepared soil. Think of it as the kitchen counter for your culinary creations – it needs to be clean, organized, and ready to support the growth of your culinary delights.
The Importance of Soil Quality
Scallions, like most plants, are happiest in well-drained, fertile soil. This means the soil should allow excess water to drain away while retaining enough moisture to keep the roots hydrated. Fertile soil provides the essential nutrients your scallions need to grow strong and healthy.
Preparing Your Soil
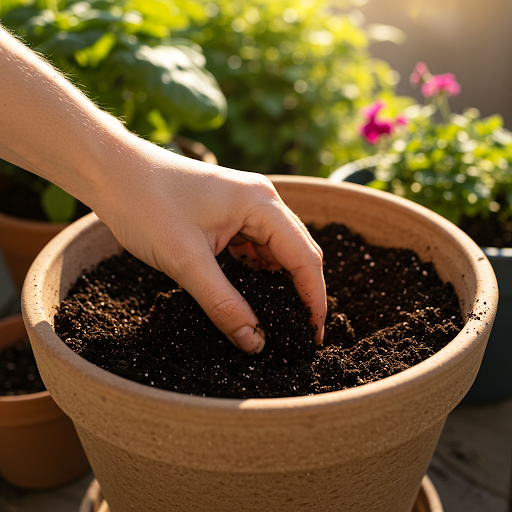
- Loosen the Soil: Begin by loosening the soil to a depth of about 6-8 inches. This allows for better root penetration and improves drainage. Use a garden fork or tiller to break up compacted soil and incorporate organic matter.
- Incorporate Organic Matter: Adding organic matter to your soil is like giving it a nutritious meal. Compost, well-rotted manure, or peat moss are excellent choices. These materials not only improve drainage but also add essential nutrients and enhance soil structure. Aim for a ratio of about 2-3 inches of organic matter per square foot of garden space.
- Consider Soil pH: Scallions prefer slightly acidic to neutral soil with a pH between 6.0 and 7.0. You can test your soil pH using a home soil test kit available at most garden centers. If your soil is too acidic, you can raise the pH by adding lime. If it’s too alkaline, you can lower the pH by adding sulfur.
Creating the Perfect Scallion Bed
If you’re planting scallions in raised beds, ensure the soil is well-drained by adding a layer of coarse sand or gravel to the bottom of the bed. This will prevent waterlogging, which can damage the roots.
Beyond the Basics
- Soil Amendments: Consider adding a slow-release fertilizer to your soil before planting. This will provide a steady supply of nutrients throughout the growing season.
- Mulching: After planting, apply a layer of organic mulch, such as straw or wood chips, around the base of the plants. Mulch helps to retain moisture, suppress weeds, and regulate soil temperature.
By preparing the ideal soil, you’re creating a nurturing environment for your scallions to flourish. Remember, healthy soil equals healthy plants, and healthy plants lead to a bountiful harvest of delicious, homegrown scallions.
3. Planting Scallions: Seeds vs. Bulbs
Now that your soil is primed and ready, it’s time to decide how you’ll be planting your scallions: from seed or from bulbs. Both methods have their own unique advantages and considerations.
Planting from Seed
- Pros:
- Cost-effective: Starting from seeds is generally more economical than purchasing bulbs.
- Wide Variety: You have access to a wider range of scallion varieties when starting from seed.
- Longer-lasting: Seed-grown scallions often have a longer shelf life.
- Cons:
- Requires Patience: Germination can take several weeks, and it may require more consistent monitoring.
- Potential for Slower Growth: Seed-grown scallions may take longer to reach maturity compared to those grown from bulbs.
- Planting Guide:
- Timing: Sow seeds indoors 6-8 weeks before the last expected frost.
- Depth: Sow seeds about ¼ inch deep.
- Spacing: Space seeds about ½ inch apart.
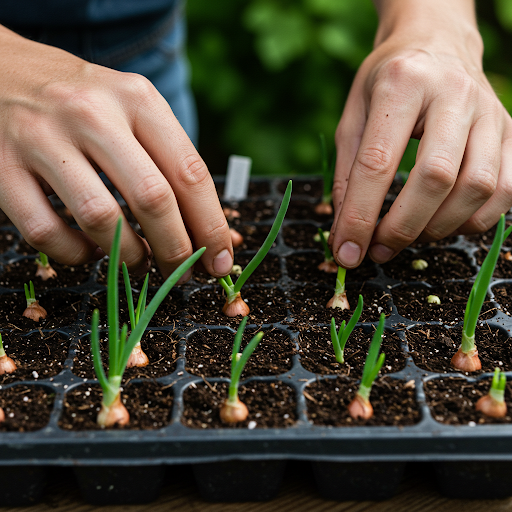
- Thinning: Once seedlings have developed two true leaves, thin them to about 2 inches apart.
Planting from Bulbs
- Pros:
- Faster Results: Bulbs establish quickly and can be harvested sooner.
- Easier to Plant: Planting bulbs is generally easier and faster than sowing seeds.
- Cons:
- Limited Variety: The availability of scallion bulbs may be limited compared to seeds.
- Higher Cost: Purchasing bulbs can be more expensive than starting from seeds.
- Planting Guide:
- Timing: Plant bulbs in spring after the last frost.
- Depth: Plant bulbs about 1 inch deep.
- Spacing: Space bulbs about 2-3 inches apart.
Choosing Your Method
Whether you choose to start from seeds or bulbs depends on your individual preferences and gardening goals. If you’re looking for a cost-effective and long-term solution, starting from seeds is a great option. However, if you prefer a quicker harvest and don’t mind spending a little more, planting bulbs may be the better choice.
Additional Tips
- Consider your climate: If you live in a region with a short growing season, starting from bulbs may be a better option.
- Experiment: Try both methods to see which one you prefer. You can even grow some scallions from seeds and some from bulbs simultaneously to compare the results.
By carefully considering your options and following the appropriate planting guidelines, you’ll be well on your way to a successful scallion harvest.
4. Watering and Sunlight Essentials
Just as we humans need water and sunshine to thrive, so do our scallion plants. Providing the right amount of water and ensuring they receive ample sunlight are crucial for healthy growth and a bountiful harvest.
Water Wisely
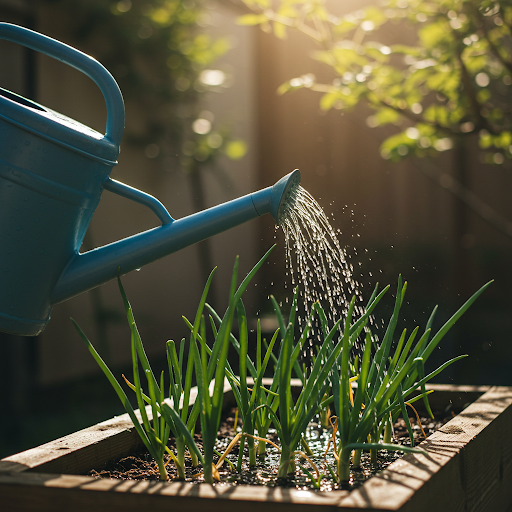
Scallions prefer consistently moist soil but dislike soggy conditions. Overwatering can lead to root rot, a serious issue that can quickly decimate your scallion crop.
- Watering Frequency: The frequency of watering will depend on several factors, including weather conditions, soil type, and the stage of growth. As a general rule, water deeply and thoroughly when the top inch of soil feels dry to the touch.
- Watering Techniques: Use a gentle stream of water from a watering can or hose to avoid dislodging the young plants. Water at the base of the plants, rather than overhead, to minimize the risk of fungal diseases.
- Mulching: Applying a layer of mulch, such as straw or wood chips, around the base of the plants helps to retain moisture in the soil, reducing the need for frequent watering.
Sunlight is Key
Scallions are sun-loving plants and require at least 6-8 hours of direct sunlight per day. Insufficient sunlight can lead to weak, spindly growth and reduced flavor.
- Ideal Locations: Choose a sunny spot in your garden or place your containers in a location that receives plenty of sunlight.
- Rotating Containers: If you’re growing scallions in containers, rotate them regularly to ensure even sunlight exposure on all sides.
Monitoring Your Plants
Pay close attention to your scallion plants. If they start to wilt or the leaves appear dull, they may not be receiving enough water. Conversely, if the leaves turn yellow or brown, they may be overwatered. Adjust your watering schedule accordingly to ensure optimal growth.
By providing your scallions with the right amount of water and sunlight, you’re creating the ideal conditions for them to thrive. Remember, consistent care and attention will reward you with a healthy and productive scallion patch.
5. Fertilizing for Optimal Growth
Just as we need a balanced diet to stay healthy, our scallion plants require a steady supply of nutrients to thrive. Fertilizing your scallions provides them with the essential elements they need to grow strong, produce abundant foliage, and develop robust root systems.
The Importance of Fertilization
Scallions utilize nutrients from the soil to produce lush green leaves and develop flavorful bulbs. Over time, the soil can become depleted of these essential nutrients, hindering the growth and productivity of your plants. Regular fertilization replenishes the soil, ensuring your scallions have access to the nutrients they need for optimal growth.
Choosing the Right Fertilizer
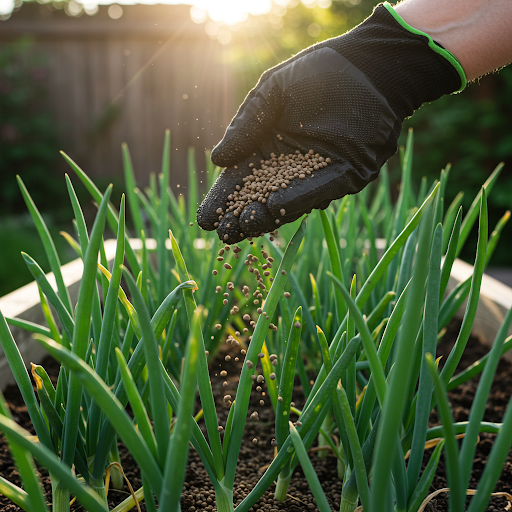
- Organic Fertilizers: Opt for organic fertilizers such as compost, well-rotted manure, or fish emulsion. These fertilizers release nutrients slowly, providing a steady supply to your plants. They also improve soil structure and promote beneficial microbial activity.
- Balanced Fertilizers: Consider using a balanced fertilizer with an NPK ratio of 10-10-10. This provides a balanced supply of nitrogen, phosphorus, and potassium, which are essential for plant growth and development.
Fertilization Schedule
- Side-dress with compost: Apply a layer of compost around the base of your scallion plants after planting. This will provide a slow-release source of nutrients.
- Liquid Fertilizers: Apply a diluted liquid fertilizer every 2-3 weeks during the growing season. Follow the instructions on the fertilizer label for the recommended dilution rate.
- Avoid Over-fertilization: Over-fertilizing can lead to excessive growth, which can make the scallions more susceptible to pests and diseases. It can also result in a strong, unpleasant flavor.
Recognizing Nutrient Deficiencies
If your scallions exhibit signs of nutrient deficiency, such as yellowing leaves or stunted growth, you may need to adjust your fertilization strategy. Consult a local gardening expert or soil test to determine the specific nutrient deficiencies and address them accordingly.
By providing your scallions with the right nutrients, you’re investing in their health and ensuring a bountiful harvest. Remember, consistent fertilization, along with proper watering and sunlight, will contribute to the overall success of your scallion-growing endeavors.
6. Growing Scallions Indoors
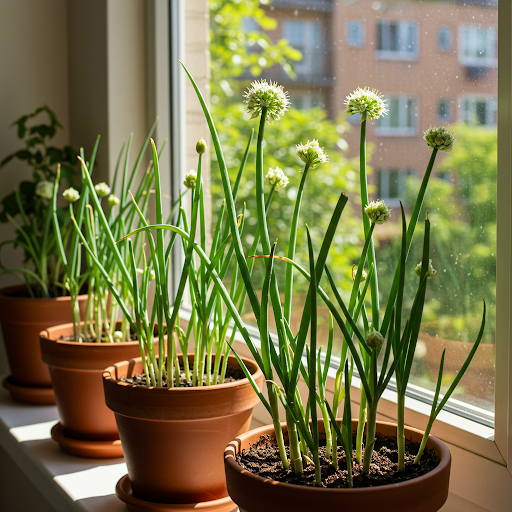
Even if you lack a sprawling backyard or a spacious garden, you can still enjoy the satisfaction of growing your own scallions. Indoor gardening has gained immense popularity, and growing scallions indoors is a breeze.
Choosing the Right Containers
- Pot Size: Select pots that are at least 6 inches deep and wide enough to accommodate the root system.
- Drainage Holes: Ensure the pots have adequate drainage holes to prevent waterlogging, which can lead to root rot.
Preparing the Potting Mix
- Well-Drained Soil: Use a well-draining potting mix that is rich in organic matter. You can also add perlite or vermiculite to improve drainage.
Planting and Care
- Planting: Plant scallion seeds or bulbs according to the instructions provided earlier.
- Sunlight: Place the pots in a location that receives at least 6 hours of direct sunlight each day. A south-facing window is ideal.
- Watering: Water regularly, allowing the top inch of soil to dry out slightly between waterings. Avoid overwatering, as this can lead to root rot.
- Fertilizing: Fertilize your indoor scallions every 2-3 weeks with a diluted liquid fertilizer.
Tips for Success
- Rotate Pots: Rotate the pots regularly to ensure even growth and prevent the plants from leaning towards the light source.
- Monitor for Pests: Keep an eye out for common pests such as aphids and spider mites. Use insecticidal soap or neem oil to control infestations.
- Harvesting: Harvest indoor scallions as needed, using the same techniques as for outdoor scallions.
The Benefits of Indoor Gardening
- Year-Round Harvest: You can enjoy fresh scallions year-round, regardless of the weather outside.
- Convenience: Indoor gardening eliminates the need to brave the elements or travel to your garden.
- Space-Saving: Indoor gardening is a great option for those with limited outdoor space.
By following these simple guidelines, you can successfully grow scallions indoors and enjoy a continuous supply of fresh, homegrown flavor.
7. Preventing Pests and Diseases
While scallions are generally resilient plants, they can still fall prey to certain pests and diseases. By implementing proactive measures, you can minimize the risk of infestations and ensure a healthy, productive harvest.
Common Pests
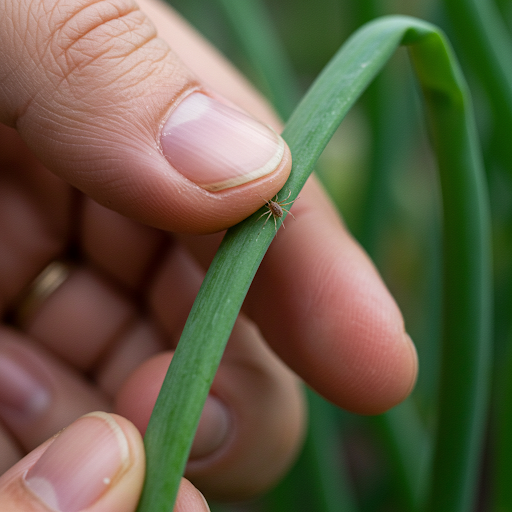
- Aphids: These tiny, sap-sucking insects can infest scallion plants, causing stunted growth and leaf distortion.
- Thrips: These small, winged insects feed on plant sap, leaving behind silvery streaks on the leaves.
- Onion Maggots: These fly larvae feed on the roots of scallions, causing the plants to wilt and die.
Preventing Pests
- Regular Inspection: Regularly inspect your scallion plants for signs of pests. Early detection is key to effective pest control.
- Handpicking: For small infestations, handpicking pests can be an effective control method.
- Natural Pesticides: Introduce beneficial insects such as ladybugs and lacewings, which prey on aphids and other pests.
- Neem Oil: Neem oil is a natural pesticide that can be effective in controlling aphids and other soft-bodied insects.
Common Diseases
- Downy Mildew: This fungal disease thrives in cool, wet conditions, causing white or gray patches on the leaves.
- Neck Rot: This fungal disease affects the base of the scallion, causing the plants to rot and collapse.
Preventing Diseases
- Proper Watering: Avoid overwatering, as excessive moisture can create ideal conditions for fungal diseases. Water at the base of the plants to keep the foliage dry.
- Good Air Circulation: Space your scallions adequately to ensure good air circulation, which helps to prevent fungal diseases.
- Crop Rotation: Rotate your scallion crops each year to break the disease cycle.
Organic Pest and Disease Control
- Companion Planting: Planting strong-smelling herbs like garlic and chives near your scallions can deter certain pests.
- Diatomaceous Earth: This natural substance can be used to control insects such as aphids and thrips.
By implementing these preventive measures, you can minimize the impact of pests and diseases on your scallion plants. Remember, early detection and proactive action are key to maintaining a healthy and productive garden.
8. Harvesting Your Scallions
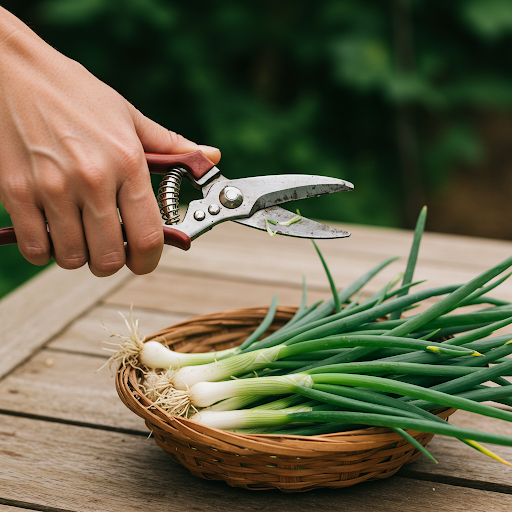
The moment you’ve been waiting for has arrived: harvest time! Harvesting your scallions is a rewarding experience, and it’s easier than you might think.
When to Harvest
Scallions are typically ready for harvest when they reach about 6-8 inches tall. You can start harvesting individual scallions as needed, or you can harvest the entire plant at once.
Harvesting Techniques
- Individual Harvesting: To harvest individual scallions, gently pull or cut the outermost stalks at the base of the plant. This allows the remaining stalks to continue growing.
- Whole Plant Harvest: To harvest the entire plant, gently pull or cut the entire plant at the base.
Storage Tips
- Refrigeration: Store harvested scallions in the refrigerator in a plastic bag or wrapped in a damp paper towel. They can last for up to a week in the refrigerator.
- Freezing: Scallions can also be frozen. Wash and chop the scallions, then blanch them in boiling water for a few seconds. Drain and cool the scallions, then transfer them to freezer bags and store in the freezer.
Continuous Harvesting
By harvesting individual stalks, you can enjoy a continuous supply of fresh scallions throughout the growing season. The plant will continue to produce new growth as long as you provide adequate water and sunlight.
Tips for a Successful Harvest
- Use sharp shears: Clean, sharp shears will provide a clean cut and prevent damage to the plant.
- Harvest in the morning: Harvesting in the morning when the plants are cool and crisp will help to preserve their flavor.
- Wash thoroughly: Wash harvested scallions thoroughly before using them in your recipes.
Harvesting your own scallions is a rewarding experience. Enjoy the satisfaction of using fresh, homegrown produce in your culinary creations.
9. Regrowing Scallions from Kitchen Scraps
One of the most exciting aspects of growing scallions is the ability to regrow them from kitchen scraps. It’s a simple, sustainable practice that minimizes waste and provides a continuous supply of fresh, homegrown scallions.
The Process
- Gather Your Scraps: Save the root ends of store-bought scallions after trimming them for use in your recipes.
- Prepare the Container: Fill a small jar or glass with water.
- Place the Roots: Place the root ends of the scallions in the water, ensuring that only the root ends are submerged.
- Provide Sunlight: Place the jar in a sunny location.
- Change the Water: Change the water every few days to prevent bacterial growth.
Tips for Success
- Use Fresh Scraps: The fresher the scraps, the better the chances of regrowth.
- Trim the Ends: Trim the ends of the scallions at a slight angle to encourage root growth.
- Patience is Key: It may take a few days or even a week for the scallions to start sprouting new growth.
- Transplanting: Once the roots have grown to about an inch long, you can transplant the scallions into soil.
Beyond the Basics
- Root Development: You can also root the scallion scraps in a small pot filled with potting mix. This method provides a more stable environment for root development.
- Continuous Growth: Once the scallions have established themselves, you can continue to harvest the outer leaves, allowing the center to continue growing.
Regrowing scallions from kitchen scraps is a rewarding and sustainable practice. It’s a simple yet effective way to reduce food waste and enjoy a continuous supply of fresh, homegrown scallions.
10. Companion Planting for Scallions
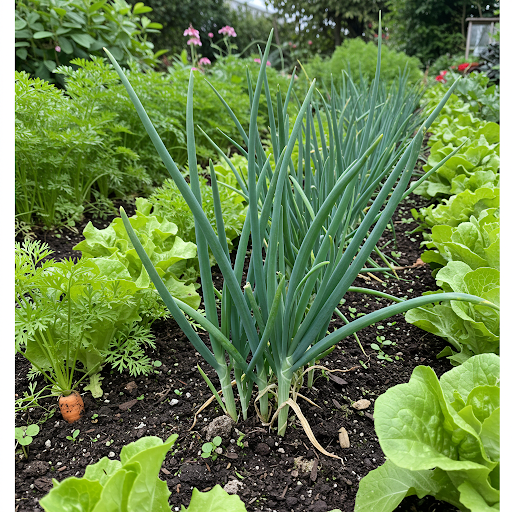
Companion planting is a gardening technique that involves growing different plants together to create a mutually beneficial environment. By strategically pairing plants, you can enhance growth, deter pests, and improve overall garden health.
Beneficial Companions for Scallions
- Carrots: Scallions and carrots make excellent companions. The strong roots of carrots help to loosen the soil, while the pungent aroma of scallions can deter carrot root maggots.
- Lettuce: Scallions and lettuce can thrive together in a mixed salad bed. The leafy greens provide shade for the soil, helping to retain moisture, while the scallions can deter some common lettuce pests.
- Tomatoes: Planting scallions near tomatoes can help to repel certain tomato pests, such as aphids and whiteflies.
Plants to Avoid
- Beans and Peas: Avoid planting scallions near beans and peas, as these plants may compete for nitrogen.
Benefits of Companion Planting
- Pest Control: Certain plants can repel pests that are attracted to other plants.
- Improved Soil Health: Some plants can help to improve soil fertility and structure.
- Increased Pollination: Some plants can attract beneficial insects that help to pollinate other plants.
- Enhanced Flavor: Some plants can enhance the flavor of their neighbors.
Tips for Successful Companion Planting
- Space Plants Appropriately: Ensure that companion plants have adequate space to grow and thrive.
- Consider Plant Height: Plant taller plants behind shorter plants to ensure that all plants receive adequate sunlight.
- Monitor Plant Health: Regularly inspect your plants for signs of pests and diseases.
By incorporating companion planting into your scallion-growing strategy, you can create a more diverse and productive garden ecosystem. Experiment with different plant combinations to discover the perfect pairings for your specific growing conditions.
FAQ
Q: How to grow scallion vegetable from kitchen scraps indoors?
A: Regrowing scallions from kitchen scraps is a simple and rewarding process.
- Gather your scraps: Save the root ends of store-bought scallions after trimming them for use in your recipes.
- Prepare the container: Fill a small jar or glass with water.
- Place the roots: Place the root ends of the scallions in the water, ensuring that only the root ends are submerged.
- Provide sunlight: Place the jar in a sunny location.
- Change the water: Change the water every few days to prevent bacterial growth.
- Transplant: Once the roots have grown to about an inch long, you can transplant the scallions into soil.
Q: Detailed steps on how to grow scallion vegetable organically from seeds at home?
A: 1. Start indoors: Sow seeds indoors 6-8 weeks before the last expected frost.
2. Prepare seed trays: Fill seed trays with a well-draining seed-starting mix.
3. Sow seeds: Sow seeds thinly about ¼ inch deep.
4. Keep moist: Keep the soil consistently moist but not soggy.
5. Provide light: Place the trays in a sunny location or under grow lights.
6. Thin seedlings: Once seedlings have developed two true leaves, thin them to about 2 inches apart.
7. Harden off seedlings: Gradually acclimate the seedlings to outdoor conditions before transplanting.
8. Transplant outdoors: Transplant seedlings into the garden after the last frost, spacing them about 6 inches apart.
9. Care for seedlings: Water regularly, fertilize with organic fertilizer, and protect from pests and diseases.
Q: What is the easiest method how to grow scallion vegetable for beginner gardeners?
A: Regrowing scallions from kitchen scraps is the easiest method for beginner gardeners. It requires minimal effort and provides quick results. Simply place the root ends of store-bought scallions in water and watch them regrow.
Q: How to grow scallion vegetable and prevent common pests and diseases naturally?
A: * Practice good hygiene: Keep your garden clean and free of debris.
- Monitor regularly: Regularly inspect your plants for signs of pests and diseases.
- Handpick pests: Remove any visible pests by hand.
- Use natural pesticides: Introduce beneficial insects such as ladybugs and lacewings to your garden.
- Neem oil: Apply neem oil to control aphids and other soft-bodied insects.
- Maintain proper spacing: Space your plants adequately to allow for good air circulation.
- Avoid overwatering: Overwatering can create conditions that favor fungal diseases.
- Rotate crops: Rotate your scallion crops each year to break the disease cycle.
Q: How to grow scallion vegetable year round using indoor hydroponic systems?
A: Hydroponic systems provide a controlled environment for growing plants without soil.
- Set up a hydroponic system: Choose a hydroponic system that suits your needs and space.
- Prepare the nutrient solution: Mix a balanced nutrient solution according to the manufacturer’s instructions.
- Plant scallions: Plant scallion seeds or bulbs in net pots filled with rockwool or other hydroponic growing medium.
- Place the net pots in the hydroponic system: Ensure the roots are submerged in the nutrient solution.
- Provide light: Provide adequate lighting using grow lights.
- Monitor and adjust: Monitor the nutrient solution pH and temperature, and adjust as needed.
Q: Best techniques how to grow scallion vegetable in containers on balcony?
A: 1. Choose the right container: Select containers that are at least 6 inches deep and have drainage holes.
2. Use well-draining potting mix: Fill the containers with a well-draining potting mix.
3. Plant scallions: Plant scallion seeds or bulbs according to the instructions provided earlier.
4. Provide sunlight: Place the containers in a location that receives at least 6 hours of direct sunlight.
5. Water regularly: Water consistently, allowing the top inch of soil to dry out slightly between waterings.
6. Fertilize: Fertilize regularly with a balanced liquid fertilizer.
Q: Step by step guide on how to grow scallion vegetable in raised garden beds successfully?
A: 1. Prepare the raised bed: Fill the raised bed with a well-draining soil mix.
2. Amend the soil: Add compost or other organic matter to improve soil fertility.
3. Plant scallions: Plant scallion seeds or bulbs according to the instructions provided earlier.
4. Water regularly: Water deeply and consistently, especially during dry periods.
5. Mulch: Apply a layer of mulch around the base of the plants to retain moisture and suppress weeds.
6. Fertilize: Fertilize with a balanced fertilizer every 2-3 weeks.
7. Monitor for pests and diseases: Regularly inspect your plants for signs of pests and diseases.
Q: How to grow scallion vegetable in water and then transplant them to soil?
A: 1. Regrow scallions in water: Place the root ends of store-bought scallions in a jar of water.
2. Allow roots to develop: Allow the roots to grow to about an inch long.
3. Prepare the soil: Prepare a well-draining bed or container with potting mix.
4. Transplant: Gently transplant the scallions into the soil, ensuring that the roots are covered.
5. Water and care: Water the transplanted scallions regularly and provide adequate sunlight.
Q: How to grow scallion vegetable and what are the best companion plants for them?
A: Carrots: Carrots and scallions make excellent companions. The strong roots of carrots help to loosen the soil, while the pungent aroma of scallions can deter carrot root maggots.
- Lettuce: Scallions and lettuce can thrive together in a mixed salad bed.
- Tomatoes: Planting scallions near tomatoes can help to repel certain tomato pests.
- Avoid planting near beans and peas: These plants may compete for nitrogen.
I hope this FAQ section provides helpful information for your scallion-growing journey!
Conclusion
Growing scallions is a rewarding and accessible gardening project for both seasoned gardeners and beginners. By following these tips and techniques, you can cultivate a thriving scallion patch and enjoy a continuous supply of fresh, homegrown flavor. Remember to choose the right variety, prepare the soil properly, and provide adequate water, sunlight, and nutrients. Don’t be afraid to experiment with different growing methods, such as indoor gardening and companion planting. With a little patience and care, you’ll be enjoying the fruits of your labor in no time.
Additional Resources
I hope this comprehensive guide has empowered you to embark on your scallion-growing journey with confidence. Happy gardening!


")

