
Growing your own vegetables can be incredibly rewarding, and red cabbage, with its vibrant color and versatility in the kitchen, is a fantastic choice. I know I have. But have you ever considered growing your own? It’s a truly rewarding experience. Many gardeners find themselves frustrated when their homegrown vegetables don’t quite match the vibrant colors and robust flavors they see in stores. They might be struggling with pests, inconsistent growth, or simply not knowing where to begin. You might be experiencing this right now. You’re putting in the effort, but not seeing the results you desire. This can be discouraging, especially when you’re investing your time and energy. But what if I told you that growing vibrant, flavorful red cabbage is easier than you think? By following a few key steps, you can cultivate beautiful, healthy heads right in your own backyard. This guide will provide you with the knowledge and techniques you need to succeed, ensuring you enjoy the satisfaction of harvesting your own delicious red cabbage.
How to Grow Red Cabbage Vegetable: A Complete Guide
Starting and nurturing a thriving red cabbage patch is a process I’ve come to truly appreciate over the years. It’s not just about throwing some seeds in the ground; it’s about understanding the plant’s needs and creating the optimal environment for it to flourish. This comprehensive guide is designed to equip you with the knowledge and practical skills you need to successfully grow red cabbage, whether you’re a seasoned gardener or just starting out. We’ll delve into everything from seed starting and transplanting to pest control and harvesting, ensuring you have all the tools you need for a successful harvest.
1. Starting Your Red Cabbage: Seeds or Transplants?
When it comes to starting your red cabbage journey, you have two main options: starting from seeds indoors or purchasing transplants from a local nursery. Both methods have their own advantages, and the best choice for you will depend on your experience level, available time, and personal preferences.
Starting from Seeds Indoors:
Starting from seeds indoors allows for greater control over the growing process and provides a wider selection of varieties. It’s a cost-effective approach, especially if you plan to grow a large number of plants. I find this method particularly rewarding because you get to witness the entire life cycle of the plant, from tiny seed to mature head.
- Timing: I recommend starting your red cabbage seeds indoors about 6-8 weeks before the last expected frost in your area. This gives the seedlings ample time to develop a strong root system before being transplanted into the garden. You can use a frost date calculator specific to your region to find the exact date.
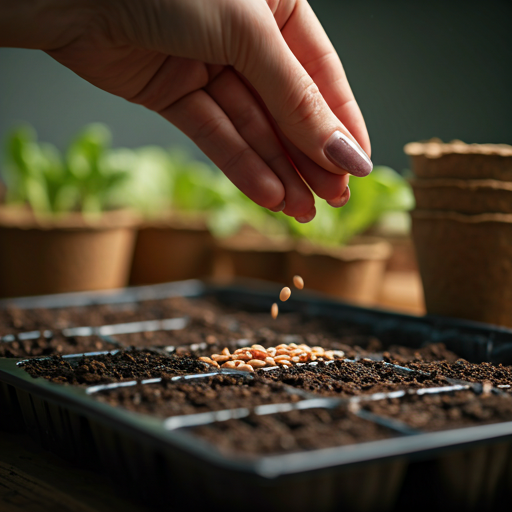
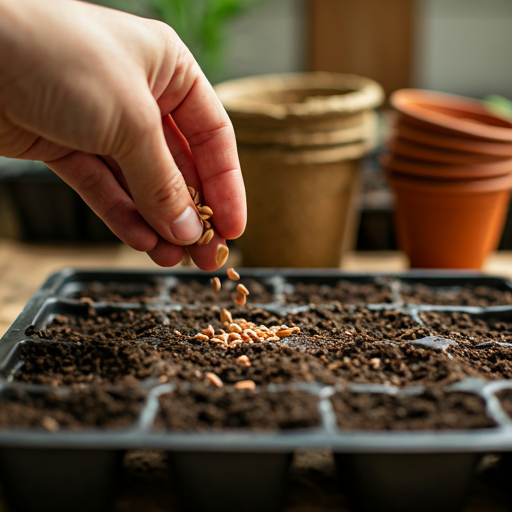
- Sowing Seeds: Use seed starting trays or small pots filled with a seed starting mix. This mix is finer than regular potting soil and provides good drainage, which is crucial for preventing damping-off disease. I typically sow the seeds about ¼ inch deep and gently cover them with the mix.
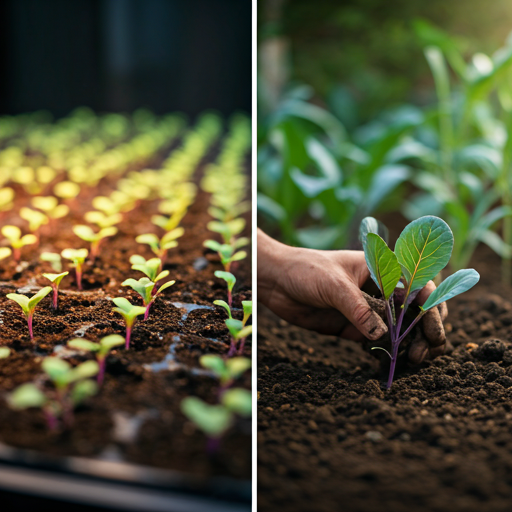
- Germination: Keep the soil consistently moist but not waterlogged. I often use a spray bottle to mist the soil regularly. You can also cover the trays with a clear plastic dome or bag to create a humid environment, which promotes germination. Place the trays in a warm location (around 70-75°F or 21-24°C) with good light. Germination usually takes about 7-10 days.
- Providing Light: Once the seedlings emerge, it’s essential to provide them with adequate light. If you don’t have a sunny windowsill, I recommend using grow lights. Position the lights a few inches above the seedlings and keep them on for about 14-16 hours per day. This prevents the seedlings from becoming leggy (tall and spindly).
- Hardening Off: Before transplanting your seedlings into the garden, you need to “harden them off.” This process gradually acclimates the seedlings to outdoor conditions. Start by placing them outdoors in a sheltered location for a few hours each day, gradually increasing the time over a week or two. This helps them adjust to the sun, wind, and temperature fluctuations.
Buying Transplants from a Nursery:
Purchasing transplants from a nursery is a convenient option, especially for beginners or those who are short on time. It eliminates the need for indoor seed starting and allows you to get your plants into the garden more quickly.
- Selecting Healthy Transplants: When choosing transplants, look for plants that are healthy and vigorous. Choose plants with sturdy stems, deep green leaves, and no signs of pests or diseases. Avoid plants that are root-bound (roots circling tightly around the bottom of the pot) or have yellowing or wilting leaves.
- Timing for Transplanting: I usually recommend transplanting red cabbage seedlings into the garden a few weeks before the last expected frost or as soon as the soil is workable in the spring. You can also plant in late summer for a fall harvest, ensuring you have enough time before the first frost.
Seed Starting vs. Transplants: A Quick Comparison
| Feature | Starting from Seeds | Buying Transplants |
| Cost | Lower | Higher |
| Variety Selection | Wider | Limited |
| Time Investment | Higher | Lower |
| Control | More | Less |
| Best for | Experienced gardeners, those wanting specific varieties | Beginners, time-conscious gardeners |
This section provides a strong foundation for understanding the initial steps of growing red cabbage.
1. Starting Your Red Cabbage: Seeds or Transplants?
When it comes to starting your red cabbage journey, you have two main options: starting from seeds indoors or purchasing transplants from a local nursery. Both methods have their own advantages, and the best choice for you will depend on your experience level, available time, and personal preferences.
Starting from Seeds Indoors:
Starting from seeds indoors allows for greater control over the growing process and provides a wider selection of varieties. It’s a cost-effective approach, especially if you plan to grow a large number of plants. I find this method particularly rewarding because you get to witness the entire life cycle of the plant, from tiny seed to mature head.
- Timing: I recommend starting your red cabbage seeds indoors about 6-8 weeks before the last expected frost in your area. This gives the seedlings ample time to develop a strong root system before being transplanted into the garden. You can use a frost date calculator specific to your region to find the exact date.
- Sowing Seeds: Use seed starting trays or small pots filled with a seed starting mix. This mix is finer than regular potting soil and provides good drainage, which is crucial for preventing damping-off disease. I typically sow the seeds about ¼ inch deep and gently cover them with the mix.
- Germination: Keep the soil consistently moist but not waterlogged. I often use a spray bottle to mist the soil regularly. You can also cover the trays with a clear plastic dome or bag to create a humid environment, which promotes germination. Place the trays in a warm location (around 70-75°F or 21-24°C) with good light. Germination usually takes about 7-10 days.
- Providing Light: Once the seedlings emerge, it’s essential to provide them with adequate light. If you don’t have a sunny windowsill, I recommend using grow lights. Position the lights a few inches above the seedlings and keep them on for about 14-16 hours per day. This prevents the seedlings from becoming leggy (tall and spindly).
- Hardening Off: Before transplanting your seedlings into the garden, you need to “harden them off.” This process gradually acclimates the seedlings to outdoor conditions. Start by placing them outdoors in a sheltered location for a few hours each day, gradually increasing the time over a week or two. This helps them adjust to the sun, wind, and temperature fluctuations.
Buying Transplants from a Nursery:
Purchasing transplants from a nursery is a convenient option, especially for beginners or those who are short on time. It eliminates the need for indoor seed starting and allows you to get your plants into the garden more quickly.
- Selecting Healthy Transplants: When choosing transplants, look for plants that are healthy and vigorous. Choose plants with sturdy stems, deep green leaves, and no signs of pests or diseases. Avoid plants that are root-bound (roots circling tightly around the bottom of the pot) or have yellowing or wilting leaves.
- Timing for Transplanting: I usually recommend transplanting red cabbage seedlings into the garden a few weeks before the last expected frost or as soon as the soil is workable in the spring. You can also plant in late summer for a fall harvest, ensuring you have enough time before the first frost.
Seed Starting vs. Transplants: A Quick Comparison
| Feature | Starting from Seeds | Buying Transplants |
| Cost | Lower | Higher |
| Variety Selection | Wider | Limited |
| Time Investment | Higher | Lower |
| Control | More | Less |
| Best for | Experienced gardeners, those wanting specific varieties | Beginners, time-conscious gardeners |
This section provides a strong foundation for understanding the initial steps of growing red cabbage.
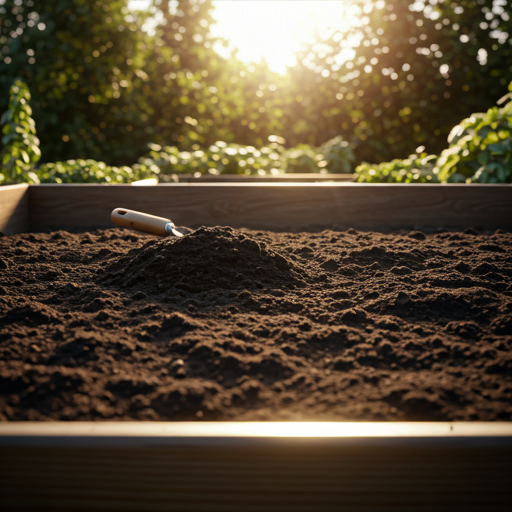
2. Preparing the Perfect Growing Environment for Red Cabbage
Red cabbage, like most vegetables, thrives in specific conditions. Creating the ideal growing environment is crucial for healthy growth and a bountiful harvest. From my experience, paying close attention to these factors can make a world of difference in the size and quality of your cabbage heads. You want to give your plants the best possible start, and that begins with proper site preparation.
- Sunlight Requirements: Red cabbage loves the sun! I’ve found that they need at least 6 hours of direct sunlight each day to develop properly. When choosing a location for your red cabbage patch, select a spot that receives full sun throughout the day. If you live in a particularly hot climate, some afternoon shade can be beneficial to prevent the plants from overheating.
- Soil Conditions: The ideal soil for red cabbage is well-draining and rich in organic matter. I always recommend amending the soil with compost or well-rotted manure before planting. This improves soil structure, drainage, and fertility, providing the plants with the nutrients they need to thrive.
- Soil pH: Red cabbage prefers a slightly acidic to neutral soil pH, ideally between 6.0 and 7.0. You can test your soil pH using a simple home test kit or by sending a soil sample to a local lab. If your soil is too acidic, you can add lime to raise the pH. If it’s too alkaline, you can add sulfur to lower it.
- Soil Preparation: Proper soil preparation is essential for successful red cabbage growing. I start by clearing the area of any weeds or debris. Then, I dig down about 12 inches and amend the soil with compost or well-rotted manure. This improves soil drainage and provides the plants with essential nutrients. I also recommend testing the soil pH and adjusting it if necessary.
Improving Soil Fertility
| Amendment | Benefits | Application Rate |
| Compost | Improves soil structure, drainage, and fertility; provides essential nutrients; enhances water retention. | Apply a 2-4 inch layer to the soil surface and work it in before planting. Side-dress plants with compost during the growing season. |
| Well-rotted Manure | Improves soil structure, drainage, and fertility; provides essential nutrients. | Apply a 2-4 inch layer to the soil surface and work it in before planting. Avoid using fresh manure, as it can burn plant roots. |
| Balanced Fertilizer | Provides essential nutrients (nitrogen, phosphorus, potassium) in specific ratios. | Follow the instructions on the fertilizer label for application rates. Apply before planting and side-dress plants during the growing season. Choose a fertilizer with an NPK ratio appropriate for vegetables. |
| Lime | Raises soil pH; provides calcium. | Apply according to soil test recommendations. |
| Sulfur | Lowers soil pH. | Apply according to soil test recommendations. |
Understanding Soil Types
| Soil Type | Characteristics | How to Improve for Red Cabbage |
| Sandy | Light, well-draining, warms up quickly; low in nutrients; doesn’t retain water well. | Amend with compost to improve water retention and fertility. |
| Clay | Heavy, poorly draining, slow to warm up; high in nutrients; retains water well. | Amend with compost and other organic matter to improve drainage and structure. Consider adding sand or other drainage materials. |
| Loam | A balanced mix of sand, silt, and clay; well-draining, retains moisture and nutrients well; ideal for most plants. | Amend with compost to maintain fertility and structure. |
By paying attention to these details, you’ll create a welcoming home for your red cabbage, setting the stage for vigorous growth and a rewarding harvest. I’ve seen firsthand how much of a difference proper soil preparation and sunlight exposure can make. It’s an investment that truly pays off in the long run.
3. Planting Your Red Cabbage: Timing and Spacing

Now that you’ve got your seedlings or transplants ready and your garden bed prepared, it’s time to get those red cabbages in the ground! Proper timing and spacing are key to ensuring they have enough room to grow and develop into those beautiful, tightly packed heads we all love. From my experience, rushing this step or neglecting proper spacing can lead to smaller heads and increased susceptibility to disease.
- When to Plant: The ideal time to plant your red cabbage depends on your local climate and whether you’re starting from seeds or transplants.
- Spring Planting: If you’re aiming for a summer or early fall harvest, plant your transplants a few weeks before the last expected frost in spring, once the soil is workable. I usually wait until the soil temperature reaches at least 45°F (7°C).
- Fall Planting: For a late fall or winter harvest in milder climates, you can also plant red cabbage in late summer. Ensure you have enough time before the first expected frost for the plants to mature.
- Spacing: Proper spacing is crucial for red cabbage development. It needs ample room to grow its large heads. I recommend spacing your plants 18-24 inches apart in rows that are 24-36 inches apart. This allows for good air circulation, which helps prevent fungal diseases.
- Planting Depth: When transplanting, make sure to plant the seedlings at the same depth they were growing in their containers. Don’t bury the stem too deep, as this can encourage rot. Gently firm the soil around the base of the plant to provide support.
- Direct Sowing vs. Transplanting: While I generally recommend starting indoors or using transplants, you can direct sow red cabbage seeds in the garden if you live in a region with a long growing season.
- Direct Sowing Method: Sow seeds ½ inch deep and thin seedlings to the proper spacing once they emerge. This method is best suited for areas with mild winters.
Planting Considerations Based on Region
| Climate Type | Best Planting Time | Additional Tips |
| Cold | Spring (after last frost) or early summer for a fall harvest | Start seeds indoors 6-8 weeks before the last frost. Use row covers to protect young plants from frost. Choose early maturing varieties. |
| Temperate | Spring or late summer for a fall/winter harvest | Planting times are more flexible. Monitor weather conditions closely and adjust planting times accordingly. |
| Hot | Late summer for a winter harvest | Provide some afternoon shade to prevent plants from overheating. Choose heat-tolerant varieties. Mulch heavily to retain moisture and keep the soil cool. |
Tips for Successful Planting:
- Water thoroughly after planting: This helps settle the soil around the roots and reduces transplant shock.
- Mulch around the plants: This helps retain moisture, suppress weeds, and regulate soil temperature. I prefer using organic mulches like straw or shredded leaves.
- Protect from pests: Young seedlings are particularly vulnerable to pests like flea beetles and cutworms. Consider using row covers or other protective measures.
By paying close attention to these planting details, you’ll give your red cabbage plants a strong start and set them up for healthy growth. I’ve found that taking the time to do it right from the beginning really pays off in the end.
4. Caring for Your Red Cabbage: Watering, Fertilizing, and Weeding
Once your red cabbage plants are in the ground, consistent care is essential for their continued growth and development. This involves regular watering, appropriate fertilization, and diligent weed control. I’ve learned that neglecting these aspects can lead to stunted growth, smaller heads, and increased vulnerability to pests and diseases.
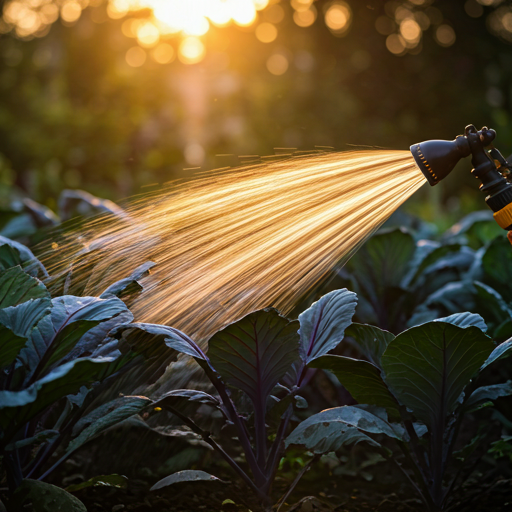
- Watering: Red cabbage needs consistent moisture, especially during dry periods. I recommend watering deeply and regularly, ensuring the soil is moist but not waterlogged. Aim for about 1-1.5 inches of water per week, either from rainfall or irrigation. Avoid overhead watering, as this can encourage fungal diseases. Instead, water at the base of the plants. I often use a soaker hose or drip irrigation to deliver water directly to the roots.
- Fertilizing: Red cabbage is a heavy feeder, meaning it requires a good supply of nutrients to grow properly. I recommend fertilizing your plants with a balanced fertilizer or side-dressing with compost or well-rotted manure.
- Balanced Fertilizer: Choose a fertilizer with an NPK (nitrogen, phosphorus, potassium) ratio that is appropriate for vegetables, such as 10-10-10 or 14-14-14. Apply the fertilizer according to the instructions on the label.
- Side-dressing with Compost: Side-dressing involves applying compost or manure to the soil around the base of the plants. This provides a slow-release source of nutrients. I usually side-dress my red cabbage plants a few weeks after transplanting and again a few weeks later.
- Weeding: Weeds compete with your red cabbage plants for water, nutrients, and sunlight. Regular weeding is essential to keep your plants healthy and productive. I recommend hand-weeding regularly or using a hoe to remove weeds. Be careful not to damage the shallow roots of your cabbage plants.
- Mulching: Applying a layer of mulch around your red cabbage plants can provide several benefits. Mulch helps retain moisture in the soil, suppress weeds, and regulate soil temperature. I prefer using organic mulches like straw, shredded leaves, or wood chips.
Watering Tips for Red Cabbage
- Water deeply and regularly: Aim for 1-1.5 inches of water per week.
- Water at the base of the plants: Avoid overhead watering.
- Water early in the morning: This allows the foliage to dry before nightfall, reducing the risk of fungal diseases.
- Use a soaker hose or drip irrigation: This delivers water directly to the roots.
- Monitor soil moisture: Check the soil moisture regularly by sticking your finger about an inch into the soil. If it feels dry, it’s time to water.
Benefits of Mulching
- Retains moisture: Reduces the need for frequent watering.
- Suppresses weeds: Reduces competition for water, nutrients, and sunlight.
- Regulates soil temperature: Keeps the soil cooler in summer and warmer in winter.
- Adds organic matter to the soil: Improves soil structure and fertility.
By following these care tips, you’ll provide your red cabbage plants with the resources they need to thrive and produce those beautiful, colorful heads. I’ve found that consistent care is the key to a successful harvest.
5. Protecting Your Red Cabbage from Pests and Diseases
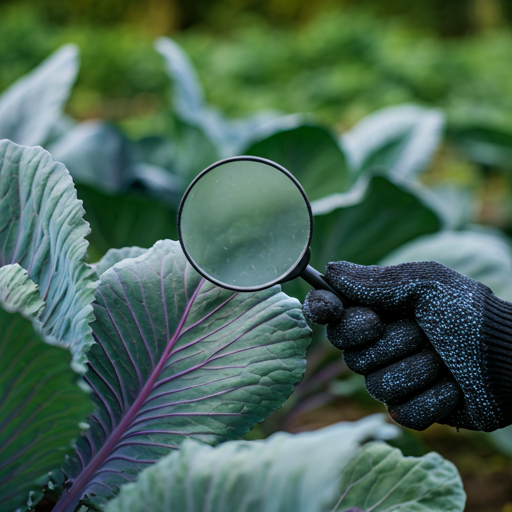
Red cabbage, like all garden vegetables, can be susceptible to various pests and diseases. Vigilance and proactive measures are key to protecting your crop and ensuring a healthy harvest. I’ve learned from experience that early detection and intervention are crucial in preventing widespread problems. By understanding the common threats and implementing preventive strategies, you can minimize damage and maintain a thriving red cabbage patch.
- Common Pests: Several pests can target red cabbage, but some of the most common include:
- Cabbage White Butterfly Caterpillars: These green caterpillars are voracious eaters and can quickly defoliate your plants.
- Aphids: These small, soft-bodied insects suck sap from the leaves, causing them to curl and distort.
- Slugs and Snails: These slimy pests can chew holes in the leaves and even damage the heads.
- Flea Beetles: These tiny beetles create small holes in the leaves, especially on young seedlings.
- Organic Pest Control Methods: I prefer using organic methods to control pests in my garden. Some effective options include:
- Handpicking: Regularly inspect your plants and remove any visible pests by hand. This is particularly effective for larger pests like caterpillars and slugs.
- Insecticidal Soap: This natural soap spray can be effective against aphids and other soft-bodied insects.
- Neem Oil: This natural oil derived from the neem tree can disrupt the life cycle of many insects.
- Row Covers: These lightweight fabric covers can be placed over your plants to prevent pests from reaching them.
- Common Diseases: Red cabbage can also be affected by several diseases, including:
- Clubroot: This soilborne disease causes the roots to become swollen and distorted, hindering the plant’s ability to absorb water and nutrients.
- Black Rot: This bacterial disease causes dark lesions on the leaves and can eventually lead to the death of the plant.
- Disease Prevention: Prevention is always the best approach when it comes to plant diseases. Here are some tips to help prevent diseases in your red cabbage patch:
- Crop Rotation: Avoid planting cabbage or other brassicas in the same location year after year.
- Good Air Circulation: Space your plants adequately to allow for good air circulation.
- Proper Watering Techniques: Avoid overhead watering and water at the base of the plants to prevent fungal diseases.
- Healthy Soil: Ensure your soil is well-draining and rich in organic matter.
6. Harvesting Your Red Cabbage: When and How
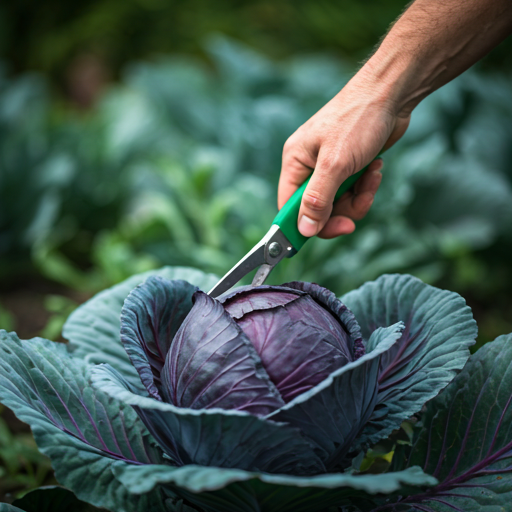
The moment you’ve been waiting for! Harvesting your own red cabbage is a truly satisfying experience. Knowing when and how to harvest correctly will ensure you enjoy the best flavor and texture. From my years of gardening, I’ve learned that patience is key. Harvesting too early can result in small, loose heads, while waiting too long can lead to splitting or bolting (going to seed).
- When to Harvest: The best time to harvest your red cabbage is when the heads are firm, solid, and have reached their mature size. This typically takes about 70-100 days from planting, depending on the variety and growing conditions. You can check for ripeness by gently squeezing the head. If it feels hard and dense, it’s ready to harvest.
- How to Harvest: Harvesting red cabbage is a simple process:
- Use a sharp knife or garden shears to cut the head at the base of the plant, just above the lowest leaves.
- Remove any loose outer leaves that are damaged or discolored.
- If you want to get a second, smaller harvest, you can leave the remaining plant in the ground. It may produce smaller side shoots that can be harvested later.
- Post-Harvest Care: After harvesting, you can remove any remaining plant debris from the garden bed and compost it. This helps prevent the spread of diseases.
Signs of a Ripe Red Cabbage:
- Firm and solid head: The head should feel dense and heavy for its size.
- Desired size: The head should have reached the mature size for the specific variety you are growing.
- Deep, vibrant color: The outer leaves should have a deep, rich purple or red color.
Harvesting Tips:
- Harvest in the morning: This is when the plants are at their crispest.
- Use a sharp knife: This will ensure a clean cut and prevent damage to the plant.
- Handle the heads carefully: They can bruise easily.
By following these harvesting tips, you’ll be able to enjoy the fruits (or rather, vegetables) of your labor. Freshly harvested red cabbage is delicious in salads, slaws, and cooked dishes.
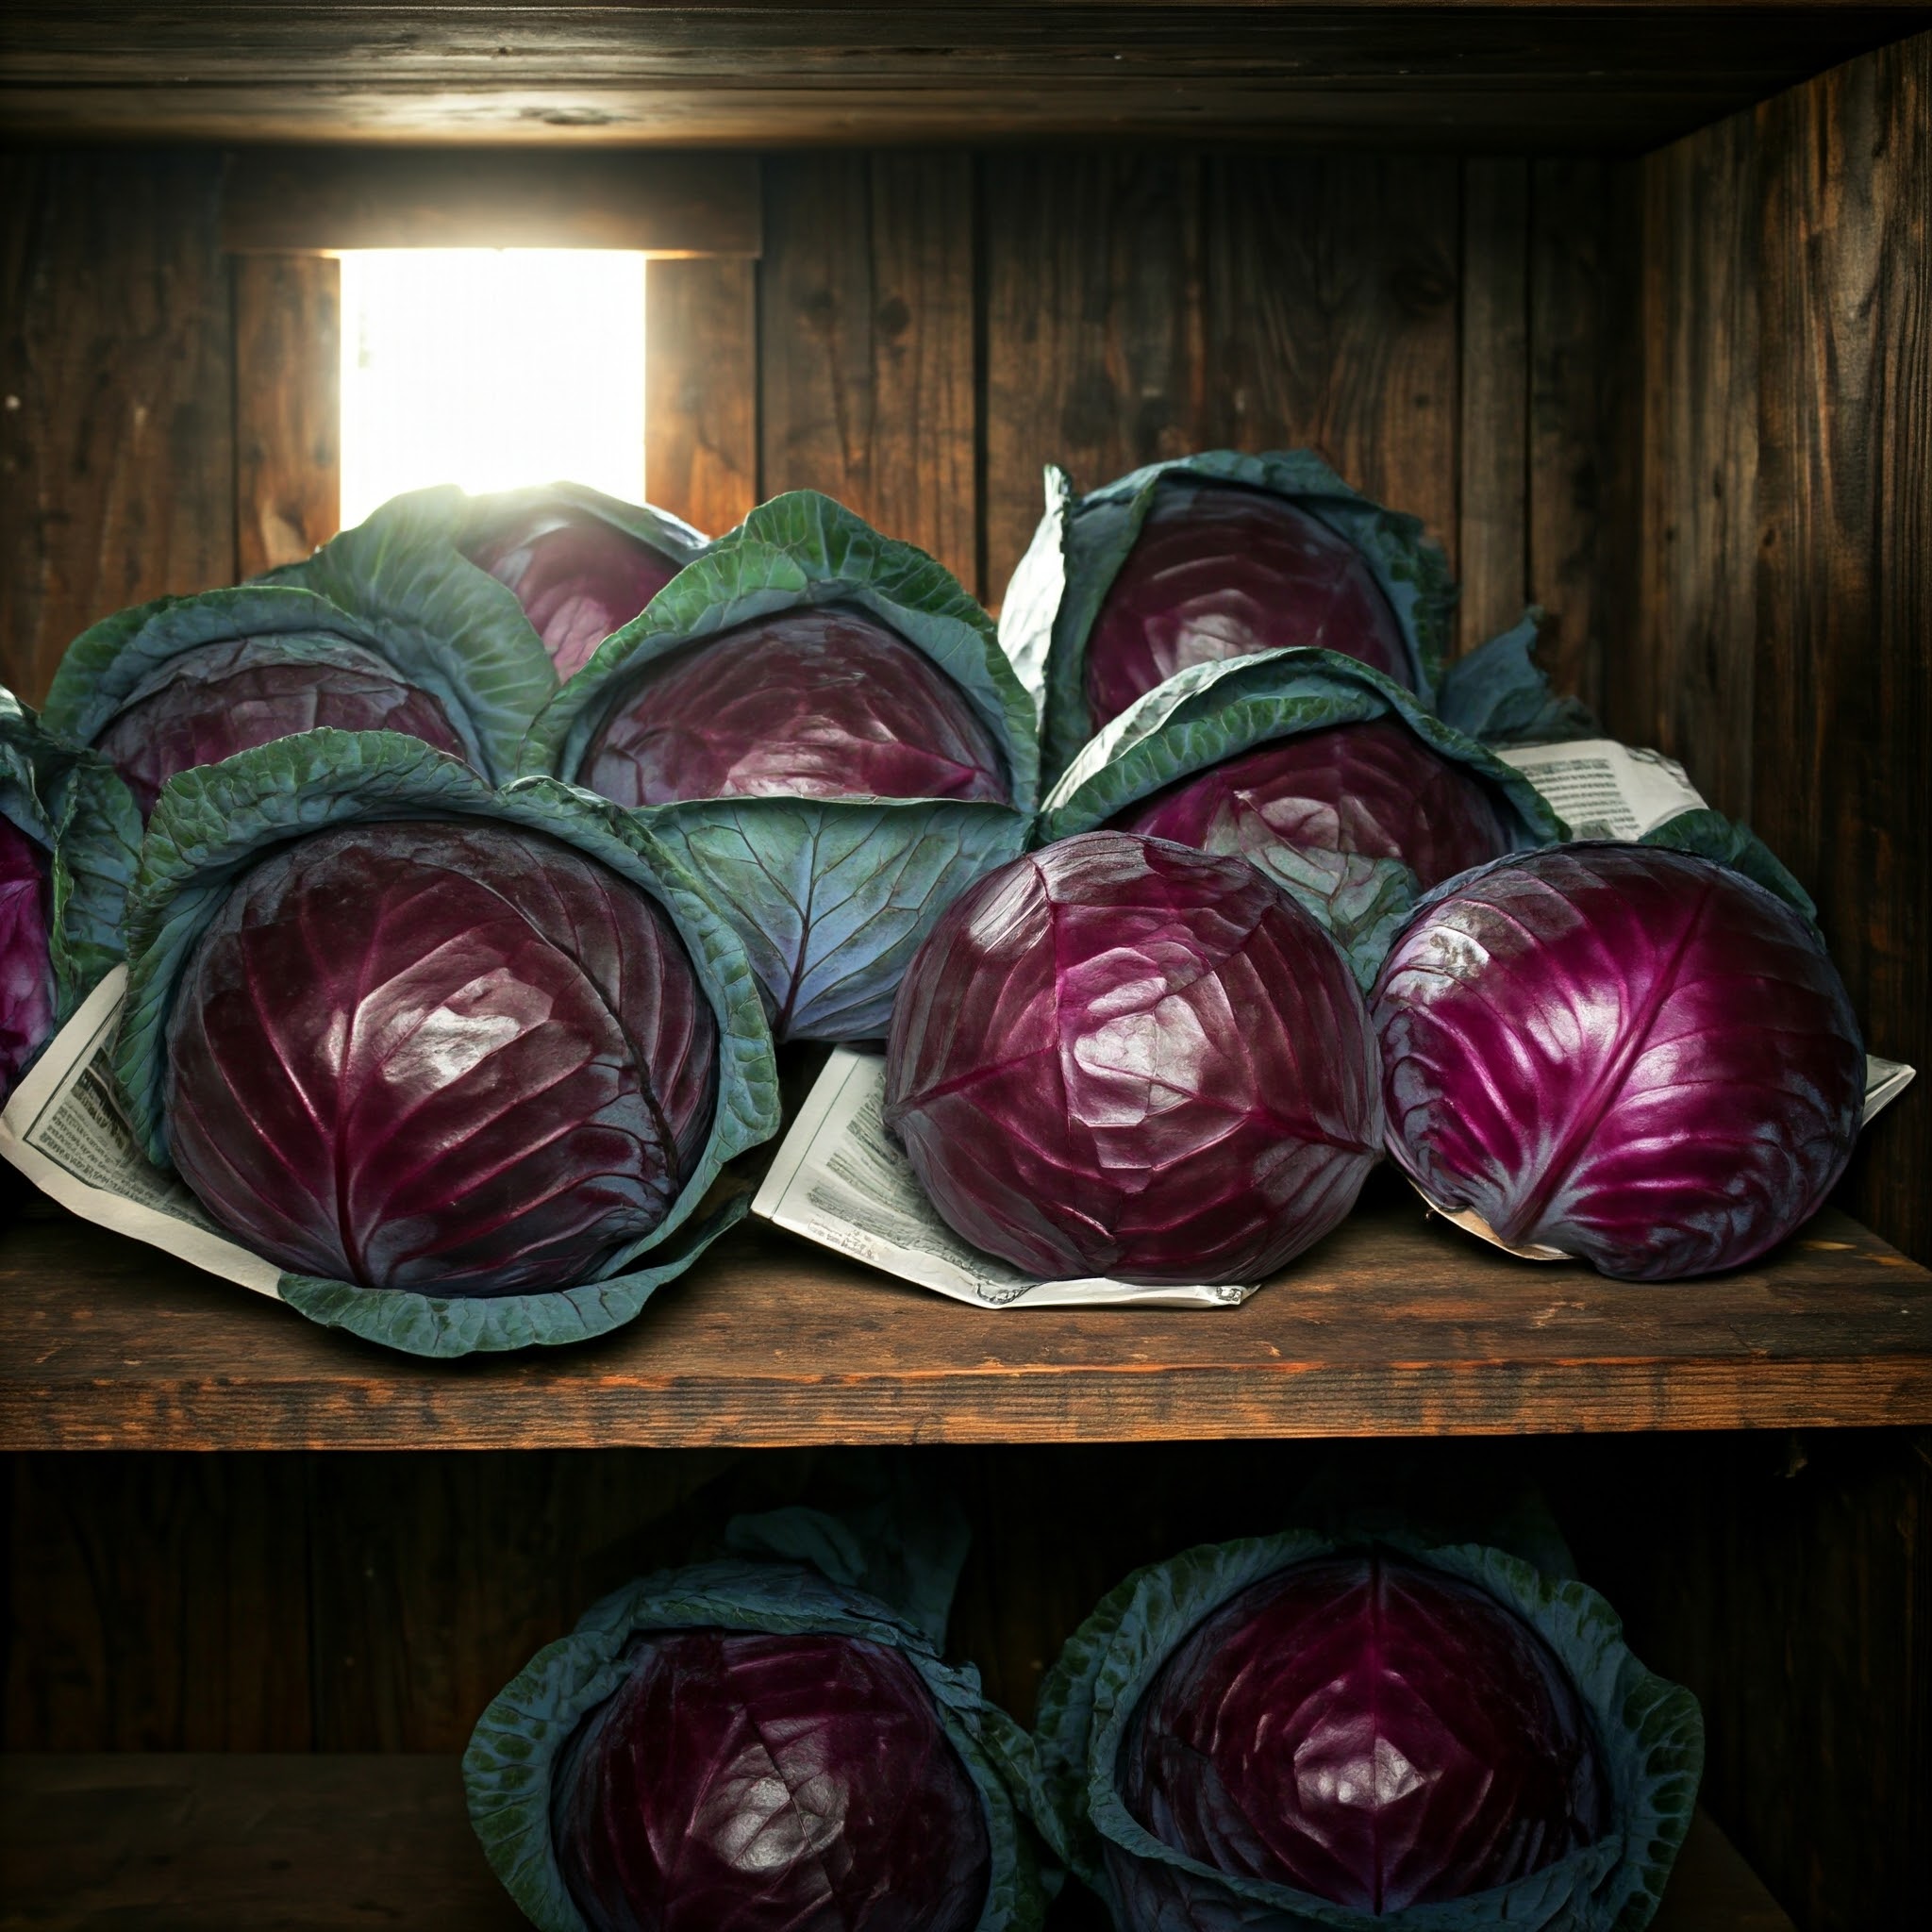
7. Storing Your Red Cabbage for Later Use

After you’ve harvested your beautiful red cabbage heads, you’ll want to store them properly to maintain their freshness and flavor. I’ve experimented with various storage methods over the years, and I’ve found that these techniques work best for keeping red cabbage crisp and delicious for extended periods. Whether you plan to use it soon or want to preserve it for the winter months, there are several effective ways to store your homegrown red cabbage.
- Short-Term Storage: If you plan to use your red cabbage within a few weeks, storing it in the refrigerator is the easiest option.
- Preparation: Remove any loose or damaged outer leaves.
- Storage: Place the head in a plastic bag or wrap it tightly in plastic wrap. This helps prevent it from drying out.
- Refrigerator Placement: Store the wrapped cabbage in the crisper drawer of your refrigerator.
- Long-Term Storage: For longer storage, you have a few options:
- Pickling: Pickling is a great way to preserve red cabbage and create a tangy, flavorful condiment. There are many different pickling recipes available, so you can choose one that suits your taste.
- Fermenting (Sauerkraut): Fermenting red cabbage into sauerkraut is another excellent way to preserve it and create a healthy, probiotic-rich food.
- Freezing: Freezing is also an option, but it can slightly alter the texture of the cabbage. To freeze red cabbage:
- Blanch the cabbage in boiling water for a few minutes.
- Cool it quickly in an ice bath.
- Drain well and then chop or shred the cabbage.
- Pack it into freezer bags or containers, removing as much air as possible.
- Label and date the bags and freeze them for up to several months.
Red Cabbage Storage Comparison
| Method | Storage Time | Advantages | Disadvantages |
| Refrigeration | Few weeks | Easy and convenient | Limited storage time |
| Pickling | Several months | Creates a flavorful condiment, long storage time | Requires additional preparation and ingredients |
| Fermenting | Several months | Creates a healthy, probiotic-rich food, long storage time | Requires specific equipment and knowledge of the fermentation process |
| Freezing | Several months | Convenient for long-term storage | Can slightly alter the texture of the cabbage |
Tips for Storing Red Cabbage:
- Choose healthy heads: Select firm, undamaged heads for storage.
- Remove damaged leaves: This helps prevent rot from spreading.
- Maintain proper temperature and humidity: Store red cabbage in a cool, dry place with good air circulation.
By using these storage techniques, you can enjoy your homegrown red cabbage long after the harvest season is over. I find it incredibly satisfying to have a supply of fresh, homegrown vegetables available throughout the year.
FAQ:
This section addresses some of the most common questions I receive about growing red cabbage.
- How to grow red cabbage vegetable in raised garden beds? Raised beds offer excellent drainage and allow you to control the soil composition, which is ideal for red cabbage. I recommend building your raised beds at least 12 inches deep to accommodate the root system. Fill them with a well-draining mix of compost, topsoil, and other organic matter. Space your plants 18-24 inches apart, just as you would in a traditional garden bed.
- What is the best way to grow red cabbage vegetable organically? Growing red cabbage organically involves using natural methods for soil preparation, fertilization, and pest/disease control. I recommend amending your soil with compost and well-rotted manure. For pest control, use methods like handpicking, insecticidal soap, and neem oil. Choose disease-resistant varieties and practice crop rotation to prevent soilborne diseases.
- How to grow red cabbage vegetable from seed to harvest indoors? Starting red cabbage indoors allows you to get a head start on the growing season. Sow your seeds in seed starting trays about 6-8 weeks before the last expected frost. Provide them with adequate light and keep the soil moist. Once the seedlings have developed a few sets of true leaves, you can transplant them into larger pots. Harden them off gradually before transplanting them into the garden.
- How to grow red cabbage vegetable in containers on a patio? Growing red cabbage in containers is a great option for those with limited space. Choose a container that is at least 12 inches deep and wide. Use a well-draining potting mix and make sure the container has drainage holes. Place the container in a location that receives at least 6 hours of sunlight per day. Water regularly and fertilize as needed.
- What are the common pests when growing red cabbage vegetable? Red cabbage is susceptible to several pests, including cabbage white butterfly caterpillars, aphids, slugs, and flea beetles. You can control these pests using organic methods like handpicking, insecticidal soap, neem oil, and row covers.
- How to grow large heads of red cabbage vegetable in my garden? To grow large heads of red cabbage, you need to provide your plants with optimal growing conditions. This includes well-draining soil rich in organic matter, at least 6 hours of sunlight per day, consistent watering, and regular fertilization. Choose varieties known for producing large heads and space your plants adequately.
- How to grow red cabbage vegetable and prevent common diseases? Preventing diseases in red cabbage involves practicing good garden hygiene and providing your plants with a healthy growing environment. This includes crop rotation, proper spacing for air circulation, avoiding overhead watering, and ensuring well-draining soil. Choose disease-resistant varieties whenever possible.
- How to grow red cabbage vegetable for beginners step by step? Growing red cabbage is a rewarding experience, even for beginners. Start by choosing either seeds or transplants. Prepare your garden bed with well-draining soil and plant your red cabbage in a sunny location. Water regularly, fertilize as needed, and protect your plants from pests and diseases. Harvest your red cabbage when the heads are firm and enjoy the fruits of your labor!
- How to grow red cabbage vegetable in poor soil conditions effectively? If you have poor soil conditions, you can still grow red cabbage with some extra effort. Amend your soil with plenty of compost and other organic matter to improve its structure and fertility. Consider using raised beds or containers, which allow you to control the soil mix more easily.
This FAQ section should address many of the questions you might have about growing red cabbage. If you have any further questions, don’t hesitate to reach out to your local gardening extension or other gardening resources.
Conclusion: Enjoying the Rewards of Your Red Cabbage Harvest

Growing your own red cabbage is a rewarding experience that provides you with fresh, flavorful produce right from your backyard. By following the tips and techniques outlined in this guide, you’ll be well on your way to enjoying a successful harvest. Remember that every garden is unique, so observe your plants closely and adapt your approach as needed. With a little patience and care, you’ll be amazed at what you can grow!
Key Takeaways for Growing Red Cabbage:
- Start early: Begin seeds indoors or purchase healthy transplants.
- Provide ample sunlight: Ensure your plants receive at least 6 hours of direct sunlight per day.
- Prepare the soil: Amend with compost and ensure good drainage.
- Water consistently: Keep the soil moist but not waterlogged.
- Protect from pests and diseases: Use organic methods whenever possible.
- Harvest at the right time: When the heads are firm and solid.
I encourage you to embrace the process of growing red cabbage and enjoy the many benefits it offers. From the satisfaction of nurturing a plant from seed to harvest to the delicious flavor of homegrown produce, it’s an experience that’s well worth the effort. Happy gardening!


")

