| Key Takeaways |
| – Raspberries are not berries, but clusters of tiny fruits called drupelets. |
| – You can grow raspberries from seed by extracting the seeds from fresh raspberries, cold stratifying them in the refrigerator, germinating them in peat pots, transplanting them into larger pots or outdoors, and caring for them throughout their growth cycle. |
| – Growing raspberries from seed has some challenges and advantages, such as longer waiting time, higher variability, lower cost, and more satisfaction. |
| – You need to consider some factors when growing raspberries from seed, such as variety, climate, zone, soil, water, light, pruning, fertilizing, and harvesting. |
| – You can enjoy your own fresh and juicy raspberries from your backyard or container garden by following some simple and clear instructions and tips. |
Introduction
Did you know that raspberries are not actually berries, but clusters of tiny fruits called drupelets? Each drupelet contains a seed and a juicy pulp that gives raspberries their sweet and tart flavor. Raspberries are one of the most popular and versatile fruits in the world, as they can be eaten fresh, frozen, dried, canned, jammed, or baked into pies, cakes, muffins, and more.
Raspberries are also one of the healthiest fruits you can eat, as they are rich in antioxidants, vitamins, minerals, and fiber. They can help lower blood pressure, cholesterol, inflammation, and oxidative stress. They can also boost your immune system, brain function, digestion, and skin health.
Raspberries come in different colors and varieties, such as red, black, yellow, purple, summer-bearing, ever-bearing, and fall-bearing. Each variety has its own characteristics and preferences for growing conditions. Raspberries are native to temperate regions of North America, Europe, and Asia. They can grow in most climates and zones with some care and attention.
One of the ways to grow raspberries is from seed. This method has some challenges and advantages compared to other methods such as cuttings or bare-root plants. Some of the challenges are:
- It takes longer to get fruit from seed-grown raspberries than from other methods. It may take 2 to 3 years before you see any berries on your plants.
- It is harder to control the quality and consistency of seed-grown raspberries than from other methods. You may get different colors or varieties than what you expected or wanted.
- It is more susceptible to diseases and pests than other methods. You may need to protect your seeds and seedlings from mold, rot, insects, birds, rodents, etc.
Some of the advantages are:
- It is cheaper to grow raspberries from seed than from other methods. You can use fresh raspberries that you bought or harvested yourself as a source of seeds.
- It is more rewarding to grow raspberries from seed than from other methods. You can enjoy the process of watching your seeds sprout into plants and eventually produce fruits.
- It is more fun to grow raspberries from seed than from other methods. You can experiment with different varieties and colors and see what you get.
In this article, you will learn how to grow raspberries from seed in five easy steps: extracting the seeds; cold stratifying the seeds; germinating the seeds; transplanting the seedlings; and caring for the plants. You will also discover some tips and tricks to make your raspberry growing experience more successful and enjoyable.
Step 1: Extracting the Seeds
The first step to grow raspberries from seed is to extract the seeds from fresh raspberries. This is important because dried or frozen raspberries may not have viable seeds or may have lower germination rates. You can use any fresh raspberries that you have access to as a source of seeds. You can buy them from local markets or farms or harvest them from your own or someone else’s garden.
To extract the seeds from fresh raspberries:
- Mash the raspberries with a fork or blender in a bowl.
- Add some water and stir well to separate the seeds from the pulp.
- Strain the mixture through a fine mesh sieve or cheesecloth into another bowl.
- Rinse the seeds with clean water and spread them on a paper towel to dry.
Here are some tips and warnings for extracting the seeds:
- Use organic or pesticide-free raspberries to avoid contaminating the seeds with chemicals that may harm them or reduce their germination.
- Avoid using metal utensils or containers as they may react with the acidic juice of the raspberries and damage the seeds.
- Do not let the seeds dry out completely as they may lose their viability. Keep them moist but not wet until you are ready to cold stratify them.
Step 2: Cold Stratifying the Seeds
The second step to grow raspberries from seed is to cold stratify the seeds. This means to expose the seeds to cold and moist conditions for a period of time to break their dormancy and stimulate their germination. This mimics the natural winter conditions that raspberry seeds go through in the wild before they sprout in the spring.
To cold stratify the raspberry seeds:
- Mix the raspberry seeds with some moist sand or peat moss in a ziplock bag or plastic container.
- Label the bag or container with the date and variety of the seeds.
- Place the bag or container in the refrigerator for 6 to 10 weeks, checking occasionally for mold or germination.
Here are some tips and warnings for cold stratifying the seeds:
- Do not use soil or compost as they may contain pathogens or pests that may harm the seeds or reduce their germination.
- Do not expose the seeds to light or heat as they may trigger premature germination or spoilage.
- Do not overwater or underwater the seeds as they may rot or dry out. The sand or peat moss should be moist but not soggy.
Step 3: Germinating the Seeds
The third step to grow raspberries from seed is to germinate the seeds. This means to sprout the seeds into seedlings that can grow into plants. This depends on factors such as temperature, moisture, and light. Raspberry seeds need warm and bright conditions to germinate well.
To germinate the raspberry seeds:
- Fill some peat pots with sterile potting mix and moisten them well.
- Sprinkle some raspberry seeds on top of each pot and cover them lightly with more potting mix.
- Place the pots in a warm and bright location, such as a windowsill or under a grow light.
- Keep the pots moist but not soggy, misting them daily with a spray bottle.
- Watch for seedlings to emerge in 2 to 4 weeks.
Here are some tips and warnings for germinating the seeds:
- Do not use garden soil or fertilized potting mix as they may contain weeds or nutrients that may inhibit germination.
- Do not bury the seeds too deep or too shallow as they may fail to sprout or dry out. The seeds should be barely visible under the potting mix.
- Do not overheat or overcool the pots as they may damage or kill the seedlings. The ideal temperature range for germination is between 18°C and 24°C (65°F and 75°F).
Step 4: Transplanting the Seedlings
The fourth step to grow raspberries from seed is to transplant the seedlings into larger pots or outdoors. This is when you move the seedlings from their original containers to their final growing places. This depends on factors such as size, weather, and location. Raspberry seedlings need enough space, sun, and soil to grow well.
To transplant the raspberry seedlings:
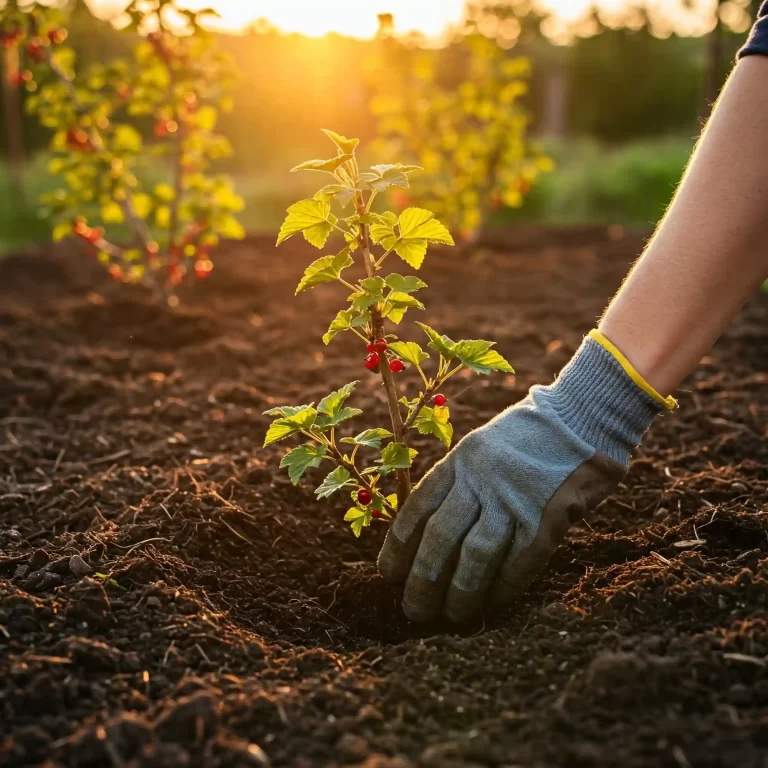
- Wait until the seedlings have at least 3 to 4 true leaves and are about 3 to 4 inches tall.
- Choose a sunny and well-drained spot in your garden or a large and sturdy container with drainage holes.
- Prepare the soil or potting mix by adding some organic matter and loosening it well.
- Carefully remove the seedlings from the peat pots by squeezing them gently and pulling them out.
- Dig some holes or make some indentations in the soil or potting mix, about 2 feet apart for each seedling.
- Place the seedlings in the holes or indentations, making sure that the roots are spread out and the stems are upright.
- Fill the holes or indentations with soil or potting mix, firming it gently around the seedlings.
- Water the seedlings well and apply some mulch around them to conserve moisture and prevent weeds.
Here are some tips and warnings for transplanting the seedlings:
- Do not transplant the seedlings too early or too late as they may suffer from frost or heat stress. The best time to transplant is after the last frost in spring or before the first frost in fall.
- Do not disturb the roots or damage the stems of the seedlings as they may cause shock or infection. Handle them gently and avoid breaking or bending them.
- Do not overcrowd or isolate the seedlings as they may compete for resources or attract pests. Space them adequately and group them with other compatible plants.
Step 5: Caring for the Plants
The fifth step to grow raspberries from seed is to care for the plants throughout their growth cycle, from pruning to fertilizing to harvesting. This is how you maintain and improve the health and productivity of your raspberry plants. This depends on factors such as variety, climate, zone, soil, water, light, pruning, fertilizing, and harvesting. Raspberry plants need regular attention and care to thrive and bear fruit.
To care for your raspberry plants:
- Prune the raspberry plants regularly to remove dead, diseased, or damaged canes and to promote air circulation and fruit production. Use sharp and clean tools and cut at an angle above a bud or branch. Prune according to the type of raspberry you have: summer-bearing, ever-bearing, or fall-bearing. Summer-bearing raspberries produce fruit on the second-year canes, so you need to prune them after harvest, leaving only the new canes for the next year. Ever-bearing and fall-bearing raspberries produce fruit on both first-year and second-year canes, so you need to prune them twice a year, in late winter and late summer, removing the old canes and thinning the new ones.
- Fertilize the raspberry plants sparingly and organically to provide them with essential nutrients and to boost their growth and yield. Use a balanced fertilizer such as 10-10-10 or a compost tea and apply it in early spring and after harvest. Avoid over-fertilizing or using chemical fertilizers, as they may burn the roots or reduce the flavor of the fruits. You can also add some organic matter such as compost, manure, or mulch to improve the soil quality and fertility.
- Harvest the raspberry fruits when they are ripe and ready to eat, usually in summer or fall depending on the variety. Pick them gently by hand or with a berry picker and place them in a shallow basket or container. Avoid picking unripe or overripe fruits, as they may be sour or mushy. Store them in the refrigerator for up to a week or freeze them for longer use. You can also enjoy them fresh, make them into jams, pies, smoothies, or other delicious recipes.
Conclusion
You have learned how to grow raspberries from seed in five easy steps: extracting the seeds; cold stratifying the seeds; germinating the seeds; transplanting the seedlings; and caring for the plants. You have also learned some tips and tricks to make your raspberry growing experience more successful and enjoyable.
Growing raspberries from seed is a rewarding and fun way to enjoy your own fresh and juicy raspberries from your backyard or container garden. You can experiment with different varieties and colors and see what you get. You can also share your raspberries with your family, friends, neighbors, or even wildlife.
Now that you know how to grow raspberries from seed, why not give it a try and enjoy your own fresh and juicy raspberries? Let us know how it goes in the comments below or share your photos with us on social media. We would love to hear from you!


[…] See also How to Grow Juicy Raspberries from Seed in 5 Easy Steps […]