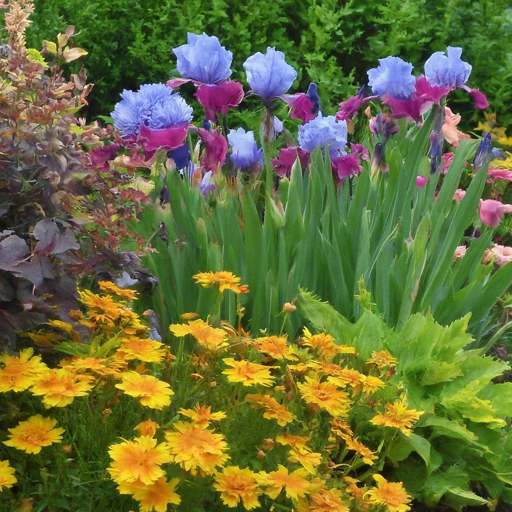
Have you ever dreamt of transforming your garden into a vibrant tapestry of color, adorned with the captivating beauty of irises? These majestic flowers, often associated with royalty and wisdom in literature, come in a dazzling array of colors and shapes, adding a touch of elegance to any landscape. But fear not, fellow garden enthusiasts! Growing these stunning blooms isn’t just for experienced horticulturists. With a little know-how and this comprehensive guide, you can unlock the secrets to cultivating breathtaking irises in your own backyard.
Finding the Perfect Spot for Flourishing Irises
Light and drainage are the cornerstones of a happy iris. Select a location bathed in at least 6-8 hours of direct sunlight daily. Morning sun is particularly beneficial, as it allows dew to evaporate from the leaves, reducing the risk of fungal diseases.
When it comes to soil, well-draining is paramount. Irises detest soggy feet, so avoid planting them in areas prone to waterlogging. Sandy loam or slightly acidic soil (pH 6.8-7.0) is ideal. If your soil is heavy clay, amend it with coarse sand or compost to improve drainage.
Here are some additional tips for choosing the perfect spot for your irises:
- Shelter from strong winds: While irises appreciate good air circulation, protect them from harsh winds that can damage flower stalks.
- Avoid overcrowding: Provide adequate spacing between irises for proper air circulation and to prevent competition for nutrients.
- Consider companion plants: Low-growing perennials like lavender or catmint complement irises beautifully and can help suppress weeds.
Preparing the Soil for Optimal Growth
Before welcoming your irises home, it’s crucial to prepare the soil for optimal growth. Here’s a step-by-step guide:
- Test your soil pH: Using a soil test kit, determine your soil’s pH level. If it falls outside the ideal range (6.8-7.0), amend it accordingly. Adding lime can raise the pH, while sulfur can lower it.
- Loosen the soil: Dig the planting area to a depth of 12-15 inches and break up any compacted soil to ensure good drainage and root penetration.
- Enrich the soil: Incorporate organic matter like compost or aged manure into the loosened soil. This will provide essential nutrients for your irises and improve soil structure.
Here’s a table summarizing the ideal soil characteristics for growing irises:
| Characteristic | Description |
| Drainage | Well-draining |
| Texture | Sandy loam |
| pH Level | 6.8 – 7.0 (slightly acidic) |
By following these steps, you’ll create the perfect foundation for your irises to thrive!
Planting Your Irises for a Flourishing Future

Now that you’ve selected the perfect spot and prepared the soil with love, it’s time to introduce your irises to their new home! Here’s a breakdown of the planting process:
- Planting Time: The ideal planting time for irises varies depending on your climate. In colder regions with harsh winters, plant them in the fall (6-8 weeks before the ground freezes) to allow for root development before winter dormancy. In warmer climates with mild winters, spring planting (after the danger of frost has passed) is also suitable.
- Planting Depth: Irises are not fans of being buried deep. As a general rule, plant rhizomes with the top surface slightly exposed, or just barely covered with soil.
- Spacing Considerations: Spacing requirements can vary depending on the iris variety. For bearded irises, a spacing of 12-18 inches between rhizomes is recommended. Dwarf irises can be spaced closer, around 6-8 inches apart.
- Spreading the Roots: Carefully fan out the roots of the iris rhizome as you place it in the planting hole. This encourages proper root development and growth.
- Watering Wisely: After planting, give your newly planted irises a good watering to settle the soil around the roots. Avoid overwatering, as this can lead to rot.
Remember: Different iris varieties might have specific planting requirements. Always refer to the planting instructions provided with your iris plants for the most accurate information.
Watering Your Irises: Striking the Perfect Balance
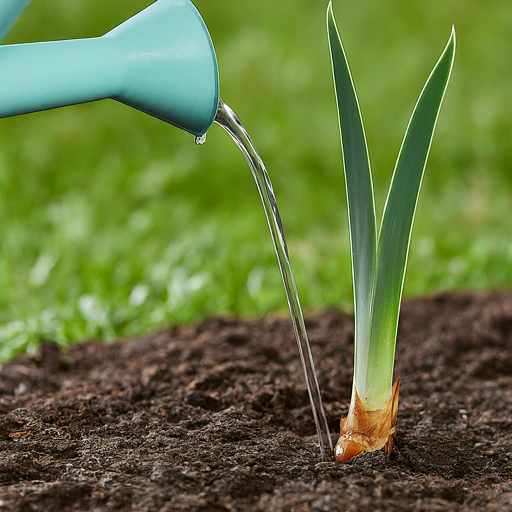
Watering is an essential aspect of iris care, but achieving the perfect balance is key. Irises dislike waterlogged soil, as it can lead to root rot. However, they also don’t appreciate drought conditions. Here are some tips for watering your irises effectively:
- Water deeply and infrequently: Aim to soak the soil thoroughly but allow it to dry out slightly between waterings. A good rule of thumb is to water when the top inch of soil feels dry to the touch.
- Focus on watering the roots: Direct the water towards the base of the plant, where the roots are located. Avoid getting water on the foliage, as this can promote fungal diseases.
- Adjust watering based on weather conditions: During hot and dry periods, you may need to water your irises more frequently. Conversely, reduce watering during cool and rainy weather.
- Observe your irises: The best way to determine your irises’ watering needs is to pay attention to their leaves. Wilting leaves indicate a need for water, while yellowing leaves can be a sign of overwatering.
By following these tips, you can ensure your irises receive the right amount of water to thrive and produce stunning blooms.
Feeding Your Irises for Vibrant Blooms
Just like us, irises need a balanced diet to flourish and produce their best blooms. While they’re not heavy feeders, providing them with essential nutrients can significantly enhance their growth and flowering. Here’s a breakdown of fertilizing irises:
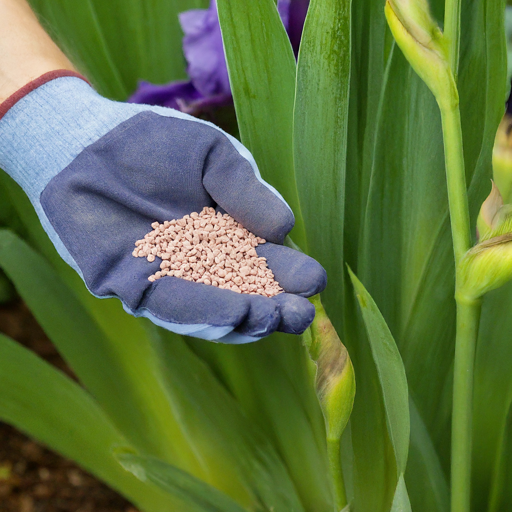
- Fertilizer Choice: A balanced fertilizer formulated for flowering plants is ideal for irises. Look for a fertilizer with an N-P-K ratio close to 10-10-10. This provides a balance of nitrogen (important for foliage growth), phosphorus (essential for root development and flowering), and potassium (promotes overall plant health).
- Fertilization Frequency: Apply fertilizer sparingly. Once in early spring, before new growth emerges, and again after the flowering period is a good general guideline. Avoid overfertilizing, as this can lead to excessive foliage growth at the expense of blooms.
- Fertilizer Application Method: Broadcast the fertilizer granules around the base of the iris plants, keeping them a few inches away from the stems. After applying fertilizer, water the area thoroughly to distribute the nutrients into the soil.
Remember: Always follow the specific application instructions on the fertilizer package you’re using.
By providing your irises with the right nutrients at the right time, you’ll encourage them to produce vibrant and abundant blooms that will be the envy of your neighborhood!
The Power of Pruning: Encouraging Continued Beauty
Pruning isn’t just for shaping shrubs and trees; it can also play a vital role in maintaining the health and beauty of your irises. Here’s how strategic pruning can benefit your irises:
- Encourages Repeat Blooms: Deadheading, the process of removing spent iris blooms, encourages the plant to put its energy into producing new flower buds for a second round of blooms later in the season.
- Promotes Healthy Growth: Removing spent flowers and foliage also helps prevent the spread of diseases and allows for better air circulation, reducing the risk of fungal problems.
- Maintains a Tidy Appearance: Deadheading spent blooms keeps your irises looking neat and prevents the garden from becoming cluttered with wilted flowers.
Pruning Techniques:
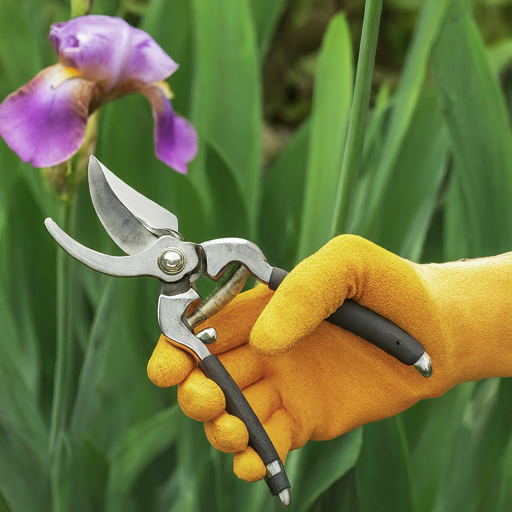
- Deadheading: Once the iris blooms have faded, use sharp pruning shears to remove the flower stalk just above the first healthy set of leaves. Don’t cut into the foliage itself.
- Fall Cleanup: In late fall, after the foliage has died back, you can cut the iris leaves to a height of about 4-6 inches above the ground. This helps to remove potential hiding places for pests and diseases over winter.
Remember: Always sterilize your pruning shears before and after use to prevent the spread of diseases.
By incorporating these simple pruning practices into your iris care routine, you can ensure your plants continue to produce beautiful blooms for years to come!:
Winterizing Your Irises: Protecting Your Precious Blooms
As winter approaches, it’s crucial to take steps to protect your irises from the harsh elements. Here’s how to properly winterize your irises:
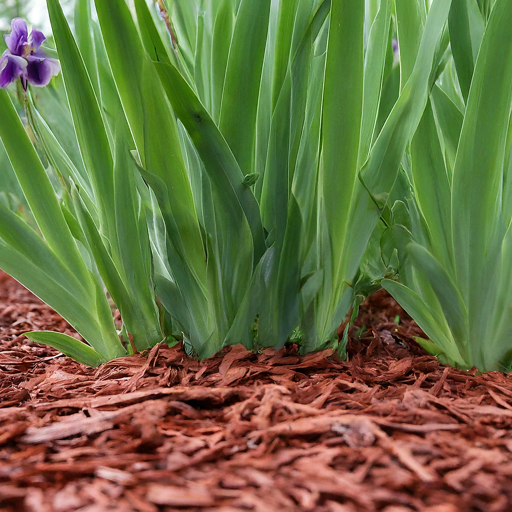
- Applying Mulch: A generous layer of mulch (around 2-3 inches thick) applied around the base of the iris plants in late fall is essential. Mulch insulates the roots from freezing temperatures and helps retain moisture in the soil. Choose organic mulch materials like shredded bark, leaves, or pine needles.
- Water Considerations: Before the ground freezes, give your irises a deep watering. This helps to saturate the soil and provide additional protection for the roots during winter.
- Climate Considerations: In regions with extremely cold winters, you may need to provide additional winter protection for your irises. This could involve covering the plants with burlap or evergreen boughs after the ground freezes.
Remember: Remove winter protection in early spring once the danger of frost has passed. This allows for new growth to emerge without hindrance.
By following these winterizing tips, you’ll ensure your irises survive the winter slumber and emerge vibrant and healthy in the spring, ready to grace your garden with their stunning blooms once again.
Dividing and Multiplying Your Irises: Sharing the Beauty

The beauty of irises doesn’t have to be confined to just one corner of your garden. Dividing established iris clumps allows you to propagate your plants and create new iris displays in other areas. Here’s when and how to divide your irises:
- The Right Time: The ideal time to divide irises is in late summer or early fall, after the flowering season has ended. This allows the newly divided plants to establish themselves before winter dormancy.
- Signs Your Irises Need Dividing: Iris clumps that become overcrowded can benefit from division. Signs include decreased flowering, smaller blooms, and the rhizomes pushing out of the soil at the edges of the clump.
The Division Process:
- Dig Up the Clump: Carefully dig up the entire iris clump using a shovel or garden fork.
- Separate the Rhizomes: Using your hands or a sharp knife, gently separate the rhizomes into individual sections. Each section should have a healthy fan of leaves and some visible roots.
- Discard Old Rhizomes: Discard any old or diseased rhizomes.
- Replanting the Divisions: Replant the healthy rhizome sections in prepared planting holes following the planting instructions outlined earlier in this guide.
Remember: Not all iris varieties respond well to division. Check the specific needs of your iris variety before attempting to divide it.
By dividing your irises, you can not only maintain the health and vigor of your existing plants but also share the joy of these stunning flowers with other gardeners or create breathtaking displays throughout your own garden.
Common Iris Problems: Troubleshooting for Continued Success

Even the most dedicated gardener can encounter occasional problems with their plants. Here’s a look at some common iris issues and solutions to keep your irises thriving:
- Iris Borers: These destructive insects burrow into the rhizomes of irises, causing wilting and stunted growth. Look for small holes in the leaves or rhizomes. Remove and destroy infested plants and apply insecticidal nematodes to control existing infestations.
- Iris Sawflies: The larvae of these sawflies feed on iris foliage, leaving ragged holes. Insecticidal soap spray can be effective in controlling these pests.
- Bacterial Soft Rot: This bacterial disease causes the rhizomes to become mushy and rot. Remove and destroy infected plants and avoid overwatering to prevent the spread of this disease.
- Iris Rust: This fungal disease manifests as orange or brown pustules on the leaves. Improve air circulation around your irises and apply fungicide as a preventative measure.
Remember: Early detection and treatment are key to managing these problems and ensuring the continued health of your irises. Regularly inspect your plants and take action at the first sign of trouble.
By understanding these common challenges and implementing the solutions provided, you can effectively troubleshoot any issues that may arise and keep your irises flourishing throughout the season.
Enjoying Your Irises: A Celebration of Elegance in Your Garden

The culmination of your efforts is finally here – a garden adorned with the breathtaking beauty of blooming irises! These majestic flowers not only add a touch of elegance to your landscape but also provide a symphony of color and captivating fragrance.
Here are some ways to fully appreciate your irises:
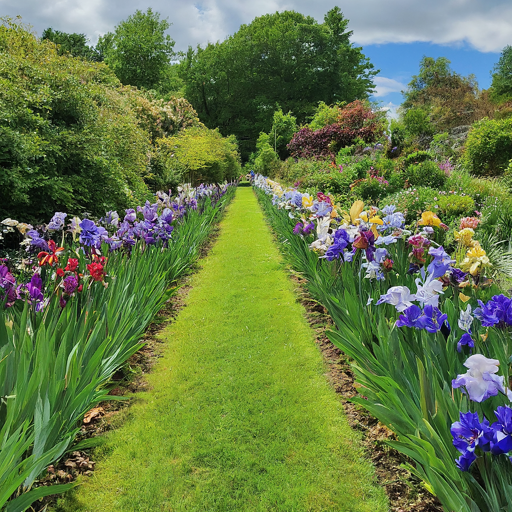
- Create a Colorful Tapestry: Plant irises in a variety of colors and bloom times to create a vibrant and dynamic display throughout the season.
- Companion Planting: Pair your irises with complementary flowering plants for a visually stunning combination. Low-growing perennials like lavender or daylilies can create a harmonious border.
- Cutting Garden Delights: Irises are excellent cut flowers, bringing their beauty indoors. Cut stems at an angle just as the first flower bud begins to open, and enjoy their vibrant presence in a vase.
Beyond Aesthetics:
Irises hold a special place in mythology and symbolism, often associated with wisdom, hope, and faith. Their presence in your garden can serve as a source of inspiration and a reminder of the beauty and resilience of nature.
Remember: Gardening is a journey of learning and discovery. Take pride in your accomplishments, observe your irises closely, and enjoy the satisfaction of nurturing these magnificent flowers. With proper care and attention, your irises will reward you with years of dazzling blooms, transforming your garden into a haven of elegance and beauty.
Conclusion: Unveiling the Magic of Irises in Your Garden
Throughout this guide, we’ve embarked on a journey to unveil the secrets of growing breathtaking irises. From selecting the perfect spot and preparing the soil to nurturing your plants through the seasons, you now possess the knowledge and confidence to cultivate these magnificent flowers in your own garden.
Remember, the magic of irises extends beyond their captivating beauty. They offer a rewarding gardening experience, allowing you to witness the wonder of nature unfold as your plants flourish. Imagine the joy of snipping a few iris blooms to brighten your home or the satisfaction of creating a vibrant floral tapestry in your garden.
With each season, your irises will continue to surprise and delight you. They’ll serve as a testament to your dedication and a constant source of beauty and inspiration. So, embrace the journey, nurture your irises with care, and allow them to transform your garden into a haven of elegance and color.