

Have you ever walked through the farmers market and spotted a gnarled, bulbous root vegetable and wondered, “What in the world is that?” Chances are, you were looking at celeriac. This often-overlooked member of the celery family offers a unique earthy flavor and can add a surprising depth to your dishes. But growing celeriac can feel daunting. You might be worried about its unusual shape, its specific growing requirements, or the potential for pests and diseases. Don’t let that deter you! With the right approach, you can successfully cultivate this rewarding root vegetable in your own garden. This guide will equip you with the knowledge and confidence to grow healthy, delicious celeriac, one step at a time.
Understanding Celeriac: What Exactly Are We Growing?
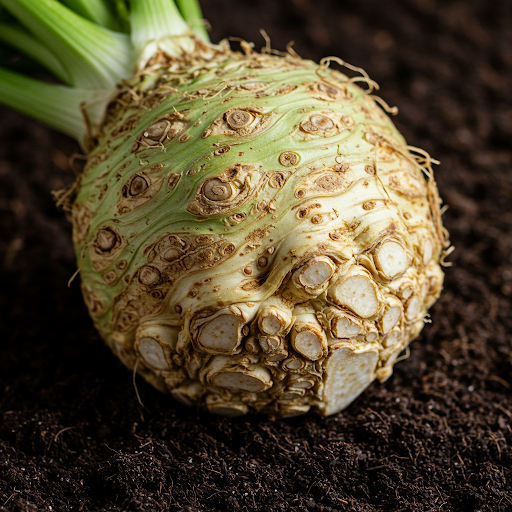
Celeriac, also known as celery root, is a fascinating root vegetable that often sparks curiosity among home gardeners. Unlike its more familiar cousin, celery, which is primarily cultivated for its stalks, celeriac is prized for its large, bulbous root that develops underground. This root is covered in knobby protrusions, giving it a somewhat unusual appearance, but its earthy flavor and versatility in the kitchen make it a worthwhile addition to any garden.
Celeriac belongs to the Apiaceae family, a diverse group of plants that also includes carrots, parsley, and fennel. This botanical kinship is evident in the subtle celery flavor that celeriac possesses, though it’s often described as having a slightly nutty or earthy undertone. This unique flavor profile makes celeriac a welcome addition to a variety of dishes, from soups and stews to salads and gratins.
While not as widely cultivated as other root vegetables like carrots or potatoes, celeriac offers several nutritional benefits. It’s a good source of vitamins and minerals, including vitamin C, potassium, and folate. Furthermore, it contains antioxidants and dietary fiber, contributing to overall health and well-being.
It’s important to understand that celeriac is a biennial plant. This means it typically completes its life cycle over two years. In the first year of growth, the plant focuses its energy on developing the large, edible root. This is the stage that most home gardeners are interested in, as it’s the time to harvest the delicious root for culinary use. In the second year, if left undisturbed, the celeriac plant will bolt, sending up a flowering stalk and ultimately producing seeds. However, for most home gardeners, the focus remains on cultivating and harvesting the flavorful root in the first year of growth.
Key Points:
- Celeriac is a root vegetable closely related to celery.
- It has a unique earthy flavor and is a good source of nutrients.
- Celeriac is a biennial plant, with the first year focused on root development.
Preparing the Perfect Environment: Soil and Location:
Celeriac has specific requirements for soil and location to thrive. It prefers a well-drained, fertile soil with a pH between 6.0 and 6.8. This means the soil should be slightly acidic to neutral. Heavy clay soils can be challenging, as they tend to retain too much moisture, which can lead to root rot. If you have heavy clay soil, you can improve drainage by incorporating organic matter such as compost or well-rotted manure.
Sunlight is another crucial factor for successful celeriac cultivation. Celeriac plants require at least 6 hours of direct sunlight per day. If your garden doesn’t receive enough sunlight, you may need to consider a different location or supplement with grow lights.
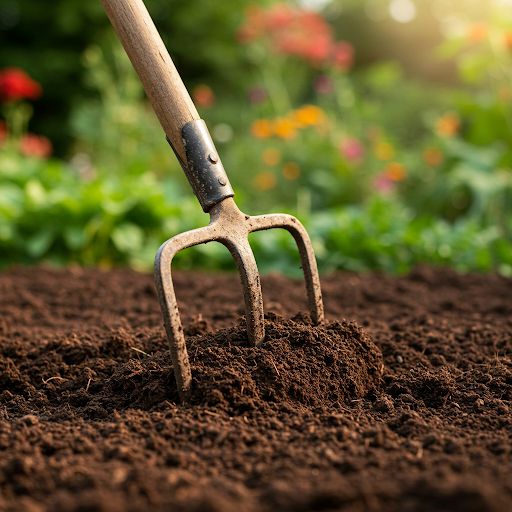
Preparing the garden bed is essential for optimal celeriac growth. Start by removing any weeds or debris from the planting area. Then, till the soil to a depth of about 12 inches to loosen it and incorporate organic matter. If your soil is particularly sandy, you may want to add some clay to improve its water-holding capacity.
Raised beds can be an excellent option for growing celeriac, especially if you have heavy clay soil or poor drainage. Raised beds provide better drainage and allow you to control the soil composition more effectively.
Key Points:
- Celeriac thrives in well-drained, fertile soil with a pH between 6.0 and 6.8.
- It requires at least 6 hours of direct sunlight per day.
- Prepare the garden bed by removing weeds, tilling the soil, and incorporating organic matter.
- Raised beds can be a beneficial option for growing celeriac.
Starting From Seeds: The Germination Process

Starting celeriac from seed offers the greatest control over the variety you grow and allows you to enjoy the entire process from germination to harvest. Here’s a guide to help you get started:
Timing:
- Indoors: Start seeds indoors 10-12 weeks before the last expected frost in your area. This typically translates to late winter or early spring.
- Direct Sowing: If you have a long growing season and mild winters, you can direct sow seeds outdoors after the last frost has passed and the soil has warmed up. However, this method may result in a slightly later harvest.
Seed Starting:
- Choose a Seed Starting Mix: Opt for a well-draining seed-starting mix that is sterile and specifically formulated for seedlings. Avoid using garden soil, as it may contain pathogens or be too heavy for young roots.
- Fill Seed Trays or Pots: Fill seed trays or small pots with the seed-starting mix, leaving about ½ inch of space at the top.
- Sow the Seeds: Gently press the seeds into the soil, about ¼ inch deep. Space the seeds evenly to prevent overcrowding.
- Water Gently: Water the seeds thoroughly but gently, ensuring the soil is evenly moistened. Avoid overwatering, as this can lead to damping-off, a fungal disease that can kill seedlings.
- Provide Warmth and Light: Place the seed trays or pots in a warm location with temperatures between 65-75°F (18-24°C). A heat mat can be used to provide additional warmth. Ensure the seedlings receive adequate light. A sunny windowsill or a grow light can be used to supplement natural light.
- Maintain Moisture: Keep the soil consistently moist but not soggy. Water gently from the bottom of the tray or pot to avoid disturbing the delicate seedlings.
- Thin Seedlings: Once the seedlings have developed their first true leaves, carefully thin them out, leaving the strongest seedling in each cell or pot.
Key Points:
- Start seeds indoors 10-12 weeks before the last expected frost.
- Use a well-draining seed-starting mix.
- Sow seeds shallowly and water gently.
- Provide adequate warmth and light.
- Thin seedlings to prevent overcrowding.
By following these steps, you can successfully germinate celeriac seeds and nurture healthy seedlings that are ready for transplanting into the garden.
Transplanting Seedlings: Giving Them Room to Grow

Once your celeriac seedlings have developed a few true leaves, typically within 4-6 weeks, it’s time to transplant them into the garden. This will give them more space to grow and develop their root systems.
Timing:
- Transplant seedlings after the last frost has passed and the soil has warmed up. This usually occurs in late spring or early summer.
- Aim for soil temperatures of around 60°F (15°C) or warmer for optimal growth.
Preparing for Transplanting:
- Harden Off Seedlings: Gradually acclimate the seedlings to outdoor conditions by placing them outside for short periods each day, increasing the duration gradually over several days. This process, known as hardening off, helps the seedlings adjust to the changes in temperature, light, and humidity.
- Prepare the Garden Bed: Ensure the soil is well-prepared and weed-free. Water the garden bed thoroughly before transplanting to ensure the soil is moist.
Transplanting:
- Dig Planting Holes: Space the planting holes 12-18 inches apart, depending on the variety and the size of the seedlings. The depth of the holes should be about the same as the depth of the seedling container.
- Gently Remove Seedlings: Carefully remove the seedlings from their containers, being mindful not to disturb the root ball.
- Plant Seedlings: Place the seedlings in the planting holes, ensuring they are planted at the same depth as they were growing in the containers.
- Firm the Soil: Gently firm the soil around the base of each seedling to ensure good contact with the roots.
- Water Thoroughly: Water the newly transplanted seedlings deeply to settle the soil and provide them with moisture.
Post-Transplanting Care:
- Watering: Water the seedlings regularly, especially during dry periods. Aim to keep the soil consistently moist but not waterlogged.
- Mulching: Apply a layer of mulch around the base of the plants to help retain moisture, suppress weeds, and regulate soil temperature.
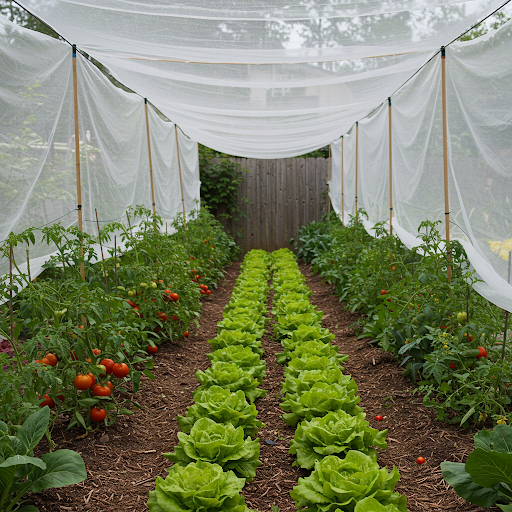
- Protection: If necessary, protect young plants from extreme weather conditions, such as heavy rain or strong winds, by using row covers or cloches.
By following these guidelines, you can successfully transplant your celeriac seedlings and give them the best possible start in the garden.
Consistent Care: Watering, Feeding, and Weeding
Providing consistent care for your celeriac plants is crucial for healthy growth and a bountiful harvest. This involves regular watering, fertilizing, and weeding.
Watering:
Celeriac has a relatively high water requirement, especially during the growing season. Consistent moisture is essential for root development and to prevent the soil from drying out. However, avoid overwatering, as this can lead to root rot.
- Watering Frequency: Water deeply and thoroughly, but allow the top inch or two of soil to dry out slightly between waterings. The frequency of watering will depend on factors such as weather conditions, soil type, and the stage of plant growth.
- Watering Methods: Water deeply at the base of the plants to avoid wetting the foliage, which can increase the risk of fungal diseases. Drip irrigation or soaker hoses can be effective methods for delivering water directly to the root zone.
- Mulching: Applying a layer of mulch around the base of the plants can help to conserve soil moisture, suppress weeds, and regulate soil temperature. Organic mulches, such as straw or wood chips, are ideal for celeriac.
Feeding:
Celeriac is a heavy feeder and benefits from regular fertilization.
- Fertilizer Choice: Use a balanced fertilizer with a ratio of nitrogen, phosphorus, and potassium, such as 10-10-10. Organic fertilizers, such as compost tea or fish emulsion, can also be effective.
- Fertilization Schedule: Apply fertilizer once or twice during the growing season. The first application can be made when the seedlings are transplanted, and a second application can be applied a few weeks later. Follow the fertilizer package instructions for the recommended application rate.
Weeding:
Regular weeding is essential to prevent weeds from competing with celeriac plants for water, nutrients, and sunlight.
- Hand Weeding: For small gardens, hand weeding is an effective method for removing weeds.
- Mulching: Applying a layer of mulch around the base of the plants can help to suppress weed growth.
By providing consistent care, including regular watering, fertilizing, and weeding, you can ensure that your celeriac plants thrive and produce a bountiful harvest.
Pest and Disease Management: Protecting Your Crop
While celeriac is generally a relatively pest- and disease-resistant plant, it’s still important to be vigilant and take steps to protect your crop.
Common Pests:
- Slugs and Snails: These slimy creatures can wreak havoc on young celeriac plants, devouring the tender leaves and even nibbling on the roots.
- Control Methods: Handpicking slugs and snails at night is an effective method. You can also create barriers around your plants using copper tape or diatomaceous earth.
- Celery Leaf Miner: This insect pest tunnels within the leaves, creating unsightly brown blotches.
- Control Methods: Remove and destroy heavily infested leaves. Encourage beneficial insects, such as parasitic wasps, which prey on leaf miners. In severe cases, you may need to use insecticidal soap or neem oil.
Diseases:
- Root Rot: This fungal disease can occur in wet conditions and can cause the roots to rot.
- Prevention: Ensure good drainage and avoid overwatering. Practice crop rotation to prevent disease buildup.
- Septoria Leaf Spot: This fungal disease causes brown spots on the leaves.
- Prevention: Water the plants at the base to avoid wetting the foliage. Remove and destroy infected leaves.
Prevention and Control Strategies:
- Crop Rotation: Rotate your crops each year to prevent the buildup of pests and diseases in the soil.
- Good Sanitation: Remove and destroy any infected plant material to prevent the spread of diseases.
- Natural Pest Control: Encourage beneficial insects, such as ladybugs and lacewings, which prey on pests.
- Monitoring: Regularly inspect your plants for signs of pests and diseases. Early detection is key to effective control.
By implementing these preventive measures and promptly addressing any issues that arise, you can protect your celeriac crop and ensure a healthy harvest.
Harvesting Celeriac: When and How to Do It
Harvesting celeriac at the right time is crucial to ensure optimal flavor and quality.
Timing:
- Celeriac is typically ready for harvest 3-4 months after transplanting, usually in late fall or early winter.
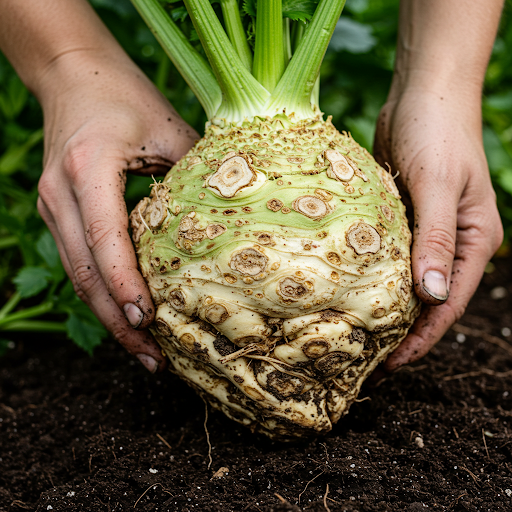
- The size of the roots will vary depending on the variety and growing conditions. Aim for roots that are 3-4 inches in diameter.
- You can start checking for harvest readiness by gently probing the soil around the base of the plants. If the roots feel firm and well-developed, they are likely ready for harvest.
Harvesting Techniques:
- Water the Soil: Water the soil thoroughly a day or two before harvesting to make it easier to dig.
- Loosen the Soil: Use a garden fork to gently loosen the soil around the base of the plant.
- Lift the Root: Carefully lift the root out of the ground, using a garden fork or your hands. Be gentle to avoid damaging the root.
- Remove Excess Soil: Brush off any excess soil from the root.
- Cut the Tops: Cut off the tops of the plants, leaving about an inch of stem attached to the root.
Post-Harvest Handling:
- Clean the Roots: Gently scrub the roots with a brush to remove any remaining soil.
- Trim the Roots: Trim off any damaged or misshapen portions of the root.
- Storing Celeriac: Celeriac can be stored for several months in a cool, dark, and well-ventilated location, such as a root cellar or refrigerator. Wrap each root individually in plastic wrap or place them in a plastic bag with a few holes to allow for air circulation.
By following these guidelines, you can harvest your celeriac at the optimal time and ensure that you enjoy the best possible flavor and quality.
Troubleshooting Common Issues: Addressing Challenges
While growing celeriac is generally straightforward, you might encounter some challenges along the way. Here are some common issues and how to address them:
Bolting: Bolting occurs when the plant prematurely flowers, diverting energy from root development. This is often triggered by warm temperatures and long days.
- Prevention: Choose varieties known for their resistance to bolting. Plant celeriac early in the spring to allow for adequate root development before the onset of hot weather.
Slow Growth or Stunted Plants:
- Causes: This can be due to insufficient water, inadequate fertilization, poor soil drainage, or pest infestations.
- Solutions: Ensure consistent watering, fertilize as needed, and address any pest or disease issues promptly.
Leaf Discoloration:
- Causes: Leaf discoloration can be a symptom of various problems, including nutrient deficiencies, fungal diseases, or pest infestations.
- Diagnosis: Observe the pattern of discoloration. Yellowing leaves may indicate nutrient deficiencies, while brown spots could be a sign of fungal diseases.
- Solutions: Address any nutrient deficiencies by applying appropriate fertilizers. For fungal diseases, improve air circulation and avoid overhead watering.
Other Challenges:
- Pests: Slugs, snails, and celery leaf miners can damage celeriac plants. Implement pest control measures as discussed in the previous section.
- Diseases: Root rot can be a problem in poorly drained soils. Ensure good drainage and avoid overwatering.
By carefully observing your plants and addressing any issues promptly, you can overcome challenges and enjoy a successful celeriac harvest.
Enjoying Your Harvest: Culinary Uses of Celeriac
Now comes the most rewarding part of your celeriac-growing journey: enjoying the fruits of your labor! Celeriac is a versatile vegetable that can be used in a variety of dishes. Here are some ideas to inspire your culinary creativity:
- Soups and Stews: Celeriac adds a subtle earthy flavor and a touch of sweetness to soups and stews. It can be diced and added to vegetable soups, French onion soup, or hearty beef stews.
- Mashes and Purees: Celeriac can be mashed or pureed like potatoes, creating a unique and flavorful side dish. It can also be combined with other root vegetables like carrots and parsnips for a delicious and nutritious mash.
- Salads: Celeriac adds a refreshing crunch and a subtle celery flavor to salads. It can be grated, diced, or thinly sliced and added to green salads, coleslaws, or potato salads.
- Roasted Celeriac: Roasting brings out the natural sweetness of celeriac. Toss diced celeriac with olive oil, herbs, and spices, and roast until tender and slightly caramelized.
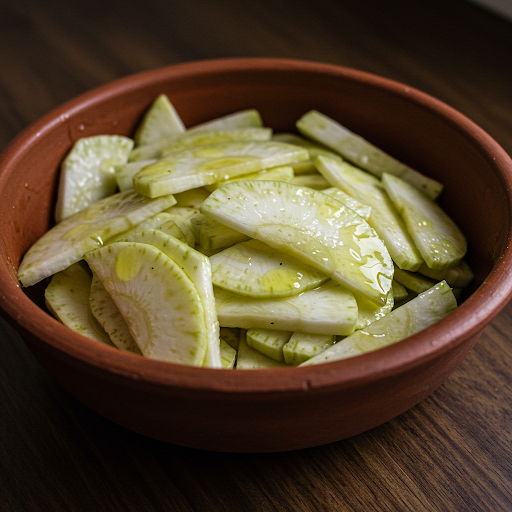
- Pickled Celeriac: Pickling celeriac is a great way to preserve its flavor and create a unique condiment. Thinly slice the celeriac and pickle it in a brine solution of vinegar, water, sugar, and spices.
Flavor Profiles and Pairing Suggestions:
Celeriac pairs well with a variety of flavors. Here are some suggestions:
- Herbs: Fresh herbs like thyme, rosemary, sage, and dill complement the earthy flavor of celeriac.
- Spices: Cumin, coriander, and nutmeg are excellent spices to pair with celeriac.
- Other Vegetables: Celeriac pairs well with carrots, potatoes, parsnips, onions, and garlic.
- Proteins: Celeriac can be added to dishes with beef, pork, poultry, and seafood.
Key Points:
- Celeriac is a versatile vegetable that can be used in a variety of dishes.
- It adds a subtle earthy flavor and a touch of sweetness to soups, stews, and salads.
- Celeriac pairs well with various herbs, spices, and other vegetables.
I hope this section has inspired you to explore the culinary possibilities of your homegrown celeriac. Enjoy the fruits of your labor and savor the delicious flavors of this unique root vegetable!
FAQ
To further assist you in your celeriac-growing journey, here are answers to some frequently asked questions:
Q: What type of soil is needed to grow celeriac vegetable?
A: Celeriac thrives in rich, well-drained soil with a pH between 6.0 and 6.8. This slightly acidic to neutral soil provides the ideal environment for root development. Avoid heavy clay soils, as they can retain too much moisture, leading to root rot. If you have heavy clay soil, amend it with organic matter like compost or well-rotted manure to improve drainage.
Q: When and how to grow celeriac vegetable from seed?
A: Start celeriac seeds indoors 10-12 weeks before the last expected frost in your area. This typically translates to late winter or early spring. Sow the seeds about ¼ inch deep in a well-draining seed-starting mix. Keep the soil consistently moist and provide adequate warmth and light. Once the seedlings have developed their first true leaves, thin them out to give them space to grow.
Q: How to grow celeriac vegetable in raised garden beds?
A: Raised beds can be an excellent option for growing celeriac, especially if you have heavy clay soil or poor drainage. They provide better drainage and allow you to control the soil composition more effectively. Fill the raised beds with a well-draining soil mix and follow the same planting and care guidelines as for in-ground planting.
Q: What are the best conditions to grow celeriac vegetable?
A: Celeriac thrives in full sun, receiving at least 6 hours of direct sunlight per day. It requires consistently moist but well-drained soil. Maintain a soil pH between 6.0 and 6.8. Protect young plants from extreme weather conditions and provide adequate fertilization.
Q: What is the best fertilizer to grow celeriac vegetable?
A: Use a balanced fertilizer with a ratio of nitrogen, phosphorus, and potassium, such as 10-10-10. Organic fertilizers, like compost tea or fish emulsion, can also be beneficial. Apply fertilizer once or twice during the growing season, following the product instructions.
Q: How to properly harvest and store your grown celeriac vegetable?
A: Harvest celeriac when the roots are 3-4 inches in diameter, typically in late fall or early winter. Gently lift the roots from the soil, brush off excess soil, and trim the tops. Store the harvested celeriac in a cool, dark, and well-ventilated location, such as a root cellar or refrigerator. Wrap each root individually in plastic wrap or place them in a plastic bag with a few holes for ventilation.
Q: How to grow celeriac vegetable and prevent common diseases?
A: To prevent diseases, ensure good air circulation, avoid overwatering, and practice crop rotation. Remove and destroy any infected plant material promptly.
Q: Detailed step-by-step guide to grow celeriac vegetable:
A: Refer to the previous sections of this article for a detailed step-by-step guide on growing celeriac, from seed starting to harvesting.
Q: Easy and organic methods to grow celeriac vegetable:
A: Use organic compost and fertilizers, such as well-rotted manure or fish emulsion. Encourage beneficial insects like ladybugs and lacewings to naturally control pests. Avoid using chemical pesticides and herbicides.
I hope this FAQ section addresses some of your common questions about growing celeriac. If you have further questions, please feel free to leave a comment below.
Conclusion:
Growing celeriac can be a rewarding experience. By following the tips and techniques outlined in this guide, you can successfully cultivate this unique root vegetable and enjoy a bountiful harvest. Remember to pay attention to soil preparation, watering, and pest control. And most importantly, don’t be afraid to experiment with different growing methods and culinary applications. Happy gardening!
I hope this comprehensive blog post has been helpful. Feel free to ask if you have any further questions.


")

