Are you tired of bland, store-bought Brussels sprouts? Do you dream of harvesting your own fresh, flavorful sprouts right from your backyard? You’re not alone. Many gardeners find the prospect of growing Brussels sprouts intimidating, often believing they are difficult to cultivate. I understand this apprehension; I felt the same way when I first started gardening. The truth is, with the right knowledge and a little patience, growing Brussels sprouts can be surprisingly rewarding. This guide will provide you with a simple, step-by-step approach to successfully growing these nutritious and versatile vegetables. I’ll share my own experiences and insights, so you can avoid common pitfalls and enjoy a bountiful harvest.
Understanding Brussels Sprouts: A Quick Overview
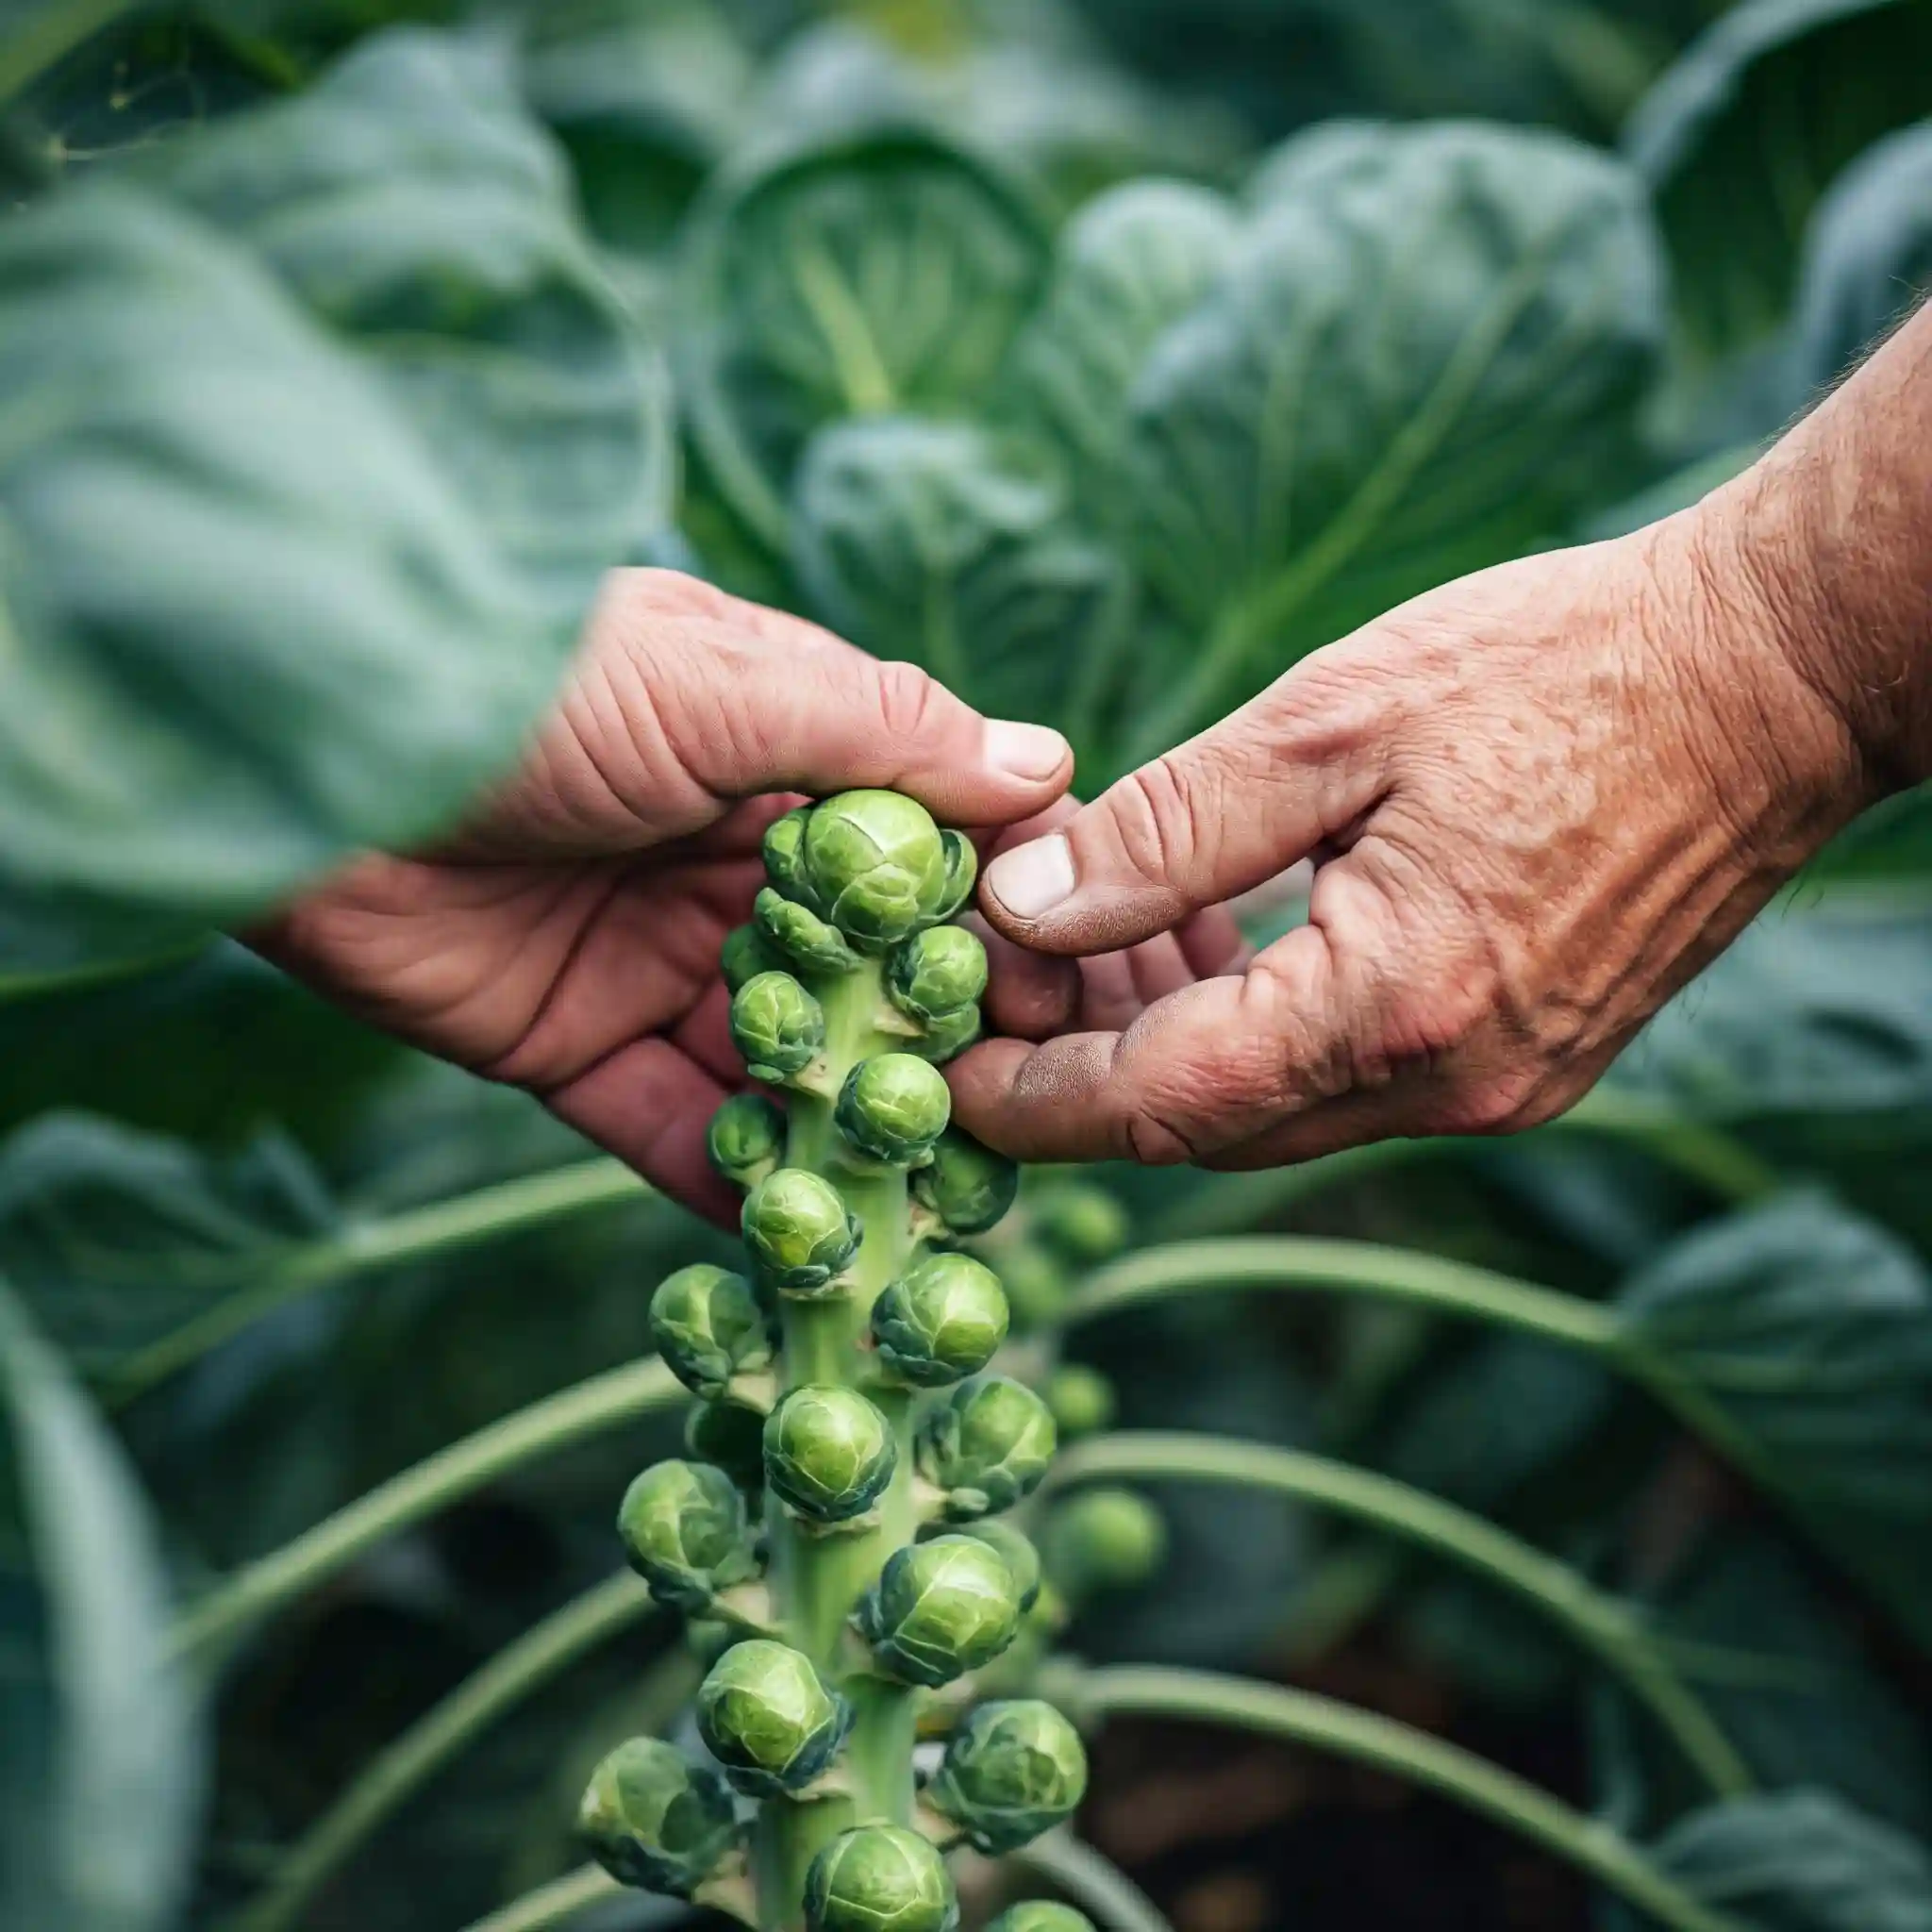
Brussels sprouts (Brassica oleracea), members of the Brassica or cruciferous vegetable family (which also includes cabbage, broccoli, and kale), are small, leafy green buds that grow along a thick stalk. These little powerhouses are packed with nutrients, making them a healthy addition to any diet. They are a great source of vitamins C and K, fiber, and antioxidants. I find that the homegrown version is far superior in taste to the store-bought ones, which often have a bitter taste. You’ll find that fresh sprouts have a nutty, slightly sweet flavor that is truly delicious.
There are many different varieties of Brussels sprouts available, each with its own unique characteristics. Some popular varieties include:
- ‘Long Island Improved’: A classic variety known for its reliable yields and good flavor.
- ‘Jade Cross E’: A hybrid variety that is resistant to many common diseases.
- ‘Diablo’: A newer variety that produces uniform, dark green sprouts.
- ‘Green Gems’: A compact variety suitable for smaller gardens or containers.
- ‘Rubine’: A unique variety that produces reddish-purple sprouts.
Choosing the right variety for your climate and growing conditions is essential for success. I recommend researching different varieties and selecting ones that are known to perform well in your area. You can often find this information from your local garden center or cooperative extension office.
Brussels sprouts thrive in cool weather and require full sun (at least six hours per day). They prefer well-drained soil that is rich in organic matter. Optimal soil pH is between 6.0 and 7.0. I’ve found that amending the soil with compost before planting significantly improves growth and yield.
Nutritional Value of Brussels Sprouts (per 1/2 cup cooked):
| Nutrient | Amount | % Daily Value |
| Vitamin C | 48 mg | 80% |
| Vitamin K | 156 mcg | 130% |
| Fiber | 2 g | 8% |
| Folate | 47 mcg | 12% |
| Antioxidants | High | N/A |
Key Growing Requirements for Brussels Sprouts:
- Sunlight: Full sun (6+ hours per day)
- Soil: Well-drained, fertile soil with a pH of 6.0-7.0
- Temperature: Cool weather (ideal growing temperatures are between 60-75°F (15-24°C))
- Watering: Consistent moisture
- Fertilization: Regular fertilization
I remember one year I neglected to amend my soil with compost, and my Brussels sprouts were significantly smaller and less flavorful. This experience taught me the importance of proper soil preparation. I always recommend that you take the time to prepare your soil before planting, as it will make a big difference in the success of your crop.
This initial overview provides a foundation for understanding Brussels sprouts and their basic needs. In the next section, I’ll delve into the process of starting your Brussels sprouts from seed.
How to Start Brussels Sprouts: From Seed to Seedling
Starting your Brussels sprouts from seed gives you a head start on the growing season and allows you to select specific varieties that may not be available as transplants at your local garden center. I’ve found that starting seeds indoors is the most reliable method, especially if you live in an area with a short growing season. You can direct sow seeds into the garden, but this method is less reliable, as the seeds are more susceptible to pests, diseases, and unfavorable weather conditions.
When to Start Seeds
The timing of starting your Brussels sprouts seeds depends on your local climate and the expected first frost date in your area. In general, you should start your seeds indoors about 4-6 weeks before the last expected frost. If you’re direct sowing, you should wait until the soil has warmed up to at least 50°F (10°C).
How to Start Seeds Indoors
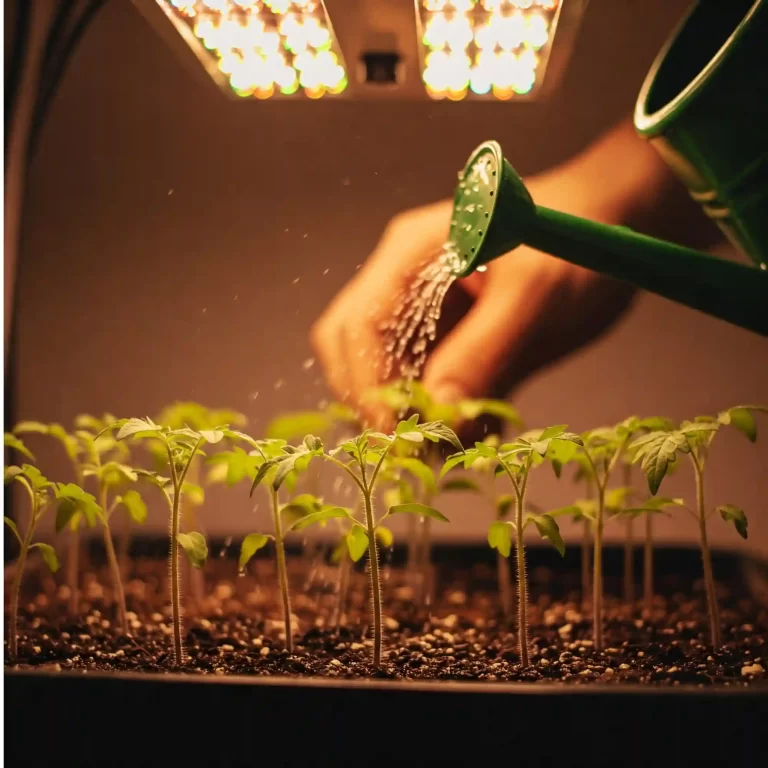
- Gather your supplies: You’ll need seed starting mix, small containers (such as seed trays or peat pots), and a grow light.
- Fill your containers with seed starting mix: Make sure the mix is moist but not soggy.
- Sow your seeds: Plant the seeds about 1/4 inch deep in the soil.
- Water your seeds: Gently water the seeds with a spray bottlel or watering can.
- Place your containers under a grow light: The grow light should be about 2-4 inches above the seedlings.
- Keep the soil moist: Water the seedlings regularly, but avoid overwatering.
- Thin your seedlings: Once the seedlings have two sets of true leaves, thin them out so that only the strongest seedling remains in each container.
Germination Time and Conditions
Brussels sprouts seeds typically germinate within 5-10 days. The ideal germination temperature is between 60-75°F (15-24°C). You can use a heat mat to help maintain the proper soil temperature.
Hardening Off Seedlings
Before transplanting your seedlings into the garden, you’ll need to harden them off. This process gradually acclimates the seedlings to the outdoor conditions. To harden off your seedlings, start by placing them in a sheltered outdoor location for a few hours each day. Gradually increase the amount of time they spend outdoors each day, until they are able to tolerate full sun and wind.
Transplanting Seedlings
Once your seedlings have been hardened off, they are ready to be transplanted into the garden. Choose a location that receives full sun and has well-drained soil. Plant the seedlings at the same depth they were growing in their containers. Space the seedlings about 18-24 inches apart.
Additional Tips for Starting Brussels Sprouts Seeds
- Use fresh seeds for the best germination rates.
- Sow a few extra seeds in case some don’t germinate.
- Label your containers with the variety of Brussels sprouts you are growing.
- Keep a record of when you started your seeds and when they germinated.
Starting your Brussels sprouts from seed is a rewarding experience that will give you a head start on the growing season. With a little care and attention, you’ll be well on your way to harvesting your own delicious Brussels sprouts.
How to Plant Brussels Sprouts: Setting Up for Success
Now that your seedlings are ready, it’s time to get them into their permanent home in the garden. This stage is crucial, as proper planting sets the foundation for healthy growth and a bountiful harvest. I’ve learned from experience that taking the time to prepare the planting site correctly pays off significantly in the long run.
Choosing the Right Location
Brussels sprouts need plenty of sunlight to thrive. Aim for a location that receives at least six hours of direct sunlight per day. I’ve noticed that plants grown in shadier spots tend to produce smaller sprouts and are more susceptible to diseases. The soil should be well-drained and fertile. If your soil is heavy clay or sandy, amend it with compost or other organic matter to improve drainage and fertility.
Soil Preparation
Before planting, it’s essential to prepare the soil properly. Start by loosening the soil to a depth of 12-15 inches. This will allow the roots to penetrate deeply and access nutrients and water. I recommend incorporating a generous amount of compost into the soil. Compost improves soil structure, drainage, and fertility. It also provides essential nutrients for your Brussels sprouts.
A soil test can help you determine the pH of your soil. Brussels sprouts prefer a soil pH between 6.0 and 7.0. If your soil is too acidic, you can add lime to raise the pH. If it’s too alkaline, you can add sulfur to lower it.
Spacing Between Plants
Proper spacing is crucial for Brussels sprouts. Plants that are too crowded will compete for sunlight, water, and nutrients. This can lead to smaller sprouts and increased susceptibility to diseases. I recommend spacing your Brussels sprouts 18-24 inches apart. This will give them plenty of room to grow and develop.
How to Transplant Seedlings into the Garden
- Dig a hole: Dig a hole that is slightly larger than the seedling’s root ball.
- Remove the seedling from its container: Gently remove the seedling from its container, being careful not to damage the roots.
- Place the seedling in the hole: Place the seedling in the hole, ensuring that the top of the root ball is level with the surrounding soil.
- Fill the hole with soil: Fill the hole with soil, gently firming it around the base of the seedling.
- Water the seedling: Water the seedling thoroughly to help it settle into its new home.
Additional Tips for Planting Brussels Sprouts
- Plant on a cloudy day or in the evening: This will help reduce transplant shock.
- Water regularly after planting: Keep the soil consistently moist until the seedlings are established.
- Mulch around the plants: Mulch helps to retain moisture, suppress weeds, and regulate soil temperature.
By following these tips, you can ensure that your Brussels sprouts get off to a strong start. In the next section, I’ll discuss how to care for your Brussels sprouts throughout the growing season.
How to Care for Brussels Sprouts: Nurturing Your Crop
Once your Brussels sprouts are planted, consistent care is essential for healthy growth and a bountiful harvest. I’ve found that regular attention to watering, fertilizing, and pest control makes a world of difference.
Watering Requirements
Brussels sprouts need consistent moisture to thrive. Water deeply and regularly, especially during dry periods. I recommend watering at the base of the plants to avoid wetting the foliage, which can encourage disease. Aim to keep the soil consistently moist but not waterlogged. A good way to check is to stick your finger about an inch into the soil. If it feels dry, it’s time to water.
Fertilizing
Brussels sprouts are heavy feeders, meaning they require a good supply of nutrients. I recommend fertilizing them every few weeks with a balanced fertilizer. You can also side-dress with compost or other organic matter. Avoid over-fertilizing, as this can lead to excessive foliage growth and smaller sprouts.
Weed Control
Weeds compete with Brussels sprouts for water, nutrients, and sunlight. It’s important to keep the area around your plants free of weeds. I recommend mulching around the plants with straw, hay, or other organic mulch. Mulch helps to suppress weeds, retain moisture, and regulate soil temperature.
Protecting From Pests and Diseases
Brussels sprouts are susceptible to several pests and diseases, including aphids, cabbage worms, and clubroot. I recommend inspecting your plants regularly for signs of pests or diseases. If you find any pests, you can handpick them off the plants or use an organic insecticide. For diseases, you can use a fungicide or remove infected plants.
Additional Tips for Caring for Brussels Sprouts
- Provide support: As your Brussels sprouts grow taller, they may need support to prevent them from falling over. You can use stakes or cages to support the plants.
- Remove yellowing leaves: As the lower leaves of your Brussels sprouts begin to yellow, you can remove them. This will improve air circulation and help to prevent disease.
- Pinch out the top: About a month before harvest, you can pinch out the top of the plant. This will encourage the sprouts to mature more quickly.
By following these tips, you can help your Brussels sprouts thrive and produce a bountiful harvest. In the next section, I’ll discuss how to harvest your Brussels sprouts at their peak of perfection.
How to Harvest Brussels Sprouts: Picking at Peak Perfection
The time has finally arrived! After all your hard work and dedication, it’s time to reap the rewards of your labor and harvest those delicious Brussels sprouts. Knowing when and how to harvest them is key to enjoying their optimal flavor and texture.
When to Harvest
Brussels sprouts are typically ready for harvest in the fall, about 80-100 days after planting. The exact timing will depend on the variety you are growing and your local climate. I’ve found that the sprouts are at their peak when they are firm, green, and about 1-2 inches in diameter. The lower sprouts on the stalk will mature first, so you can begin harvesting them while the upper sprouts are still developing.
How to Harvest
Harvesting Brussels sprouts is a simple process. You can either twist or cut the sprouts from the stalk. I prefer to twist them off, as this is less likely to damage the plant. Start with the lowest sprouts on the stalk and work your way up. You can harvest all the sprouts at once, or you can harvest them gradually as they mature.
Storing Harvested Brussels Sprouts
After harvesting your Brussels sprouts, you can store them in the refrigerator for up to two weeks. To store them, remove any yellowing leaves and place the sprouts in a plastic bag or container. You can also freeze Brussels sprouts for longer storage. To freeze them, blanch them in boiling water for a few minutes, then cool them in ice water. Drain the sprouts and then place them in freezer bags or containers.
Additional Tips for Harvesting Brussels Sprouts
- Harvest after a frost: A light frost can actually improve the flavor of Brussels sprouts, making them sweeter.
- Don’t wait too long to harvest: If you wait too long, the sprouts can become bitter and tough.
- Leave the stalk in the garden: After harvesting the sprouts, you can leave the stalk in the garden. It may produce some smaller sprouts later in the season.
By following these tips, you can ensure that you harvest your Brussels sprouts at their peak of perfection. In the next section, I’ll discuss some common problems that you may encounter while growing Brussels sprouts, and how to troubleshoot them.
Troubleshooting Common Brussels Sprouts Problems
Even with the best care, you may encounter some problems while growing Brussels sprouts. I’ve certainly had my share of challenges over the years, from pest infestations to diseases. But don’t worry, most of these problems are easily manageable with a little knowledge and prompt action.
Sprouts Not Forming
One common problem is sprouts not forming properly. This can be caused by several factors, including:
- Insufficient sunlight: Brussels sprouts need at least six hours of direct sunlight per day to produce well.
- Poor soil fertility: Brussels sprouts are heavy feeders and require a good supply of nutrients.
- High temperatures: Hot weather can inhibit sprout formation.
- Improper spacing: Plants that are too crowded will compete for resources and may not produce well.
Splitting Sprouts
Another common issue is sprouts splitting open. This is usually caused by inconsistent watering or heavy rainfall after a dry period.
Pest and Disease Issues
Brussels sprouts are susceptible to several pests and diseases, including:
- Aphids: These small insects can suck the sap from the leaves, causing them to yellow and curl.
- Cabbage worms: These caterpillars can devour the leaves and sprouts.
- Clubroot: This fungal disease can cause the roots to become swollen and distorted, preventing the plant from taking up nutrients.
Yellowing Leaves
Yellowing leaves can be a sign of several problems, including nutrient deficiency, disease, or pest infestation.
Additional Tips for Troubleshooting Brussels Sprouts Problems
- Inspect your plants regularly: This will help you catch problems early on.
- Use organic control methods whenever possible: This will help protect the environment and your health.
- Rotate your crops: This can help prevent soilborne diseases from building up.
- Choose disease-resistant varieties: This can help reduce the risk of disease problems.
By being aware of these common problems and taking steps to prevent or manage them, you can ensure a successful Brussels sprout harvest. In the next section, I’ll answer some frequently asked questions about growing Brussels sprouts.
FAQ (Frequently Asked Questions About Growing Brussels Sprouts)
I’ve compiled a list of frequently asked questions about growing Brussels sprouts to help you troubleshoot any issues and ensure a successful harvest.
Q: How to grow Brussels sprouts from seed indoors?
A: To start Brussels sprouts from seed indoors, sow seeds ¼ inch deep in seed-starting mix 4-6 weeks before the last expected frost. Keep the soil moist and warm (70-75°F) until seedlings emerge. Once seedlings have two sets of true leaves, transplant them into individual pots. Harden off seedlings by gradually exposing them to outdoor conditions before transplanting them into the garden after the last frost.
Q: How to protect Brussels sprouts from cabbage white butterflies?
A: Cabbage white butterflies are a common pest of Brussels sprouts. To protect your plants, cover them with netting or row covers to prevent the butterflies from laying eggs. You can also handpick caterpillars off the plants or use organic insecticides like Bacillus thuringiensis (Bt).
Q: How to prevent clubroot disease in Brussels sprouts plants?
A: Clubroot is a fungal disease that can affect Brussels sprouts. To prevent it, ensure your soil pH is above 7.0, practice crop rotation, and plant disease-resistant varieties. If clubroot is present in your garden, avoid planting brassicas in the affected area for at least two years.
Q: Why are my Brussels sprouts not forming properly, and how to fix it?
A: Several factors can cause Brussels sprouts not to form properly, including insufficient sunlight, poor soil fertility, high temperatures, and improper spacing. Ensure your plants receive at least 6 hours of sunlight daily, fertilize regularly with a balanced fertilizer, and space plants 18-24 inches apart. If temperatures are consistently above 80°F, provide shade during the hottest part of the day.
Q: How to get rid of aphids on my Brussels sprouts plants naturally?
A: Aphids can be controlled naturally by spraying plants with a strong stream of water, introducing beneficial insects like ladybugs or lacewings, or using insecticidal soap or neem oil.
Q: How do I know when my Brussels sprouts are ready to harvest?
A: Brussels sprouts are typically ready to harvest when the sprouts are firm, green, and about 1-2 inches in diameter. The lower sprouts on the stalk will mature first, so you can begin harvesting them while the upper sprouts are still developing.
Q: What are some common problems that can occur when growing Brussels sprouts?
A: Some common problems include sprouts not forming, splitting sprouts, pest infestations (aphids, cabbage worms), and diseases (clubroot). Regular inspection of your plants and prompt action can help prevent or manage these issues.
Q: How do I store my Brussels sprouts after harvesting them?
A: Brussels sprouts can be stored in the refrigerator for up to two weeks. Remove any yellowing leaves and place the sprouts in a plastic bag or container. You can also freeze Brussels sprouts for longer storage. Blanch them in boiling water for a few minutes, cool them in ice water, drain them, and then place them in freezer bags or containers.
Conclusion: Enjoying Your Homegrown Brussels Sprouts
Growing your own Brussels sprouts can be a truly rewarding experience. From starting the tiny seeds to harvesting those fresh, flavorful sprouts, each step of the process brings you closer to nature and the satisfaction of enjoying homegrown produce. I encourage you to give it a try. With the knowledge and tips I’ve shared in this guide, you’ll be well on your way to a successful harvest.
Remember, the key to growing great Brussels sprouts lies in understanding their needs and providing them with the proper care. Give them plenty of sunlight, well-drained soil, consistent moisture, and regular fertilization. Protect them from pests and diseases, and harvest them at their peak of perfection.
I hope this guide has provided you with the information and inspiration you need to start growing your own Brussels sprouts. Happy gardening!
Additional Resources
