

Do you dream of biting into a juicy, sun-warmed bell pepper you grew yourself? Tired of store-bought peppers lacking that fresh-from-the-garden flavor? You’re not alone. Many gardeners share the desire to cultivate these vibrant vegetables, but the prospect of growing bell peppers can seem daunting. Fear not! With the right approach, you can successfully cultivate these delicious fruits and enjoy a bountiful harvest. This guide will walk you through ten simple steps, from seed selection to harvest, empowering you to grow healthy, flavorful bell peppers in your own garden.
1. Selecting the Right Bell Pepper Varieties
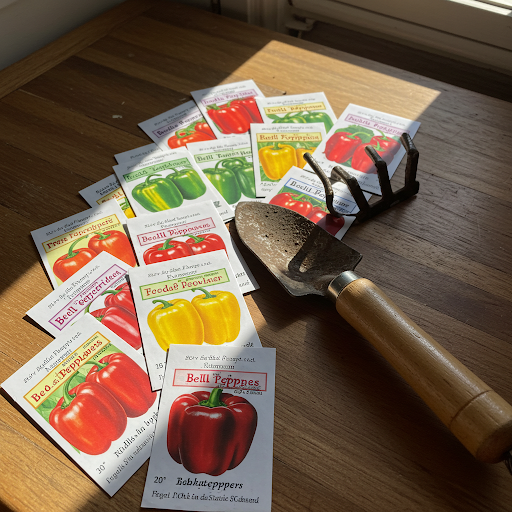
Choosing the right bell pepper varieties is a crucial first step on your journey to a bountiful harvest. Just like selecting the right tools for a specific job, choosing the right pepper varieties will significantly impact your success.
Consider these key factors when making your selection:
- Climate: Bell peppers are warm-season crops that thrive in hot, sunny conditions. Consider your specific climate and growing zone. Some varieties are better suited for cooler climates, while others excel in warmer regions. Research varieties that are known to perform well in your area.
- Growing Space: The size of your garden will influence your variety choices. If you have limited space, opt for compact varieties like ‘Corno di Toro’ or ‘Gypsy,’ which produce peppers on shorter plants. For larger gardens, explore larger varieties like ‘California Wonder’ or ‘Bullnose’ that can spread out more.
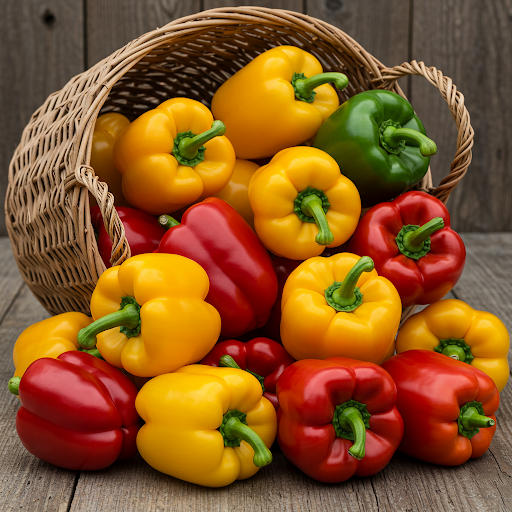
- Color and Flavor: The world of bell peppers is a kaleidoscope of colors and flavors. From classic green to vibrant red, yellow, orange, and even purple, each variety offers a unique taste experience. Green bell peppers tend to have a milder flavor, while ripe peppers (red, yellow, orange) develop a sweeter and more complex taste.
Here are some additional tips for selecting the best bell pepper varieties:
- Days to Maturity: Choose varieties that mature within the growing season in your area. This information is typically listed on the seed packet.
- Disease Resistance: Opt for varieties that are resistant to common diseases like blossom end rot and bacterial leaf spot. These diseases can significantly reduce your yield.
- Seed Source: Purchase high-quality seeds from reputable suppliers. Look for seeds that have high germination rates and are free of diseases.
By carefully considering these factors and selecting varieties that are well-suited to your specific needs and growing conditions, you’ll set the stage for a successful bell pepper growing experience.
2. Starting Seeds Indoors
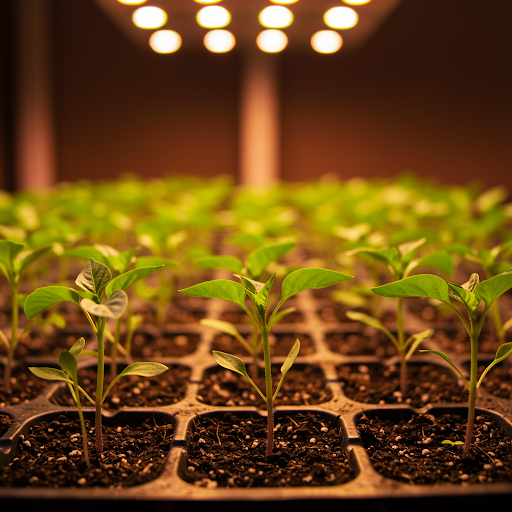
Starting bell pepper seeds indoors provides several advantages, including:
- Earlier Harvest: You can get a head start on the growing season, enjoying fresh peppers weeks or even months earlier than direct-sowing in the garden.
- Greater Control: Starting seeds indoors allows you to control the growing environment, ensuring optimal conditions for germination and seedling development.
- Variety Selection: You have a wider range of seed varieties available, including those that may be difficult to find as transplants.
Here’s a step-by-step guide to starting bell pepper seeds indoors:
- Choose the Right Seed Starting Mix: Select a well-draining seed starting mix that is specifically formulated for seedlings. Avoid using garden soil, as it can be too heavy and may harbor diseases.
- Prepare Seed Trays or Pots: Fill seed trays or small pots with the seed starting mix, leaving a little space at the top. Gently firm the soil.
- Sow the Seeds: Plant two or three seeds per cell or pot, pressing them gently into the soil. Cover the seeds with a thin layer of soil.
- Water Gently: Water the seeds thoroughly but gently, ensuring the soil is evenly moistened. Avoid overwatering, which can lead to damping off.
- Provide Adequate Light and Heat: Place the seed trays or pots under a grow light or in a sunny windowsill. Maintain a consistent temperature of around 70-75°F (21-24°C).
- Maintain Moisture: Keep the soil consistently moist but not soggy. Water gently as needed, allowing the top layer of soil to dry slightly between waterings.
- Thin the Seedlings: Once the seedlings have developed two true leaves, carefully thin them, leaving the strongest seedling in each cell or pot.
- Harden Off the Seedlings: Before transplanting outdoors, gradually acclimate the seedlings to outdoor conditions. This process, called hardening off, helps them adjust to the changes in temperature, light, and humidity.
By following these steps, you can successfully start your bell pepper seeds indoors and nurture healthy seedlings that are ready to thrive in your garden.
3. Preparing the Ideal Growing Environment
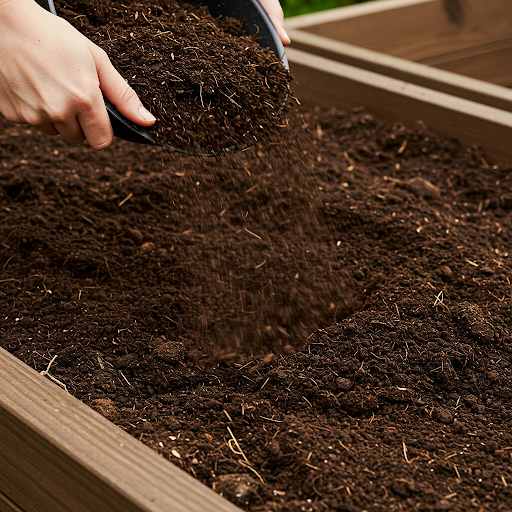
Providing bell peppers with the ideal growing environment is crucial for their healthy development and abundant fruit production.
Soil: Bell peppers thrive in well-drained, fertile soil with a pH between 6.0 and 6.8.
- Improve Soil Quality: Before planting, amend your soil with plenty of organic matter such as compost, well-rotted manure, or peat moss. This will improve soil structure, drainage, and nutrient content.
- Consider Soil Testing: A soil test can help you determine the pH and nutrient levels in your soil. This information will guide you in making necessary amendments to create the optimal growing conditions.
Sunlight: Bell peppers are sun-loving plants and require at least 6-8 hours of direct sunlight per day. Choose a planting location that receives full sun throughout the day.
Drainage: Poor drainage can lead to root rot, a serious problem for bell pepper plants. Ensure the soil drains well by amending heavy clay soil with compost and perlite, or by creating raised beds.
Temperature: Bell peppers are warm-season crops that prefer warm temperatures. They grow best when soil temperatures are consistently above 60°F (15°C).
By preparing the ideal growing environment, you’ll provide your bell pepper plants with the foundation they need to thrive and produce a bountiful harvest.
4. Transplanting Seedlings
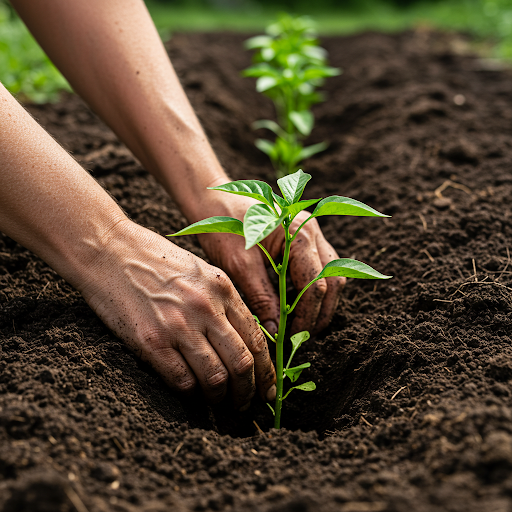
Once your bell pepper seedlings have developed a few sets of true leaves and the weather has warmed up, it’s time to transplant them into the garden.
Timing: Transplant seedlings outdoors after the last frost has passed and soil temperatures have warmed to at least 60°F (15°C).
Preparing the Planting Site:
- Harden Off: Gradually acclimate your seedlings to outdoor conditions by placing them outside for short periods each day, increasing the duration gradually over several days. This process, known as hardening off, helps the seedlings adjust to the changes in temperature, light, and humidity.
- Prepare the Soil: Ensure the soil is well-prepared and amended with compost or other organic matter. Water the planting site thoroughly before transplanting.
- Space the Plants: Space the seedlings according to the variety’s recommendations. Typically, bell peppers are spaced 18-24 inches apart.
Transplanting:
- Dig Holes: Dig planting holes that are slightly larger than the root ball of each seedling.
- Gently Remove Seedlings: Carefully remove the seedlings from their containers, being mindful not to disturb the roots.
- Plant Deeply: Plant the seedlings slightly deeper than they were growing in the containers. This encourages deeper root development.
- Firm the Soil: Gently firm the soil around the base of each seedling.
- Water Thoroughly: Water the newly transplanted seedlings deeply to settle the soil and provide them with moisture.
Aftercare:
- Mulch: Apply a layer of mulch around the base of the plants to help retain moisture, suppress weeds, and regulate soil temperature.
- Water Regularly: Water the plants deeply and consistently, especially during dry periods. Avoid overwatering, which can lead to root rot.
By following these steps and providing your transplanted seedlings with the proper care, you’ll set them up for success in the garden.
5. Watering and Feeding Your Bell Peppers
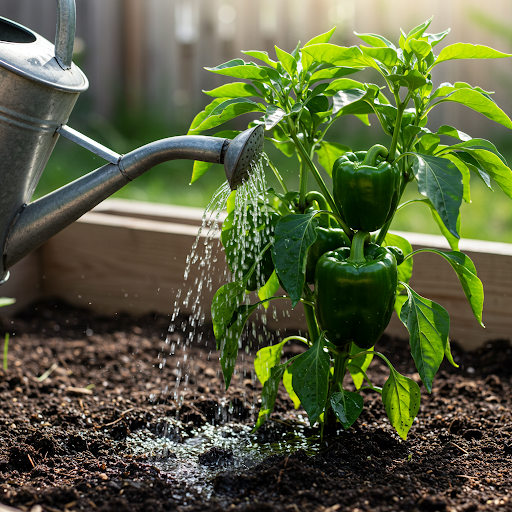
Consistent watering and proper fertilization are essential for healthy bell pepper plants and a bountiful harvest.
Watering:
- Water Deeply and Infrequently: Water deeply and thoroughly, ensuring that the water reaches the root zone. Allow the top few inches of soil to dry out slightly between waterings. Avoid overhead watering, which can spread diseases and promote fungal growth.
- Mulch: Applying a layer of mulch around the base of the plants helps to retain soil moisture and suppress weeds.
Fertilizing:
- Fertilize Regularly: Bell peppers are heavy feeders and require regular fertilization for optimal growth and fruit production.
- Choose the Right Fertilizer: Use a balanced fertilizer with a ratio of nitrogen, phosphorus, and potassium (NPK) such as 10-10-10 or a fertilizer specifically formulated for vegetables.
- Organic Options: Consider using organic fertilizers such as compost tea or fish emulsion.
Monitoring and Adjusting:
- Observe Your Plants: Monitor your plants closely for signs of nutrient deficiencies or excess. Yellowing leaves can indicate a lack of nitrogen, while purple leaves may suggest a phosphorus deficiency.
- Adjust Watering and Fertilizing: Adjust your watering and fertilizing practices based on the specific needs of your plants and the prevailing weather conditions.
By providing your bell pepper plants with adequate water and nutrients, you’ll support their growth and ensure a healthy and productive harvest.
6. Supporting Your Growing Plants
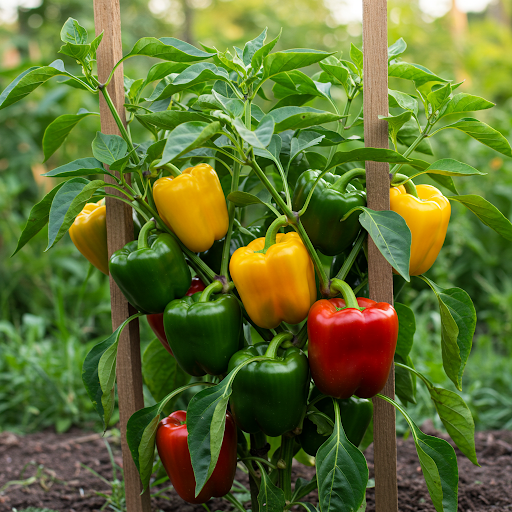
As bell pepper plants grow, they can become top-heavy, especially when laden with fruit. Providing support helps prevent them from falling over and ensures optimal growth and fruit development.
Methods for Supporting Bell Pepper Plants:
- Staking: Drive stakes into the ground near the base of each plant. As the plants grow, gently tie them to the stakes using soft garden ties or twine. Avoid tying the stems too tightly, which can restrict growth.
- Caging: Enclose each plant within a wire cage or tomato cage. This provides overall support and helps to keep the plant upright.
Benefits of Support:
- Improved Stability: Support prevents plants from falling over, especially during windy conditions or heavy fruit loads.
- Better Air Circulation: Improved air circulation reduces the risk of fungal diseases.
- Increased Productivity: By keeping the plants upright, you maximize sunlight exposure and promote better fruit development.
By providing adequate support, you can help your bell pepper plants reach their full potential and enjoy a bountiful harvest.
7. Dealing with Pests and Diseases

While growing bell peppers, it’s important to be vigilant about potential pest and disease problems. Early detection and timely action can help minimize damage and ensure a healthy harvest.
Common Pests:
- Aphids: These small, sap-sucking insects can infest plants, causing stunted growth and leaf distortion.
- Spider Mites: These tiny mites feed on plant sap, causing leaves to turn yellow and drop.
- Flea Beetles: These small beetles chew holes in leaves, causing significant damage to young plants.
- Cutworms: These caterpillars cut off young seedlings at or near the soil line.
Common Diseases:
- Blossom End Rot: This physiological disorder is caused by calcium deficiency and appears as black, leathery spots on the blossom end of the fruit.
- Powdery Mildew: This fungal disease causes a white, powdery coating on leaves, which can eventually lead to leaf drop.
- Bacterial Leaf Spot: This disease causes small, dark spots on leaves, which can eventually merge and cause leaf drop.
Pest and Disease Control:
- Prevention: The best defense against pests and diseases is prevention. Practice good garden hygiene, such as removing weeds and debris around your plants.
- Organic Control: Encourage beneficial insects like ladybugs and lacewings, which prey on aphids and other pests. Use organic pest control methods like insecticidal soap or neem oil.
- Resistant Varieties: Select varieties that are resistant to common diseases.
- Monitor Regularly: Regularly inspect your plants for signs of pests and diseases. Early detection allows for prompt action and minimizes damage.
By being proactive and taking appropriate measures, you can effectively manage pests and diseases and ensure a healthy and productive bell pepper harvest.
8. Harvesting Your Bell Peppers at the Right Time
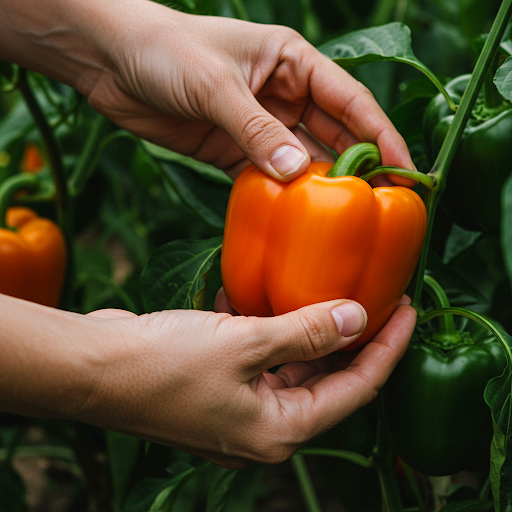
Harvesting your bell peppers at the right time is crucial for enjoying their peak flavor and quality.
Signs of Ripeness:
- Color: The color of the pepper will vary depending on the variety. Green bell peppers may be harvested when they reach the desired size, even if they are not fully ripe. However, for optimal flavor, many gardeners prefer to allow them to ripen on the plant to yellow, orange, or red.
- Firmness: Ripe bell peppers will be firm and glossy. Avoid harvesting peppers that are soft or wrinkled, as these may be overripe or damaged.
Harvesting Techniques:
- Use Sharp Scissors or Garden Shears: Cut the peppers from the plant, leaving a short stem attached. This helps to prevent damage to the plant and reduces the risk of disease.
- Harvest Regularly: Harvest peppers regularly to encourage continued production.
Tips for Handling and Storage:
- Handle Gently: Handle harvested peppers gently to avoid bruising.
- Cool Down Quickly: Cool the peppers quickly after harvest to maintain freshness.
- Store Properly: Store peppers in a cool, dry place. They can also be stored in the refrigerator for up to a week.
By harvesting your bell peppers at the right time and handling them properly, you can enjoy their fresh flavor and extend their shelf life.
9. Common Mistakes to Avoid When Growing Bell Peppers
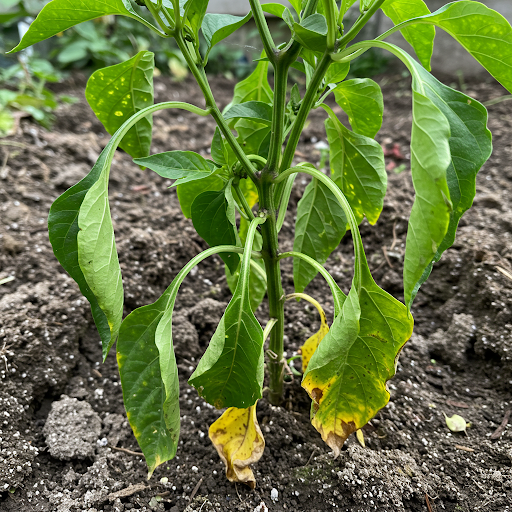
Even the most experienced gardeners can make mistakes when growing bell peppers. By being aware of these common pitfalls, you can avoid them and increase your chances of a successful harvest.
- Overwatering: Overwatering is a common mistake that can lead to root rot and other fungal diseases. Allow the top few inches of soil to dry out slightly between waterings.
- Underwatering: Bell peppers require consistent moisture, especially during hot, dry periods. Insufficient watering can lead to stunted growth, blossom end rot, and reduced fruit production.
- Improper Fertilization: Using too much fertilizer, especially nitrogen-rich fertilizers, can result in excessive vegetative growth at the expense of fruit production. Conversely, insufficient fertilization can lead to nutrient deficiencies and poor plant health.
- Planting in Poor Soil: Planting in heavy clay soil or soil with poor drainage can hinder root development and lead to waterlogging.
- Incorrect Planting Depth: Planting seedlings too deeply can inhibit their growth and increase the risk of stem rot.
- Lack of Support: Tall-growing varieties may need support to prevent them from falling over, especially when laden with fruit.
- Exposure to Extreme Temperatures: Bell peppers are sensitive to both cold and extreme heat. Protect them from frost and provide shade during the hottest parts of the day.
By being mindful of these common mistakes and taking the necessary precautions, you can avoid these pitfalls and cultivate healthy, productive bell pepper plants.
10. Final Tips for a Successful Bell Pepper Harvest
Congratulations! You’ve successfully navigated the journey of growing bell peppers. By following these tips and paying close attention to your plants, you’ve increased your chances of enjoying a bountiful harvest of these delicious and nutritious fruits.
Here are a few final tips to ensure your success:
- Observe and Adapt: Continuously observe your plants, paying attention to their growth, development, and any signs of stress. Adjust your care practices as needed to ensure optimal growth.
- Embrace the Learning Process: Growing bell peppers is a learning experience. Don’t be discouraged by setbacks. Learn from your experiences and make adjustments for future growing seasons.
- Enjoy the Process: Growing your own food is a rewarding experience. Take pride in your efforts, savor the taste of your homegrown peppers, and share your harvest with friends and family.
By following these tips and embracing the learning process, you can cultivate healthy, productive bell pepper plants and enjoy the satisfaction of harvesting your own homegrown produce. Happy gardening!
FAQ:
- Q: What is the best soil for growing bell pepper vegetables?
A: Bell peppers thrive in well-drained, fertile soil with a pH between 6.0 and 6.8. Amend your soil with plenty of organic matter such as compost, well-rotted manure, or peat moss to improve its structure, drainage, and nutrient content.
- Q: Best organic fertilizer for how to grow bell pepper vegetables in pots?
A: Use a balanced organic fertilizer such as compost tea or fish emulsion. These fertilizers provide essential nutrients without introducing harmful chemicals.
- Q: What are the watering requirements for how to grow bell pepper vegetables?
A: Water your bell pepper plants deeply and thoroughly, ensuring that the water reaches the root zone. Allow the top few inches of soil to dry out slightly between waterings. Avoid overhead watering, which can spread diseases and promote fungal growth.
- Q: How to support bell pepper vegetable plants for maximum growth?
A: As bell pepper plants grow, they can become top-heavy, especially when laden with fruit. Provide support by staking the plants or using cages to prevent them from falling over. This will ensure optimal growth and fruit development.
- Q: How to prevent pests when learning how to grow bell pepper vegetables?
A: Encourage beneficial insects like ladybugs and lacewings, which prey on aphids and other pests. Use organic pest control methods like insecticidal soap or neem oil. Regularly inspect your plants for signs of pests and take action promptly.
- Q: What are common diseases affecting how to grow bell pepper vegetables?
A: Common diseases include blossom end rot, powdery mildew, and bacterial leaf spot. Maintain good garden hygiene, provide adequate air circulation, and choose disease-resistant varieties to minimize the risk of these problems.
- Q: When is the optimal time for how to grow bell pepper vegetables outdoor?
A: Transplant seedlings outdoors after the last frost has passed and soil temperatures have warmed to at least 60°F (15°C).
- Q: How to increase bell pepper vegetable yield in a small garden?
A: Utilize vertical gardening techniques, such as growing plants in hanging baskets or using trellises. Consider using compact, high-yielding varieties.
- Q: Step by step guide on how to grow bell pepper vegetables organically?
A: Start with organic seeds, use organic fertilizers and pest control methods, and amend your soil with compost or other organic matter.
- Q: How to grow bell pepper vegetables from seeds indoors easily?
A: Use a well-draining seed starting mix, provide adequate light and warmth, and maintain consistent moisture. Harden off the seedlings before transplanting them outdoors.


")

