Tired of paying premium prices for those slender green spears at the grocery store? Do you crave the taste of freshly picked asparagus, still warm from the sun? I know I did. For years, I dreamt of having my own asparagus patch, a source of fresh, delicious spears right in my backyard. The problem was, I always heard it was “too difficult” or “took too long.” This misconception kept me from enjoying homegrown asparagus for far too long. But let me tell you, while it does require patience, growing asparagus is entirely achievable, even for beginner gardeners like I once was. In this guide on How to Grow Asparagus Vegetable, I’ll share everything I’ve learned, from choosing the right plants to harvesting your first spears, so you can enjoy the same homegrown goodness I do now.
Understanding Asparagus (General Information)
Asparagus (Asparagus officinalis) isn’t your typical annual vegetable. It’s a perennial, meaning it can live for many years, producing a harvest year after year – a true investment for your garden. This makes it a unique and rewarding crop for any home gardener. You plant it once, and with proper care, you can enjoy fresh asparagus for decades.
Why should you, as a busy individual perhaps balancing work and family, consider growing your own asparagus? Several compelling reasons convinced me, and I believe they’ll resonate with you too:
- Unmatched Freshness: Store-bought asparagus often travels long distances, losing flavor and nutrients along the way. Homegrown asparagus, picked just moments before cooking, offers an unparalleled level of freshness and taste. You’ll notice the difference immediately.
- Cost Savings Over Time: While there’s an initial investment of time and resources, growing your own asparagus can save you money in the long run, especially considering the high cost of fresh asparagus at the grocery store. I’ve found the savings add up considerably over the years.
- Variety and Control: Growing your own allows you to choose from a wider variety of asparagus types than you’ll typically find in stores. You also have complete control over growing practices, ensuring your asparagus is grown without harmful chemicals if you choose.
There are different types of asparagus, each with unique characteristics:
- Green Asparagus: The most common type, known for its vibrant green color and classic asparagus flavor. This is what you’ll find in most supermarkets.
- Purple Asparagus: This variety boasts a beautiful deep purple hue and a slightly sweeter, milder flavor than green asparagus. It also contains higher levels of antioxidants.
- White Asparagus: Grown in complete darkness (a process called blanching), white asparagus is prized for its tender texture and delicate flavor. It’s more common in European cuisine.
Asparagus thrives in specific conditions, and understanding these will set you up for success:
- Climate: Asparagus prefers cool winters and warm summers. It requires a period of dormancy in the winter to produce well. It’s hardy in USDA zones 3-8, meaning it can tolerate a wide range of temperatures. You can check your specific zone online.
- Sunlight: Asparagus needs at least 6-8 hours of direct sunlight per day. Choose a sunny spot in your garden where it won’t be shaded by trees or buildings. This is crucial for energy production.
- Soil: Well-drained, sandy loam soil is ideal for asparagus. It doesn’t tolerate heavy clay soil or overly wet conditions. If you have clay soil, amending it with compost and other organic matter is essential for good drainage.
Understanding these basics is the foundation for successfully growing asparagus. In the next section, I’ll delve into the practical steps of planting your asparagus patch.
How to Plant Asparagus (Step-by-Step Guide)
Planting asparagus is a long-term commitment, so it’s important to get it right from the start. Trust me, taking the time to properly prepare and plant your asparagus bed will pay off in the long run with a bountiful harvest for years to come. Here’s a detailed breakdown of the planting process:
A. Choosing between seeds and crowns:
You have two main options when starting your asparagus patch: seeds or crowns. Each has its own advantages and disadvantages:
- Seeds: Starting from seed is the more economical option, but it requires more patience. It takes an extra year or two before you can harvest any spears. However, it allows you to grow varieties that might not be available as crowns in your area.
- Crowns: These are one-year-old asparagus plants that have already developed a root system. Planting crowns is faster, allowing you to harvest sooner (usually after two years). While they are more expensive upfront, they offer a head start.
If you opt for crowns, it’s crucial to source them from a reputable nursery. Look for plump, healthy crowns with well-developed roots. Avoid crowns that look dry or shriveled.
B. Preparing the asparagus bed:
Asparagus needs a permanent home, as it will occupy the same spot in your garden for many years. Therefore, proper bed preparation is essential:
- Soil Testing and Amendment: Asparagus prefers a soil pH between 6.5 and 7.5. A soil test will tell you your soil’s pH and nutrient levels. Amend the soil with compost or other organic matter to improve drainage and fertility. This is especially important if you have heavy clay soil. I’ve found that adding well-rotted manure also works wonders.
- Creating Trenches: Dig trenches that are 12-18 inches wide and 6-8 inches deep. The depth will depend on your soil type; deeper trenches are needed for lighter, sandier soils. Space the trenches about 4-5 feet apart to allow ample room for the asparagus ferns to grow.
C. Planting asparagus crowns:
Now comes the exciting part – planting your asparagus!
- Spacing Crowns in the Trench: Create small mounds of soil at the bottom of the trench, spacing them about 12-18 inches apart. Place the asparagus crowns on top of these mounds, spreading the roots out evenly.
- Covering Crowns with Soil Gradually: Initially, cover the crowns with about 2 inches of soil. As the spears begin to grow, gradually fill in the trench with more soil until it’s level with the surrounding ground. This encourages the crowns to develop a deeper root system.
D. Planting asparagus from seed:
If you choose to start from seed, you can either start them indoors or direct sow them into the garden:
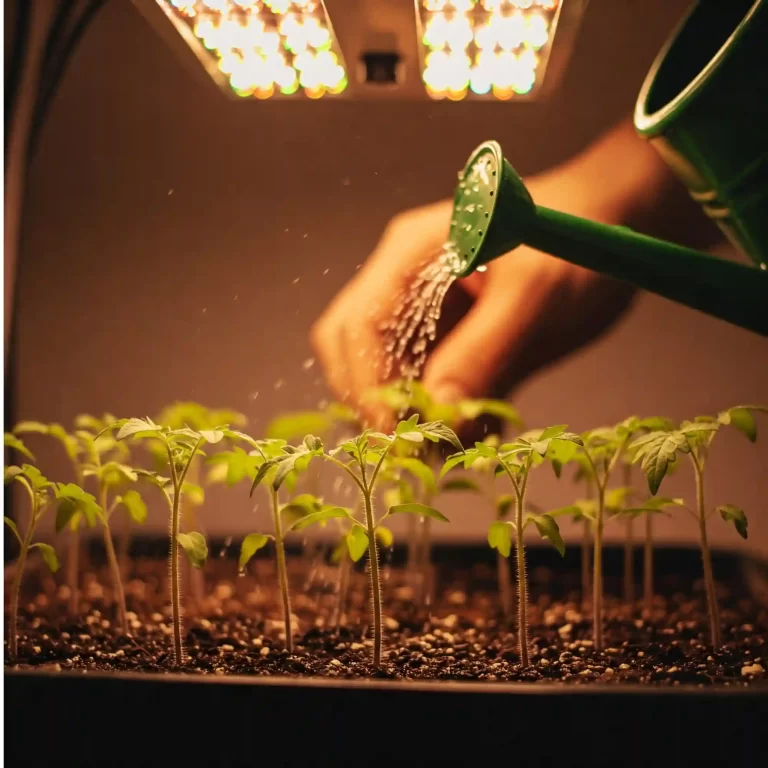
- Starting Seeds Indoors: Start seeds indoors about 8-10 weeks before the last expected frost in your area. Sow the seeds about 1 inch deep in seed-starting mix. Keep the soil moist and warm. Once the seedlings are a few inches tall, you can transplant them into the garden after hardening them off.
- Direct Sowing: You can also direct sow asparagus seeds into the garden after the danger of frost has passed. Sow the seeds about 1 inch deep and keep the soil consistently moist.
Planting asparagus requires patience, but the rewards are well worth the wait. In the next section, I’ll cover how to care for your asparagus patch to ensure a healthy and productive harvest.
How to Care for Asparagus (Maintenance)
Once your asparagus is planted, consistent care is key to establishing a healthy and productive patch. This section covers the essential maintenance practices you’ll need to follow:
A. Watering:
Proper watering is crucial, especially during the first few years as your asparagus plants establish their root systems.
- Watering Frequency and Depth: Water deeply and regularly, especially during dry periods. Aim for about 1-2 inches of water per week. I’ve found that a good soaker hose placed along the rows works wonders, delivering water directly to the roots.
- Importance of Consistent Moisture: Consistent moisture is essential for healthy growth. Avoid letting the soil dry out completely, but also avoid overwatering, which can lead to root rot.
B. Fertilizing:
Asparagus is a heavy feeder, so regular fertilization is important to provide the necessary nutrients.
- Types of Fertilizer: You can use either organic or synthetic fertilizers. Organic options include compost, well-rotted manure, and bone meal. Synthetic fertilizers with a balanced NPK (nitrogen, phosphorus, potassium) ratio can also be used.
- Fertilizing Schedule: Fertilize in early spring before the spears emerge and again after the harvest season. I like to use a side-dressing method, applying the fertilizer along the sides of the rows.
C. Weeding:
Weeds compete with asparagus for water and nutrients, so keeping your asparagus bed weed-free is crucial.
- Importance of Weed Control: Regular weeding, especially during the first few years, will help your asparagus plants establish themselves.
- Mulching to Suppress Weeds: Applying a layer of organic mulch, such as straw or wood chips, can help suppress weeds and retain moisture in the soil. I’ve found this to be a very effective way to minimize weeding chores.
D. Pest and disease control:
While asparagus is relatively pest and disease-resistant, there are a few issues to watch out for:
- Common asparagus pests: The asparagus beetle is the most common pest. Both the adults and larvae feed on the spears and ferns. Handpicking beetles, introducing beneficial insects like ladybugs, or using organic insecticides like neem oil can help control infestations.
- Common asparagus diseases: Rust and crown rot are common fungal diseases. Ensuring good drainage, providing adequate air circulation, and avoiding overhead watering can help prevent these diseases. If you notice signs of disease, remove affected ferns and consider using a fungicide if necessary.
Providing consistent care for your asparagus patch will ensure a healthy and productive harvest for many years. In the next section, I’ll discuss the exciting part: harvesting your first spears.
How to Harvest Asparagus (When and How)
After all your hard work, the time has finally come to harvest your own fresh asparagus! This is the most rewarding part of the process, and trust me, the taste of homegrown asparagus is worth the wait.
When to start harvesting:
Patience is key here. Do not harvest any spears during the first two years after planting crowns or the first three years after planting seeds. This allows the plants to establish a strong root system, which is crucial for long-term productivity. After this establishment period, you can begin harvesting for a short period (about 2-3 weeks) in the spring. In subsequent years, you can extend the harvest period to 6-8 weeks.
How to harvest asparagus spears:
When the spears are about 6-8 inches tall and the tips are still tightly closed, they are ready to harvest. You can either cut or snap the spears.
- Cutting: Use a sharp knife to cut the spear at ground level. This is the preferred method, as it minimizes damage to the crown.
- Snapping: You can also snap the spears by bending them near the base. They will naturally break at the tender point.
Harvesting frequency and duration:
During the harvest season, you can harvest spears every day or every other day, depending on the weather and growth rate. In warm weather, spears can grow several inches in a single day. It’s important to harvest regularly to encourage continued production. Once the spears become thin and spindly, it’s time to stop harvesting and allow the ferns to grow.
Post-harvest care:
After harvesting, wash the spears and store them in the refrigerator. To keep them fresh for longer, you can wrap the cut ends in a damp paper towel and store them in a plastic bag.
Harvesting your own asparagus is a truly rewarding experience. In the next section, I’ll discuss how to extend the asparagus season and ensure your patch remains productive for years to come.
Okay, here’s the next section, including the image as requested:
Extending the Asparagus Season
While asparagus is typically harvested in the spring, there are a few things you can do to extend the season and ensure your patch remains productive for many years.
Cutting back ferns in the fall:
In the fall, after the ferns have turned yellow and brown, you can cut them back to about 2 inches above the ground. This helps to remove any potential disease spores and prepares the plants for winter dormancy. I usually wait until the first hard frost has killed off the foliage before cutting back the ferns. This ensures that the plants have had ample time to photosynthesize and store energy for the following spring. It’s a bit like giving your asparagus a good “haircut” before winter.
Winterizing asparagus beds:
In colder climates, it’s beneficial to mulch your asparagus beds with a thick layer of organic material, such as straw, compost, or even shredded leaves, in the fall. This helps to insulate the crowns and protect them from freezing temperatures. I’ve found that a 4-6 inch layer of mulch is sufficient in most areas. This blanket of protection helps to prevent frost heave, which can damage the crowns.
Encouraging early spring growth:
In the early spring, as the weather begins to warm, you can remove the winter mulch. Be careful not to disturb the crowns while doing so. You can also apply a side-dressing of fertilizer to encourage new growth. I sometimes use a dark-colored plastic mulch to warm the soil earlier in the spring, which can encourage the spears to emerge a bit sooner. This is a trick I learned from a local asparagus farmer, and it can make a noticeable difference.
By following these tips, you can extend your asparagus harvest and enjoy fresh spears for a longer period. It’s all about providing the right conditions for your asparagus to thrive throughout the year. Now, let’s address some of the most frequently asked questions I get about growing asparagus.
FAQs
I’ve compiled a list of frequently asked questions that I often receive from fellow gardeners about growing asparagus. I’ve tried to address the long-tail keywords we discussed earlier, providing specific and helpful answers:
How to grow asparagus vegetable from seed at home?
Growing asparagus from seed requires patience, as it takes an extra year or two before you can harvest. Start by soaking the seeds in warm water for 24 hours to improve germination. Then, sow them indoors 8-10 weeks before the last frost, about 1 inch deep in seed-starting mix. Keep the soil moist and warm. Once the seedlings are a few inches tall, transplant them into individual pots. After the danger of frost has passed, you can harden them off and transplant them into your prepared asparagus bed.
How to grow asparagus vegetable in containers on a patio?
Growing asparagus in containers is possible, but it requires large containers (at least 18 inches deep and wide) to accommodate the extensive root system. Use a well-draining potting mix and ensure the container has drainage holes. Place the container in a sunny location and water regularly. You’ll also need to fertilize more frequently than you would with in-ground plantings.
How to grow asparagus vegetable in clay soil successfully?
Clay soil can be challenging for asparagus, as it tends to retain water and drain poorly. To improve clay soil, amend it with large amounts of organic matter, such as compost, well-rotted manure, or leaf mold. This will improve drainage and aeration. You can also create raised beds or plant on mounds to further improve drainage.
How to grow asparagus vegetable and prevent asparagus beetles naturally?
Asparagus beetles can be a nuisance. You can handpick the beetles and their larvae off the plants. Introducing beneficial insects like ladybugs and lacewings can also help. Neem oil is an effective organic insecticide that can be used to control infestations.
How to grow asparagus vegetable for continuous harvest throughout the season?
While you can’t have a continuous harvest year-round, you can maximize your harvest period by properly caring for your asparagus patch. This includes regular watering, fertilizing, and weed control. Harvesting spears regularly during the harvest season encourages continued production.
How to grow asparagus vegetable in zone 5 with cold winters?
In zone 5, winter protection is essential. After cutting back the ferns in the fall, apply a thick layer of mulch (4-6 inches) to insulate the crowns. This will protect them from freezing temperatures and prevent frost heave.
How to grow asparagus vegetable without using chemical fertilizers?
You can successfully grow asparagus without chemical fertilizers by using organic options such as compost, well-rotted manure, bone meal, and blood meal. These provide essential nutrients and improve soil health.
How to grow asparagus vegetable from crowns the first year?
When planting crowns, it’s crucial to be patient. Do not harvest any spears during the first year. This allows the crowns to establish a strong root system. Focus on providing consistent watering, weeding, and fertilizing.
How to grow asparagus vegetable and protect it from frost damage?
Protecting young asparagus plants from late spring frosts is important. You can cover the emerging spears with blankets or row covers when frost is predicted.
How to grow asparagus vegetable and companion plants for best results?
Companion planting can be beneficial for asparagus. Some good companion plants include tomatoes, basil, parsley, and marigolds. These plants can help deter pests and improve growth.
Conclusion
Growing your own asparagus is a rewarding endeavor that provides fresh, delicious spears for many years. While it requires patience and a bit of planning, the process is entirely achievable for any home gardener. From preparing the bed and choosing the right plants to caring for your patch and harvesting the spears, each step contributes to a thriving asparagus garden.
I’ve shared my experiences and insights in this guide, covering everything from the basics of asparagus cultivation to specific tips for different situations, like growing in clay soil or dealing with pests. I hope that by following these steps, you feel empowered to start your own asparagus patch and enjoy the taste of homegrown goodness.
Here’s a quick recap of the key steps to growing asparagus:
- Plan and Prepare: Choose a sunny location with well-drained soil. Amend the soil with organic matter and prepare trenches for planting.
- Choose Your Plants: Decide whether to start from seeds or crowns. Source high-quality crowns from a reputable nursery if you choose that route.
- Plant Carefully: Plant crowns in trenches, gradually covering them with soil as they grow. If starting from seed, start indoors or direct sow after the last frost.
- Provide Consistent Care: Water regularly, fertilize appropriately, and keep the bed weed-free. Monitor for pests and diseases and take appropriate action.
- Harvest with Patience: Don’t harvest any spears during the first two to three years. Once established, harvest spears regularly during the spring harvest season.
- Maintain Your Patch: Cut back ferns in the fall and mulch for winter protection. Encourage early spring growth by removing mulch and fertilizing.
- Enjoy the Rewards: Savor the taste of fresh, homegrown asparagus and enjoy the long-term benefits of your productive asparagus patch.
Growing asparagus is a long-term investment, but it’s an investment that keeps on giving. With proper care and attention, your asparagus patch will provide you with delicious spears for years to come. I encourage you to give it a try. There’s nothing quite like the taste of asparagus fresh from your own garden. It’s a taste of spring, a taste of accomplishment, and a taste that I know you will thoroughly enjoy.


