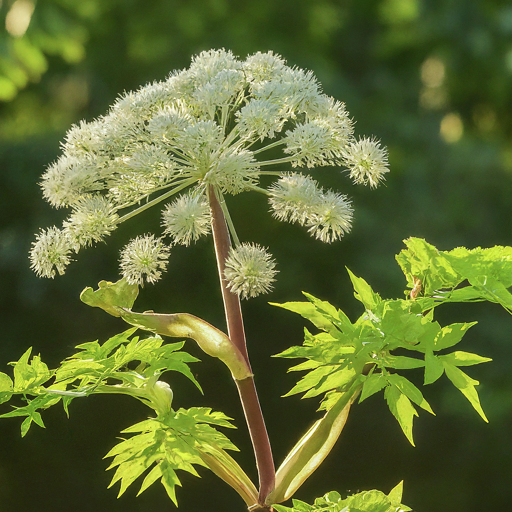
Angelica, a towering biennial herb with a rich history and unique flavor profile, adds a touch of grandeur to any garden. Its towering stalks, reaching up to eight feet tall, are adorned with vibrant green, fern-like leaves and crowned with delicate white flower clusters. Beyond its ornamental appeal, Angelica boasts a range of culinary and medicinal uses, making it a valuable addition to any gardener’s repertoire.
This comprehensive guide will equip you with the knowledge and confidence to cultivate thriving Angelica in your garden, even if you’re a complete novice. We’ll delve into every step of the process, from selecting the perfect variety to harvesting your Angelica bounty and (bonus!) explore strategies for overwintering this majestic herb.
Choosing the Right Angelica Variety (Angelica archangelica vs. Angelica gigas)
Angelica comes in two primary varieties, each with distinct characteristics:
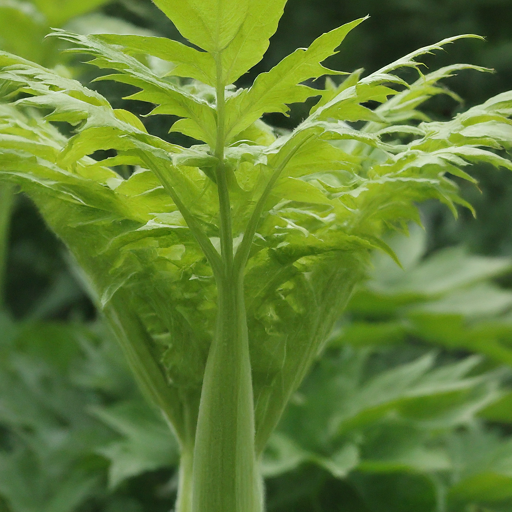
Angelica archangelica

- Appearance: This is the more common variety, reaching heights of 4-8 feet with slender, green, hollow stems and large, fern-like leaves. White flower clusters bloom in its second year.
- Flavor: Angelica archangelica possesses a complex flavor profile, often described as musky, citrusy, and slightly bitter.
- Uses: Primarily used for its medicinal properties, with the roots, stems, and seeds finding application in teas, tinctures, and culinary dishes for digestive and respiratory ailments.
Angelica gigas
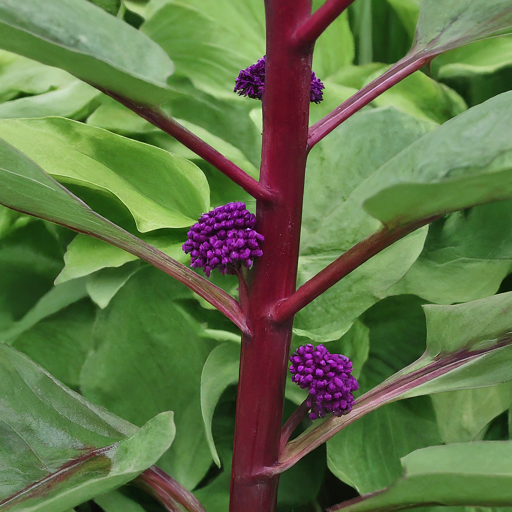
- Appearance: This showstopping variety boasts impressive stature, reaching heights of 6-10 feet with robust, reddish-purple stems and large, green leaves. Deep purple flower clusters add a dramatic touch.
- Flavor: The flavor of Angelica gigas is milder and sweeter compared to Angelica archangelica, with some hints of celery and spice.
- Uses: Primarily valued for its culinary applications, with the stems and leaves finding use in candied snacks, desserts, and savory dishes.
Sowing Angelica Seeds or Planting Angelica Starts
Angelica can be cultivated from seeds or established transplants (starts). Both methods have their merits, allowing you to choose the approach that best suits your gardening experience and timeline.
Sowing Angelica Seeds
- Sowing Time: Sow Angelica seeds directly outdoors in late fall (around October-November in most climates) or early spring (around March-April) after the danger of frost has passed.
- Seed Preparation: Angelica seeds benefit from cold stratification, a process that mimics winter conditions and improves germination rates. Simply place the seeds in a moist paper towel or potting mix and store them in your refrigerator for 4-6 weeks before sowing.
- Sowing Process: Sow the seeds directly into prepared garden beds or seed trays filled with a well-draining seed starting mix. Gently press the seeds into the soil surface and lightly cover them with a thin layer of soil. Water the seeds thoroughly and maintain consistent moisture throughout the germination period.
Planting Angelica Starts
- Planting Time: Purchase established Angelica starts from a reputable nursery in early spring.
- Planting Process: Choose a well-draining planting location that receives ample sunlight (at least 6-8 hours daily). Prepare the soil by digging a hole large enough to accommodate the root ball of the transplant. Gently remove the Angelica start from its container, loosen any tightly bound roots, and place it in the prepared hole. Backfill the hole with soil, ensuring the plant sits at the same level as it did in the container. Water the transplant thoroughly to settle the soil and encourage root establishment.
Selecting the Perfect Location for Angelica
Angelica thrives in locations that provide the ideal balance of sunlight and moisture. Here’s what to consider when choosing a planting site:
- Sunlight: Angelica requires full sun, receiving at least 6-8 hours of direct sunlight daily. However, in very hot climates, some afternoon shade might be beneficial to prevent scorching of the leaves.
- Soil: Select a well-draining, fertile soil rich in organic matter. Sandy loam soils are ideal. If your soil is heavy clay, amend it with compost or aged manure to improve drainage and aeration.
- Moisture: Angelica appreciates consistent moisture throughout the growing season. However, it’s crucial to avoid waterlogged conditions, which can lead to root rot.
Preparing the Soil for Angelica Growth
Angelica thrives in a rich, well-draining environment. Here’s how to ensure your soil provides the optimal conditions for your Angelica to flourish:
- Soil Testing: Before planting, consider conducting a soil test to determine your soil’s pH level and nutrient content. Ideally, Angelica prefers a slightly acidic soil with a pH between 6.0 and 6.8.
- Soil Amendments: If your soil test reveals a pH outside the preferred range, you can take steps to adjust it. To increase acidity, add elements like elemental sulfur or peat moss. To raise the pH, incorporate lime or wood ash.
- Compost Incorporation: Amending your soil with generous amounts of aged compost or well-rotted manure will enrich the soil with essential nutrients, improve drainage, and enhance moisture retention – all crucial factors for successful Angelica growth.
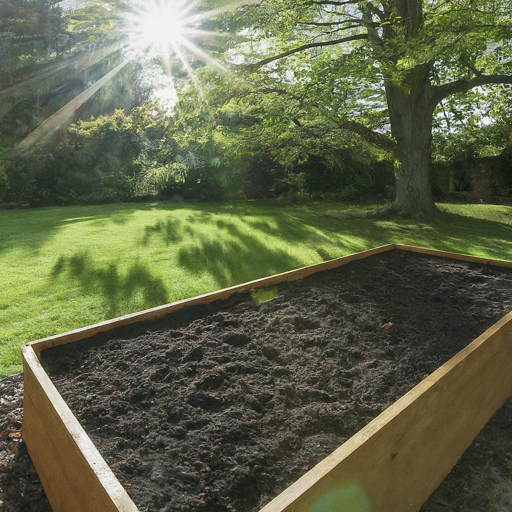
- Raised Beds: In areas with poor drainage or heavy clay soils, consider planting your Angelica in raised beds. This allows you to create an ideal growing environment with well-draining, fertile soil.
Caring for Your Angelica Plants (Watering, Weeding, and Mulching)
Once your Angelica is established, providing proper ongoing care is essential to ensure healthy, vigorous growth:
Watering
- Angelica requires consistent moisture throughout the growing season, especially during hot, dry periods. Aim to keep the soil evenly moist but not waterlogged.
- Deep watering, allowing water to penetrate the root zone, is more beneficial than frequent shallow watering.
- During periods of extended drought, consider providing supplemental irrigation to maintain consistent moisture levels.
Weeding
- Regularly remove weeds competing with your Angelica plants for water, nutrients, and sunlight.
- Hand weeding is the most effective method for young Angelica plants. As the plants mature, a layer of mulch can help suppress weed growth.
Mulching
- Apply a 2-3 inch layer of organic mulch around the base of your Angelica plants after they are established. Mulch helps retain moisture, regulate soil temperature, and suppress weeds.
- Suitable mulching materials include shredded bark, wood chips, or compost. Be sure to leave a few inches of space clear around the base of the plant to prevent stem rot.
Angelica Plant Spacing Requirements
| Angelica Variety | Row Spacing | Plant Spacing Within Row |
| Angelica archangelica | 24-36 inches | 18-24 inches |
| Angelica gigas | 36-48 inches | 24-30 inches |
Harvesting Angelica Stalks, Seeds, and Roots (When and How)
Angelica offers a bounty of harvests throughout its growth cycle. Here’s a breakdown of harvesting each part of the plant at the optimal time:
Angelica Stalks
- Harvest Time: Harvest Angelica stalks in the first year before they flower, typically in late summer or early fall. The stalks are most flavorful and tender when young and immature.
- Harvest Method: Use sharp pruners or shears to cut the stalks at the base of the plant. Aim to harvest the outer stalks first, allowing the central stalk to develop and produce flowers in the second year (if desired).
Angelica Seeds
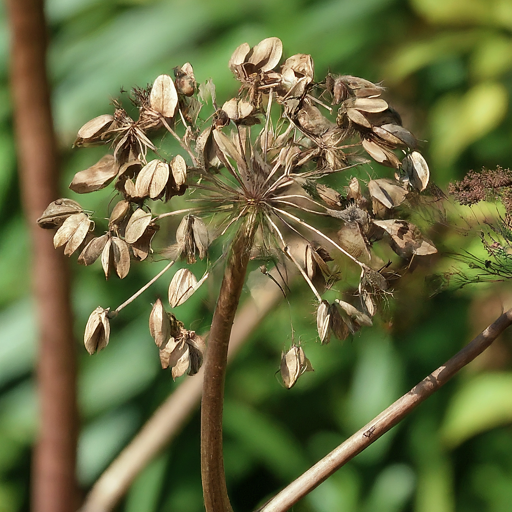
- Harvest Time: Harvest Angelica seeds in the second year after the plant flowers and produces seed pods. The seeds are ready for harvest when they turn brown and dry, typically in late summer or early fall.
- Harvest Method: Carefully cut the seed heads from the stalks and allow them to dry completely in a well-ventilated location out of direct sunlight. Once dry, gently break open the seed pods to release the seeds.
Angelica Roots
- Harvest Time: Harvest Angelica roots in the fall of the second year, after the plant has flowered and gone to seed.
- Harvest Method: Carefully dig up the entire Angelica plant using a spade or garden fork. Wash the roots thoroughly to remove soil and debris. Slice the roots into smaller sections for easier drying.
Angelica Drying Recommendations
| Plant Part | Drying Method | Drying Time |
| Stalks | Slice stalks into thin pieces and dry in a well-ventilated location out of direct sunlight. | 7-10 days |
| Seeds | Spread seeds out in a single layer on a drying screen in a well-ventilated location out of direct sunlight. | 1-2 weeks |
| Roots | Slice roots into thin pieces and dry in a well-ventilated location out of direct sunlight. | 2-3 weeks |
Overwintering Angelica for Continued Harvest (Bonus Section)
Angelica, despite being a biennial, can be coaxed into surviving a second winter in some climates with proper care. This bonus section provides strategies for extending your Angelica harvest:
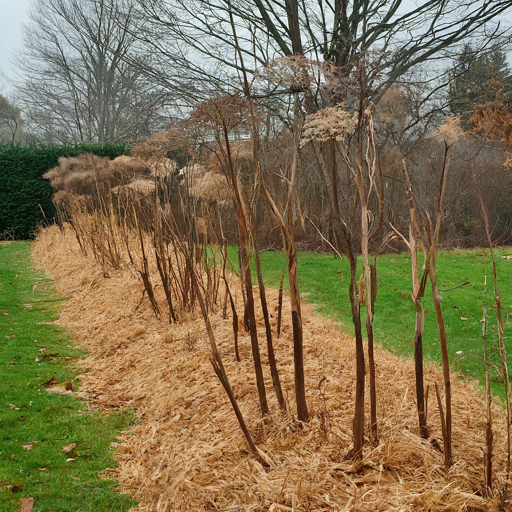
- Climate Considerations: This technique is most successful in zones 5 and above, where winters are relatively mild. In colder climates, it’s best to treat Angelica as a true biennial and replant each year.
- Fall Preparations: In late fall, after the first frost, cut back the Angelica stalks to about 6 inches above the ground. Apply a thick layer of mulch (around 4-6 inches) around the base of the plant to insulate the roots and crown from harsh winter temperatures. Suitable mulch materials include straw, shredded leaves, or evergreen boughs.
- Spring Care: In early spring, once the danger of frost has passed, carefully remove the winter mulch. Monitor the soil moisture and water as needed to prevent the plant from drying out. With proper care, your overwintered Angelica should produce a fresh crop of stalks in the second year.
By following these tips, you can enjoy the rewards of Angelica for a longer period, maximizing your harvest potential.
Conclusion: The Majesty and Bounty of Angelica in Your Garden
Angelica, with its towering stature, captivating flowers, and unique flavor profile, adds a touch of grandeur and versatility to any garden. This comprehensive guide has equipped you with the knowledge and confidence to cultivate thriving Angelica, from selecting the perfect variety to harvesting its bounty and (bonus!) even extending its lifespan through overwintering strategies.
Remember, with consistent care and attention, your Angelica plants will flourish, rewarding you with a season (or even two!) of culinary and medicinal delights. So, get ready to embrace the majesty and bounty of Angelica in your garden!