Have you ever admired the thick, fleshy leaves of an aloe vera plant, perhaps even used its soothing gel on a sunburn, and thought, “I’d love to grow one of those”? You’re not alone. Many people are drawn to this versatile succulent, not only for its aesthetic appeal but also for its well-known medicinal properties. However, sometimes, even with the best intentions, our aloe vera plants might not thrive as we’d hoped. They might become droopy, develop brown spots, or simply refuse to grow. It can be frustrating to see your plant struggling, especially when you know how beneficial and easy to care for they are when you know how. I understand this frustration. I’ve been there myself, nursing a sad-looking aloe vera back to health. That’s why I’ve put together this comprehensive guide on how to grow aloe vera herbs, so you can confidently cultivate these amazing plants and enjoy their many benefits. This guide provides actionable advice on growing aloe vera indoors, aloe vera plant care, and other aspects of aloe vera cultivation.
Aloe vera, scientifically known as Aloe barbadensis miller, is a succulent plant species from the Asphodelaceae family. It’s native to the Arabian Peninsula, but it’s now cultivated worldwide. Aloe vera has been used for centuries for its medicinal properties, particularly the clear gel found within its leaves. You’ve probably seen it in countless skincare products, and for good reason. From soothing minor burns and sunburns to moisturizing dry skin, aloe vera gel has a wide range of applications. But beyond its practical uses, aloe vera is also a beautiful and low-maintenance houseplant that can add a touch of greenery to your home.
In this guide, I will share my knowledge and experience on how to grow aloe vera herbs successfully. I’ll cover everything from choosing the right pot and soil to watering, fertilizing, and propagating your plants. You’ll learn how to create the ideal environment for your aloe vera to flourish, whether you’re growing it indoors on a windowsill or in a container on your patio. I’ll also address common problems that aloe vera growers face, such as overwatering, pests, and diseases, providing you with practical solutions to keep your plants healthy and happy. Whether you’re a seasoned gardener or just starting your plant journey, I’m confident that you’ll find this guide helpful in your quest to grow thriving aloe vera herbs. So, let’s dive in and unlock the secrets to cultivating these remarkable plants. This guide will cover how to grow aloe vera herbs, growing aloe vera indoors, aloe vera plant care, and other aspects of aloe vera cultivation.
Understanding Aloe Vera: More Than Just a Pretty Plant
Beyond its popularity as a soothing balm for sunburns, aloe vera possesses a rich history and fascinating botanical characteristics. I’ve always found it interesting how this seemingly simple plant holds so much complexity. You might be surprised to learn just how much there is to know about this remarkable succulent.
Scientifically classified as Aloe barbadensis miller, aloe vera belongs to the Asphodelaceae family, a family of flowering plants that also includes lilies and asparagus. This succulent is native to the Arabian Peninsula, thriving in arid and semi-arid climates. This origin explains its remarkable ability to store water within its thick, fleshy leaves, a characteristic that makes it incredibly resilient and relatively easy to care for, even if you sometimes forget to water it (we’ve all been there!).
Aloe vera’s history is as rich as its botanical makeup. Its medicinal use dates back thousands of years, with evidence of its use found in ancient Egyptian texts. Cleopatra herself is said to have used aloe vera in her beauty regime. I often think about this when I’m tending to my own aloe vera plants; it’s like I’m participating in a tradition that spans millennia.
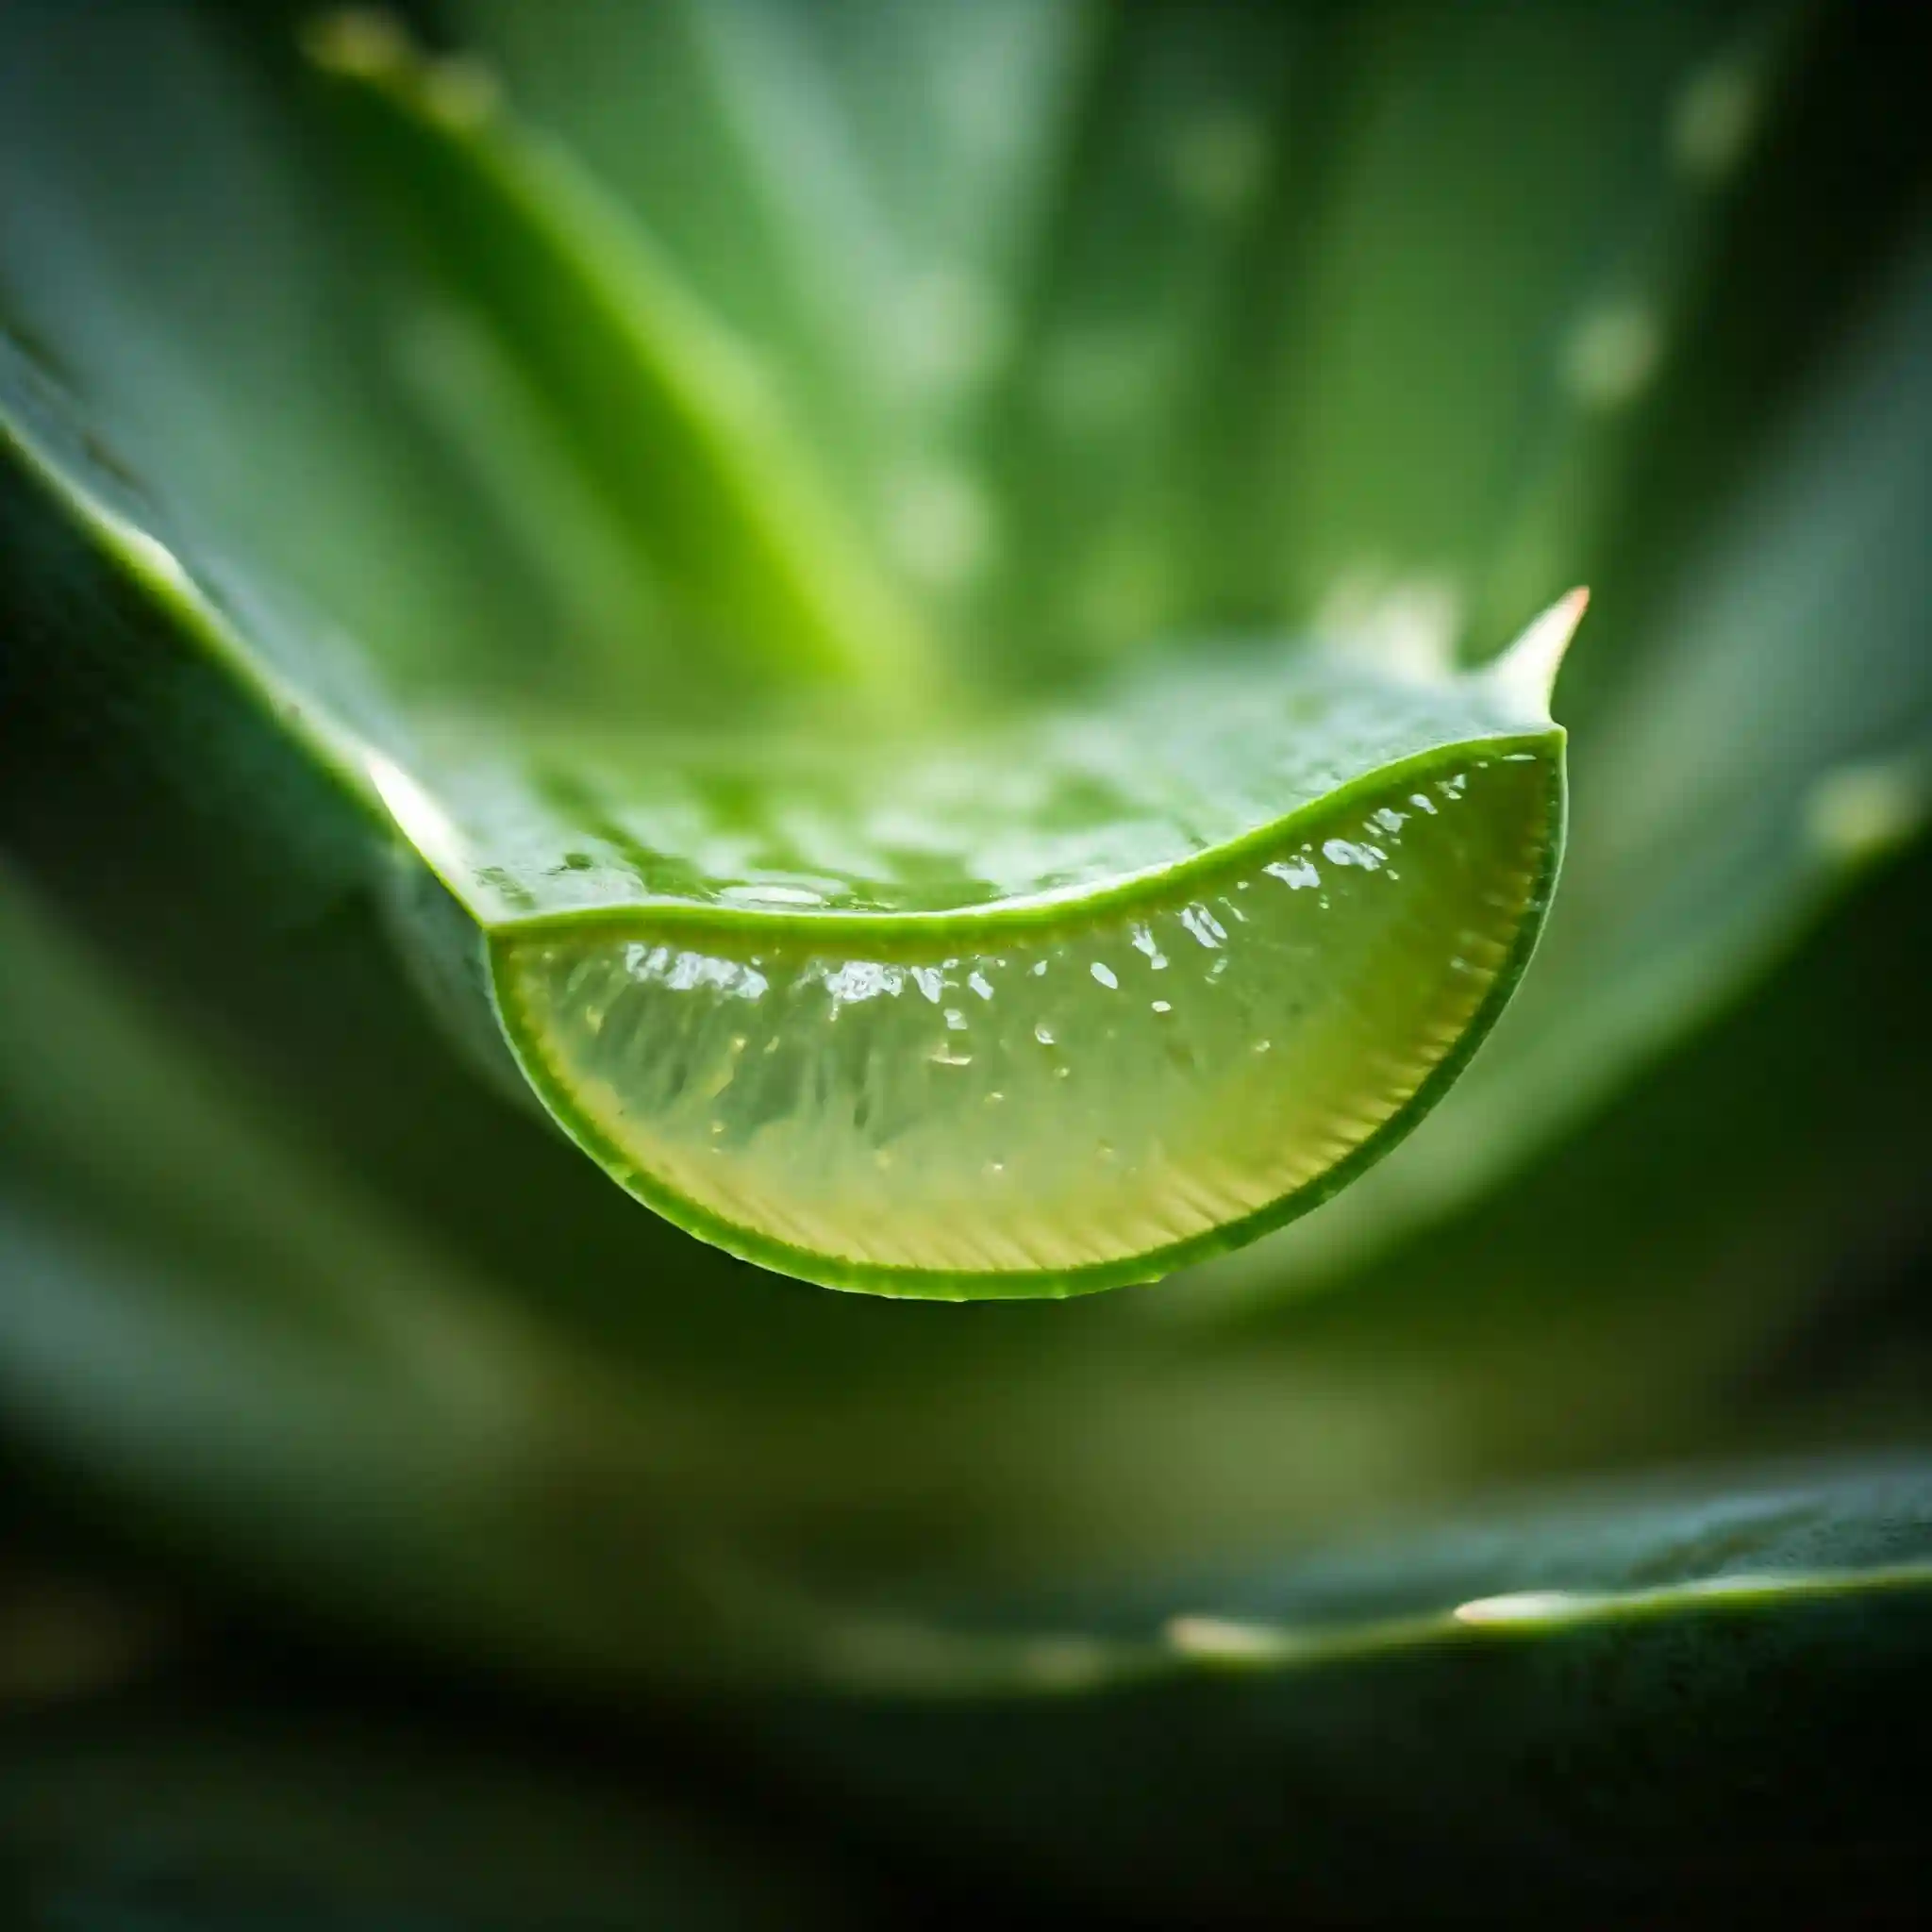
While you likely know aloe vera for its soothing gel, it’s essential to understand that this gel is just one part of the plant’s complex structure. The leaf is composed of several layers:
- The outer layer (rind): This is the tough, green outer skin of the leaf that protects the inner layers.
- The inner layer (latex): This layer contains a bitter, yellowish sap known as aloe latex, which has laxative properties.
- The innermost layer (gel): This is the clear, jelly-like substance that we commonly associate with aloe vera’s medicinal uses. It’s rich in vitamins, minerals, amino acids, and antioxidants.
Aloe Vera Composition
| Layer | Characteristics |
| Outer Layer | Tough, green protective skin |
| Inner Layer | Contains bitter, yellowish sap (aloe latex) |
| Innermost | Clear gel rich in beneficial compounds |
Understanding these different layers is crucial when you’re harvesting aloe vera gel. You want to extract the clear gel while avoiding the bitter latex. I’ll cover this in more detail later in the guide.
Aloe vera’s classification as a succulent is also significant. Succulents are plants that have adapted to survive in arid environments by storing water in their leaves, stems, or roots. This adaptation makes aloe vera incredibly drought-tolerant, but it also means that it’s susceptible to overwatering. I’ve learned this lesson the hard way, losing a few aloe vera plants to root rot before I understood their watering needs.
Key Characteristics of Succulents
- Water storage in leaves, stems, or roots
- Adaptation to arid environments
- Susceptibility to overwatering
Knowing that aloe vera is a succulent will significantly influence how you care for it. You’ll need to provide it with well-draining soil, avoid overwatering, and ensure it gets plenty of sunlight.
How to Plant Aloe Vera Herbs: Getting Started Right
Planting your aloe vera correctly is the foundation for a healthy and thriving plant. I’ve found that taking the time to set things up properly from the start makes all the difference in the long run. You wouldn’t build a house on a shaky foundation, and the same principle applies to your aloe vera. Let’s explore the key factors to consider when planting your aloe vera herbs.
Choosing the Right Pot
The pot you select plays a crucial role in your aloe vera’s well-being. Here are some essential considerations:
- Drainage Holes: Absolutely Essential: This is non-negotiable. Aloe vera is highly susceptible to root rot, a condition caused by excessive moisture around the roots. Drainage holes allow excess water to escape, preventing waterlogging. I cannot stress this enough – drainage is paramount.
- Suitable Pot Materials:
- Terracotta Pots: These are my personal favorite. Terracotta is porous, which means it allows air and moisture to pass through the walls of the pot. This promotes healthy root growth and helps the soil dry out more quickly.
- Plastic Pots: These are a more affordable option, but they don’t offer the same breathability as terracotta. If you choose a plastic pot, make sure it has ample drainage holes.
- Pot Size Considerations:
- Start with a pot that’s slightly larger than the root ball of your aloe vera pup or cutting.
- As your plant grows, you’ll need to repot it into a larger container. I usually recommend repotting every 1-2 years, or when the roots start to circle around the bottom of the pot.
Selecting the Ideal Soil Mix
Just as important as the pot is the soil mix you use. Aloe vera thrives in well-draining soil that mimics its natural arid environment.
- Importance of Well-Draining Soil: This is crucial for preventing root rot. The soil should allow water to drain quickly, preventing the roots from sitting in soggy conditions.
- DIY Soil Mix Recipe: I’ve found that a simple DIY mix works wonders:
- 1 part cactus mix
- 1 part perlite
- 1 part coarse sand
- Commercial Succulent/Cactus Mixes: If you prefer a ready-made option, commercial succulent or cactus mixes are readily available at most garden centers. These mixes are specifically formulated to provide the drainage that aloe vera needs.
Planting Methods
There are a few different ways to plant aloe vera:
- Planting Aloe Vera Pups (Offsets): This is the most common and easiest method. Pups are small offshoots that grow from the base of the mother plant.
- Gently remove the pup from the mother plant, ensuring you include some roots.
- Allow the pup to callous over for a few days before planting. This helps prevent infection.
- Plant the pup in your prepared pot and soil mix.
- Planting Aloe Vera Cuttings (Less Common): While less reliable than pups, you can propagate aloe vera from leaf cuttings:
- Cut a healthy leaf from the mother plant.
- Allow the cut end to callous over for several days.
- Plant the cutting in moist soil mix.
- Starting from Seeds (Rarely Done at Home): This method is more challenging and time-consuming, and it’s not typically recommended for home gardeners.
By following these planting guidelines, you’ll give your aloe vera a strong start and set it up for healthy growth. In the next section, I’ll discuss how to create the perfect environment for your aloe vera to thrive indoors.
How to Grow Aloe Vera herbs indoors: Creating the Perfect Environment
Once you’ve planted your aloe vera, creating the right indoor environment is crucial for its continued health and growth. I’ve learned that mimicking their natural habitat as closely as possible is the key to success. You want to provide them with the right balance of light, water, temperature, and humidity. Let’s break down each of these factors:
Light Requirements
Aloe vera thrives in bright, indirect sunlight. This means they need plenty of light, but they don’t want to be scorched by direct sunbeams, especially during the hottest part of the day.
- Importance of Bright, Indirect Sunlight: Think of it like this: aloe vera loves to bask in the light, but it prefers to do so under a gentle shade. Direct sunlight can cause sunburn, leading to brown or reddish discoloration on the leaves.
- Ideal Placement: An east or west-facing window is usually ideal. These locations provide ample light throughout the day without the intensity of direct midday sun. A south-facing window can also work, but you might need to diffuse the light with a sheer curtain, especially during the summer months.
- Signs of Insufficient Light: If your aloe vera isn’t getting enough light, you’ll notice its leaves becoming pale, thin, and elongated. The plant might also start to lean towards the light source. I’ve seen this happen when I’ve placed my aloe vera too far from a window. It’s a clear sign that it’s searching for more light.
Watering Techniques
Watering is perhaps the trickiest aspect of aloe vera care. Because they’re succulents, they store water in their leaves, making them prone to overwatering.
- “Soak and Dry” Method: This is the best approach for watering aloe vera. Water thoroughly until water drains out of the drainage holes, then allow the soil to dry out completely before watering again. I usually check the soil with my finger – if the top inch or two is dry, it’s time to water.
- Frequency of Watering: The frequency will vary depending on the time of year, the pot material, and the humidity levels in your home. During the active growing season (spring and summer), you might need to water every 2-3 weeks. In the dormant season (fall and winter), you can reduce watering to once a month or even less.
- Avoiding Overwatering and Root Rot: This is the most common mistake I see people make with aloe vera. Overwatering leads to root rot, a condition where the roots decay due to lack of oxygen. Signs of overwatering include soft, mushy leaves, a drooping plant, and a foul odor coming from the soil. If you suspect root rot, you’ll need to repot your aloe vera with fresh, dry soil and remove any affected roots.
Temperature and Humidity
Aloe vera prefers warm temperatures and low to moderate humidity.
- Ideal Temperature Range: Aim for temperatures between 65°F and 80°F (18°C and 27°C). They can tolerate slightly cooler temperatures, but they don’t like frost.
- How to Manage Humidity Indoors: Most homes have sufficiently low humidity for aloe vera. If your home is particularly humid, you can improve air circulation by using a fan or opening a window.
Creating the Ideal Environment: A Summary
- Light: Bright, indirect sunlight
- Watering: “Soak and dry” method, infrequent watering
- Temperature: 65°F to 80°F (18°C to 27°C)
- Humidity: Low to moderate
By providing your aloe vera with these conditions, you’ll create a happy and healthy environment where it can thrive. In the next section, I’ll delve into the specifics of ongoing aloe vera plant care, including fertilizing, repotting, pest and disease management, and pruning.
Aloe Vera Plant Care: Nurturing Your Green Friend
Once your aloe vera is planted in the right environment, regular care is essential to keep it thriving. I’ve found that a little consistent attention goes a long way in ensuring your aloe vera stays healthy and vibrant. Let’s explore the key aspects of aloe vera plant care:
Fertilizing Aloe Vera
While aloe vera isn’t a heavy feeder, a little fertilizer can help it grow and stay healthy.
- When and How to Fertilize: I recommend fertilizing your aloe vera during the active growing season (spring and summer). You can use a balanced liquid fertilizer diluted to half strength. Apply the fertilizer after watering to avoid burning the roots.
- Type of Fertilizer to Use: A balanced liquid fertilizer with an NPK ratio of 10-10-10 or 20-20-20 is suitable. You can also use a fertilizer specifically formulated for succulents or cacti.
- Avoiding Over-Fertilization: This is crucial. Over-fertilizing can damage your aloe vera’s roots and lead to leaf burn. It’s always better to under-fertilize than to over-fertilize.
Repotting Aloe Vera
As your aloe vera grows, it will eventually outgrow its pot.
- When to Repot: You’ll know it’s time to repot when the roots start to circle around the bottom of the pot or when the plant becomes top-heavy. I usually recommend repotting every 1-2 years.
- Choosing a Larger Pot: Select a pot that’s one size larger than the current pot. Make sure it has drainage holes.
- Repotting Process: Gently remove the aloe vera from its current pot, loosen the root ball, and place it in the new pot with fresh potting mix.
Pest and Disease Management
Aloe vera is relatively pest-free, but it can occasionally be affected by mealybugs or scale insects.
- Common Pests: Mealybugs are small, white, cottony insects that suck sap from the leaves. Scale insects are small, brown, armored insects that attach themselves to the leaves and stems.
- Natural Pest Control Methods: You can remove mealybugs and scale insects by hand using a cotton swab dipped in rubbing alcohol. You can also use insecticidal soap or neem oil.
- Recognizing and Treating Diseases: The most common disease that affects aloe vera is root rot, which is caused by overwatering. You can prevent root rot by providing well-draining soil and avoiding overwatering.
Pruning Aloe Vera
Pruning is essential for removing dead or damaged leaves and for harvesting aloe vera gel.
- Removing Dead or Damaged Leaves: Use a sharp knife or scissors to remove any dead, damaged, or discolored leaves. Cut the leaves close to the base of the plant.
- How to Harvest Aloe Vera Gel: Select a mature outer leaf. Cut the leaf close to the base of the plant. Allow the yellow sap to drain out. Then, slice off the spiky edges and the top layer of the leaf to expose the clear gel. You can then scoop out the gel with a spoon.
By following these care tips, you’ll help your aloe vera thrive and enjoy its many benefits. In the next section, I’ll discuss how to propagate aloe vera, allowing you to expand your collection and share these amazing plants with friends and family.
Propagating Aloe Vera: Expanding Your Collection
Propagating aloe vera is a rewarding way to expand your collection and share these beneficial plants with friends and family. I’ve found that it’s surprisingly easy to create new aloe vera plants from existing ones, and it’s a great way to ensure you always have a supply of this versatile succulent. There are two main methods of propagation: from pups (offsets) and from leaf cuttings. Let’s explore each method in detail:
Propagating from Pups (Offsets)
This is the most common and straightforward method of propagating aloe vera. Pups are small offshoots that grow from the base of the mother plant.
- How to Separate Pups from the Mother Plant:
- Carefully remove the mother plant from its pot.
- Gently loosen the soil around the base of the plant to expose the pups.
- Using a sharp knife or scissors, carefully separate the pups from the mother plant, ensuring each pup has some roots.
- Allow the pups to callous over for a few days before planting. This helps prevent infection.
- Planting the Pups in New Pots:
- Once the pups have calloused over, plant them in small pots filled with well-draining potting mix.
- Water the pups lightly and place them in a bright location with indirect sunlight.
- Keep the soil moist but not soggy.
- The pups should start to root within a few weeks.
Propagating from Cuttings (Less Common)
While less reliable than pups, you can also propagate aloe vera from leaf cuttings.
- How to Take a Leaf Cutting:
- Select a healthy, mature leaf from the mother plant.
- Using a sharp knife, make a clean cut near the base of the leaf.
- Allow the cut end of the leaf to callous over for several days.
- Callousing and Rooting the Cutting:
- Once the cutting has calloused over, you can plant it in a small pot filled with moist potting mix.
- Alternatively, you can place the cutting in a glass of water, ensuring only the cut end is submerged.
- Change the water regularly.
- Roots should start to develop within a few weeks.
- Once the roots are a few inches long, you can plant the cutting in a pot.
Choosing the Right Propagation Method
- Pups: This is the easiest and most reliable method, especially for beginners.
- Leaf Cuttings: This method is less reliable, but it can be a good option if your aloe vera plant doesn’t produce pups.
Tips for Successful Propagation
- Use a sharp, clean knife or scissors to prevent the spread of disease.
- Allow the pups or cuttings to callous over before planting to prevent infection.
- Use well-draining potting mix to prevent root rot.
- Provide bright, indirect sunlight.
- Keep the soil moist but not soggy.
By following these propagation tips, you can easily expand your aloe vera collection and enjoy the many benefits of these amazing plants. In the next section, I’ll discuss how to troubleshoot common aloe vera problems, such as overwatering, underwatering, sunburn, and pest infestations.
Troubleshooting Common Aloe Vera Problems
Even with the best care, you might encounter some issues while growing aloe vera. I’ve certainly had my share of challenges, from overwatering mishaps to unexpected pest infestations. But don’t worry, most aloe vera problems are easily fixable if you know what to look for. Let’s dive into some common issues and how to address them:
Overwatering and Root Rot
This is the most frequent problem I see with aloe vera, and it’s something I’ve struggled with myself in the past. Because aloe vera stores water in its leaves, it’s very susceptible to overwatering, which can lead to root rot.
- Symptoms:
- Soft, mushy leaves
- Drooping plant
- A foul odor coming from the soil
- Leaves turning translucent or brown at the base
- Prevention:
- Use well-draining soil.
- Water only when the soil is completely dry.
- Ensure your pot has drainage holes.
- Treatment:
- Remove the plant from its pot.
- Carefully inspect the roots and remove any that are brown or mushy.
- Repot the plant in fresh, dry potting mix.
- Avoid watering for a few weeks to allow the roots to dry out.
Underwatering
While overwatering is more common, underwatering can also be a problem, especially if you live in a hot, dry climate.
- Symptoms:
- Leaves becoming thin and shriveled
- Leaves turning brown at the tips
- Soil pulling away from the sides of the pot
- Treatment:
- Water the plant thoroughly until water drains out of the drainage holes.
- Adjust your watering schedule to water more frequently, but still allow the soil to dry out between waterings.
Sunburn
Although aloe vera loves sunlight, direct sun exposure, especially during the hottest part of the day, can cause sunburn.
- Symptoms:
- Brown or reddish discoloration on the leaves
- Dry, crispy patches on the leaves
- Prevention:
- Provide bright, indirect sunlight.
- Avoid placing your aloe vera in direct sun, especially during the afternoon.
- Treatment:
- Move the plant to a location with less direct sunlight.
- Remove any severely sunburned leaves.
Pest Infestations
Aloe vera is relatively pest-free, but it can occasionally be affected by mealybugs or scale insects.
- Mealybugs: These are small, white, cottony insects that suck sap from the leaves.
- Treatment: Wipe them off with a cotton swab dipped in rubbing alcohol, or use insecticidal soap or neem oil.
- Scale Insects: These are small, brown, armored insects that attach themselves to the leaves and stems.
- Treatment: Scrape them off with a fingernail or use insecticidal soap or neem oil.
Other Potential Issues
- Leaf Spot Diseases: These are caused by fungal or bacterial infections.
- Treatment: Improve air circulation, avoid overhead watering, and use a fungicide if necessary.
- Cold Damage: Aloe vera is sensitive to frost.
- Prevention: Bring your aloe vera indoors during the winter months if you live in a cold climate.
By being aware of these common problems and their solutions, you can keep your aloe vera healthy and thriving for years to come. In the next section, I’ll answer some frequently asked questions about growing aloe vera, providing you with even more helpful tips and information.
Frequently Asked Questions (FAQ)
I often get asked various questions about growing aloe vera, and I’ve noticed certain themes pop up time and time again. So, I’ve compiled a list of the most frequently asked questions to provide you with quick and easy answers. I hope this section clarifies any lingering doubts you might have.
Watering and Soil:
- How often should I water my aloe vera? This is the million-dollar question! As I mentioned earlier, the “soak and dry” method is key. Water thoroughly when the top inch or two of soil is completely dry. The frequency will vary depending on the season, pot material, and your home’s humidity, but generally, every 2-3 weeks during the growing season and once a month or less during the dormant season is a good starting point.
- What kind of soil is best for aloe vera herbs? Well-draining soil is essential to prevent root rot. A mix of cactus mix, perlite, and coarse sand works perfectly. You can also use a commercial succulent or cactus mix.
- Can I use tap water to water my aloe vera? Yes, you can, but if your tap water is heavily chlorinated or contains a lot of minerals, it’s best to let it sit out for 24 hours before using it to allow the chlorine to evaporate.
Light and Location:
- How do I know if my aloe vera is getting enough sunlight? If the leaves are pale, thin, and elongated, or if the plant is leaning towards the light source, it’s not getting enough light. Move it to a brighter location with indirect sunlight.
- How to grow aloe vera herbs indoors in pots? Growing aloe vera indoors is quite simple, provided you give them bright, indirect light, well-draining soil, and avoid overwatering. Choose a pot with drainage holes, use a suitable potting mix, and place it near an east or west-facing window.
- How to grow aloe vera herbs in a small apartment garden? Aloe vera is perfect for small spaces because it doesn’t require a lot of room. A windowsill or a small balcony with indirect sunlight will do just fine.
Propagation and Growth:
- How to grow aloe vera herbs from cuttings successfully? While pups are the easiest method, you can try leaf cuttings. Let the cut end callous over for several days before planting it in moist soil or placing it in water to root.
- How to grow aloe vera herbs from pups for beginners? Separating pups is simple: remove the mother plant, gently separate the pups with roots, let them callous over, and plant them in small pots.
- How big will my aloe vera get? Indoors, aloe vera typically grows to about 1-2 feet tall and wide. The size will also depend on the variety and the size of the pot.
Specific Concerns:
- How to grow aloe vera herbs without getting root rot? The key is to avoid overwatering and use well-draining soil. Make sure your pot has drainage holes and allow the soil to dry out completely between waterings.
- How to grow aloe vera herbs for medicinal use at home? Growing aloe vera for its medicinal gel is the same as growing it for ornamental purposes. The key is to harvest mature leaves (outer leaves) and extract the clear gel while avoiding the yellow latex.
- Is aloe vera safe for pets? Aloe vera is considered toxic to dogs and cats if ingested. It can cause vomiting, diarrhea, and other gastrointestinal issues. If you have pets, it’s best to keep your aloe vera plants out of their reach.
Climate and Conditions:
- How to grow aloe vera herbs in different climate conditions? Aloe vera thrives in warm climates. If you live in a colder region, it’s best to grow it indoors. During the summer months, you can place it outdoors in a location with indirect sunlight.
I believe this FAQ section addresses the most common questions about growing aloe vera. If you have any other questions, feel free to leave a comment below!
Conclusion: Enjoying Your Thriving Aloe Vera
Growing aloe vera can be a truly rewarding experience. Not only do you get to enjoy the beauty of this unique succulent, but you also gain access to its amazing healing properties. I hope this guide has provided you with the knowledge and confidence you need to successfully cultivate your own aloe vera plants.
Let’s recap the key points:
- Choose the right pot: Ensure it has drainage holes and is made of a suitable material like terracotta or plastic.
- Use well-draining soil: A mix of cactus mix, perlite, and coarse sand is ideal.
- Provide bright, indirect sunlight: Avoid direct sun exposure, especially during the hottest part of the day.
- Water sparingly: Use the “soak and dry” method and avoid overwatering.
- Fertilize during the growing season: Use a balanced liquid fertilizer diluted to half strength.
- Repot as needed: When the plant outgrows its pot, repot it into a larger container.
- Watch out for pests and diseases: Take action if you notice any signs of infestation or disease.
- Propagate to expand your collection: Use pups or leaf cuttings to create new aloe vera plants.
Now that you’re armed with this information, I encourage you to start your own aloe vera growing journey. Whether you’re a seasoned gardener or just starting out, I’m confident that you can successfully grow these amazing plants.
Remember, every plant is unique, so pay attention to your aloe vera’s specific needs and adjust your care accordingly. With a little patience and attention, you’ll be rewarded with a thriving aloe vera plant that you can enjoy for years to come.
I’d love to hear about your experiences growing aloe vera. Feel free to share your tips, questions, or photos in the comments below!
Happy gardening!
