

Have you ever craved the fresh, zesty flavor of chives in your cooking, only to find yourself without them? It’s frustrating, isn’t it? You’re ready to whip up a delicious meal, but a key ingredient is missing. You rush to the store, only to find wilted, overpriced chives. I’ve been there, and I know how disappointing it can be. But what if I told you that you could have a constant supply of fresh chives right at your fingertips? Growing your own chives is not only possible, but it’s also incredibly easy and rewarding. In this guide, I’ll share my years of experience and knowledge to help you, even if you’re a complete beginner, learn how to grow chives successfully. Let’s transform your garden (or even your windowsill) into a chive haven!
How to Grow Chives from Seed
Starting chives from seed is a rewarding and cost-effective way to cultivate these flavorful herbs. It allows you to have a greater sense of connection to your food and can be a fun and engaging activity, especially for families with children. While it may seem daunting at first, growing chives from seed is a relatively straightforward process that even novice gardeners can master.
1. Choosing the Right Seeds:
Selecting high-quality seeds is crucial for a successful harvest. Opt for non-GMO seeds from reputable sources that specialize in herb seeds. Look for varieties that are well-suited to your climate and growing conditions. Some popular chive varieties include:
- Common Chives: This is the most common variety, known for its mild onion flavor.
- Giant Siberian Chives: This variety produces larger leaves and a stronger onion flavor.
- Garlic Chives: These chives have a distinct garlic flavor and can be used as a substitute for garlic in some dishes.
Consider purchasing certified organic seeds if you prioritize organic gardening practices.
2. Soil Preparation:
Chives thrive in well-draining soil that is rich in organic matter. If you are starting seeds indoors, use a high-quality seed starting mix. This type of mix is specifically formulated to provide the ideal balance of nutrients and drainage for germinating seeds.
If you are planting chives directly in your garden, prepare the soil by amending it with compost or well-rotted manure. This will improve soil structure, increase drainage, and provide essential nutrients for the developing chives. Till the soil to a depth of about 6-8 inches to ensure proper aeration.
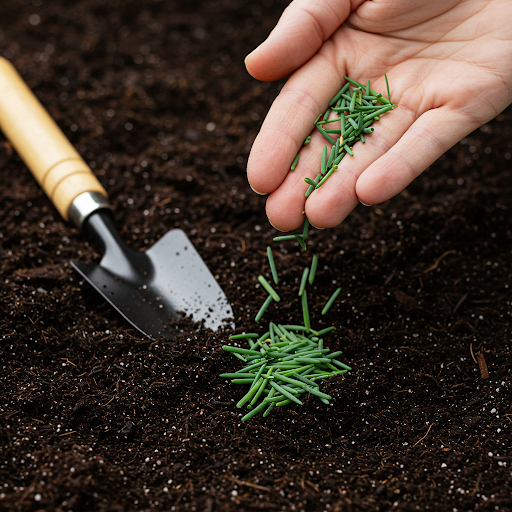
3. Sowing the Seeds:
- Timing: The best time to sow chive seeds depends on your climate. In most regions, early spring is an ideal time to start seeds indoors or directly in the garden.
- Method: Create shallow furrows in the soil, about ¼ inch deep. Sprinkle the seeds evenly along the furrows, spacing them about an inch apart.
- Covering: Gently cover the seeds with a thin layer of soil.
- Firming: Firm the soil gently to ensure good seed-to-soil contact.
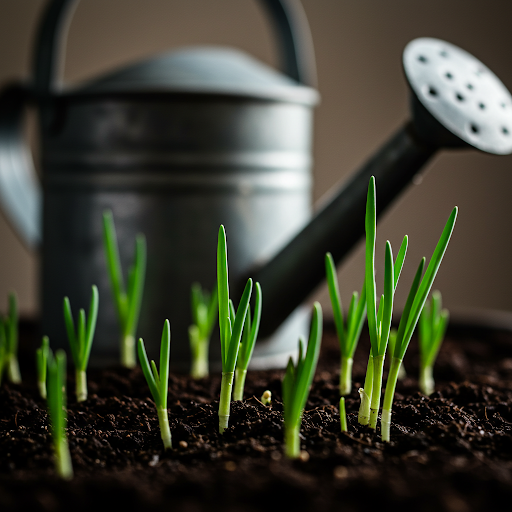
4. Watering:
Consistent moisture is crucial for successful seed germination. Water the seeds gently and thoroughly after sowing. Use a watering can with a fine mist setting to avoid disturbing the seeds.
- Frequency: Water regularly to keep the soil consistently moist, but avoid overwatering, which can lead to seed rot.
- Monitoring: Monitor the soil moisture levels daily, especially during hot and dry weather.
5. Sunlight:
Chives are sun-loving plants and require at least 6 hours of direct sunlight per day to thrive. If you are starting seeds indoors, place them on a sunny windowsill or under grow lights.
- Grow Lights: If you are using grow lights, position them a few inches above the seedlings and adjust the height as they grow.
- Sunlight Exposure: If you are planting chives directly in the garden, choose a sunny location with well-drained soil.
6. Thinning:
Once the seedlings have developed their first set of true leaves, it’s time to thin them out. This will give the remaining seedlings enough space to grow and develop strong root systems.
- Method: Use a pair of small scissors to carefully snip out the weaker seedlings, leaving the strongest ones in place.
- Spacing: Thin the seedlings to a distance of about 4-6 inches apart.
7. Transplanting (Optional):
If you started your chives indoors, you can transplant them to the garden once the weather has warmed up and the threat of frost has passed.
- Harden Off: Before transplanting, gradually acclimate the seedlings to outdoor conditions. This process, known as “hardening off,” helps the plants adjust to the changes in temperature, light, and humidity.
- Transplanting: Carefully dig holes in the garden, slightly larger than the root ball of each seedling. Gently remove the seedlings from their containers, being careful not to disturb the roots. Place the seedlings in the holes and fill in the soil around them. Water gently after transplanting.
By following these steps, you can successfully grow chives from seed and enjoy the fresh flavor of these versatile herbs in your own kitchen.
How to Grow Chives in Pots
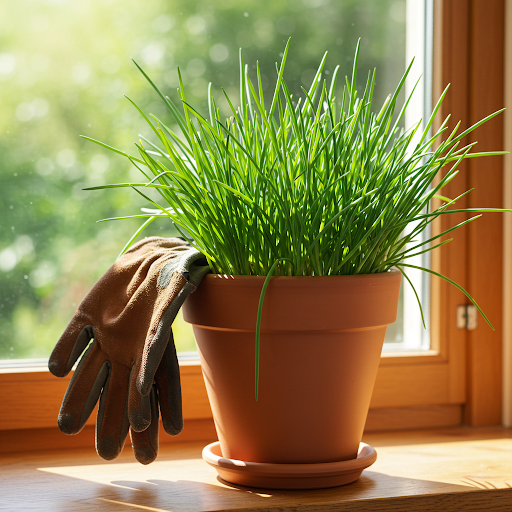
Growing chives in pots is a fantastic option for those with limited garden space or who simply enjoy having fresh herbs readily accessible near their kitchen. It’s a convenient and rewarding way to cultivate these flavorful herbs, allowing you to enjoy their fresh taste whenever you need them. Here’s how to successfully grow chives in pots:
1. Choosing the Right Pot:
Selecting the appropriate pot is crucial for the health and well-being of your potted chives.
- Size: Opt for a pot that is at least 6 inches in diameter. This provides sufficient space for the chives to develop a robust root system. Larger pots can accommodate multiple chive plants.
- Drainage: Ensure the pot has drainage holes to prevent waterlogging. Excess water can lead to root rot, which can be detrimental to the health of your chives.
- Material: Terracotta pots are a popular choice for growing herbs, as they allow excess moisture to evaporate through their porous walls. However, plastic or ceramic pots can also work well.
2. Potting Mix:
Using the right potting mix is essential for container-grown chives.
- Avoid Garden Soil: Avoid using garden soil in containers. Garden soil tends to be dense and can compact, hindering drainage and restricting root growth.
- Choose a Well-Draining Mix: Opt for a high-quality potting mix that is specifically formulated for container gardening. These mixes are typically lighter and more airy, providing optimal drainage and aeration for the roots.
3. Planting:
- Starting from Seed: If you’re starting chives from seed, follow the steps outlined in the previous section on “How to Grow Chives from Seed.”
- Planting Established Plants: If you’re planting established chive plants, gently loosen the roots before placing them in the pot. Fill the pot with potting mix, leaving about an inch of space between the top of the soil and the rim of the pot.
4. Watering:
Proper watering is crucial for the success of container-grown chives.
- Monitoring Moisture Levels: Monitor the soil moisture regularly. Stick your finger about an inch deep into the soil. If it feels dry, it’s time to water.
- Watering Technique: Water thoroughly until excess water drains out of the bottom of the pot.
- Avoid Overwatering: Overwatering can lead to root rot, so be cautious not to let the pot sit in water.
5. Fertilizing:
Container-grown chives benefit from regular fertilization to ensure they receive the necessary nutrients for healthy growth.
- Fertilizer Type: Use a balanced liquid fertilizer, such as a 10-10-10 formulation, diluted according to the manufacturer’s instructions.
- Frequency: Fertilize your chives every 4-6 weeks during the growing season.
6. Sunlight:
Chives need ample sunlight to thrive.
- Placement: Place your potted chives in a location that receives at least 6 hours of direct sunlight per day. A south-facing window or a sunny patio are ideal locations.
- Sunlight Deficiency: If you don’t have enough natural light, consider using grow lights to supplement sunlight.
7. Location:
One of the significant advantages of growing chives in pots is their portability.
- Move as Needed: You can easily move your potted chives to different locations based on their sunlight needs or to bring them indoors during inclement weather.
- Bring Indoors: During the winter, you can bring your potted chives indoors to enjoy fresh herbs year-round.
By following these tips, you can successfully grow vibrant and flavorful chives in containers, adding a touch of fresh greenery and culinary delight to your home or patio.
How to Grow Chives Indoors
Growing chives indoors allows you to enjoy the convenience of fresh herbs year-round, regardless of the weather outside. It’s a fantastic way to add a touch of green to your kitchen and have a readily available source of flavor for your culinary creations. While it may require a bit more attention than outdoor growing, cultivating chives indoors is a rewarding experience.
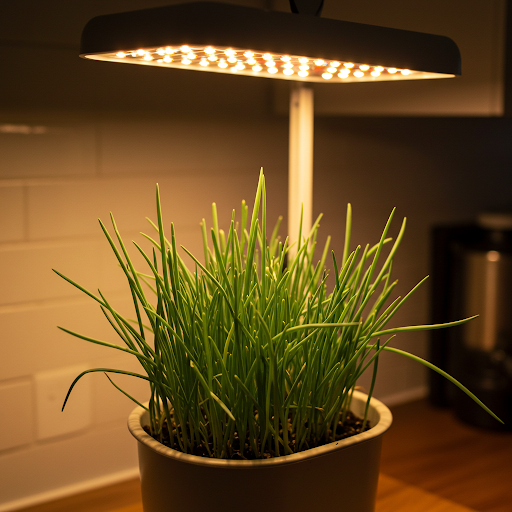
1. Light:
Adequate light is the most critical factor for successful indoor chive cultivation. Chives need at least 6 hours of direct sunlight per day to thrive.
- Sunlight: If you have a south-facing window that receives ample sunlight, place your chive pot near it. This will provide the necessary light for healthy growth.
- Grow Lights: If you don’t have a suitable window or if your indoor space lacks sufficient natural light, consider using grow lights. LED grow lights are a popular choice for indoor gardening as they are energy-efficient and provide the specific spectrum of light that plants need. Position the grow lights a few inches above the chives and adjust the height as they grow.
2. Containers:
Choose pots that are at least 6 inches in diameter to provide enough space for the chives to develop. Ensure the pots have drainage holes to prevent waterlogging, which can lead to root rot.
- Potting Mix: Use a high-quality potting mix specifically designed for container gardening. Avoid using garden soil, as it can compact and hinder drainage.
- Consider Self-Watering Pots: Self-watering pots can be a convenient option for indoor gardening, as they help maintain consistent moisture levels.
3. Watering:
Proper watering is crucial for healthy indoor chives.
- Monitoring: Monitor the soil moisture regularly. Stick your finger about an inch deep into the soil. If it feels dry, it’s time to water.
- Watering Technique: Water thoroughly until excess water drains out of the bottom of the pot.
- Avoid Overwatering: Overwatering is a common problem for indoor plants. Avoid letting the pot sit in water, as this can lead to root rot.
4. Temperature:
Chives prefer cool to moderate temperatures, typically between 60°F and 70°F (15°C to 21°C).
- Avoid Heat Sources: Keep your chives away from heat sources such as radiators or heating vents, as these can dry out the soil and damage the plants.
- Consider Air Conditioning: During hot summer months, you may need to provide some cooling to prevent the temperature from becoming too high.
5. Fertilizing:
Indoor chives benefit from regular fertilization to ensure they receive the necessary nutrients for healthy growth.
- Fertilizer Type: Use a balanced liquid fertilizer diluted according to the manufacturer’s instructions.
- Frequency: Fertilize your chives every few weeks during the growing season.
6. Humidity:
While chives aren’t particularly fussy about humidity, they can benefit from slightly increased humidity levels.
- Increasing Humidity: You can increase humidity by placing a tray of water near your chives or by misting them occasionally with water from a spray bottle.
7. Air Circulation:
Good air circulation is essential for preventing fungal diseases.
- Provide Airflow: Ensure that there is adequate airflow around your indoor chives. You can achieve this by placing a small fan near the plants or by gently moving the air around them with your hand.
By following these tips, you can successfully grow healthy and vibrant chives indoors, enjoying the convenience of fresh herbs all year round.
How to Care for Chives
While chives are relatively low-maintenance plants, providing them with proper care will ensure they thrive and produce a bountiful harvest. Here are some essential care tips to keep in mind:
1. Watering:
Consistent moisture is crucial for healthy chive growth.
- Frequency: Water your chives regularly, especially during dry periods.
- Depth: Water deeply to ensure that the roots receive adequate moisture.
- Avoid Overwatering: Overwatering can lead to root rot, so be cautious not to waterlog the soil.
- Monitoring: Check the soil moisture regularly. Stick your finger about an inch into the soil. If it feels dry, it’s time to water.
2. Fertilizing:
Chives are moderate feeders and benefit from regular fertilization to ensure optimal growth and flavor.
- Fertilizer Type: Use a balanced liquid fertilizer, such as a 10-10-10 formulation.
- Frequency: Fertilize your chives every 4-6 weeks during the growing season.
- Organic Options: If you prefer organic gardening practices, use compost tea or fish emulsion as a fertilizer.
3. Pest and Disease Control:
Chives are generally pest-resistant, but they can occasionally be affected by certain pests and diseases.
- Common Pests: Aphids and onion thrips are common pests that can infest chive plants.
- Control Methods: Regularly inspect your chives for pests. If you notice an infestation, you can use insecticidal soap or neem oil to control the pests.
- Diseases: Chives can be susceptible to diseases like powdery mildew and onion downy mildew.
4. Dividing:
Over time, chive clumps can become overcrowded, which can hinder growth and reduce yield.
- Frequency: Divide your chives every 2-3 years to rejuvenate the plants and encourage vigorous growth.
- Method: Carefully dig up the entire clump of chives. Gently separate the clump into smaller divisions, each with healthy roots and foliage.
- Replanting: Replant the divisions in a new location or pot, ensuring that they have adequate space to grow.
5. Winter Care:
In colder climates, chives may go dormant during the winter.
- Protection: Mulch the base of the plants with a layer of organic matter, such as straw or leaves, to protect them from frost.
- Indoor Cultivation: If you live in a very cold climate, you can dig up a portion of the chive clump and pot it up to grow indoors during the winter.
By following these care tips, you can ensure that your chives remain healthy, productive, and provide you with a continuous supply of fresh herbs for your culinary endeavors.
How to Harvest Chives

Harvesting chives is a simple and rewarding process. By following a few guidelines, you can ensure that your chives continue to thrive and provide you with a steady supply of fresh herbs.
1. Timing:
The best time to harvest chives is when the plants are actively growing. This is typically during the spring and summer months.
- Avoid Harvesting Before Establishment: Allow young chives to establish themselves before harvesting. This usually takes a few weeks after planting or germination.
- Monitor Growth: Regularly inspect your chives for signs of vigorous growth. When the leaves are about 6-8 inches tall, they are ready for harvesting.
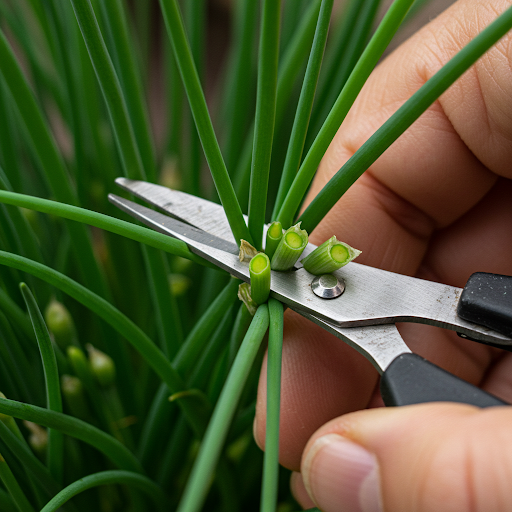
2. Harvesting Method:
- Use Sharp Scissors or Shears: Use clean, sharp scissors or shears to cut the chives.
- Cut Above the Base: Cut the leaves about an inch above the base of the plant. This will encourage new growth from the base.
- Avoid Cutting the Entire Plant: Avoid cutting the entire plant to the ground, as this can weaken the chives.
3. Frequency of Harvesting:
- Regular Harvesting: Regular harvesting encourages bushier growth and prevents the plants from going to seed.
- Frequency: Harvest chives as needed, depending on your usage. You can harvest a few leaves at a time or cut larger amounts for preserving or drying.
4. Handling and Storage:
- Fresh Use: If using chives immediately, rinse them thoroughly under cold water to remove any dirt or debris.
- Short-Term Storage: Store freshly cut chives in the refrigerator in a plastic bag or a damp paper towel for up to a week.
- Freezing: To store chives for longer periods, you can freeze them. Chop the chives finely and place them in an ice cube tray filled with water. Freeze the trays, then transfer the frozen cubes to a freezer bag for long-term storage.
- Drying: You can also dry chives for later use. Tie small bunches of chives together and hang them upside down in a warm, dry, and well-ventilated area. Once the chives are completely dry, crumble them and store them in an airtight container.
By following these harvesting guidelines, you can enjoy a continuous supply of fresh, flavorful chives throughout the growing season. Remember to harvest responsibly and allow your chives to continue thriving.
Common Chive Growing Problems & Solutions
While chives are generally hardy and easy to grow, they can sometimes encounter certain problems. By being aware of these potential issues and knowing how to address them, you can ensure that your chives remain healthy and productive.
1. Yellowing Leaves:
One of the most common problems encountered when growing chives is yellowing leaves. This can be caused by several factors:
- Overwatering: Overwatering is a common cause of yellowing leaves. When the soil is constantly saturated, it can lead to root rot, which can then cause the leaves to turn yellow and wilt.
- Underwatering: Conversely, insufficient watering can also cause yellowing leaves. Chives need consistent moisture to thrive.
- Nutrient Deficiencies: If the soil is lacking in essential nutrients, such as nitrogen, the chives may develop yellowing leaves.
- Pests and Diseases: Some pests and diseases can also cause yellowing leaves.
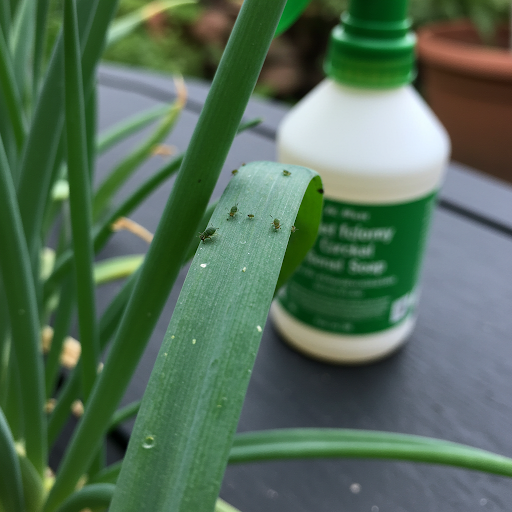
2. Aphids:
Aphids are small, sap-sucking insects that can infest chive plants. They feed on the plant sap, causing leaves to curl, distort, and eventually turn yellow.
- Identifying Aphids: Aphids are typically small, pear-shaped insects that can be green, black, or brown. They often cluster on the undersides of leaves.
- Control Methods:
- Natural Predators: Encourage the presence of natural predators, such as ladybugs and lacewings, which feed on aphids.
- Insecticidal Soap: Spray the affected plants with insecticidal soap, following the product instructions.
- Strong Water Spray: A strong blast of water from a garden hose can dislodge aphids from the plants.
3. Onion Thrips:
Onion thrips are tiny insects that can also damage chive plants. They feed on the plant sap, causing the leaves to become discolored and stunted.
- Identifying Onion Thrips: Onion thrips are difficult to see with the naked eye. They often leave behind silvery streaks or stippling on the leaves.
- Control Methods:
- Neem Oil: Apply neem oil to the plants according to the product instructions.
- Diatomaceous Earth: Dust the base of the plants with diatomaceous earth, which can help to control thrips populations.
4. Powdery Mildew:
Powdery mildew is a fungal disease that can affect chive plants. It appears as a white, powdery coating on the leaves.
- Preventing Powdery Mildew:
- Proper Spacing: Provide adequate spacing between plants to allow for good air circulation.
- Avoid Overhead Watering: Water the base of the plants, rather than overhead, to minimize leaf wetness.
- Treating Powdery Mildew:
- Fungicides: Apply a fungicide specifically labeled for powdery mildew control, following the product instructions.
5. Onion Downy Mildew:
Onion downy mildew is another fungal disease that can affect chives. It causes leaf yellowing, wilting, and stunted growth.
- Preventing Onion Downy Mildew:
- Resistant Varieties: Plant disease-resistant chive varieties if available.
- Crop Rotation: Rotate your chive planting location each year to reduce the risk of disease buildup.
- Treating Onion Downy Mildew:
- Fungicides: Apply a fungicide labeled for onion downy mildew control, following the product instructions.
By being vigilant and taking appropriate action, you can effectively address these common chive growing problems and ensure that your plants remain healthy and productive.
FAQ: Growing Chives

Growing chives can sometimes present unique challenges or raise specific questions. Here are some frequently asked questions (FAQs) and their answers to help you navigate the process:
1. How to Grow Chives in Containers Indoors for Beginners?
Growing chives indoors in containers is a fantastic option for beginners, especially those with limited space. Here are some tips:
- Choose the Right Container: Select a pot that is at least 6 inches in diameter with drainage holes to prevent waterlogging.
- Use a Well-Draining Potting Mix: Avoid using garden soil, as it can compact and hinder drainage. Opt for a high-quality potting mix specifically designed for container gardening.
- Provide Adequate Light: Place the container in a location that receives at least 6 hours of direct sunlight per day. A south-facing window is ideal. Alternatively, you can use grow lights to supplement natural light.
- Water Regularly: Water the chives when the top inch of soil feels dry to the touch. Avoid overwatering, as this can lead to root rot.
- Fertilize Regularly: Use a balanced liquid fertilizer diluted according to the manufacturer’s instructions every few weeks during the growing season.
2. How to Grow Chives from Seed in Pots on a Windowsill?
Growing chives from seed in pots on a windowsill is a rewarding experience. Here’s how to do it:
- Choose the Right Pot: Select small pots with drainage holes.
- Use a Seed Starting Mix: Fill the pots with a high-quality seed starting mix.
- Sow the Seeds: Sow the chive seeds about ¼ inch deep and cover them lightly with soil.
- Water Gently: Water the seeds gently and keep the soil consistently moist.
- Provide Adequate Light: Place the pots on a sunny windowsill.
- Thin the Seedlings: Once the seedlings have developed their first set of true leaves, thin them out to give them enough space to grow.
3. How to Grow Chives Hydroponically in a Small Indoor System?
Hydroponics is a method of growing plants without soil. While it may seem complex, growing chives hydroponically can be a rewarding experience.
- Choose a Hydroponic System: Select a small hydroponic system designed for herbs.
- Prepare the System: Follow the manufacturer’s instructions to set up the hydroponic system.
- Plant the Chives: Place the chive seedlings or cuttings in the designated slots within the system.
- Provide Nutrients: Use a nutrient solution specifically formulated for hydroponic growing.
- Maintain Adequate Light: Ensure the system receives sufficient light, either from a sunny window or grow lights.
4. How to Grow Chives that are Healthy and Don’t Turn Yellow?
Yellowing leaves in chives can be caused by various factors. Here are some tips to ensure healthy chive growth:
- Proper Watering: Water your chives regularly but avoid overwatering.
- Adequate Drainage: Ensure that the soil is well-draining to prevent root rot.
- Sufficient Sunlight: Provide at least 6 hours of direct sunlight per day.
- Fertilization: Fertilize your chives regularly with a balanced fertilizer.
- Pest and Disease Control: Monitor your chives for pests and diseases and take appropriate action if necessary.
5. How to Grow Chives for Cooking and Using in Recipes?
Growing chives for culinary use is a rewarding endeavor. Here are some tips:
- Plant in a Convenient Location: Plant your chives in a location that is easily accessible from your kitchen.
- Harvest Regularly: Regular harvesting encourages bushier growth and a continuous supply of fresh chives.
- Use Freshly Cut Chives: Use freshly cut chives in your favorite dishes for the best flavor.
- Experiment with Different Chive Varieties: Try different chive varieties, such as garlic chives, for a variety of flavors.
By addressing these frequently asked questions, you can gain a deeper understanding of how to grow chives successfully and enjoy the benefits of having fresh herbs readily available.


")

