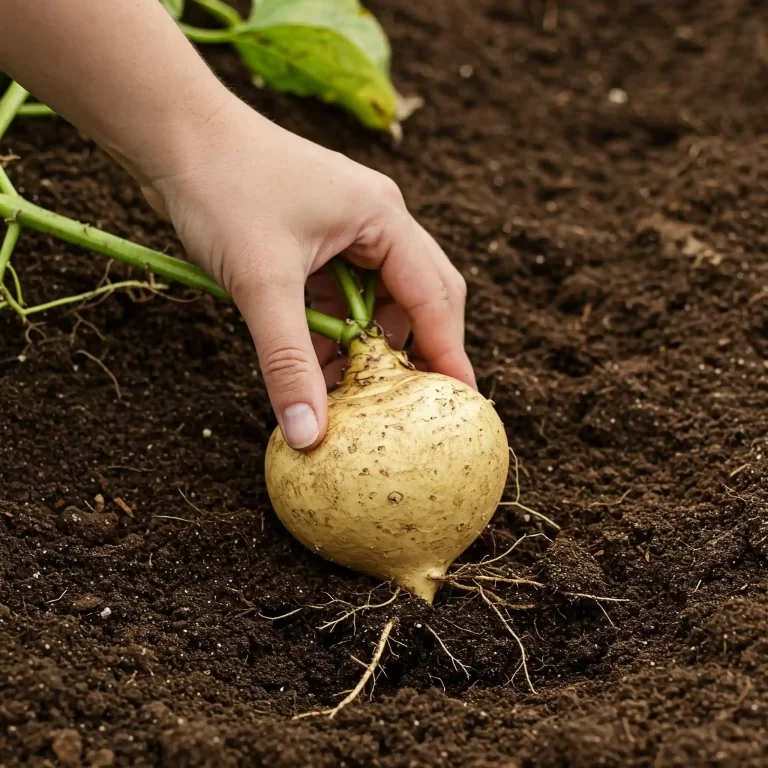
Are you tired of the same old vegetables in your garden? Do you crave something unique, easy to grow, and packed with nutrients? I know I used to feel that way. I was looking for something different, something that would thrive with minimal fuss, and that’s when I discovered topinambur (Jerusalem artichokes). If you’re looking for a rewarding gardening experience and a delicious addition to your meals, learning how to grow topinambur vegetables is a fantastic choice. This comprehensive guide will walk you through 10 simple steps, sharing my own experiences and insights to help you cultivate these fascinating tubers successfully.
1. Choosing the Right Topinambur Tubers
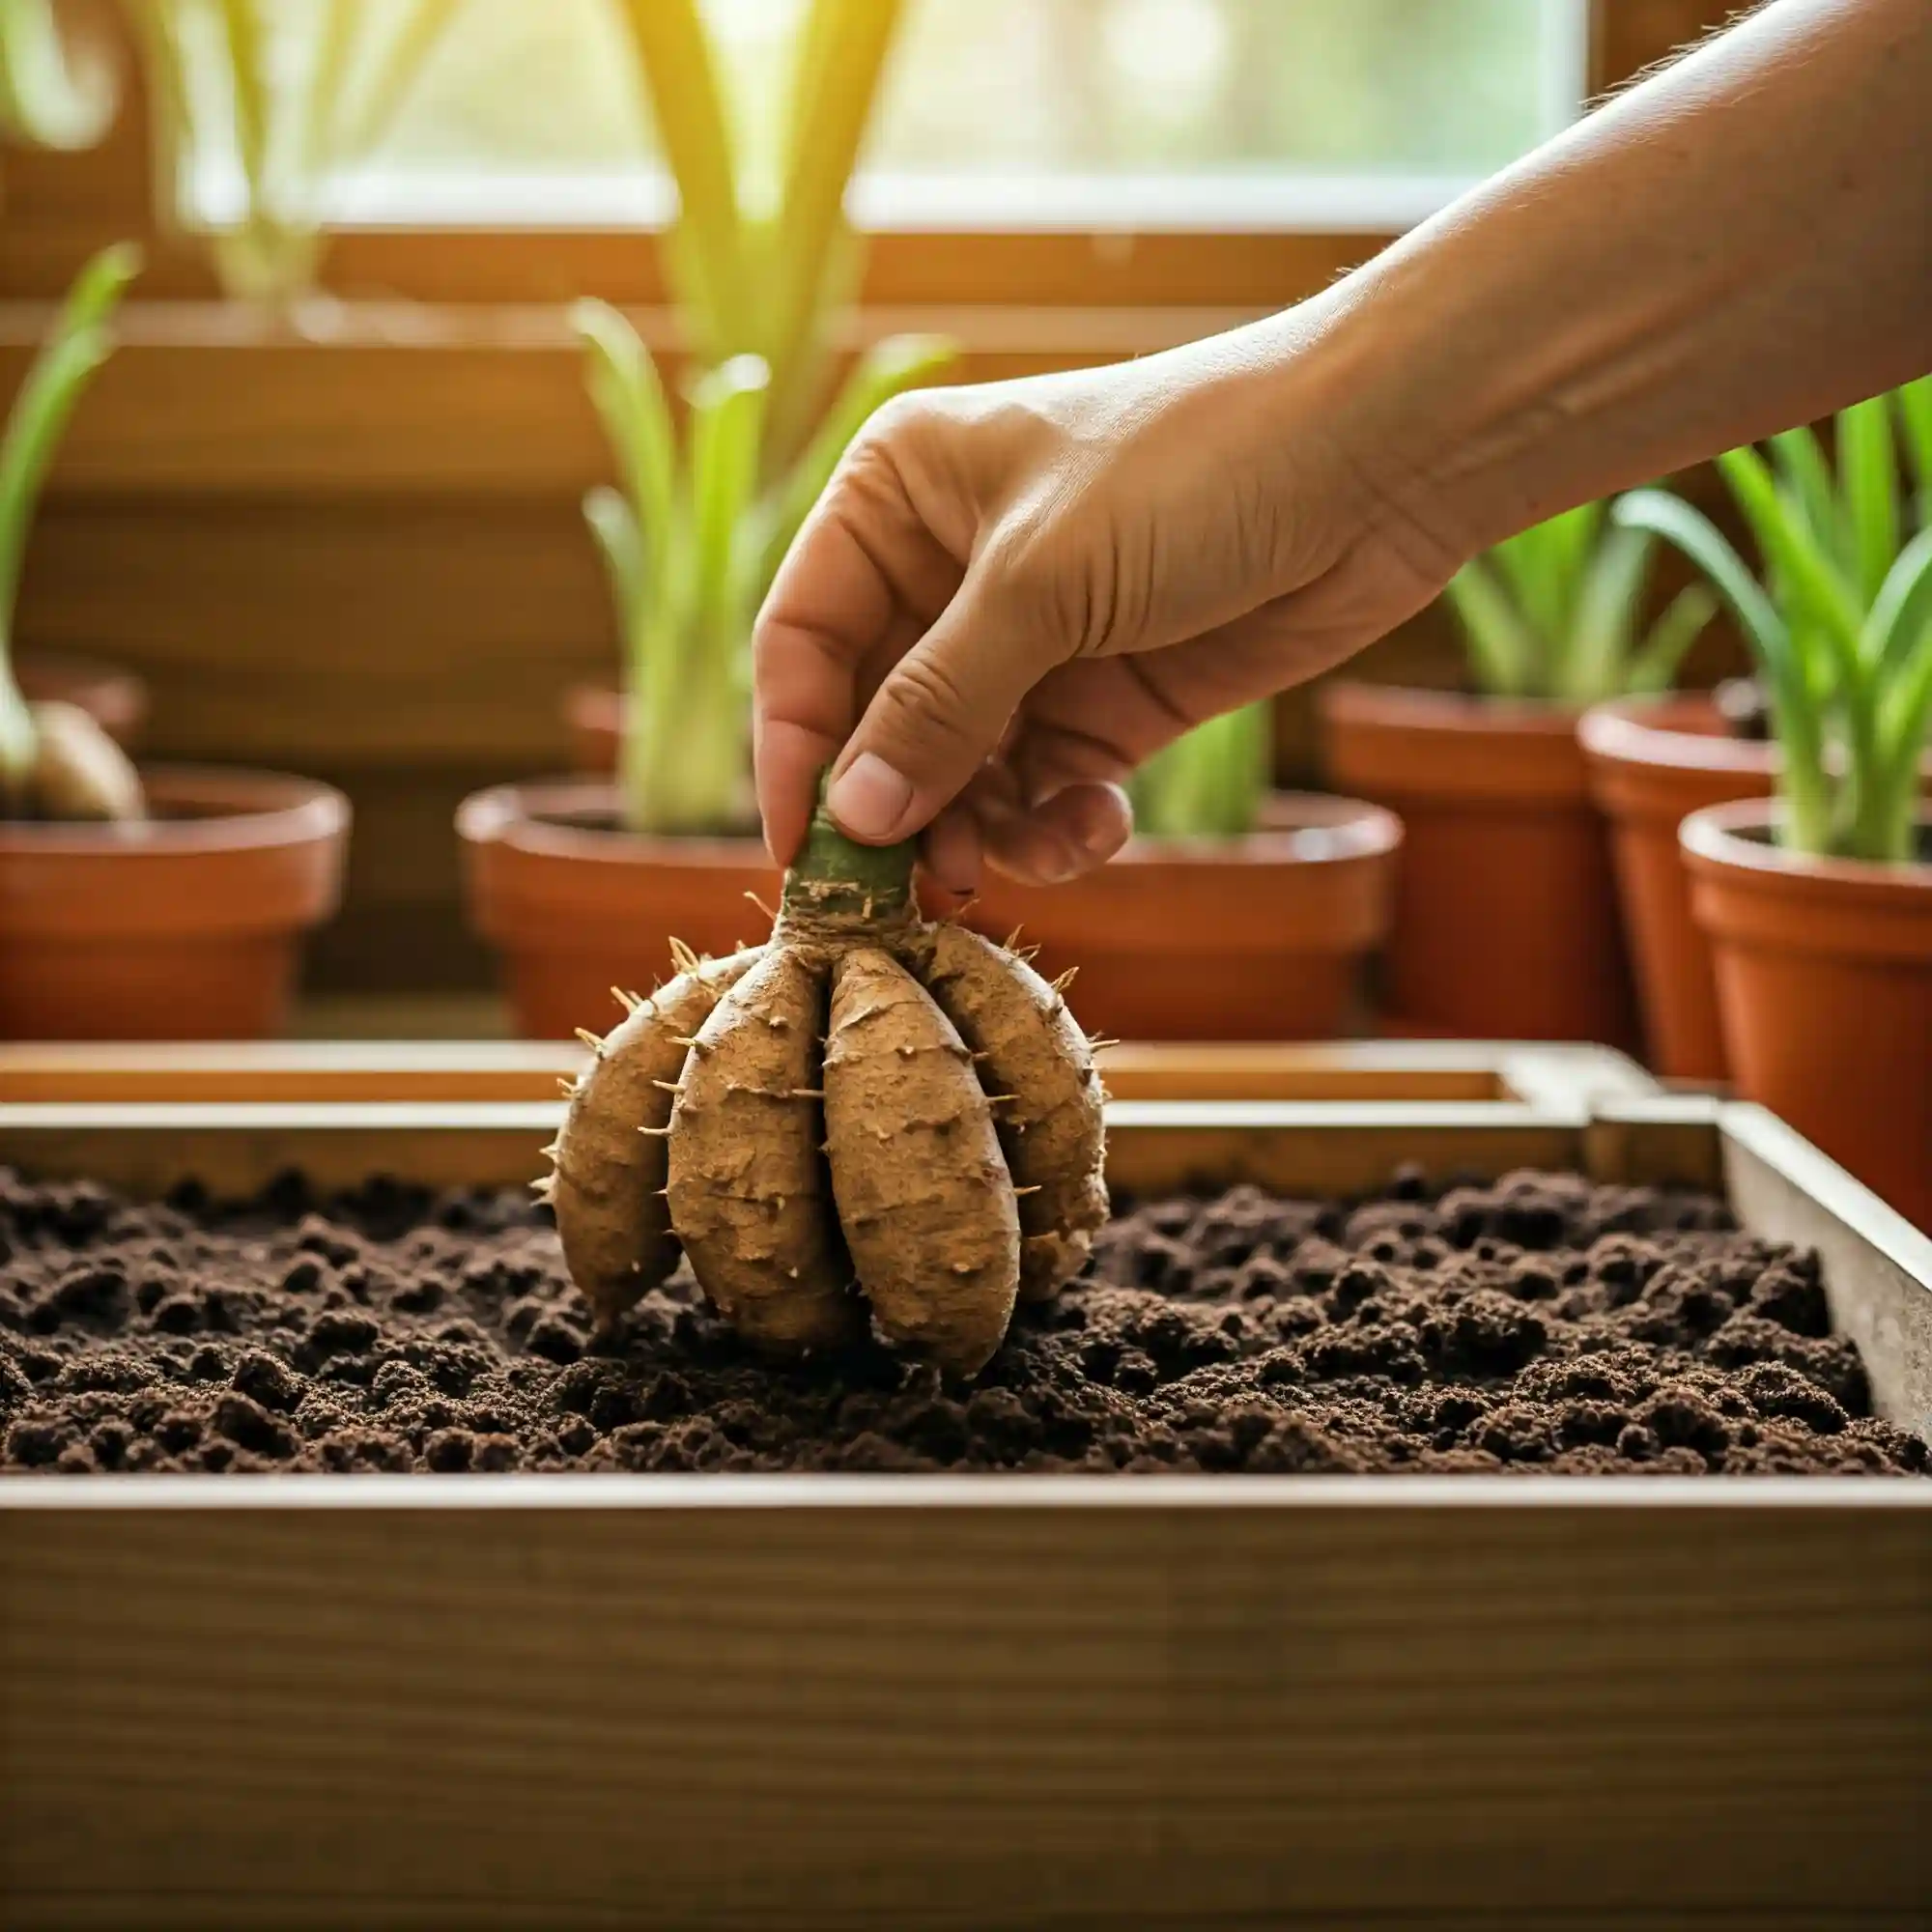
Choosing the right starting material is crucial for any successful gardening endeavor, and how to grow topinambur is no exception. Selecting healthy, disease-free tubers is the first step towards a bountiful harvest. When I first started growing topinambur, I learned this lesson the hard way. I planted a few tubers that looked a bit soft, and they didn’t thrive. So, trust me on this one! Here’s what to look for when selecting your topinambur tubers:
- Firmness: The tubers should be firm to the touch, not soft or squishy. This indicates they are healthy and have stored sufficient energy for sprouting. Soft tubers may be rotting or have been damaged.
- Smooth Skin: Look for tubers with smooth, undamaged skin. Avoid those with cuts, bruises, or signs of disease, such as mold or soft spots. These imperfections can introduce pathogens or weaken the tuber, hindering its growth.
- Size: Choose medium-sized tubers. While larger tubers might seem like a better deal, they can be more prone to rotting. Smaller tubers, on the other hand, might lack the energy reserves needed for vigorous growth. Medium-sized tubers offer a good balance.
- Source: Purchase your tubers from a reputable nursery or garden center. This ensures you’re getting healthy, disease-free stock. You can also obtain tubers from fellow gardeners, but make sure they come from healthy plants.
- Variety: There are different varieties of topinambur, each with slightly different characteristics. Some are smoother, some are knobbier, and some have different colored flesh. Consider the variety based on your preferences and local growing conditions.
Understanding Tuber Quality:
A healthy tuber is like a battery for the new plant, storing the energy it needs to get started. When you plant a tuber, it uses these stored resources to develop roots and shoots. If the tuber is damaged or diseased, it won’t have the energy to support strong growth, leading to weak plants or even failure to sprout.
My Experience with Different Varieties:
Over the years, I’ve experimented with several different varieties of topinambur. I found that some varieties are more resistant to certain pests, while others produce larger or smoother tubers. It’s worth researching the varieties available in your area to find one that suits your needs.
Tips for Inspecting Tubers:
- Gently handle the tubers to avoid bruising them.
- Check for any signs of sprouting. While a few small sprouts are okay, avoid tubers with long, spindly sprouts, as they may have depleted their energy reserves.
- If possible, cut a small piece off a tuber (if you have multiple) to inspect the inside. The flesh should be firm and white or cream-colored. Avoid tubers with brown or discolored flesh.
By carefully selecting your topinambur tubers, you’re setting the stage for a successful and rewarding growing experience. This first step is essential in how to grow topinambur vegetables effectively.
2. Preparing the Soil for Topinambur
Just like any other plant, topinambur thrives in the right soil conditions. When I first started, I simply planted the tubers in the existing soil in my garden, which was quite heavy clay. While they did grow, the harvest wasn’t as abundant as I’d hoped. I learned that proper soil preparation is essential for how to grow topinambur vegetables effectively. Here’s what I recommend:
- Well-Drained Soil: Topinambur prefers well-drained soil to prevent the tubers from rotting. If your soil is heavy clay like mine was, amend it with plenty of organic matter, such as compost or well-rotted manure. This will improve drainage and aeration.
- Rich in Organic Matter: Topinambur are heavy feeders, meaning they require a good supply of nutrients. Adding compost or manure not only improves drainage but also enriches the soil with essential nutrients, promoting healthy growth and a bountiful harvest.
- Soil pH: Topinambur prefers a slightly acidic to neutral soil pH, ideally between 6.0 and 7.0. You can test your soil pH using a simple soil test kit available at most garden centers. If your soil is too alkaline, you can amend it with sulfur or peat moss. If it’s too acidic, you can add lime.
- Sunlight: Topinambur thrives in full sun, meaning at least 6 hours of direct sunlight per day. Choose a location in your garden that receives plenty of sunlight.
- Weed-Free: Before planting, make sure the area is free of weeds. Weeds compete with your topinambur plants for nutrients and water, hindering their growth.
Improving Soil Structure:
If you have heavy clay soil, like I did, improving its structure is crucial. Clay soil tends to be dense and poorly draining, which can lead to waterlogging and root rot. Here are some tips for improving clay soil:
- Add Organic Matter: As mentioned earlier, adding plenty of compost or well-rotted manure is essential. This will help break up the clay particles and improve drainage.
- Use Gypsum: Gypsum is a soil amendment that can help improve clay soil structure. It helps to loosen the clay particles and improve drainage.
- Avoid Working Wet Soil: Avoid working the soil when it’s wet, as this can further compact it. Wait until the soil is dry enough to crumble in your hand before working it.
Preparing the Planting Bed:
Once you’ve amended the soil, it’s time to prepare the planting bed. Here’s what I do:
- Dig the Bed: Dig the bed to a depth of about 12 inches.
- Remove Rocks and Debris: Remove any rocks, weeds, or other debris from the bed.
- Level the Bed: Rake the bed to create a level surface.
By taking the time to properly prepare the soil, you’re giving your topinambur plants the best possible start and setting yourself up for a successful harvest.
3. Planting Topinambur Tubers
Planting topinambur is a straightforward process, but there are a few key things to keep in mind to ensure success. I remember one year I planted my tubers too shallowly, and they ended up sprouting prematurely due to a warm spell. It taught me the importance of proper planting depth. Here’s a detailed guide on how to plant topinambur tubers:
- Timing: The best time to plant topinambur is in early spring, after the last frost, or in late fall, before the ground freezes. Fall planting is often preferred, as it allows the tubers to establish roots over the winter and get a head start in the spring.
- Depth: Plant the tubers about 4-6 inches deep. This depth protects them from frost and helps prevent premature sprouting.
- Spacing: Space the tubers 12-18 inches apart. This gives the plants enough room to grow and prevents overcrowding.
- Orientation: You don’t need to worry about which way up you plant the tubers. They will sprout regardless of their orientation.
- Soil Contact: Ensure good soil contact by gently firming the soil around the tubers after planting.
Planting Methods:
There are two main methods for planting topinambur:
- Direct Planting: This is the most common method. Simply dig holes to the appropriate depth and spacing, place the tubers in the holes, and cover them with soil.
- Container Planting: If you have limited space or poor soil conditions, you can grow topinambur in containers. Choose a large container with good drainage and fill it with a well-draining potting mix. Plant the tubers at the same depth and spacing as you would in the ground.
My Tips for Planting:
- Prepare the Planting Area: Before planting, make sure the area is free of weeds and debris.
- Water After Planting: Water the area thoroughly after planting to help settle the soil and encourage root growth.
- Mark the Planting Area: It’s a good idea to mark the planting area so you don’t accidentally disturb the tubers later.
By following these simple steps, you can successfully plant your topinambur tubers and look forward to a bountiful harvest.
4. Caring for Your Topinambur Plants
Once your topinambur tubers are planted, they require relatively little maintenance. However, there are a few key things you can do to ensure they thrive and produce a bountiful harvest. Here are some tips for caring for your topinambur plants:
- Watering: Topinambur needs regular watering, especially during dry periods. Water deeply and consistently, ensuring the soil is moist but not waterlogged. Avoid overhead watering, as this can promote fungal diseases.
- Weeding: Keep the area around your topinambur plants free of weeds. Weeds compete with your plants for nutrients and water, hindering their growth.
- Fertilizing: Topinambur generally doesn’t require heavy fertilization. However, you can side-dress your plants with compost or well-rotted manure a few times during the growing season to provide them with extra nutrients.
- Mulching: Applying a layer of mulch around your plants can help retain moisture, suppress weeds, and regulate soil temperature.
- Staking: If your topinambur plants grow very tall, they may need staking to prevent them from falling over in strong winds.
My Experience with Watering:
I’ve found that topinambur is quite drought-tolerant once established. However, during prolonged dry spells, they benefit from regular watering. I usually water them deeply once a week, or more often if the weather is particularly hot and dry.
Tips for Weed Control:
- Hand-pulling: The most effective way to control weeds is to hand-pull them regularly. This is especially important when the topinambur plants are young and vulnerable.
- Mulching: As mentioned earlier, mulching can help suppress weeds.
- Hoeing: You can also use a hoe to remove weeds, but be careful not to damage the shallow roots of your topinambur plants.
By following these simple care tips, you can ensure your topinambur plants thrive and produce a delicious harvest.
5. Preventing Topinambur from Becoming Invasive
One of the most important things to know about how to grow topinambur vegetables is that they can be quite vigorous growers. If left unchecked, they can spread rapidly and become invasive. I remember one year, I didn’t take proper precautions, and my topinambur patch expanded much further than I intended. It took some effort to get it back under control. So, take it from me, it’s much easier to prevent them from becoming invasive in the first place. Here are some effective strategies:
- Plant in a Contained Area: The simplest way to prevent topinambur from spreading is to plant them in a contained area, such as a raised bed or a large container. This will physically limit their ability to spread.
- Use Root Barriers: If you’re planting topinambur directly in the ground, you can use root barriers to prevent them from spreading. These are physical barriers, such as plastic or metal edging, that you bury in the ground around the planting area. The barrier should extend at least 12 inches deep to be effective.
- Harvest Regularly: Regular harvesting is another effective way to control the spread of topinambur. By harvesting the tubers regularly, you’re removing potential sources of new growth.
- Remove Unwanted Plants: If you see any topinambur plants sprouting up outside of your designated growing area, remove them immediately.
My Experience with Containing Topinambur:
I’ve found that using a combination of methods is the most effective way to contain topinambur. I plant them in raised beds and also use root barriers to be extra safe. I also make sure to harvest them regularly, which helps to keep them in check.
Additional Tips for Controlling Topinambur:
- Don’t Compost Tubers: Avoid composting topinambur tubers, as they can easily sprout and spread.
- Monitor the Planting Area: Keep an eye on the planting area and remove any unwanted plants as soon as you see them.
By taking these precautions, you can enjoy growing topinambur without worrying about them taking over your garden.
6. Dealing with Pests and Diseases
While topinambur are generally hardy and resistant to many pests and diseases, there are a few issues that can occasionally arise. In my experience, the biggest problems I’ve encountered are with aphids and slugs, especially during wet periods. Here’s what you need to know about protecting your topinambur plants:
Common Pests:
- Aphids: These small insects can suck sap from the leaves and stems of your topinambur plants, weakening them. Look for clusters of small insects on the undersides of leaves or on new growth.
- Slugs and Snails: These pests can feed on the leaves and tubers of your topinambur plants, especially young plants. Look for signs of damage, such as holes in the leaves or tubers.
Common Diseases:
- Sclerotinia Stem Rot: This fungal disease can cause the stems of your topinambur plants to rot at the base. It’s more common in wet conditions.
- Powdery Mildew: This fungal disease can cause a white powdery coating on the leaves of your topinambur plants. It’s more common in dry conditions with poor air circulation.
My Tips for Pest and Disease Control:
- Regular Inspection: The best way to prevent problems is to inspect your plants regularly for signs of pests or diseases.
- Hand-picking: If you find any pests, such as aphids or slugs, you can hand-pick them off the plants.
- Natural Remedies: For mild infestations, you can try natural remedies, such as spraying your plants with a mixture of water and dish soap or using neem oil.
- Crop Rotation: Rotating your crops can help prevent soilborne diseases from building up.
- Good Air Circulation: Ensure good air circulation around your plants to help prevent fungal diseases.
Preventative Measures:
- Healthy Soil: Healthy soil is the best defense against pests and diseases. Make sure your soil is rich in organic matter and well-draining.
- Proper Spacing: Proper spacing between plants can help improve air circulation and reduce the risk of fungal diseases.
- Watering Practices: Avoid overhead watering, as this can promote fungal diseases. Water at the base of the plants instead.
By taking these preventative measures and addressing any problems promptly, you can keep your topinambur plants healthy and productive.
7. Knowing When to Harvest Topinambur
Knowing when to harvest your topinambur is crucial for getting the best flavor and texture. I’ve learned that harvesting too early can result in smaller, less flavorful tubers, while harvesting too late can lead to them becoming soft or even sprouting in the ground. Here’s a guide on how to know when to harvest topinambur:
- Foliage Dieback: The most reliable sign that your topinambur are ready for harvest is when the foliage starts to die back in the fall. This usually happens after the first frost. The leaves will turn yellow and then brown, and the stems will begin to dry out.
- Time of Year: In most regions, topinambur are typically harvested from late fall to early spring. You can even leave them in the ground over winter and harvest them as needed.
- Tuber Size: You can also check the size of the tubers by digging up a test plant. The tubers should be at least a few inches long and firm to the touch.
How to Harvest Jerusalem Artichokes:
Harvesting topinambur is a simple process:
- Loosen the Soil: Use a garden fork or shovel to loosen the soil around the base of the plants.
- Lift the Tubers: Gently lift the tubers from the ground.
- Remove Excess Soil: Remove any excess soil from the tubers.
My Tips for Harvesting:
- Harvest After a Frost: Harvesting after a frost can improve the flavor of the tubers, as the cold temperatures convert some of the starches to sugars.
- Leave Some Tubers in the Ground: If you want to grow topinambur again next year, leave some tubers in the ground. They will sprout in the spring and start a new crop.
- Wash the Tubers: Wash the tubers thoroughly after harvesting to remove any remaining soil.
By following these tips, you can ensure you harvest your topinambur at the peak of their flavor and enjoy a bountiful harvest.
8. Storing Your Topinambur Harvest
Once you’ve harvested your topinambur, proper storage is essential to maintain their quality and freshness. I remember one year I left my harvested tubers in a warm, sunny spot, and they quickly started to shrivel and sprout. It was a disappointing experience, but it taught me the importance of proper storage techniques. Here’s what I’ve learned about how to store topinambur effectively:
- Cool and Dark: The ideal storage conditions for topinambur are cool, dark, and humid. A root cellar or a cool basement is an excellent option. If you don’t have a root cellar, you can store them in the refrigerator, but they may not last as long.
- Prevent Drying Out: Topinambur tubers can dry out quickly if they’re not stored properly. To prevent this, you can store them in a container filled with slightly moist sand or sawdust. This will help to maintain humidity and prevent them from shriveling.
- Avoid Washing Before Storing: It’s best to avoid washing the tubers before storing them, as this can promote rot. Instead, brush off any excess soil and store them as they are. You can wash them thoroughly just before you’re ready to use them.
- Check Regularly: Check your stored tubers regularly for any signs of rot or sprouting. Remove any damaged tubers to prevent the rot from spreading.
Storage Methods:
Here are a few different methods you can use to store your topinambur:
- In the Ground: The simplest way to store topinambur is to leave them in the ground until you’re ready to use them. They are very hardy and can withstand freezing temperatures. Just be sure to harvest them before they start to sprout in the spring.
- In a Root Cellar: A root cellar provides the ideal storage conditions for topinambur. If you have a root cellar, you can store the tubers in bins or crates filled with slightly moist sand or sawdust.
- In the Refrigerator: If you don’t have a root cellar, you can store topinambur in the refrigerator. Place them in a plastic bag or container with a damp cloth to maintain humidity. They should last for several weeks in the refrigerator.
How Long Do Topinambur Last in Storage?
With proper storage, topinambur can last for several months. However, their quality will gradually decline over time. It’s best to use them as soon as possible for the best flavor and texture.
9. Growing Topinambur in Containers (Urban Gardening)
While topinambur are often grown in traditional garden beds, they can also thrive in containers, making them a great option for urban gardeners with limited space. I’ve successfully grown topinambur in large pots on my balcony, and it’s a fantastic way to enjoy fresh produce even in a city environment. Here’s what you need to know about how to grow topinambur in containers:
- Container Size: Choose a large container with a diameter of at least 18 inches and a depth of at least 12 inches. This will provide enough space for the tubers to grow and develop.
- Drainage: Ensure the container has drainage holes to prevent waterlogging, which can cause the tubers to rot.
- Potting Mix: Use a well-draining potting mix that’s rich in organic matter. Avoid using garden soil, as it can become compacted in containers.
- Planting Depth and Spacing: Plant the tubers at the same depth and spacing as you would in the ground (4-6 inches deep and 12-18 inches apart).
- Sunlight: Place the container in a location that receives at least 6 hours of direct sunlight per day.
- Watering: Water regularly, ensuring the potting mix is moist but not waterlogged. You may need to water more frequently than you would with plants grown in the ground, especially during hot weather.
- Fertilizing: Fertilize your container-grown topinambur plants with a balanced fertilizer every few weeks during the growing season.
My Experience with Container-Grown Topinambur:
I’ve found that container-grown topinambur tend to be a bit smaller than those grown in the ground, but they are still delicious and productive. It’s a great way to enjoy fresh topinambur even if you don’t have a traditional garden.
Tips for Container Gardening:
- Choose the Right Container: Avoid dark-colored containers, as they can absorb heat and overheat the soil.
- Use a Potting Mix with Good Drainage: This is crucial for preventing waterlogging and root rot.
- Water Regularly: Check the moisture level of the potting mix regularly and water when the top inch or two is dry.
- Fertilize Regularly: Container-grown plants need regular fertilization to provide them with the nutrients they need.
By following these tips, you can successfully grow topinambur in containers and enjoy a fresh harvest, no matter where you live.
10. Topinambur Recipes and Uses
Now that you’ve successfully grown and harvested your topinambur, it’s time to enjoy the fruits (or rather, tubers) of your labor! Topinambur are incredibly versatile in the kitchen and can be used in a variety of dishes. I personally love their unique nutty flavor and slightly sweet taste. Here are some ideas for how to use your topinambur harvest:
Raw:
- Salads: Thinly sliced raw topinambur adds a delightful crunch and nutty flavor to salads.
- Crudités: Serve raw topinambur sticks with your favorite dips.
Cooked:
- Roasted: Toss topinambur with olive oil, herbs, and spices, and roast them until tender and slightly caramelized.
- Mashed: Boil or steam topinambur until tender, then mash them with butter, milk, and seasonings, just like you would potatoes.
- Soups and Stews: Add diced topinambur to soups and stews for a hearty and flavorful addition.
- Sautéed: Slice topinambur and sauté them in butter or olive oil until tender and slightly browned.
- Pickled: Pickled topinambur make a tangy and delicious condiment.
My Favorite Topinambur Recipes:
- Roasted Topinambur with Rosemary and Garlic: This is a simple yet delicious way to enjoy topinambur. Toss the tubers with olive oil, rosemary, garlic, salt, and pepper, and roast them until tender and slightly crispy.
- Creamy Topinambur Soup: This soup is perfect for a cold winter day. Sauté onions, garlic, and topinambur, then add vegetable broth and simmer until the topinambur is tender. Blend until smooth and creamy, and season with salt, pepper, and nutmeg.
- Topinambur and Apple Salad: This refreshing salad combines thinly sliced raw topinambur with apples, celery, and a light vinaigrette dressing.
Nutritional Benefits of Topinambur:
Topinambur are not only delicious but also packed with nutrients. They are a good source of:
- Inulin: A type of prebiotic fiber that promotes gut health.
- Potassium: An essential mineral that helps regulate blood pressure.
- Iron: An important mineral for red blood cell production.
- Vitamin C: An antioxidant that supports immune function.
By incorporating topinambur into your diet, you can enjoy their unique flavor and reap their numerous health benefits.
11. Frequently Asked Questions About Growing Topinambur
Growing any new plant can bring up questions, and topinambur is no exception. Over the years, I’ve received numerous questions from fellow gardeners about growing these unique tubers. Here are some of the most frequently asked questions, along with detailed answers to help you on your topinambur growing journey:
General Growing Questions:
- Are topinambur easy to grow? Yes, topinambur are considered one of the easiest vegetables to grow. They are very adaptable and can thrive in a variety of conditions.
- How long does it take to grow topinambur? Topinambur typically take about 4-5 months to mature from planting to harvest.
- Do topinambur need full sun? Yes, topinambur prefer full sun, meaning at least 6 hours of direct sunlight per day.
- What type of soil do topinambur need? Topinambur prefer well-drained soil that’s rich in organic matter.
- How often should I water topinambur? Water topinambur regularly, especially during dry periods. Ensure the soil is moist but not waterlogged.
Specific Growing Questions:
- How to grow topinambur vegetables in heavy clay soil? Amend the soil with plenty of compost and consider raised beds for better drainage. This will improve the soil structure and prevent waterlogging.
- How to grow topinambur vegetables for maximum tuber production? Ensure proper spacing, fertile soil, consistent watering, and adequate sunlight. You can also side-dress your plants with compost or manure during the growing season.
- How to grow topinambur vegetables organically in a small garden? Use containers or designated areas with physical barriers to control their spread. You can also use organic fertilizers and pest control methods.
- How to grow topinambur vegetables from tubers purchased at the store? Select firm, healthy tubers and follow the planting instructions provided in this guide.
- How to grow topinambur vegetables and prevent them from becoming invasive? Use physical barriers, harvest regularly, and remove any unwanted plants promptly.
- How to grow topinambur vegetables in containers for urban gardening? Choose a large container with good drainage, use a well-draining potting mix, and provide adequate sunlight and water.
- How to grow topinambur vegetables in raised beds for better drainage? This is a great option, especially if you have heavy clay soil. The raised beds will improve drainage and create a better growing environment for your topinambur.
- How to grow topinambur vegetables in the fall for spring harvest? Plant the tubers in late fall, before the ground freezes. They will establish roots over the winter and be ready to grow vigorously in the spring.
- How to grow topinambur vegetables without using chemical fertilizers or pesticides? Amend your soil with compost or manure, use natural pest control methods, and practice crop rotation.
By addressing these common questions, I hope to provide you with the confidence and knowledge you need to successfully grow your own topinambur.
12. Conclusion: Enjoying Your Topinambur Harvest
Growing topinambur is a rewarding experience for any gardener. With these simple steps, you can enjoy a delicious and healthy harvest of your own. These versatile tubers are a great addition to any garden and kitchen.
Key Takeaways:
- Topinambur are easy to grow and require minimal maintenance.
- Proper soil preparation and planting are essential for a bountiful harvest.
- Regular harvesting and containment methods can prevent topinambur from becoming invasive.
- Topinambur are versatile in the kitchen and can be used in a variety of dishes.
- They are also packed with nutrients and offer numerous health benefits.
I encourage you to give topinambur a try in your own garden. They are a unique and rewarding crop that can provide you with a delicious and healthy harvest for years to come.
I hope this comprehensive guide has provided you with all the information you need to successfully grow topinambur. If you have any further questions, please feel free to leave a comment below.
