
Are you tired of growing the same old vegetables in your garden year after year? Do you crave a unique flavor and a touch of history on your dinner plate? Many gardeners stick to familiar crops, missing out on the delightful world of heirloom vegetables like skirret. This can lead to a sense of gardening monotony and a missed opportunity to explore diverse flavors. But what if you could easily introduce a forgotten culinary gem into your garden? I’m here to tell you, you absolutely can! In this comprehensive guide, I’ll walk you through 12 simple steps on how to grow skirret vegetable, ensuring you a sweet and satisfying harvest.
Understanding Skirret: A Quick Introduction
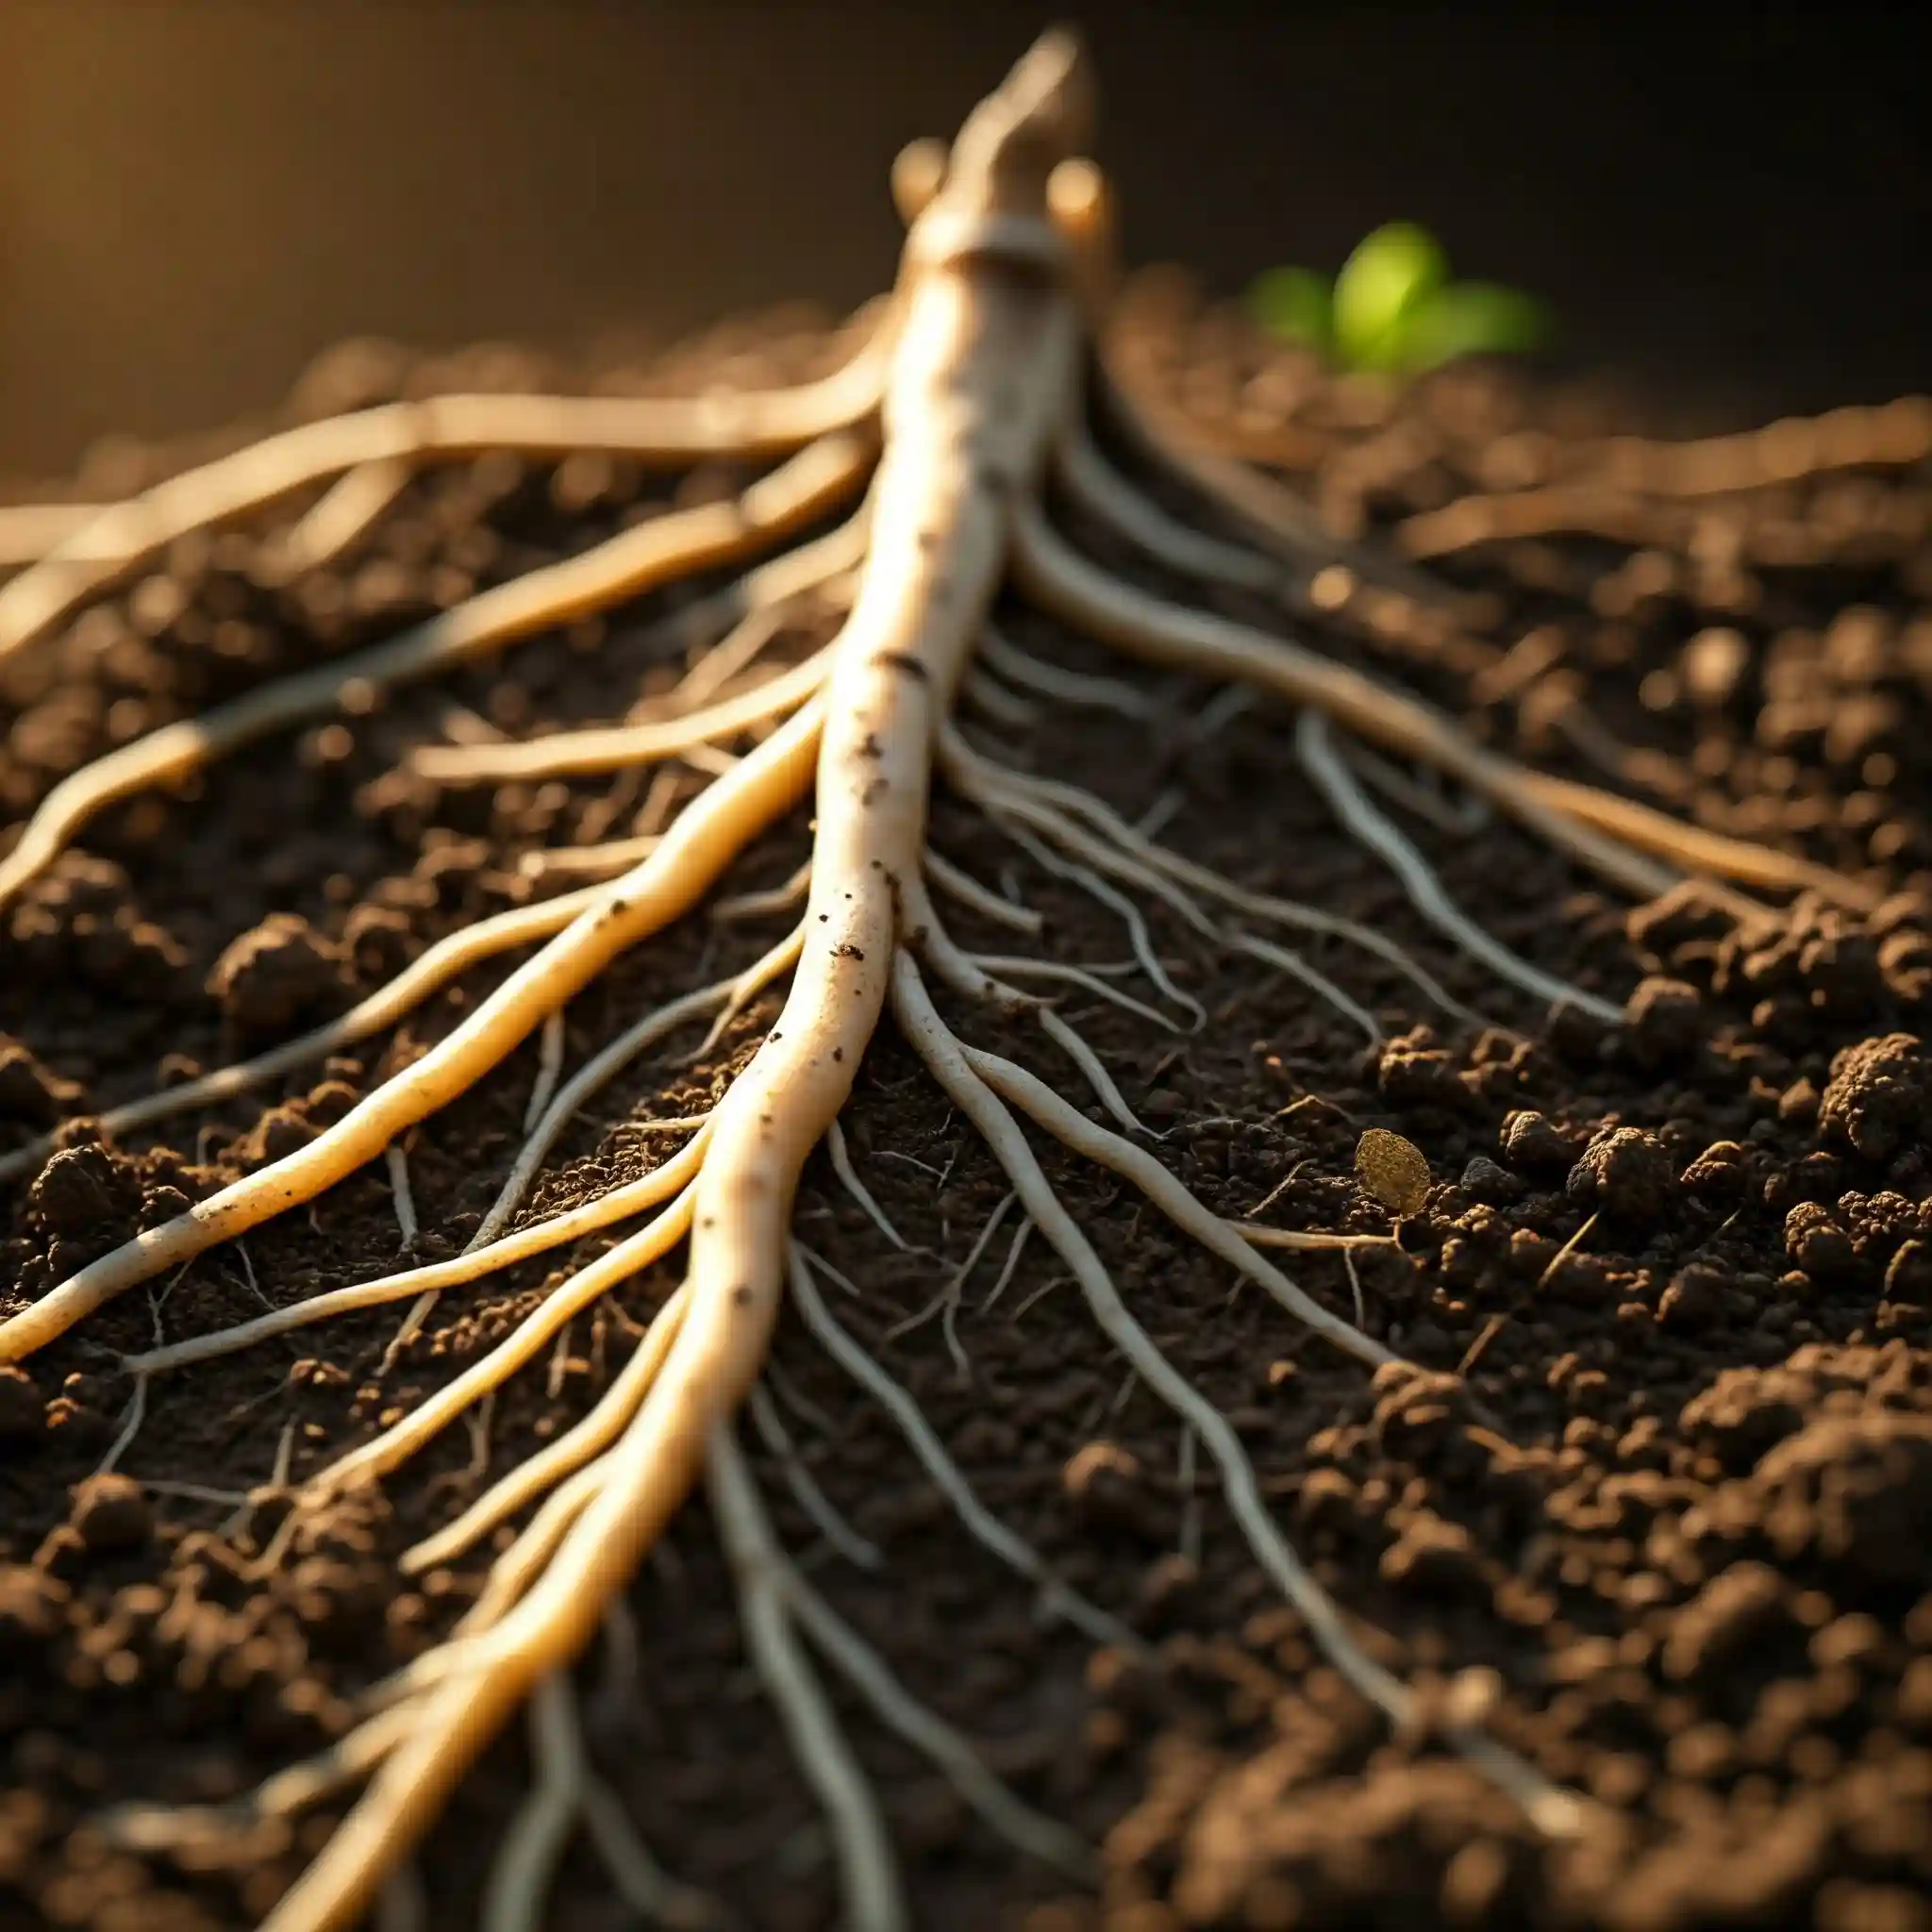
Let’s dive into the world of Sium sisarum, commonly known as skirret. This fascinating root vegetable boasts a rich history, once gracing the tables of Europeans for centuries before the potato’s rise in popularity. You might be wondering, “What does skirret taste like?” Well, imagine a delightful blend of parsnip and carrot, with a subtle hint of sweetness and a touch of peppery warmth. Some even detect a nutty undertone. This unique flavor profile makes skirret a versatile addition to various dishes.
Skirret belongs to the Apiaceae family, also known as the carrot or parsley family. This family includes other familiar vegetables like carrots, parsnips, celery, and parsley. Skirret is a perennial plant, meaning it can live for more than two years. In the garden, it produces clusters of slender, creamy-white roots, typically 4-8 inches long. These roots are the edible part of the plant, and they offer a unique texture when cooked – tender, slightly sticky, and melt-in-your-mouth.
From my experience, understanding a plant’s origins and characteristics is crucial for successful cultivation. Skirret’s historical significance as a staple food in Europe highlights its adaptability and resilience. Knowing that it’s a perennial means you can potentially enjoy harvests for multiple years from a single planting.
Key Characteristics of Skirret:
- Botanical Name: Sium sisarum
- Family: Apiaceae (Carrot/Parsley Family)
- Type: Perennial Root Vegetable
- Taste: Sweet, slightly peppery, nutty
- Edible Part: Roots
- Origin: Europe
Why Grow Skirret?
You might be thinking, with so many vegetables available, why bother with skirret? Here are a few compelling reasons:
- Unique Flavor: Skirret offers a taste unlike any other root vegetable, adding a special touch to your meals.
- Historical Significance: Growing skirret connects you to centuries of culinary tradition.
- Garden Diversity: It’s a great way to diversify your garden and try something new.
- Perennial Nature: Once established, it can provide harvests for several years.
- Nutritional Value: While not extensively studied, skirret is a source of carbohydrates and fiber.
A Brief History of Skirret:
Skirret has a long and fascinating history. It was a popular food source in Europe long before the arrival of the potato. During the medieval and Renaissance periods, skirret was a common ingredient in both peasant and aristocratic cuisine. It was particularly prized in England during the Tudor and Stuart eras. However, with the widespread cultivation of the potato, skirret gradually fell out of favor. Today, it is considered a heritage or “forgotten” vegetable, but its unique flavor and historical significance are attracting renewed interest from gardeners and chefs alike.
I remember the first time I tasted skirret. It was at a local farmers’ market, and I was immediately intrigued by its unusual flavor. That experience sparked my interest in growing this fascinating vegetable, and I’m excited to share my knowledge with you.
Sourcing Skirret Seeds or Roots
Now that you know a bit about skirret, the next step in learning how to grow skirret vegetable is finding your starting material. You have two main options: seeds or root divisions. Each has its own advantages, and your choice might depend on availability and your gardening style.
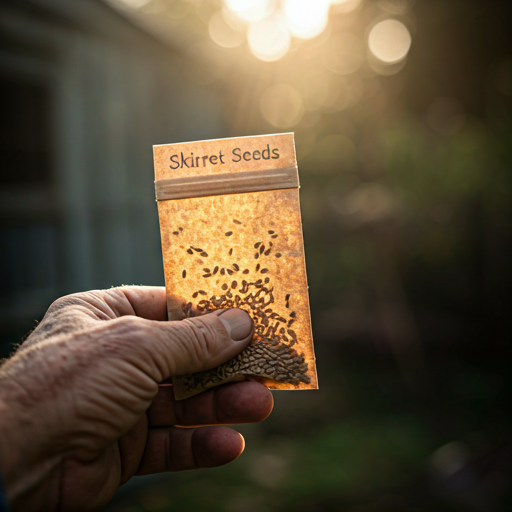
Finding Skirret Seeds:
If you choose to start from seed, sourcing them can be a bit of a treasure hunt. Skirret seeds aren’t as readily available as common vegetable seeds, but don’t worry, they’re not impossible to find. Here are some places I recommend checking:
- Specialty Seed Suppliers: Many companies specialize in heirloom or unusual vegetable seeds. These are often your best bet for finding skirret seeds.
- Online Retailers: Online marketplaces and seed companies offer a wide variety of seeds, including skirret. Be sure to check reviews and choose reputable sellers.
- Horticultural Societies: Local horticultural societies or gardening clubs sometimes have seed exchanges or can provide information on where to find skirret seeds.
- Seed Saving Networks: Some organizations focus on preserving heirloom varieties through seed saving. They might have skirret seeds available or be able to connect you with someone who does.
Tips for Choosing Skirret Seeds:
- Look for Fresh Seeds: Check the packaging for a recent “packed on” date. Fresh seeds have a higher germination rate.
- Choose Reputable Suppliers: Buy from companies with a good reputation for quality seeds.
- Consider Organic Options: If you’re an organic gardener, look for certified organic skirret seeds.
Starting with Root Divisions:
Another way how to grow skirret is by starting with root divisions. This method is faster than starting from seed, as you’re essentially planting a piece of an already established plant. If you have access to a friend’s skirret patch or know of a local gardener who grows it, you might be able to obtain some root divisions.
How to Obtain Root Divisions:
- Ask Fellow Gardeners: Reach out to local gardening communities or friends who might be growing skirret.
- Check Local Nurseries: Some nurseries that specialize in unusual plants might carry skirret root divisions.
Advantages and Disadvantages of Each Method:
To help you decide which method is right for you, here’s a quick comparison:
| Method | Advantages | Disadvantages |
| Starting from Seed | More widely available, allows for greater variety selection, cost-effective | Takes longer to reach harvest, germination can be variable |
| Starting with Root Divisions | Faster time to harvest, more reliable than seed germination | Less widely available, limited variety selection, potential for disease transfer |
From my experience, if you’re eager to get started and have access to root divisions, that’s a great option. However, if you enjoy the process of nurturing plants from seed and have the patience, starting from seed can be very rewarding.
No matter which method you choose, sourcing your skirret plants from a reliable source is crucial. This will ensure you start with healthy, vigorous plants that are more likely to thrive in your garden. Now that you know how to find your skirret, let’s move on to preparing the ideal growing environment.
Preparing the Ideal Growing Environment
Now that you have your skirret seeds or root divisions, it’s time to create the perfect home for them in your garden. Just like any plant, skirret has specific preferences when it comes to its growing environment. Providing the right conditions is key to a successful harvest. Here’s what I’ve learned about preparing the ideal growing environment for skirret:
Soil Preparation:
Skirret thrives in well-drained soil that is rich in organic matter. This means the soil should be able to retain moisture but not become waterlogged. Here are some tips for preparing your soil:
- Choose the Right Location: Select a spot in your garden that receives at least 6 hours of sunlight per day.
- Loosen the Soil: Use a garden fork or tiller to loosen the soil to a depth of 12-18 inches. This will allow the skirret roots to grow easily.
- Amend with Compost: Mix in plenty of compost or other organic matter to improve soil fertility and drainage.
- Check the pH: Skirret prefers a soil pH between 6.0 and 7.0. You can test your soil pH with a home testing kit or by sending a sample to your local extension office.
Planting Skirret:
Once your soil is prepared, it’s time to plant your skirret. Here are some tips for planting skirret from seed:
- Start Seeds Indoors: Sow seeds indoors 6-8 weeks before the last frost in your area.
- Direct Sow Seeds: You can also direct sow seeds into the garden after the danger of frost has passed.
- Plant Seeds 1/2 Inch Deep: Plant seeds about 1/2 inch deep and 1 inch apart.
- Keep Soil Moist: Keep the soil consistently moist until the seeds germinate.
Here are some tips for planting skirret from root divisions:
- Plant in Spring or Fall: Plant root divisions in the spring or fall.
- Plant 2-3 Inches Deep: Plant root divisions about 2-3 inches deep.
- Space Plants 12-18 Inches Apart: Space plants 12-18 inches apart to allow for adequate growth.
Providing Proper Care:
Once your skirret is planted, it’s important to provide proper care to ensure a healthy harvest. Here are some tips for caring for skirret:
- Water Regularly: Water skirret regularly, especially during dry periods.
- Fertilize Monthly: Fertilize skirret monthly with a balanced fertilizer.
- Weed Regularly: Weed around your skirret plants regularly to prevent competition for water and nutrients.
- Mulch: Apply a layer of mulch around your skirret plants to help retain moisture and suppress weeds.
By following these tips, you can create the ideal growing environment for your skirret and enjoy a bountiful harvest.
Starting Skirret from Seed
While obtaining root divisions can offer a quicker start, beginning your skirret patch from seed opens up a world of possibilities. It allows you to explore different varieties and witness the entire life cycle of this fascinating plant. If you choose this path, you’ll need to start your seeds indoors about 6-8 weeks before the last expected frost in your region. This head start ensures that your seedlings are strong enough to withstand the outdoor elements once the weather warms up.
Here’s a step-by-step guide to starting skirret from seed:
- Gather Your Supplies: You’ll need seed starting trays or small pots, a seed starting mix (a fine-textured soil blend specifically designed for seedlings), skirret seeds, a spray bottle for watering, and a warm, sunny location or a grow light.
- Sow the Seeds: Fill your seed starting trays or pots with the seed starting mix, leaving about half an inch of space at the top. Gently sow the skirret seeds about ¼ inch deep, spacing them about an inch apart.
- Water Carefully: Use a spray bottle to lightly moisten the soil. Avoid overwatering, as this can lead to fungal diseases. The soil should be consistently damp but not soggy.
- Provide Warmth and Light: Place the trays or pots in a warm, sunny location, such as a south-facing windowsill. If you don’t have enough natural light, use a grow light to provide 12-16 hours of light per day.
- Maintain Moisture: Keep the soil consistently moist by misting it regularly with the spray bottle. You may also want to cover the trays or pots with a plastic dome or bag to help retain moisture.
- Be Patient: Skirret seeds can be slow to germinate, sometimes taking up to three weeks. Be patient and continue to provide the necessary care.
- Thin Seedlings: Once the seedlings have emerged and have a couple of sets of true leaves, thin them out, so that only the strongest seedling remains in each pot or cell.
- Harden Off Seedlings: Before transplanting your seedlings outdoors, you’ll need to acclimate them to the outdoor conditions. This process, called “hardening off,” involves gradually exposing the seedlings to cooler temperatures and more sunlight over a period of 7-10 days.
Once the danger of frost has passed and your seedlings have been hardened off, they’re ready to be transplanted into your garden. Choose a location that receives at least 6 hours of sunlight per day and has well-drained soil that’s rich in organic matter. Dig small holes that are slightly larger than the seedling’s root ball and carefully transplant each seedling into its new home. Space the seedlings about 12-18 inches apart to give them plenty of room to grow.
Starting skirret from seed requires a bit more time and attention, but it’s a rewarding experience that allows you to nurture your plants from their earliest stages. Now that you know how to start skirret from seed, let’s explore the other option: planting root divisions.
Planting Skirret Root Divisions
If you have access to skirret root divisions, you’re in for a treat! This method offers a quicker path to harvest compared to starting from seed. It’s akin to planting bulbs or other root crops, and it’s a great way to propagate existing skirret plants. You might obtain root divisions from a fellow gardener, a local nursery specializing in unusual plants, or even through online plant exchanges.
Here’s how to plant skirret root divisions:
- Obtain Healthy Divisions: Look for firm, healthy roots with visible growth points or “eyes.” Avoid any that are soft, mushy, or show signs of disease.
- Prepare the Planting Site: Choose a location with well-drained soil and at least 6 hours of sunlight per day. Prepare the soil as you would for seed planting, loosening it and amending it with compost.
- Plant at the Right Depth: Dig small holes about 2-3 inches deep. Place the root division in the hole with the growth points facing upwards. Cover with soil and gently firm the soil around the division.
- Space Appropriately: Space the root divisions about 12-18 inches apart to allow ample room for growth.
- Water Well: After planting, water the area thoroughly to settle the soil around the roots.
Best Time to Plant Root Divisions:
The ideal time to plant skirret root divisions is in the spring or fall. Planting in the spring allows the plants to establish themselves before the heat of summer. Fall planting allows the roots to develop over the winter, giving them a head start in the spring.
Caring for Newly Planted Divisions:
After planting, keep the soil consistently moist but not waterlogged. You may want to add a layer of mulch around the plants to help retain moisture and suppress weeds. Once the plants begin to grow, follow the same care guidelines as for plants started from seed, including providing adequate sunlight, watering, and occasional fertilization.
Advantages of Planting Root Divisions:
- Faster Time to Harvest: You’ll typically harvest roots sooner than if you started from seed.
- More Reliable: Root divisions are more likely to grow successfully compared to seeds, which can have variable germination rates.
- Preserves Specific Varieties: If you have a particular skirret variety you enjoy, planting root divisions ensures you’re growing an exact clone of that plant.
Disadvantages of Planting Root Divisions:
- Less Availability: Root divisions are not as widely available as seeds.
- Potential for Disease Transfer: If the parent plant has a disease, it can be passed on to the new plants through the root divisions.
From my experience, planting root divisions is a great way to quickly establish a skirret patch. It’s particularly useful if you have access to a good source of healthy divisions. However, if you enjoy the process of starting from seed or are looking for specific varieties, that’s still a viable option.
Now that we’ve covered both seed starting and planting root divisions, let’s move on to the essential aspects of ongoing care, including sunlight, watering, and fertilization.
Providing Proper Sunlight and Watering
Just like us, plants need the right environment to thrive. For skirret, two key elements are sunlight and water. These are crucial for photosynthesis, nutrient uptake, and overall plant health. Getting these right is essential for learning how to grow skirret vegetable successfully. From my experience, observing your plants closely and understanding their needs is key to providing optimal care.
Sunlight: The Energy Source
Skirret thrives in a sunny location, requiring at least 6 hours of direct sunlight per day. This is crucial for photosynthesis, the process by which plants convert light energy into chemical energy for growth.
- Ideal Location: Choose a spot in your garden that receives full sun for most of the day.
- Partial Shade Tolerance: While skirret prefers full sun, it can tolerate some partial shade, especially in hotter climates. However, too much shade can lead to reduced yields.
- Observing Your Plants: If your skirret plants are not getting enough sunlight, they may become leggy (tall and spindly) and produce fewer roots.
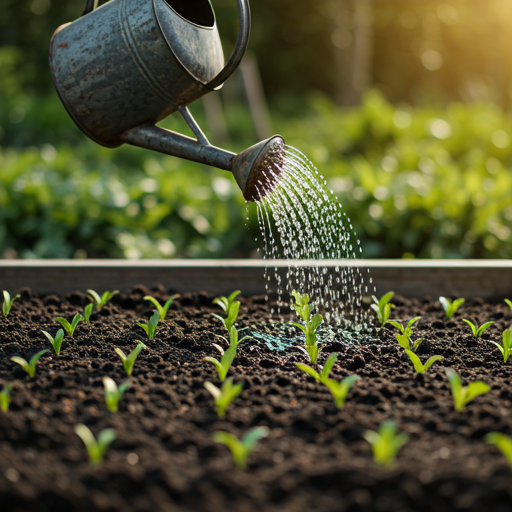
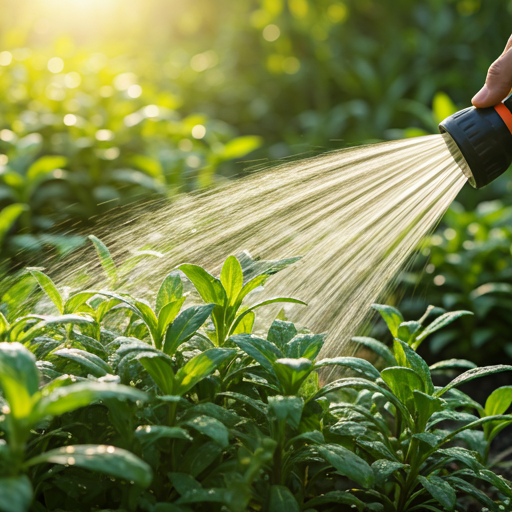
Watering: Keeping Things Moist
Consistent watering is essential for skirret, especially during dry periods. However, it’s crucial to avoid overwatering, as this can lead to root rot.
- Watering Frequency: Water your skirret plants deeply whenever the top inch of soil feels dry to the touch.
- Watering Method: Water at the base of the plants to avoid wetting the foliage, which can encourage fungal diseases.
- Mulching: Applying a layer of mulch around your skirret plants can help retain moisture and reduce the need for frequent watering.
- Observing Your Plants: If your skirret plants are not getting enough water, they may wilt or their leaves may turn yellow. Overwatering can lead to yellowing leaves and soft, mushy roots.
Adapting to Different Climates:
The specific sunlight and watering needs of your skirret plants may vary depending on your climate.
- Hot Climates: In hot climates, skirret may benefit from some afternoon shade to prevent heat stress. You may also need to water more frequently.
- Cool Climates: In cooler climates, ensure your skirret plants receive as much sunlight as possible. You may need to water less frequently.
Tips for Proper Watering:
- Water in the Morning: Watering in the morning allows the foliage to dry before nightfall, reducing the risk of fungal diseases.
- Water Deeply: When you water, water deeply enough to reach the roots.
- Avoid Overwatering: Overwatering can lead to root rot, which can kill your plants.
- Use a Moisture Meter: A moisture meter can help you determine when your plants need water.
By providing your skirret plants with the proper amount of sunlight and water, you’ll set them up for healthy growth and a bountiful harvest. Now that we’ve covered these essential elements, let’s move on to feeding your skirret plants.
Feeding Your Skirret Plants: A Guide to Fertilization
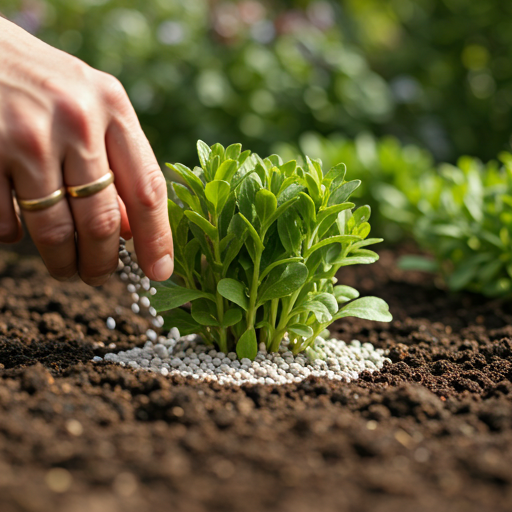
While skirret isn’t an exceptionally heavy feeder, providing the right nutrients can significantly boost its growth and yield. From my experience, a balanced approach to fertilization is key. Over-fertilizing can lead to excessive foliage growth at the expense of root development, which is what we’re after when growing skirret.
Understanding Skirret’s Nutritional Needs:
Skirret, like most root vegetables, benefits from a balanced fertilizer with a slightly higher phosphorus content. Phosphorus promotes root growth and development, which is essential for a good harvest.
Types of Fertilizers:
You have several options when it comes to fertilizing your skirret plants:
- Compost: This is my preferred method. Compost is a natural, slow-release fertilizer that improves soil structure and provides a wide range of nutrients.
- Organic Granular Fertilizers: These fertilizers are made from natural materials and release nutrients gradually over time. Look for a balanced formula or one with a slightly higher phosphorus content.
- Liquid Fertilizers: These fertilizers are diluted in water and applied directly to the soil or foliage. They provide a quick boost of nutrients but need to be applied more frequently.
When to Fertilize:
- At Planting Time: When planting seeds or root divisions, you can incorporate some compost or a slow-release granular fertilizer into the soil.
- During the Growing Season: Side-dress your skirret plants with compost or a granular fertilizer once or twice during the growing season. You can also apply a liquid fertilizer every few weeks.
- Avoid Late Fertilization: Avoid fertilizing late in the season, as this can delay root maturation.
How to Fertilize:
- Compost: Spread a 1-2 inch layer of compost around the base of your skirret plants.
- Granular Fertilizer: Sprinkle the fertilizer evenly around the base of the plants, avoiding contact with the foliage. Gently work it into the soil and water thoroughly.
- Liquid Fertilizer: Dilute the fertilizer according to the package directions and apply it to the soil around the base of the plants.
Tips for Fertilizing Skirret:
- Test Your Soil: A soil test can help you determine the specific nutrient needs of your soil.
- Start with Compost: Compost is a great way to provide a base level of nutrients and improve soil health.
- Don’t Over-Fertilize: Over-fertilizing can harm your plants and lead to environmental problems.
- Observe Your Plants: Pay attention to your plants’ growth and adjust your fertilization schedule accordingly.
By providing your skirret plants with the right nutrients, you’ll help them thrive and produce a bountiful harvest of delicious roots. Now that we’ve covered fertilization, let’s move on to protecting your skirret from pests and diseases.
Protecting Skirret from Pests and Diseases

While skirret is generally a hardy plant, it can occasionally be susceptible to certain pests and diseases. As an experienced gardener, I’ve learned that proactive prevention and early detection are key to keeping your skirret patch healthy. In this section, I’ll share some common skirret pests and diseases, along with tips on how to prevent and manage them.
Common Skirret Pests:
- Aphids: These small, soft-bodied insects can suck sap from skirret leaves, causing them to curl and distort.
- Carrot Root Fly: The larvae of this fly can tunnel into skirret roots, causing damage and reducing yield.
- Slugs and Snails: These mollusks can feed on skirret leaves and roots, especially young plants.
Common Skirret Diseases:
- Root Rot: This fungal disease can occur in waterlogged soils, causing the roots to rot and the plant to die.
- Leaf Spot: This fungal disease can cause brown or black spots to appear on skirret leaves.
Preventing Pests and Diseases:
- Choose a Sunny Location: Skirret thrives in full sun, which helps to prevent fungal diseases.
- Ensure Well-Drained Soil: Well-drained soil is essential for preventing root rot.
- Practice Crop Rotation: Avoid planting skirret in the same location year after year.
- Monitor Your Plants Regularly: Check your plants regularly for signs of pests or diseases.
- Encourage Beneficial Insects: Attract beneficial insects like ladybugs and lacewings to your garden to help control pests.
Managing Pests and Diseases:
- Handpicking: For small infestations of aphids or slugs, you can handpick them off the plants.
- Insecticidal Soap: Insecticidal soap can be effective against aphids and other soft-bodied insects.
- Neem Oil: Neem oil is a natural insecticide and fungicide that can be used to control a variety of pests and diseases.
- Copper Fungicide: Copper fungicide can be used to control fungal diseases like leaf spot.
Tips for Healthy Skirret:
- Water at the Base of the Plants: Avoid wetting the foliage when watering.
- Provide Good Air Circulation: Space your plants adequately to allow for good air circulation.
- Remove Infected Plants: If you find any plants that are severely infected with pests or diseases, remove them from the garden to prevent the spread.
By taking these preventative measures and addressing any issues promptly, you can keep your skirret patch healthy and productive. Now that we’ve covered pest and disease management, let’s move on to the next important aspect of skirret cultivation: weeding and maintenance.
Weeding and Maintaining Your Skirret Patch
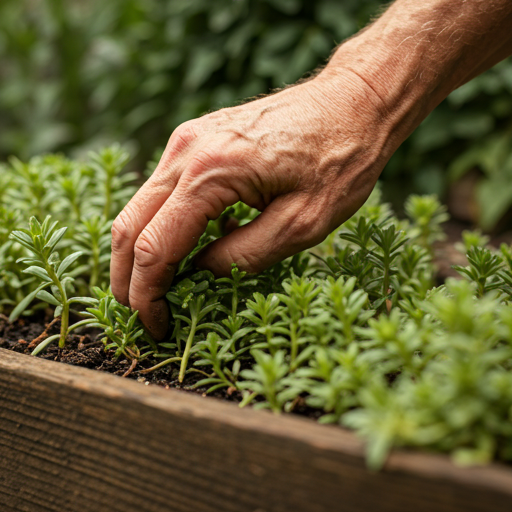
Maintaining a healthy skirret patch involves more than just planting and watering. Regular weeding and other maintenance tasks are crucial for ensuring your plants thrive and produce a bountiful harvest. As an avid gardener, I’ve learned that a little consistent effort goes a long way in keeping your skirret patch in top shape.
The Importance of Weeding
Weeds compete with your skirret plants for valuable resources like water, nutrients, and sunlight. If left unchecked, they can significantly reduce your yield and even stunt the growth of your skirret.
- Regular Removal: Regularly remove weeds by hand or with a garden hoe. Aim to weed at least once a week, or more frequently if needed.
- Target Young Weeds: It’s easier to remove weeds when they are young and their root systems are not yet established.
- Be Gentle: Be careful not to damage the skirret roots when weeding.
Other Maintenance Tasks
In addition to weeding, here are some other maintenance tasks to keep your skirret patch healthy:
- Mulching: Applying a layer of mulch around your skirret plants can help suppress weeds, retain moisture, and regulate soil temperature.
- Thinning: If you started your skirret from seed, you may need to thin the seedlings to provide adequate spacing.
- Supporting: As skirret plants grow taller, they may need some support to prevent them from flopping over. You can use stakes or twine to provide support.
- Monitoring: Keep an eye on your plants for signs of pests or diseases and take action as needed.
Tips for Maintaining Your Skirret Patch
- Use the Right Tools: Use appropriate tools for weeding and other maintenance tasks.
- Work in Dry Conditions: Avoid working in the garden when the soil is wet, as this can compact the soil.
- Dispose of Weeds Properly: Dispose of weeds in a compost pile or yard waste bin.
- Enjoy the Process: Gardening should be an enjoyable experience. Take your time and appreciate the process of nurturing your skirret plants.
By following these tips, you can maintain a healthy and productive skirret patch. Now that we’ve covered weeding and maintenance, let’s move on to the exciting part: harvesting your skirret roots.
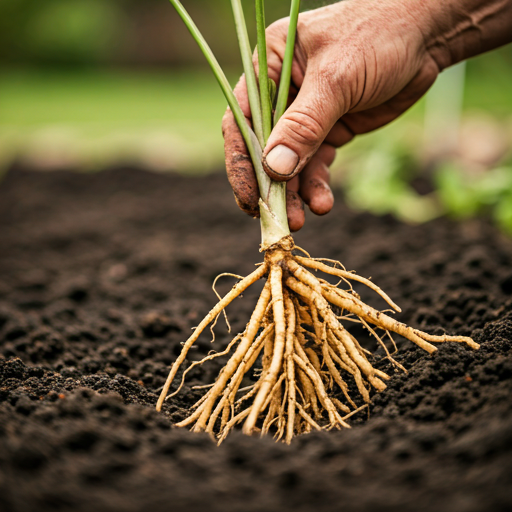
Harvesting Your Skirret Roots
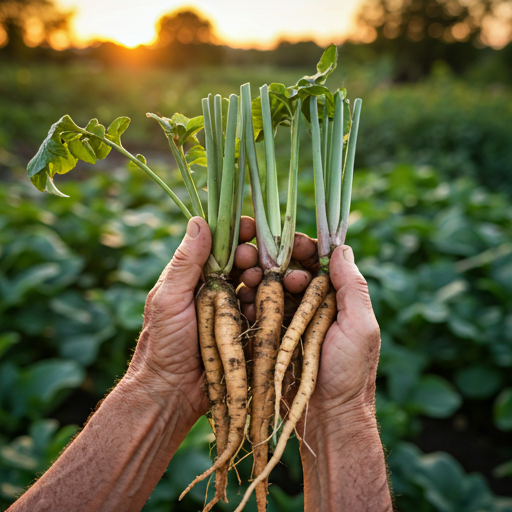
After all your hard work and patience, the most rewarding part of growing skirret is finally here: harvesting your own fresh roots! Knowing when and how to harvest is key to enjoying the best flavor and texture. From my experience, timing is everything when it comes to harvesting root vegetables.
When to Harvest
Skirret is typically ready for harvest in the fall, after the foliage has died back. This usually occurs after the first frost in your area. However, you can also harvest skirret earlier in the fall if you prefer smaller, more tender roots.
How to Harvest
Harvesting skirret is a simple process:
- Loosen the Soil: Use a garden fork or spade to loosen the soil around the base of the plant.
- Gently Lift the Roots: Carefully lift the roots out of the ground, using your hands to remove any excess soil.
- Separate the Roots: Separate the individual roots from the cluster.
- Wash the Roots: Wash the roots thoroughly to remove any remaining soil.
Tips for Harvesting
- Choose a Dry Day: Harvest your skirret on a dry day to prevent the roots from rotting.
- Handle with Care: Be gentle when harvesting to avoid damaging the roots.
- Save Some Roots for Next Year: If you want to grow skirret again next year, save some of the smaller roots to replant.
Enjoying Your Harvest
Freshly harvested skirret can be enjoyed in a variety of ways. It can be eaten raw, cooked, or pickled. Skirret has a sweet, slightly peppery flavor that is delicious in salads, soups, and stews.
Storing Skirret
If you’re not going to eat your skirret right away, you can store it for later use. Here are some tips for storing skirret:
- Store in a Cool, Dry Place: Store your skirret in a cool, dry place, such as a basement or root cellar.
- Pack in Sand or Sawdust: Pack the roots in sand or sawdust to help keep them moist.
- Check Regularly: Check the roots regularly for signs of spoilage.
By following these tips, you can enjoy your skirret harvest for months to come. Now that you know how to grow, harvest, and store skirret, let’s move on to the next section: enjoying your skirret harvest.
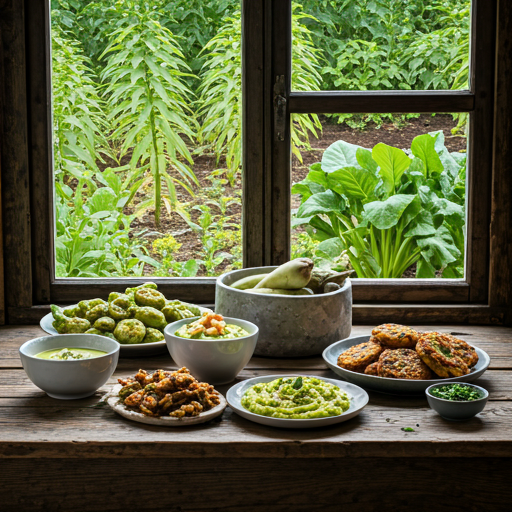
Enjoying Your Skirret Harvest: Culinary Uses

Congratulations! You’ve successfully grown and harvested your own skirret. Now comes the best part: enjoying the fruits (or rather, roots) of your labor. Skirret’s unique flavor profile, a delightful blend of sweet, peppery, and subtly nutty notes, makes it a versatile ingredient in the kitchen.
Ways to Prepare Skirret
- Raw: Young, tender skirret roots can be eaten raw in salads or as a crudité with dips. Their crisp texture and sweet flavor make them a refreshing addition to any raw vegetable platter.
- Boiled: Boiling skirret brings out its sweetness and creates a tender, slightly sticky texture. Boiled skirret can be mashed, pureed, or added to soups and stews.
- Steamed: Steaming is another excellent way to cook skirret, preserving its delicate flavor and nutrients. Steamed skirret can be served as a side dish with butter or herbs.
- Roasted: Roasting skirret intensifies its sweetness and gives it a slightly caramelized flavor. Roasted skirret can be served as a side dish or added to roasted vegetable medleys.
- Fried: Fried skirret is a delicious treat, with a crispy exterior and a tender interior. It can be served as a side dish or as a snack.
Skirret in Different Cuisines
Skirret has a long history of culinary use in Europe, and it can be incorporated into a variety of dishes:
- Soups and Stews: Skirret adds a unique sweetness and depth of flavor to soups and stews.
- Salads: Raw or cooked skirret can be added to salads for a touch of sweetness and texture.
- Side Dishes: Boiled, steamed, or roasted skirret can be served as a side dish with butter, herbs, or sauces.
- Main Courses: Skirret can be used as a main ingredient in dishes like skirret pie or skirret fritters.
Tips for Cooking with Skirret
- Choose Young Roots: Young skirret roots are more tender and have a milder flavor.
- Peel or Scrub: Depending on the recipe, you may need to peel or scrub the skirret roots before cooking.
- Cook Until Tender: Skirret is cooked when it is tender enough to be easily pierced with a fork.
- Experiment with Flavors: Skirret pairs well with a variety of flavors, including butter, herbs, spices, and citrus.
Skirret Recipes to Try
- Skirret and Parsnip Mash: Combine boiled skirret and parsnips with butter and milk for a creamy and flavorful mash.
- Roasted Skirret with Herbs: Toss roasted skirret with olive oil, herbs, and spices for a simple and delicious side dish.
- Skirret Soup: Add boiled skirret to your favorite soup recipe for a touch of sweetness and depth of flavor.
- Skirret Fritters: Grate raw skirret and combine it with flour, eggs, and spices to make crispy fritters.
Preserving Your Skirret Harvest
If you have a surplus of skirret, you can preserve it for later use by pickling or freezing it.
- Pickled Skirret: Pickled skirret is a tangy and flavorful condiment that can be enjoyed with sandwiches or salads.
- Frozen Skirret: Cooked skirret can be frozen for up to 6 months.
Enjoying the Rewards of Your Labor
Growing your own skirret is a rewarding experience that allows you to enjoy this unique and delicious vegetable. Whether you choose to eat it raw, cooked, or preserved, skirret is sure to add a touch of sweetness and history to your meals.
Storing Skirret for Winter Use

If you find yourself with a surplus of skirret after your harvest, don’t worry! There are several ways to preserve these delicious roots for enjoyment throughout the winter months. Proper storage ensures you can savor the unique flavor of your homegrown skirret long after the growing season has ended.
Short-Term Storage:
For skirret you plan to use within a few weeks, you can store it in the refrigerator.
- Trim the Greens: Remove the leafy tops, leaving about an inch of stem.
- Wash and Dry: Gently wash the roots to remove any excess soil and allow them to dry completely.
- Store in a Plastic Bag: Place the skirret in a plastic bag and store it in the crisper drawer of your refrigerator.
Long-Term Storage:
For extended storage, you have a couple of options:
- Storing in Sand or Sawdust: This method mimics natural storage conditions and can keep skirret fresh for several months.
- Choose a Container: Select a wooden crate, box, or bucket with drainage holes.
- Layer with Sand or Sawdust: Place a layer of damp sand or sawdust in the bottom of the container.
- Arrange the Roots: Arrange the skirret roots in a single layer on top of the sand or sawdust, ensuring they don’t touch each other.
- Cover with More Sand or Sawdust: Cover the roots with another layer of damp sand or sawdust.
- Store in a Cool, Dark Place: Store the container in a cool, dark place, such as a basement or root cellar.
- Freezing: Freezing is another effective way to preserve skirret for long-term use.
- Cook the Skirret: Boil or steam the skirret until it is tender but not mushy.
- Cool and Drain: Allow the skirret to cool completely and drain any excess water.
- Package and Freeze: Place the skirret in freezer bags or containers and freeze for up to 6 months.
Tips for Storing Skirret:
- Choose Healthy Roots: Select firm, undamaged roots for storage.
- Maintain Proper Humidity: Keep the storage environment slightly humid to prevent the roots from drying out.
- Check Regularly: Check your stored skirret regularly and remove any roots that show signs of spoilage.
By following these storage tips, you can extend the enjoyment of your skirret harvest well into the winter months. Whether you choose to store them fresh in the refrigerator or preserve them for long-term use by storing them in sand or sawdust or freezing, you’ll have a supply of this unique vegetable on hand whenever you desire.
Frequently Asked Questions (FAQs)
You’ve reached the end of our comprehensive guide on growing skirret! I hope you’re feeling inspired and equipped to cultivate this unique root vegetable in your own garden. To further assist you, I’ve compiled a list of frequently asked questions that address specific concerns and queries you might have.
Q: How to grow skirret vegetable in raised garden beds?
A: Growing skirret in raised beds offers several advantages, including improved drainage, warmer soil temperatures, and easier access for harvesting. To successfully grow skirret in raised beds, ensure the bed is at least 12 inches deep to accommodate the root growth. Amend the soil with plenty of compost to improve drainage and fertility. Plant your skirret seeds or root divisions according to the spacing guidelines mentioned earlier in this guide.
Q: What is the best soil for growing skirret vegetable?
A: Skirret thrives in well-drained soil that is rich in organic matter. A sandy loam soil is ideal, as it provides good drainage while retaining enough moisture for the roots. Amend heavy clay soils with compost or other organic matter to improve drainage. Avoid soils that are prone to waterlogging, as this can lead to root rot.
Q: How to grow skirret vegetable from seed in pots?
A: Growing skirret in pots is a great option for those with limited garden space. Choose pots that are at least 12 inches deep and have drainage holes. Fill the pots with a well-draining potting mix amended with compost. Plant your skirret seeds according to the spacing guidelines mentioned earlier in this guide. Place the pots in a sunny location and water regularly.
Q: How to grow skirret vegetable in a cold climate successfully?
A: Skirret is a hardy plant that can tolerate cold temperatures. However, in colder climates, it’s essential to provide some winter protection to prevent the roots from freezing. Mulching around the base of the plants with straw or leaves can help insulate the roots. You can also grow skirret in raised beds, which tend to warm up earlier in the spring.
Q: What are the common pests when growing skirret vegetable?
A: Skirret is relatively pest-free, but a few common garden pests may occasionally bother it. Aphids, carrot root flies, slugs, and snails are the most common culprits. These pests can be controlled using organic methods, such as handpicking, insecticidal soap, or neem oil.
Q: How to harvest and store skirret vegetable for winter use?
A: Skirret is typically harvested in the fall, after the foliage has died back. To harvest, loosen the soil around the roots and gently lift them out of the ground. Wash the roots thoroughly and store them in a cool, dry place, such as a basement or root cellar. You can also store skirret in the refrigerator for short-term use.
Q: How to grow organic skirret vegetable in your backyard?
A: Growing organic skirret involves using natural methods to cultivate your plants. This includes amending the soil with compost, using organic fertilizers, and controlling pests and diseases with organic methods. Avoid using synthetic pesticides and fertilizers, as these can harm the environment and your health.
Q: How to grow skirret vegetable without using chemical fertilizers?
A: Skirret can be successfully grown without using chemical fertilizers. Compost is an excellent natural fertilizer that provides essential nutrients for skirret growth. You can also use other organic fertilizers, such as manure or bone meal.
Q: Step-by-step guide on how to grow skirret vegetable easily.
A: Growing skirret is a relatively straightforward process. Here’s a quick recap of the steps involved:
- Start seeds indoors or plant root divisions in the spring or fall.
- Choose a sunny location with well-drained soil.
- Water regularly and fertilize occasionally.
- Control pests and diseases as needed.
- Harvest the roots in the fall.
Q: Where can I buy seeds for growing skirret vegetable online?
A: Skirret seeds can be purchased from various online seed suppliers. Check online reviews and choose reputable suppliers that offer high-quality seeds.
Q: How to grow skirret vegetable for beginners in small gardens?
A: Skirret is a great choice for beginners and can be grown successfully in small gardens. Choose a sunny spot and amend the soil with compost. Plant your skirret seeds or root divisions in containers or directly in the ground. Water regularly and enjoy your homegrown skirret!
Q: How to grow skirret vegetable and prevent common diseases naturally?
A: Preventing diseases in skirret involves creating a healthy growing environment. This includes choosing a sunny location, ensuring well-drained soil, and practicing crop rotation. You can also use organic methods to control diseases, such as neem oil or copper fungicide.
Conclusion: A Rewarding Journey from Garden to Table
Growing skirret is more than just cultivating a root vegetable; it’s a connection to the past, a celebration of unique flavors, and a testament to the rewards of gardening. From the initial excitement of sourcing seeds or root divisions to the satisfaction of harvesting your own crop, the journey of growing skirret is a fulfilling experience for any gardener.
As you’ve learned throughout this comprehensive guide, cultivating skirret involves a few key steps: preparing the ideal growing environment, starting seeds or planting root divisions, providing proper care through sunlight, watering, and fertilization, protecting your plants from pests and diseases, and finally, harvesting and storing your bounty. Each step plays a crucial role in ensuring a successful harvest.
I remember my first attempt at growing skirret. I was drawn to its historical significance and the promise of a unique flavor. There were a few challenges along the way, of course, as there always are in gardening. But the moment I harvested my first skirret roots and tasted their sweet, peppery flavor, I knew it was all worth it.
I encourage you to embark on your own skirret-growing adventure. Whether you’re a seasoned gardener or just starting out, this guide provides the knowledge and tips you need to succeed. Don’t be afraid to experiment and adapt the techniques to your specific growing conditions.
Beyond the practical aspects of growing skirret, there’s a deeper connection to be made. By cultivating this “forgotten” vegetable, you’re not only adding diversity to your garden and your diet but also preserving a piece of culinary history. You’re participating in a tradition that spans centuries, connecting with generations of gardeners who have cultivated this unique root.
So, as you plan your garden for the upcoming season, consider adding skirret to your list. You might just discover a new favorite vegetable and a newfound appreciation for the rich history of food. With a little care and attention, you can enjoy the sweet rewards of your skirret harvest, bringing a touch of history and unique flavor to your table. Happy gardening!


")

