
Valentine’s Day. It’s that time of year again, and the pressure is on to find the perfect gift for your guy. If he’s a passionate gardener, you know the struggle is real. Generic gifts just won’t cut it. You want something thoughtful, something personal, something that speaks to his love for all things green. I’ve been there, wracking my brain for the perfect present, and I know how frustrating it can be. But this year, I’ve got you covered. I’ve compiled a list of 15 heartfelt DIY Valentine’s Day gardening gifts for him that are sure to impress. These gifts aren’t just things; they’re expressions of your love and appreciation for his passion. Whether you’re a seasoned DIYer or just starting out, you’ll find inspiration here to create something truly special. Let’s dive in and discover the perfect way to show your love this Valentine’s Day!
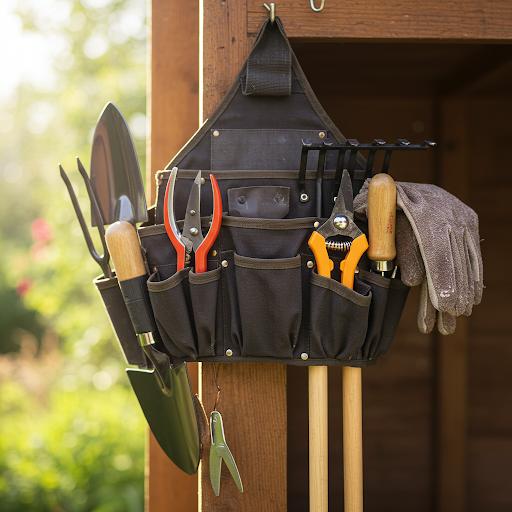
Personalized Garden Tool Organizer: Keep His Tools Handy
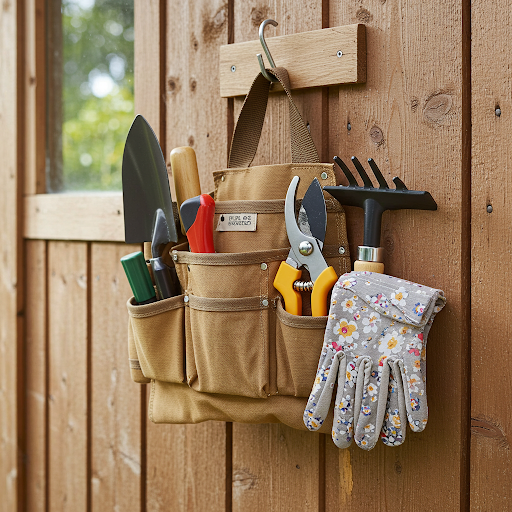
Every gardener knows the frustration of searching for that one specific tool. It’s a common problem, and it’s something I’ve experienced countless times in my own garden. A disorganized tool collection can put a damper on any gardening session. That’s why a personalized garden tool organizer makes such a fantastic gift. It’s practical, thoughtful, and shows you understand his needs. You’re not just giving him a place to store his tools; you’re giving him the gift of efficiency and ease in his favorite hobby.
DIY Ideas:
- Repurpose an Old Tool Belt: I love this idea because it’s both eco-friendly and budget-conscious. Find an old tool belt at a thrift store or garage sale. Clean it up, maybe add some new pockets or loops, and then personalize it with his initials or a fun gardening-related quote. You can even embroider his name or a design on it.
- Build a Wooden Organizer: If you’re handy with woodworking, this is a great option. You can build a custom organizer to fit his specific tool collection. Consider adding shelves, drawers, or hooks for different types of tools. Paint or stain the wood in his favorite color, or leave it natural for a rustic look.
- Create a Hanging Organizer: This is perfect for smaller spaces. You can use a piece of sturdy fabric or canvas and sew pockets of various sizes to hold his tools. Hang it on a wall or the back of a door for easy access. You can even use repurposed materials like old jeans or canvas bags for a unique touch.
Materials:
- Wood: For building a wooden organizer. Consider different types of wood like pine, cedar, or even reclaimed wood for a unique touch.
- Fabric: For creating a hanging organizer. Canvas, denim, or even heavy-duty cotton fabric work well.
- Paint/Stain: To personalize the organizer. Choose colors that he likes or that complement his gardening style.
- Tools: Hammer, nails, screws, saw, measuring tape, etc.
- Recycled Materials: Old tool belts, jeans, canvas bags, etc.
Tool Organizer Ideas
| Organizer Type | Materials | Difficulty | Personalization |
| Repurposed Tool Belt | Old tool belt, fabric, paint | Easy | Embroider initials, add patches |
| Wooden Organizer | Wood, paint, tools | Medium | Custom build, paint/stain |
| Hanging Organizer | Fabric, thread, hooks | Easy | Sew pockets, use recycled materials |
Case Study:
I once made a tool organizer for my dad, who is a passionate gardener. I repurposed an old wooden crate and added several compartments and hooks. I then painted it a deep green and stenciled his initials on the front. He absolutely loved it! It was a practical gift that also showed him how much I cared about his hobby. He uses it to this day, and it always makes me happy to see it in his shed.
Quote:
“The best gifts are the ones that come from the heart.” – Samantha
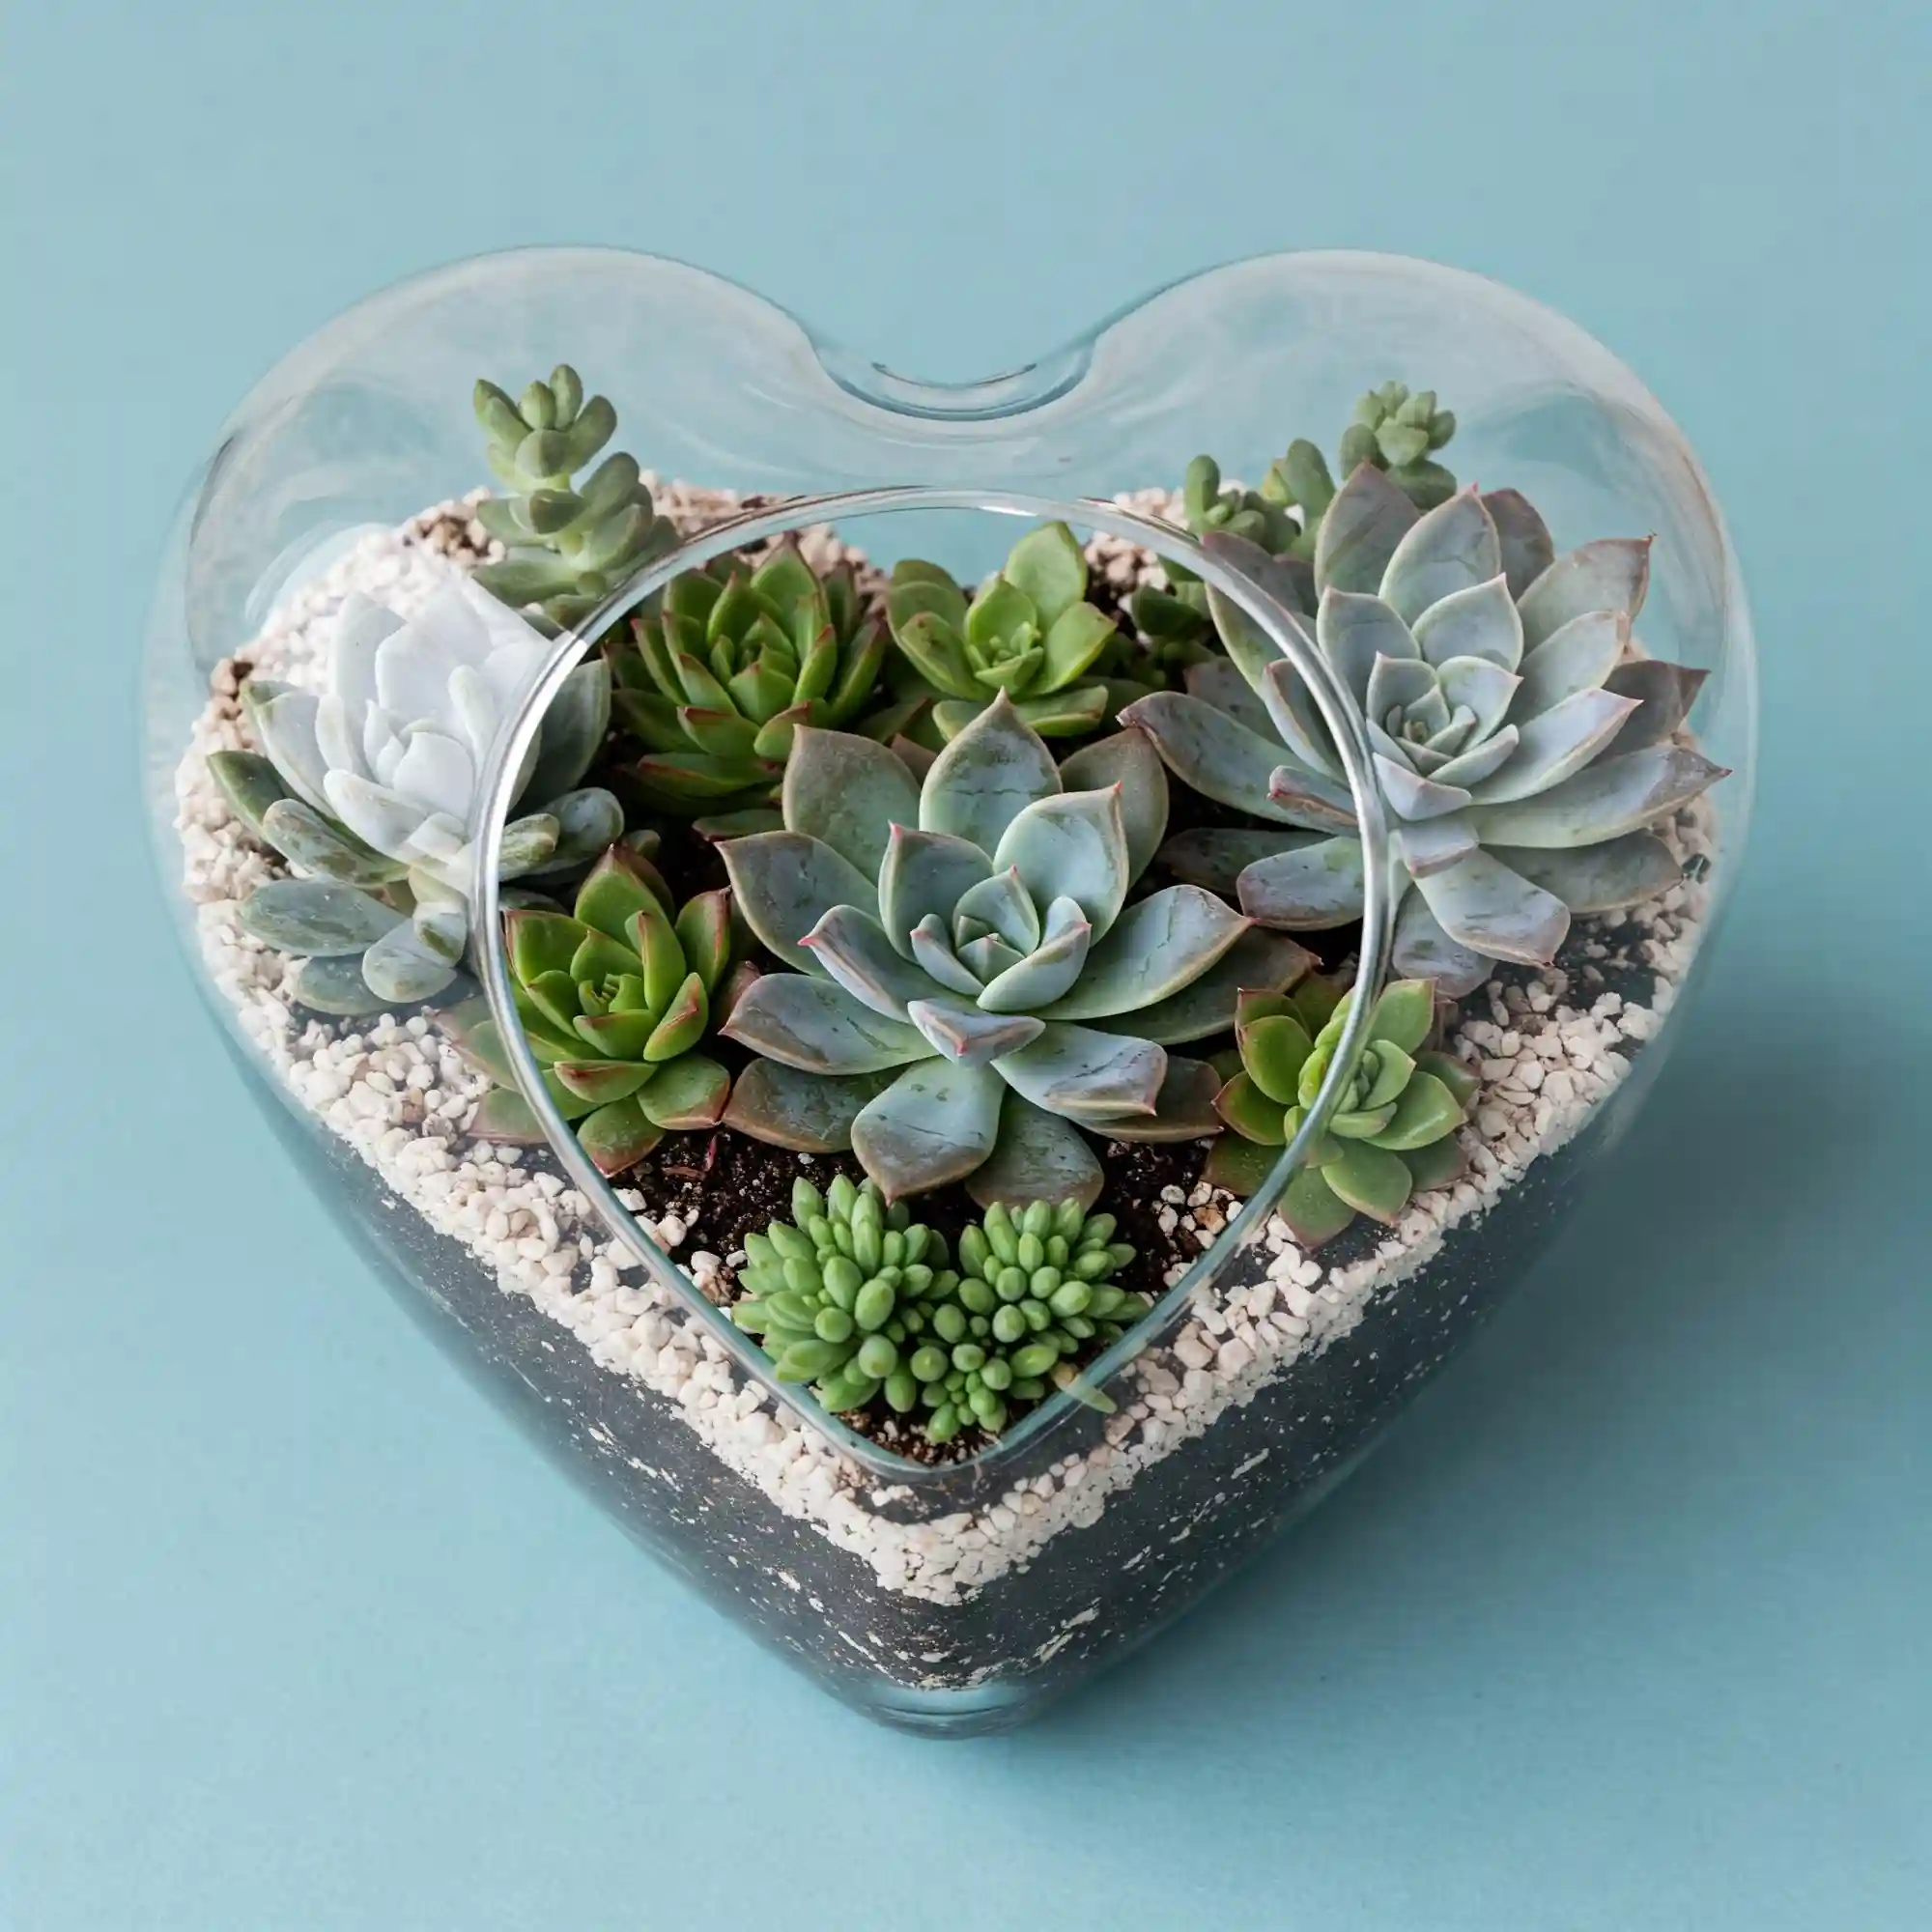
Romantic Succulent Terrarium: A Symbol of Everlasting Love
Succulents are a symbol of resilience, strength, and enduring love. They thrive in harsh conditions and require minimal care, much like a true love that withstands the test of time. Creating a succulent terrarium together can be a fun and romantic activity, and the finished product will serve as a beautiful reminder of your love for years to come.
DIY Ideas:
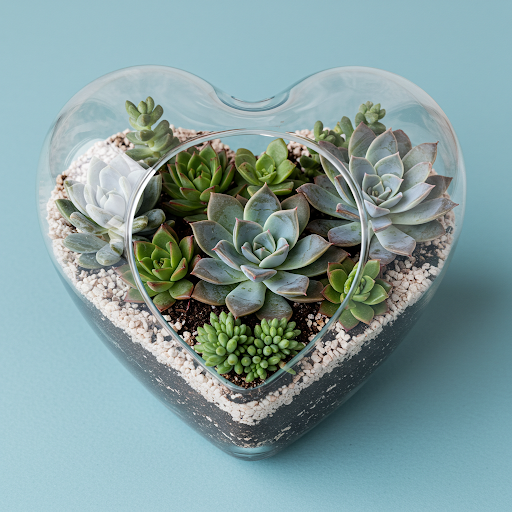
- Create a Heart-Shaped Terrarium: This is a classic and romantic choice. You can find heart-shaped glass containers at craft stores or even repurpose a glass jar. Fill the container with a layer of pebbles for drainage, then add a layer of cactus and succulent soil. Carefully arrange a variety of succulents in the terrarium, leaving some space for air circulation.
- Add Small Romantic Touches: To personalize your terrarium, consider adding small decorative elements like tiny flags, hearts, or pebbles. You can also include a handwritten note or a small love letter inside the terrarium.
- Choose Succulents with Meaning: Some succulents have symbolic meanings that can add an extra layer of romance to your gift. For example, jade plants are believed to bring good luck and prosperity, while heart-shaped succulents symbolize love and affection.
Materials:
- Glass container (heart-shaped or other shape)
- Succulents
- Cactus and succulent soil
- Pebbles
- Decorative elements (optional)
- Handwritten note (optional)
Tips:
- When choosing succulents, select varieties that are well-suited for terrarium environments.
- Water your terrarium sparingly to avoid overwatering the succulents.
- Place your terrarium in a location that receives bright, indirect light.
- Enjoy your beautiful creation together and watch your love grow!
Case Study:
I once made a succulent terrarium for my wife on our anniversary. I chose a heart-shaped glass container and filled it with a variety of succulents, including a jade plant and a heart-shaped succulent. I added a layer of colorful pebbles and a small heart-shaped charm. I also included a handwritten note expressing my love and appreciation for her. She absolutely loved it, and the terrarium has become a cherished symbol of our love and commitment.
Quote:
“Love is like a succulent, it thrives on neglect.” – Samantha
Personalized Garden Markers: Labeling with Love
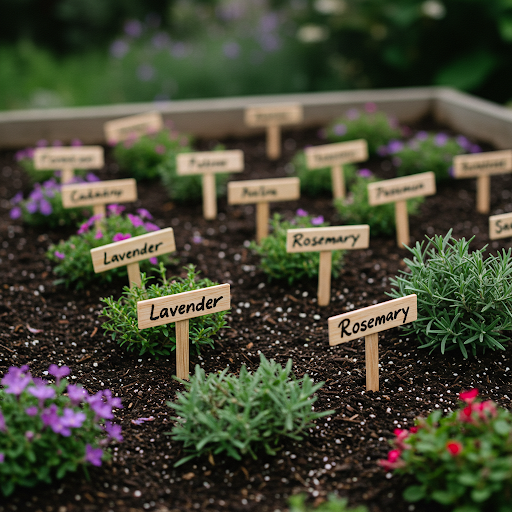
Personalized garden markers are a practical and thoughtful way to add a touch of love and personality to his garden. They not only help him keep track of his plants but also serve as a constant reminder of your thoughtfulness.
DIY Ideas:
- Paint Wooden Markers: This is a classic and easy DIY project. You can find plain wooden markers at most craft stores. Paint them in his favorite colors or use stencils to create unique designs. Write the plant names on the markers using paint pens or permanent markers.
- Use Stones: If you prefer a more natural look, you can use flat stones as garden markers. Clean the stones and paint the plant names on them using acrylic paint or paint pens. You can also add decorative elements like glitter or small charms.
- Create Markers from Recycled Materials: Get creative and use recycled materials to make unique garden markers. For example, you can use bottle caps, spoons, or even chopsticks. Paint them and write the plant names on them.
Materials:
- Wooden markers
- Stones
- Paint
- Paint pens
- Permanent markers
- Recycled materials (bottle caps, spoons, chopsticks, etc.)
Tips:
- Use weatherproof paint or sealant to protect your markers from the elements.
- Choose a clear and easy-to-read font for the plant names.
- Add a personal touch by including a special message or date on the markers.
Case Study:
I once made a set of garden markers for my friend who loves gardening. I used small wooden dowels and painted them in bright colors. I then used a stencil to add a heart design to each marker. I wrote the plant names on the markers in a clear, easy-to-read font. My friend loved the markers and said they added a touch of personality to his garden.
Quote:
“A garden is a place where you can find solace and peace.” – Samantha
Custom Seed Starting Kit: Grow Together
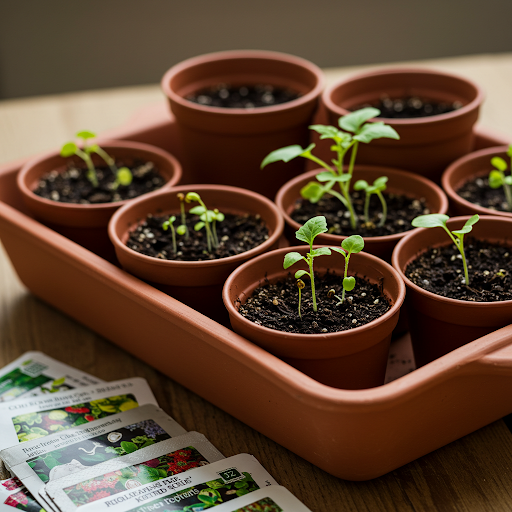
Starting seeds together can be a fun and rewarding experience. It’s a shared activity that symbolizes growth, new beginnings, and the potential for a bountiful harvest. Plus, it gives you the opportunity to spend quality time together while nurturing something new.
DIY Ideas:
- Assemble a Kit with Various Seeds, Pots, and Soil: Choose a variety of seeds that are appropriate for your climate and his interests. Include a mix of vegetables, herbs, and flowers. Select small seed starting pots or biodegradable peat pellets. Include a bag of seed starting mix or a mix of perlite and vermiculite.
- Personalize the Kit with a Handwritten Note: Write a heartfelt message expressing your love and appreciation. You can also include a small gardening journal for him to document his progress.
- Add Helpful Resources: Include a small guide on seed starting or a link to online resources. This will help him get started and ensure his success.
Materials:
- Seeds
- Seed starting pots or peat pellets
- Seed starting mix or perlite/vermiculite
- A container to hold the kit
- Handwritten note
- Gardening journal (optional)
- Helpful resources (optional)
Tips:
- Choose seeds that are appropriate for your climate and easy to start.
- Make sure the seed starting mix is moist but not soggy.
- Provide the seedlings with plenty of light and warmth.
- Transplant the seedlings outdoors when they are large enough.
Case Study:
I once made a seed starting kit for my brother-in-law, who is a passionate gardener. I chose a variety of heirloom tomato seeds, pepper seeds, and herb seeds. I included small biodegradable pots, seed starting mix, and a small watering can. I also included a handwritten note encouraging him to enjoy the process of growing his own food. He loved the kit and sent me photos of his seedlings throughout the growing season.
Quote:
“The greatest gift you can give someone is the gift of your time.” – Samantha
Hand-Painted Flower Pots: Blooming with Creativity
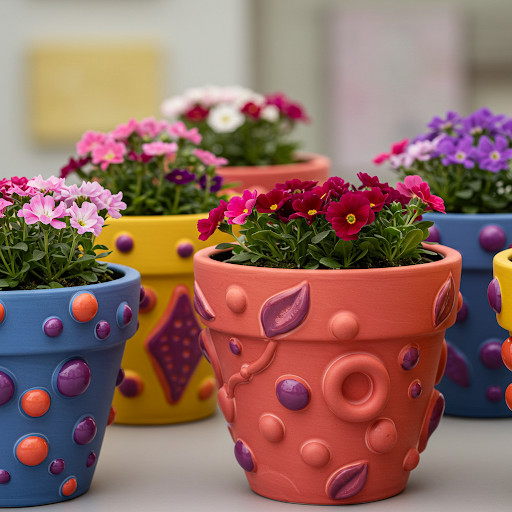
Painting flower pots is a simple yet rewarding DIY project that allows you to unleash your creativity and add a personal touch to his garden. It’s a great way to spend a relaxing afternoon and create something beautiful and functional.
DIY Ideas:
- Paint Pots with His Favorite Colors or Patterns: Choose colors that complement his garden or reflect his personality. You can use a variety of painting techniques, such as freehand painting, sponging, or using stencils.
- Add Personalized Messages or Quotes: Write a heartfelt message or a favorite quote on the pots. You can use paint pens or stencils to create a unique design.
- Use Stencils to Create Intricate Designs: Stencils are a great way to add intricate designs to your pots. You can find a variety of stencils at craft stores or create your own.
Materials:
- Plain flower pots (terracotta, ceramic, or plastic)
- Paint (acrylic, ceramic, or outdoor paint)
- Paintbrushes
- Stencils (optional)
- Paint pens (optional)
Tips:
- Prepare the Pots: Clean the pots thoroughly with soap and water and let them dry completely before painting.
- Use a Primer: If you’re using ceramic or terracotta pots, apply a coat of primer before painting. This will help the paint adhere better.
- Seal the Paint: Once the paint is dry, seal the pots with a clear sealant to protect them from the elements.
- Let Your Creativity Shine: Don’t be afraid to experiment with different colors, patterns, and techniques.
Case Study:
I once painted a set of flower pots for my brother-in-law. I used acrylic paint and stencils to create a whimsical garden scene on each pot. He loved the pots and used them to plant a variety of herbs and flowers. He even told me that he enjoyed watering the plants and admiring the colorful pots.
Quote:
“The beauty of a garden is not just the flowers, but also the hands that tend to them.” – Samantha
Romantic Garden Stones: Words Etched in Stone

Garden stones are a simple yet charming way to add personality and meaning to his outdoor space. You can find smooth, flat stones in your garden or at your local creek or beach. These stones become little canvases for your expressions of love and affection.
DIY Ideas:
- Paint Stones with Romantic Quotes or Song Lyrics: Choose quotes that resonate with both of you or lyrics from your favorite love song. Use acrylic paints or paint pens to write the quotes on the stones.
- Add His Initials or a Special Date: Personalize the stones by adding his initials, the date you met, or a special anniversary.
- Use Different Sizes and Shapes of Stones: Create a collection of stones with varying sizes and shapes. This will add visual interest to his garden.
Materials:
- Flat stones
- Acrylic paint or paint pens
- Stencils (optional)
- Glitter or other embellishments (optional)
Tips:
- Choose Weather-Resistant Paint: Use acrylic paint or outdoor paint to ensure the quotes will last through the elements.
- Seal the Paint: Once the paint is dry, you can seal the stones with a clear sealant to protect them from the weather.
- Place the Stones Strategically: Place the stones in prominent locations in his garden, such as along the path, near his favorite plants, or around the base of a tree.
Case Study:
I once made a set of garden stones for my husband on our anniversary. I found several smooth, flat stones and painted each one with a different romantic quote. I also added our initials and the date of our anniversary to each stone. He loved the stones and placed them around our garden. Every time he sees them, he is reminded of my love and affection.
Quote:
“Love is the flower you have to let grow.” – John Lennon
Building a Mini Greenhouse: Growing Year-Round

A mini greenhouse is a fantastic gift for any gardener, especially those who live in colder climates or want to extend their growing season. It allows them to nurture delicate plants and start seeds earlier in the year. Building a mini greenhouse together can be a fun and rewarding project that you can enjoy together.
DIY Ideas:
- Build a Greenhouse from Recycled Windows or Plastic Sheeting: This is a budget-friendly and eco-friendly option. You can find old windows at salvage yards or reuse plastic sheeting. Create a frame using wood or PVC pipes and attach the windows or plastic sheeting to the frame.
- Add Shelves or Racks for Organizing Plants: This will maximize space and make it easier to care for your plants. You can use wooden shelves, wire racks, or even repurposed shelving units.
- Include a Thermometer and Humidity Gauge: This will help him monitor the temperature and humidity levels inside the greenhouse, ensuring that his plants thrive.
Materials:
- Recycled windows or plastic sheeting
- Wood or PVC pipes
- Tools (saw, drill, screwdriver, etc.)
- Shelves or racks (optional)
- Thermometer and humidity gauge (optional)
Tips:
- Choose a location for your greenhouse that receives plenty of sunlight.
- Make sure the greenhouse is well-ventilated to prevent overheating.
- Water your plants regularly, but avoid overwatering.
- Monitor the temperature and humidity levels inside the greenhouse.
Case Study:
I once built a mini greenhouse for my father using old windows and wooden pallets. We worked together to assemble the frame and attach the windows. He was thrilled with the result and used the greenhouse to start his tomato seedlings weeks ahead of schedule. He even grew some exotic plants that wouldn’t have survived the cold winter temperatures.
Quote:
“The greatest gift you can give someone is the gift of your time.” – Samantha
Crafting a Unique Garden Sculpture: Art in the Garden
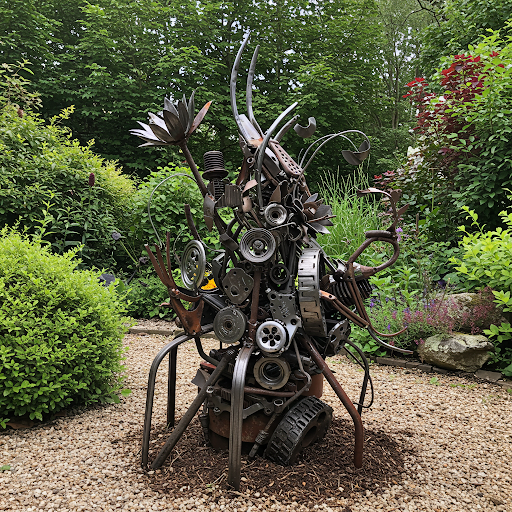
A garden sculpture is a unique and personal way to add a touch of artistic flair to his outdoor space. It can be a focal point in the garden and a conversation starter for guests.
DIY Ideas:
- Create a Sculpture from Recycled Metal Pieces: This is a great way to repurpose old metal objects and create something unique and meaningful. You can use old tools, machinery parts, or even scrap metal.
- Use Natural Materials: Gather natural materials such as branches, stones, and driftwood to create a whimsical and natural sculpture.
- Design a Sculpture that Reflects His Interests or Hobbies: If he’s a fan of animals, create a sculpture of his favorite animal. If he loves music, create a sculpture of a musical instrument.
Materials:
- Recycled metal pieces
- Natural materials (branches, stones, driftwood)
- Tools (wire cutters, pliers, etc.)
- Paint (optional)
- Embellishments (optional)
Tips:
- Consider the Size and Scale of the Sculpture: Make sure the sculpture is the right size for his garden.
- Choose a Location for the Sculpture: Place the sculpture in a prominent location where it can be admired.
- Add a Personal Touch: Include a small plaque with his name or a special message.
Case Study:
I once made a garden sculpture for my brother using old metal tools and machinery parts. I welded the pieces together to create a whimsical bird. He loved the sculpture and placed it in the center of his garden. It has become a favorite gathering spot for birds and a conversation starter for guests.
Quote:
“The greatest gift you can give someone is the gift of your time.” – Samantha
Making a Compost Bin Together: Sustainable Love
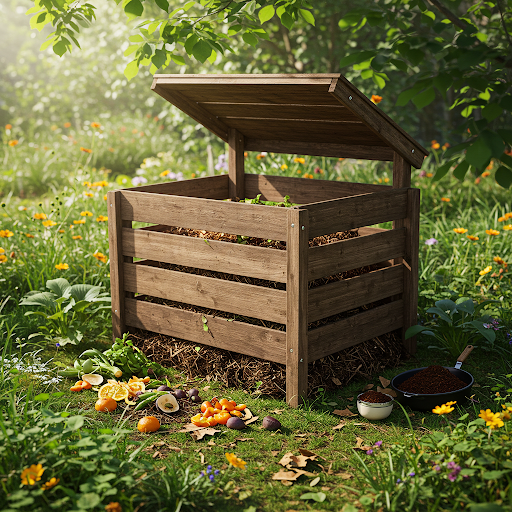
Composting is a sustainable and eco-friendly way to reduce waste and create nutrient-rich soil for your garden. Building a compost bin together can be a fun and rewarding project that you can enjoy together. It’s also a practical gift that will benefit his garden for years to come.
DIY Ideas:
- Build a Compost Bin from Wood or Recycled Materials: You can find plans online or design your own compost bin. Use wood, pallets, or even old barrels to create a sturdy and attractive bin.
- Decorate the Bin with Paint or Stencils: Add a personal touch by painting the bin with his favorite colors or adding a decorative design.
- Include a Composting Guide: Provide him with a guide on how to compost effectively. This will help him get started and ensure that his compost bin is successful.
Materials:
- Wood, pallets, or other materials for the bin
- Tools (saw, drill, screwdriver, etc.)
- Paint (optional)
- Stencils (optional)
- Composting guide (optional)
Tips:
- Choose a location for your compost bin that is shaded and well-drained.
- Layer your compost materials, alternating between green (nitrogen-rich) materials like vegetable scraps and brown (carbon-rich) materials like leaves and twigs.
- Keep your compost bin moist but not soggy.
- Turn your compost regularly to aerate it and speed up the decomposition process.
Case Study:
I once built a compost bin for my father using old pallets. We worked together to assemble the bin and then decorated it with a playful garden scene. He was so excited to start composting, and he even started collecting materials from around the neighborhood. He now has a thriving compost pile and uses the nutrient-rich soil to fertilize his garden.
Quote:
“The greatest gift you can give someone is the gift of your time.” – Samantha
Designing a Miniature Zen Garden: A Place for Peace

A miniature zen garden is a beautiful and calming gift that provides a space for relaxation and contemplation. Creating a zen garden together can be a meditative and bonding experience.
DIY Ideas:
- Create a Miniature Zen Garden in a Container: You can use a variety of containers, such as a shallow bowl, a wooden box, or even a repurposed baking dish.
- Include Sand, Rocks, and Miniature Plants: Use fine sand or gravel for the base. Add a variety of rocks and stones in different sizes and colors. Choose miniature plants that are well-suited for small spaces, such as succulents, bonsai trees, or moss.
- Add a Small Rake for Creating Patterns in the Sand: Raking the sand is a meditative practice that helps to clear the mind and reduce stress.
Materials:
- Container
- Sand or gravel
- Rocks and stones
- Miniature plants
- Small rake
Tips:
- Choose a location for your zen garden that is peaceful and quiet.
- Use your hands to create patterns in the sand.
- Add a small water feature, such as a fountain or a small waterfall, to enhance the calming atmosphere.
- Light some candles or incense to create a relaxing ambiance.
Case Study:
I once made a miniature zen garden for my friend who was going through a stressful period. I used a wooden box and filled it with sand and small pebbles. I added a variety of miniature plants, including a small bonsai tree and some succulents. I also included a small rake and a few decorative stones. My friend loved the zen garden and said it helped her to relax and de-stress.
Quote:
“A garden is a place where you can find solace and peace.” – Samantha
Assembling a Vertical Herb Garden: Herbs Within Reach
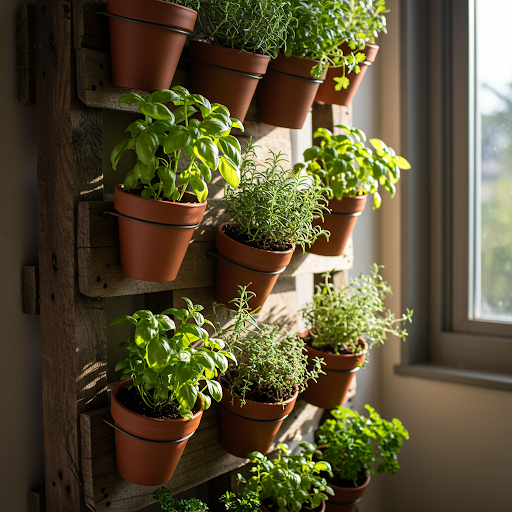
A vertical herb garden is a space-saving and practical solution for those who love fresh herbs but have limited space. It allows you to grow a variety of herbs within easy reach, making it convenient for cooking and adding a touch of greenery to your kitchen or patio.
DIY Ideas:
- Build a Vertical Herb Garden from Pallets or Recycled Materials: This is a budget-friendly and eco-friendly option. You can find old pallets at construction sites or repurpose other materials such as wood crates or shelves.
- Use Small Pots or Containers for the Herbs: Mason jars, tin cans, or even plastic bottles can be repurposed as herb planters.
- Label Each Herb with Its Name: This will help you identify each herb and ensure that you’re using the right one in your recipes.
Materials:
- Pallets, wood crates, shelves, or other materials for the structure
- Small pots or containers
- Herbs
- Soil
- Labels
Tips:
- Choose herbs that thrive in your climate and receive plenty of sunlight.
- Water your herbs regularly, but avoid overwatering.
- Fertilize your herbs regularly to keep them healthy and productive.
- Harvest your herbs regularly to encourage new growth.
Case Study:
I once built a vertical herb garden for my mother using old wooden crates. We filled the crates with potting soil and planted a variety of herbs, including basil, parsley, thyme, and rosemary. My mother loved the herb garden and used it to add fresh flavor to her cooking. She even shared her herbs with her neighbors!
Quote:
“The greatest gift you can give someone is the gift of your time.” – Samantha
A Romantic Garden Journal: Documenting Your Love Story
A garden journal is a wonderful way for him to document his gardening journey, from planting seeds to harvesting his crops. It’s also a special way for you to express your love and appreciation for his passion.
DIY Ideas:
- Create a Personalized Garden Journal with His Name and a Special Date: You can find blank journals at craft stores or online. Personalize the journal by writing his name and a special date, such as your anniversary or the date you started dating.
- Include Sections for Notes, Photos, and Pressed Flowers: Encourage him to write about his gardening experiences, including his successes and challenges. He can also paste photos of his plants and press flowers from his garden.
- Add Prompts for Recording His Gardening Experiences: Include prompts such as “What did you plant today?”, “What challenges did you face?”, and “What did you learn today?”
Materials:
- Blank journal
- Pens
- Pencils
- Colored pencils or markers (optional)
- Glue
- Photos (optional)
- Pressed flowers (optional)
Tips:
- Encourage him to write in his journal regularly.
- Make it a special occasion to review his journal together.
- Use the journal as a starting point for conversations about his gardening adventures.
Case Study:
I once made a garden journal for my husband as a birthday gift. I found a beautiful leather-bound journal and personalized it with his name and our wedding date. I included sections for notes, photos, and pressed flowers. I also included a few inspirational quotes about gardening. He loved the journal and uses it to document his gardening experiences throughout the year.
Quote:
“The greatest gift you can give someone is the gift of your time.” – Samantha
Building a Raised Garden Bed Together: A Joint Project
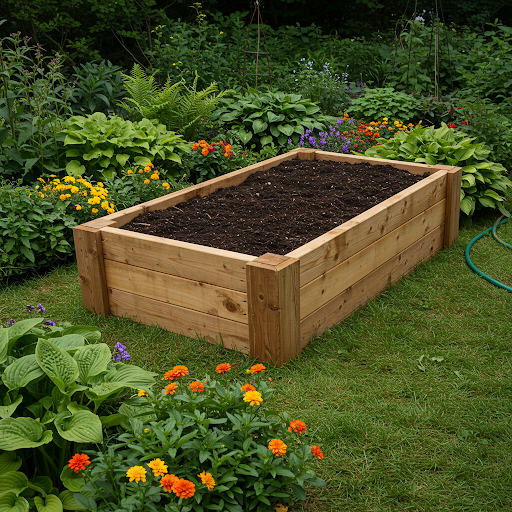
Building a raised garden bed together can be a rewarding and fun project that you can enjoy together. It’s a tangible symbol of your shared love for gardening and a space where you can nurture your relationship and your plants.
DIY Ideas:
- Build a Raised Garden Bed from Wood or Recycled Materials: You can find plans online or design your own garden bed. Use wood, bricks, or even old pallets to create a sturdy and attractive structure.
- Choose a Size and Shape that Fits His Garden: Consider the space available and his gardening needs. A smaller raised bed is perfect for herbs and smaller plants, while a larger bed is ideal for growing vegetables and flowers.
- Plant His Favorite Vegetables or Flowers Together: Choose plants that are appropriate for your climate and his interests. This will make the project even more meaningful and enjoyable.
Materials:
- Wood, bricks, pallets, or other materials for the structure
- Soil
- Plants
- Tools (saw, drill, screwdriver, etc.)
Tips:
- Choose a location for your raised garden bed that receives plenty of sunlight.
- Amend the soil with compost or other organic matter to improve drainage and fertility.
- Water your plants regularly, especially during dry periods.
- Weed your garden bed regularly to keep it healthy and productive.
Case Study:
I once built a raised garden bed for my husband as a surprise birthday gift. I used old wooden pallets and filled them with a mixture of soil and compost. We planted a variety of vegetables, including tomatoes, peppers, and herbs. We spent many afternoons working in the garden together, nurturing our plants and enjoying each other’s company. The raised garden bed became a symbol of our shared love for gardening and our commitment to growing a healthy and sustainable lifestyle.
Quote:
“The greatest gift you can give someone is the gift of your time.” – Samantha
Crafting a Unique Birdhouse or Feeder: Welcoming Wildlife
Building a birdhouse or feeder is a fun and rewarding project that will attract birds to his garden and add a charming touch to his outdoor space. It’s also a great way to observe and appreciate the beauty of nature.
DIY Ideas:
- Build a Birdhouse from Wood or Recycled Materials: You can find plans online or design your own birdhouse. Use wood, recycled materials, or even gourds to create a unique and cozy home for birds.
- Paint the Birdhouse with Bright Colors or Patterns: This will make the birdhouse more visible to birds and add a touch of personality.
- Include Birdseed or Other Treats: Fill the birdhouse or feeder with a variety of seeds, nuts, or suet to attract different types of birds.
Materials:
- Wood, recycled materials, or gourds
- Tools (saw, drill, screwdriver, etc.)
- Paint (optional)
- Birdseed, nuts, or suet
Tips:
- Choose a location for your birdhouse or feeder that is protected from the elements and predators.
- Clean the birdhouse or feeder regularly to prevent the spread of disease.
- Observe the birds that visit your feeder and learn about their habits and preferences.
Case Study:
I once built a birdhouse for my neighbor using a hollowed-out gourd. I painted the gourd with bright colors and added a small wooden perch. I hung the birdhouse in a tree in his backyard, and soon it was occupied by a family of bluebirds. My neighbor was thrilled to have the birds nesting in his yard, and he enjoyed watching them raise their young.
Quote:
“The greatest gift you can give someone is the gift of your time.” – Samantha
I hope this comprehensive blog post provides you with plenty of inspiration for creating heartfelt DIY Valentine’s Day gardening gifts for your special someone. Remember, the most important ingredient is the love and care you put into each project. Happy crafting and happy Valentine’s Day!
FAQ:
This section addresses some of the most common questions you might have about DIY Valentine’s Day gardening gifts for him:
- What are some good DIY Valentine’s Day gardening gifts for him? This article offers a variety of DIY gardening gift ideas, from personalized tool organizers to romantic succulent terrariums.
- I need easy DIY Valentine’s Day gardening gift ideas for my boyfriend. Several easy projects are included, such as painting flower pots, creating garden markers, and assembling a seed starting kit.
- How can I make a personalized gardening gift for him for Valentine’s Day? There are many ways to personalize your DIY gifts. You can add his initials, a special date, or a heartfelt message. You can also choose colors and designs that reflect his personality.
- Best DIY Valentine’s Day gifts for a gardener who has everything? Even if he seems to have everything, a handmade gift from the heart is always appreciated. Consider creating a unique garden sculpture, building a mini greenhouse, or designing a personalized garden journal.
- Where can I find DIY Valentine’s Day gardening gift ideas for him? This article is a great starting point! You can also find inspiration online, at craft stores, and in gardening magazines.
- I’m on a budget, what are some cheap DIY gardening gifts for him? Many of the projects in this article are budget-friendly. Repurposing old materials, using natural elements, and focusing on simple designs can help you create thoughtful gifts without breaking the bank.
- My husband loves gardening, what DIY gift can I make him for Valentine’s Day? Consider creating a personalized garden tool organizer, building a raised garden bed together, or making a compost bin. These are all practical and meaningful gifts that he will appreciate.
- Looking for romantic DIY Valentine’s Day gardening gift ideas for him. A heart-shaped succulent terrarium, a garden journal filled with love notes, or a set of garden stones with romantic quotes are all romantic and thoughtful gift ideas.
- How to make a practical and useful DIY gardening gift for him for Valentine’s Day? Focus on creating gifts that are both functional and beautiful. A personalized tool organizer, a well-designed raised garden bed, or a sturdy compost bin are all practical and useful gifts that he will appreciate.
- Need unique and creative DIY Valentine’s Day gardening gift ideas for him. Get creative and think outside the box! Use recycled materials, incorporate his interests, and add personal touches to make your gifts truly unique.
I hope this FAQ section helps you find the perfect DIY Valentine’s Day gardening gift for your special someone. Remember, the most important ingredient is the love and care you put into each project. Happy crafting and happy Valentine’s Day!


