

Have you ever felt frustrated watching your spring garden struggle, battling pests and yielding less than you hoped? It’s disheartening to put in the effort and not see the results you desire. I understand that feeling. That’s why I want to share a solution that has transformed my own garden: companion planting for spring gardens. By strategically pairing plants, you can naturally enhance growth, deter pests, and boost your harvest. Let’s explore how to make your spring garden thrive.
1. Tomatoes & Basil: The Classic Spring Duo

When I think of the quintessential spring garden, tomatoes and basil immediately come to mind. You know, these two aren’t just delicious together on a plate; they’re also fantastic garden companions. The relationship between tomatoes and basil is a perfect example of synergy in the garden. Basil emits compounds that repel pests like tomato hornworms and whiteflies, which can wreak havoc on your tomato plants. Additionally, many gardeners, including myself, have noticed that basil seems to enhance the flavor of tomatoes. It’s like they’re helping each other become their best selves.
How to Plant this Combination in Spring:
- Timing: I always wait until after the last frost to plant both tomatoes and basil. In my region, this is usually late April or early May. You want to ensure the soil has warmed up to at least 50°F (10°C) for optimal growth.
- Spacing: I space my tomato plants about 24-36 inches (60-90 cm) apart, and I plant basil in between or around them. This spacing allows for adequate airflow and sunlight, which are crucial for both plants.
- Soil Preparation: Both tomatoes and basil prefer well-draining soil rich in organic matter. I amend my soil with compost and aged manure to provide the necessary nutrients.
- Planting Seedlings: I purchase healthy seedlings from a reputable nursery or start my own indoors 6-8 weeks before the last frost. When planting, I dig a hole slightly larger than the root ball, gently place the seedling, and backfill with soil, ensuring the plant is firmly in place.
- Mulching: I apply a layer of mulch around the plants to retain moisture, suppress weeds, and regulate soil temperature.
Plant Care for this Combination in Spring:
- Watering: Tomatoes require consistent watering, especially during fruiting. I water deeply at the base of the plant, avoiding overhead watering, which can lead to fungal diseases. Basil also prefers consistent moisture but doesn’t like soggy soil.
- Fertilizing: I feed my tomatoes with a balanced fertilizer every 4-6 weeks to support their growth and fruiting. Basil benefits from occasional feeding with a liquid seaweed fertilizer.
- Pruning: I prune my tomato plants to remove suckers (side shoots) that grow between the main stem and branches. This helps to improve airflow and focus the plant’s energy on fruit production. I also pinch back the tips of basil plants to encourage bushier growth.
- Pest and Disease Monitoring: I regularly inspect my plants for signs of pests or diseases. If I notice any issues, I address them promptly with organic pest control methods or fungicides.
- Support: As tomato plants grow, they need support to prevent them from toppling over. I use stakes, cages, or trellises to support my plants.
Benefits of this Pairing:
- Pest Repellence: Basil repels tomato hornworms, whiteflies, and other pests.
- Flavor Enhancement: Basil enhances the flavor of tomatoes.
- Increased Yield: By protecting tomatoes from pests, basil helps to increase yield.
- Space Efficiency: Planting basil among tomatoes maximizes the use of garden space.
Case Study:
Last spring, I conducted a small experiment in my garden. I planted two rows of tomatoes, one with basil companions and one without. The row with basil had significantly fewer pest problems and a noticeably higher yield. The tomatoes also tasted sweeter and more flavorful. This experience reinforced the benefits of this classic pairing.
Data:
According to a study by the University of Florida, basil has been shown to reduce whitefly populations on tomato plants by up to 50%.
Tomato and Basil Companion Planting Guide
| Aspect | Tomato | Basil |
| Planting Time | After last frost | After last frost |
| Spacing | 24-36 inches (60-90 cm) | In between or around tomatoes |
| Soil | Well-draining, rich in organic matter | Well-draining, rich in organic matter |
| Watering | Consistent, deep watering | Consistent, avoid soggy soil |
| Fertilizing | Balanced fertilizer every 4-6 weeks | Liquid seaweed fertilizer occasionally |
| Pruning | Remove suckers | Pinch back tips |
By following these tips, you can create a thriving tomato and basil pairing in your spring garden.
2. Carrots & Onions: Underground Allies

Carrots and onions form another powerful partnership in the spring garden. This pairing is a classic example of how plants can work together to improve each other’s growth and protect themselves from pests.
The Benefits of This Dynamic Duo
- Pest Deterrence: Onions are known to deter carrot flies, a common pest that can decimate a carrot crop. The strong odor emitted by onions confuses carrot flies, making it difficult for them to locate and lay their eggs on the carrot roots.
- Improved Soil Health: Both carrots and onions are considered “heavy feeders,” meaning they require a significant amount of nutrients from the soil. However, they have different nutrient requirements. Carrots are heavy feeders of potassium, while onions require more nitrogen. By planting them together, you can create a balanced nutrient uptake and prevent nutrient depletion in the soil.
- Space Efficiency: Carrots and onions have different growth habits. Carrots grow deep into the soil, while onions grow more vertically. This allows you to efficiently utilize garden space by planting them together without significant competition for resources.
Planting Carrots and Onions in Spring
- Timing: Both carrots and onions can be sown directly in the garden in early spring, as soon as the soil can be worked. However, onion sets can also be planted in late spring or early summer.
- Spacing: Plant carrot seeds in rows about 6 inches apart, and thin the seedlings to about 2-3 inches apart once they emerge. Plant onion sets or seeds about 4-6 inches apart.
- Soil Preparation: Prepare the soil by loosening it to a depth of about 8-10 inches. Incorporate compost or well-rotted manure to improve soil fertility and drainage.
- Planting Technique: Sow carrot seeds thinly and cover them lightly with soil. Plant onion sets or seeds at the appropriate depth according to the package instructions.
- Mulching: Apply a layer of mulch around the plants to conserve moisture, suppress weeds, and regulate soil temperature.
Caring for Your Carrot and Onion Patch
- Watering: Keep the soil consistently moist but not waterlogged. Carrots and onions require regular watering, especially during dry periods.
- Thinning: Thin carrot seedlings when they are about 2 inches tall, leaving the strongest seedlings to grow.
- Weeding: Keep the area around the plants free of weeds to prevent competition for water and nutrients.
- Harvesting: Carrots can be harvested in late summer or fall, while onions can be harvested in late spring or early summer for green onions or in late summer for mature bulbs.
Tips for Success:
- Variety Selection: Choose carrot varieties with different maturity dates to extend your harvest season.
- Soil pH: Both carrots and onions prefer slightly acidic soil with a pH between 6.0 and 7.0.
- Pest and Disease Monitoring: Regularly inspect your plants for signs of pests or diseases. If you notice any problems, address them promptly.
By following these tips and understanding the benefits of this dynamic duo, you can successfully grow carrots and onions together in your spring garden. This simple companion planting strategy can help you maximize your garden space, improve soil health, and enjoy a bountiful harvest of these delicious and nutritious vegetables.
3. Lettuce & Radishes: Fast Spring Partners

Lettuce and radishes are the perfect example of a speedy and efficient companion planting strategy for your spring garden. They are both cool-season crops that can be planted early in the spring, and they work together to enhance each other’s growth and protect against pests.
The Benefits of This Quick-Growing Duo
- Trap Cropping: Radishes act as a trap crop for flea beetles, which are notorious for damaging lettuce leaves. Flea beetles are attracted to radishes, and by planting them alongside lettuce, you can draw these pests away from your lettuce crop.
- Rapid Growth: Both lettuce and radishes are fast-growing crops, making them ideal for early spring planting. You can harvest radishes within a few weeks, and lettuce will follow shortly after.
- Space Optimization: Radishes mature quickly, allowing you to harvest them before lettuce fully develops. This creates space for the lettuce to grow without competition.
- Soil Loosening: Radishes help to loosen the soil, creating a more favorable environment for lettuce roots to grow.
Planting Lettuce and Radishes in Spring
- Timing: Plant lettuce and radish seeds as soon as the soil can be worked in early spring. They can tolerate light frosts, making them ideal for early planting.
- Spacing: Sow radish seeds in rows about 1-2 inches apart, and plant lettuce seedlings or seeds in rows about 6-12 inches apart. You can also interplant radishes between lettuce rows for efficient use of space.
- Soil Preparation: Prepare the soil by loosening it to a depth of about 6-8 inches. Incorporate compost or well-rotted manure to improve soil fertility and drainage.
- Planting Technique: Sow radish seeds thinly and cover them lightly with soil. Plant lettuce seedlings or seeds at the appropriate depth according to the package instructions.
- Mulching: Apply a light layer of mulch around the plants to conserve moisture and suppress weeds.
Caring for Your Lettuce and Radish Patch
- Watering: Keep the soil consistently moist but not waterlogged. Lettuce and radishes require regular watering, especially during dry periods.
- Thinning: Thin radish seedlings when they are about 1-2 inches tall, leaving the strongest seedlings to grow. Thin lettuce seedlings as needed to ensure proper spacing.
- Weeding: Keep the area around the plants free of weeds to prevent competition for water and nutrients.
- Harvesting: Radishes can be harvested within 3-4 weeks, while lettuce can be harvested as soon as the leaves are large enough.
Tips for Success:
- Succession Planting: To extend your harvest season, consider succession planting by sowing new seeds every 1-2 weeks.
- Variety Selection: Choose radish varieties with different maturity dates to stagger your harvest. Select lettuce varieties that are suitable for your climate and growing conditions.
- Pest and Disease Monitoring: Regularly inspect your plants for signs of pests or diseases. If you notice any problems, address them promptly.
By following these tips and understanding the benefits of this fast-growing duo, you can successfully grow lettuce and radishes together in your spring garden. This simple companion planting strategy can help you maximize your garden space, protect your lettuce crop from pests, and enjoy a bountiful harvest of these delicious and nutritious vegetables.
4. Peas & Carrots: A Sweet Spring Synergy

Peas and carrots form a delightful partnership in the spring garden. This pairing is a testament to the interconnectedness of plants and how they can work together to create a more productive and resilient ecosystem.
The Benefits of This Dynamic Duo
- Nitrogen Fixation: Peas are legumes, which means they have the unique ability to form symbiotic relationships with soil bacteria. These bacteria convert atmospheric nitrogen into a form that plants can use, enriching the soil and providing a natural source of nitrogen for the carrots.
- Improved Soil Structure: As pea vines grow, they create a natural mulch as they decompose. This adds organic matter to the soil, improving its structure, aeration, and water retention.
- Pest Deterrence: While not a direct pest repellent like some other companion plantings, the presence of peas can help to attract beneficial insects like ladybugs and lacewings, which can prey on pests that might affect both crops.
- Space Efficiency: Peas are vining plants that can be grown vertically on trellises or cages. This allows you to maximize garden space by planting them alongside ground-level crops like carrots.
Planting Peas and Carrots in Spring
- Timing: Peas can be sown directly in the garden as soon as the soil can be worked in early spring. Carrots can also be sown directly in early spring, but you can start them indoors a few weeks earlier for an earlier harvest.
- Spacing: Plant pea seeds about 2-3 inches deep and 2-4 inches apart. Sow carrot seeds thinly in rows about 6 inches apart.
- Soil Preparation: Prepare the soil by loosening it to a depth of about 8-10 inches. Incorporate compost or well-rotted manure to improve soil fertility and drainage.
- Planting Technique: Sow pea seeds directly into the ground or in shallow trenches. Sow carrot seeds thinly and cover them lightly with soil.
- Mulching: Apply a layer of mulch around the base of the pea plants to conserve moisture and suppress weeds.
Caring for Your Pea and Carrot Patch
- Watering: Keep the soil consistently moist but not waterlogged. Peas and carrots both require regular watering, especially during dry periods.
- Supporting Peas: As pea plants grow, provide them with support by erecting trellises or cages. This will help to prevent the vines from sprawling and ensure optimal growth.
- Thinning: Thin carrot seedlings when they are about 2 inches tall, leaving the strongest seedlings to grow.
- Weeding: Keep the area around the plants free of weeds to prevent competition for water and nutrients.
- Harvesting: Peas can be harvested continuously as the pods mature. Carrots can be harvested in late summer or fall.
Tips for Success:
- Variety Selection: Choose pea varieties that are suitable for your climate and growing season. Select carrot varieties with different maturity dates to extend your harvest.
- Soil pH: Both peas and carrots prefer slightly acidic soil with a pH between 6.0 and 7.0.
- Pest and Disease Monitoring: Regularly inspect your plants for signs of pests or diseases. If you notice any problems, address them promptly.
By following these tips and understanding the benefits of this dynamic duo, you can successfully grow peas and carrots together in your spring garden. This simple companion planting strategy can help you improve soil health, enhance your garden’s productivity, and enjoy a bountiful harvest of these delicious and nutritious crops.
Strawberries & Borage5. Strawberries & Borage: Blooming Benefits

Strawberries and borage form a delightful partnership that can enhance the productivity and flavor of your spring garden. Borage, with its striking blue flowers and fuzzy leaves, adds a touch of charm while providing several benefits to the strawberry plants.
The Benefits of This Blooming Duo
- Enhanced Pollination: Borage flowers are a magnet for pollinators such as bees, butterflies, and hoverflies. By planting borage near your strawberries, you increase the number of pollinators visiting your plants, leading to improved fruit set and larger berries.
- Pest Deterrence: Borage is believed to deter certain pests that can damage strawberries, such as aphids and snails. The strong scent of borage can confuse or repel these pests, protecting your strawberry plants.
- Improved Soil Health: Borage is a cover crop that can help to improve soil health. Its deep roots aerate the soil and add organic matter as it decomposes, benefiting both the strawberries and other plants in your garden.
Planting Strawberries and Borage in Spring
- Timing: Plant strawberry plants in early spring, after the last frost has passed. Sow borage seeds directly in the garden a few weeks before or after planting your strawberries.
- Spacing: Plant strawberry plants about 12-18 inches apart, depending on the variety. Sow borage seeds thinly around the base of the strawberry plants or in between rows.
- Soil Preparation: Prepare the soil by loosening it to a depth of about 8-10 inches. Incorporate compost or well-rotted manure to improve soil fertility and drainage.
- Planting Technique: Plant strawberry plants at the appropriate depth, ensuring that the crown is level with the soil surface. Sow borage seeds thinly and cover them lightly with soil.
- Mulching: Apply a layer of mulch around the strawberry plants to conserve moisture, suppress weeds, and regulate soil temperature.
Caring for Your Strawberry and Borage Patch
- Watering: Keep the soil consistently moist but not waterlogged. Strawberries require regular watering, especially during dry periods.
- Mulching: Maintain a layer of mulch around the strawberry plants to conserve moisture and suppress weeds.
- Harvesting: Harvest strawberries as they ripen, using a gentle touch to avoid damaging the plants. Borage flowers can be harvested throughout the growing season for culinary use or to attract pollinators.
- Pest and Disease Monitoring: Regularly inspect your plants for signs of pests or diseases. If you notice any problems, address them promptly.
Tips for Success:
- Variety Selection: Choose strawberry varieties that are suitable for your climate and growing conditions.
- Soil pH: Strawberries prefer slightly acidic soil with a pH between 5.5 and 6.5.
- Succession Planting: Sow borage seeds throughout the growing season to ensure a continuous supply of flowers for attracting pollinators.
By following these tips and understanding the benefits of this blooming duo, you can create a thriving strawberry patch in your spring garden. The addition of borage can enhance pollination, deter pests, and improve soil health, leading to a more abundant and flavorful strawberry harvest.
6. Marigolds & Almost Everything: Spring’s Guardian

Marigolds are a gardener’s best friend, especially in the spring garden. These cheerful flowers, with their vibrant colors and strong scent, offer a multitude of benefits to your vegetable and herb garden.
The Benefits of Marigolds in the Spring Garden
- Pest Deterrence: Marigolds are natural repellents for a wide range of garden pests, including nematodes, aphids, whiteflies, and even some species of beetles. The strong scent emitted by marigolds disrupts the feeding and mating behaviors of these pests, protecting your other plants.
- Attracting Beneficial Insects: While marigolds deter harmful pests, they also attract beneficial insects like ladybugs and lacewings. These beneficial insects prey on aphids and other pests, helping to maintain a healthy balance in your garden ecosystem.
- Improving Soil Health: Marigolds are considered soil-conditioning plants. Their roots help to break up compacted soil and improve drainage. As they decompose, they add organic matter to the soil, enriching it with nutrients.
Planting Marigolds in Your Spring Garden
- Timing: Marigolds can be sown directly in the garden after the last frost has passed. You can also start them indoors a few weeks earlier and transplant them outdoors when the weather is warm.
- Spacing: Plant marigold seedlings or seeds about 12-18 inches apart. You can interplant them throughout your garden, placing them near susceptible plants like tomatoes, cabbage, and lettuce.
- Soil Preparation: Prepare the soil by loosening it to a depth of about 6-8 inches. Incorporate compost or well-rotted manure to improve soil fertility and drainage.
- Planting Technique: Plant marigold seedlings at the appropriate depth, ensuring that the roots are covered with soil. Sow marigold seeds thinly and cover them lightly with soil.
- Mulching: Apply a layer of mulch around the marigold plants to conserve moisture and suppress weeds.
Caring for Your Marigolds
- Watering: Keep the soil consistently moist but not waterlogged. Marigolds require regular watering, especially during dry periods.
- Deadheading: Regularly remove spent flowers to encourage continuous blooming and prevent self-seeding.
- Pest and Disease Monitoring: Regularly inspect your marigolds for signs of pests or diseases. If you notice any problems, address them promptly.
Tips for Success:
- Variety Selection: Choose marigold varieties with different colors and flower sizes to add visual interest to your garden.
- Companion Planting Combinations: Plant marigolds near susceptible plants like tomatoes, cabbage, lettuce, and cucumbers to protect them from pests.
- Succession Planting: Sow marigold seeds throughout the growing season to ensure a continuous supply of flowers.
By incorporating marigolds into your spring garden, you can create a natural and effective pest control system while adding beauty and vibrancy to your garden space. These versatile flowers offer numerous benefits, making them a valuable asset to any gardener.
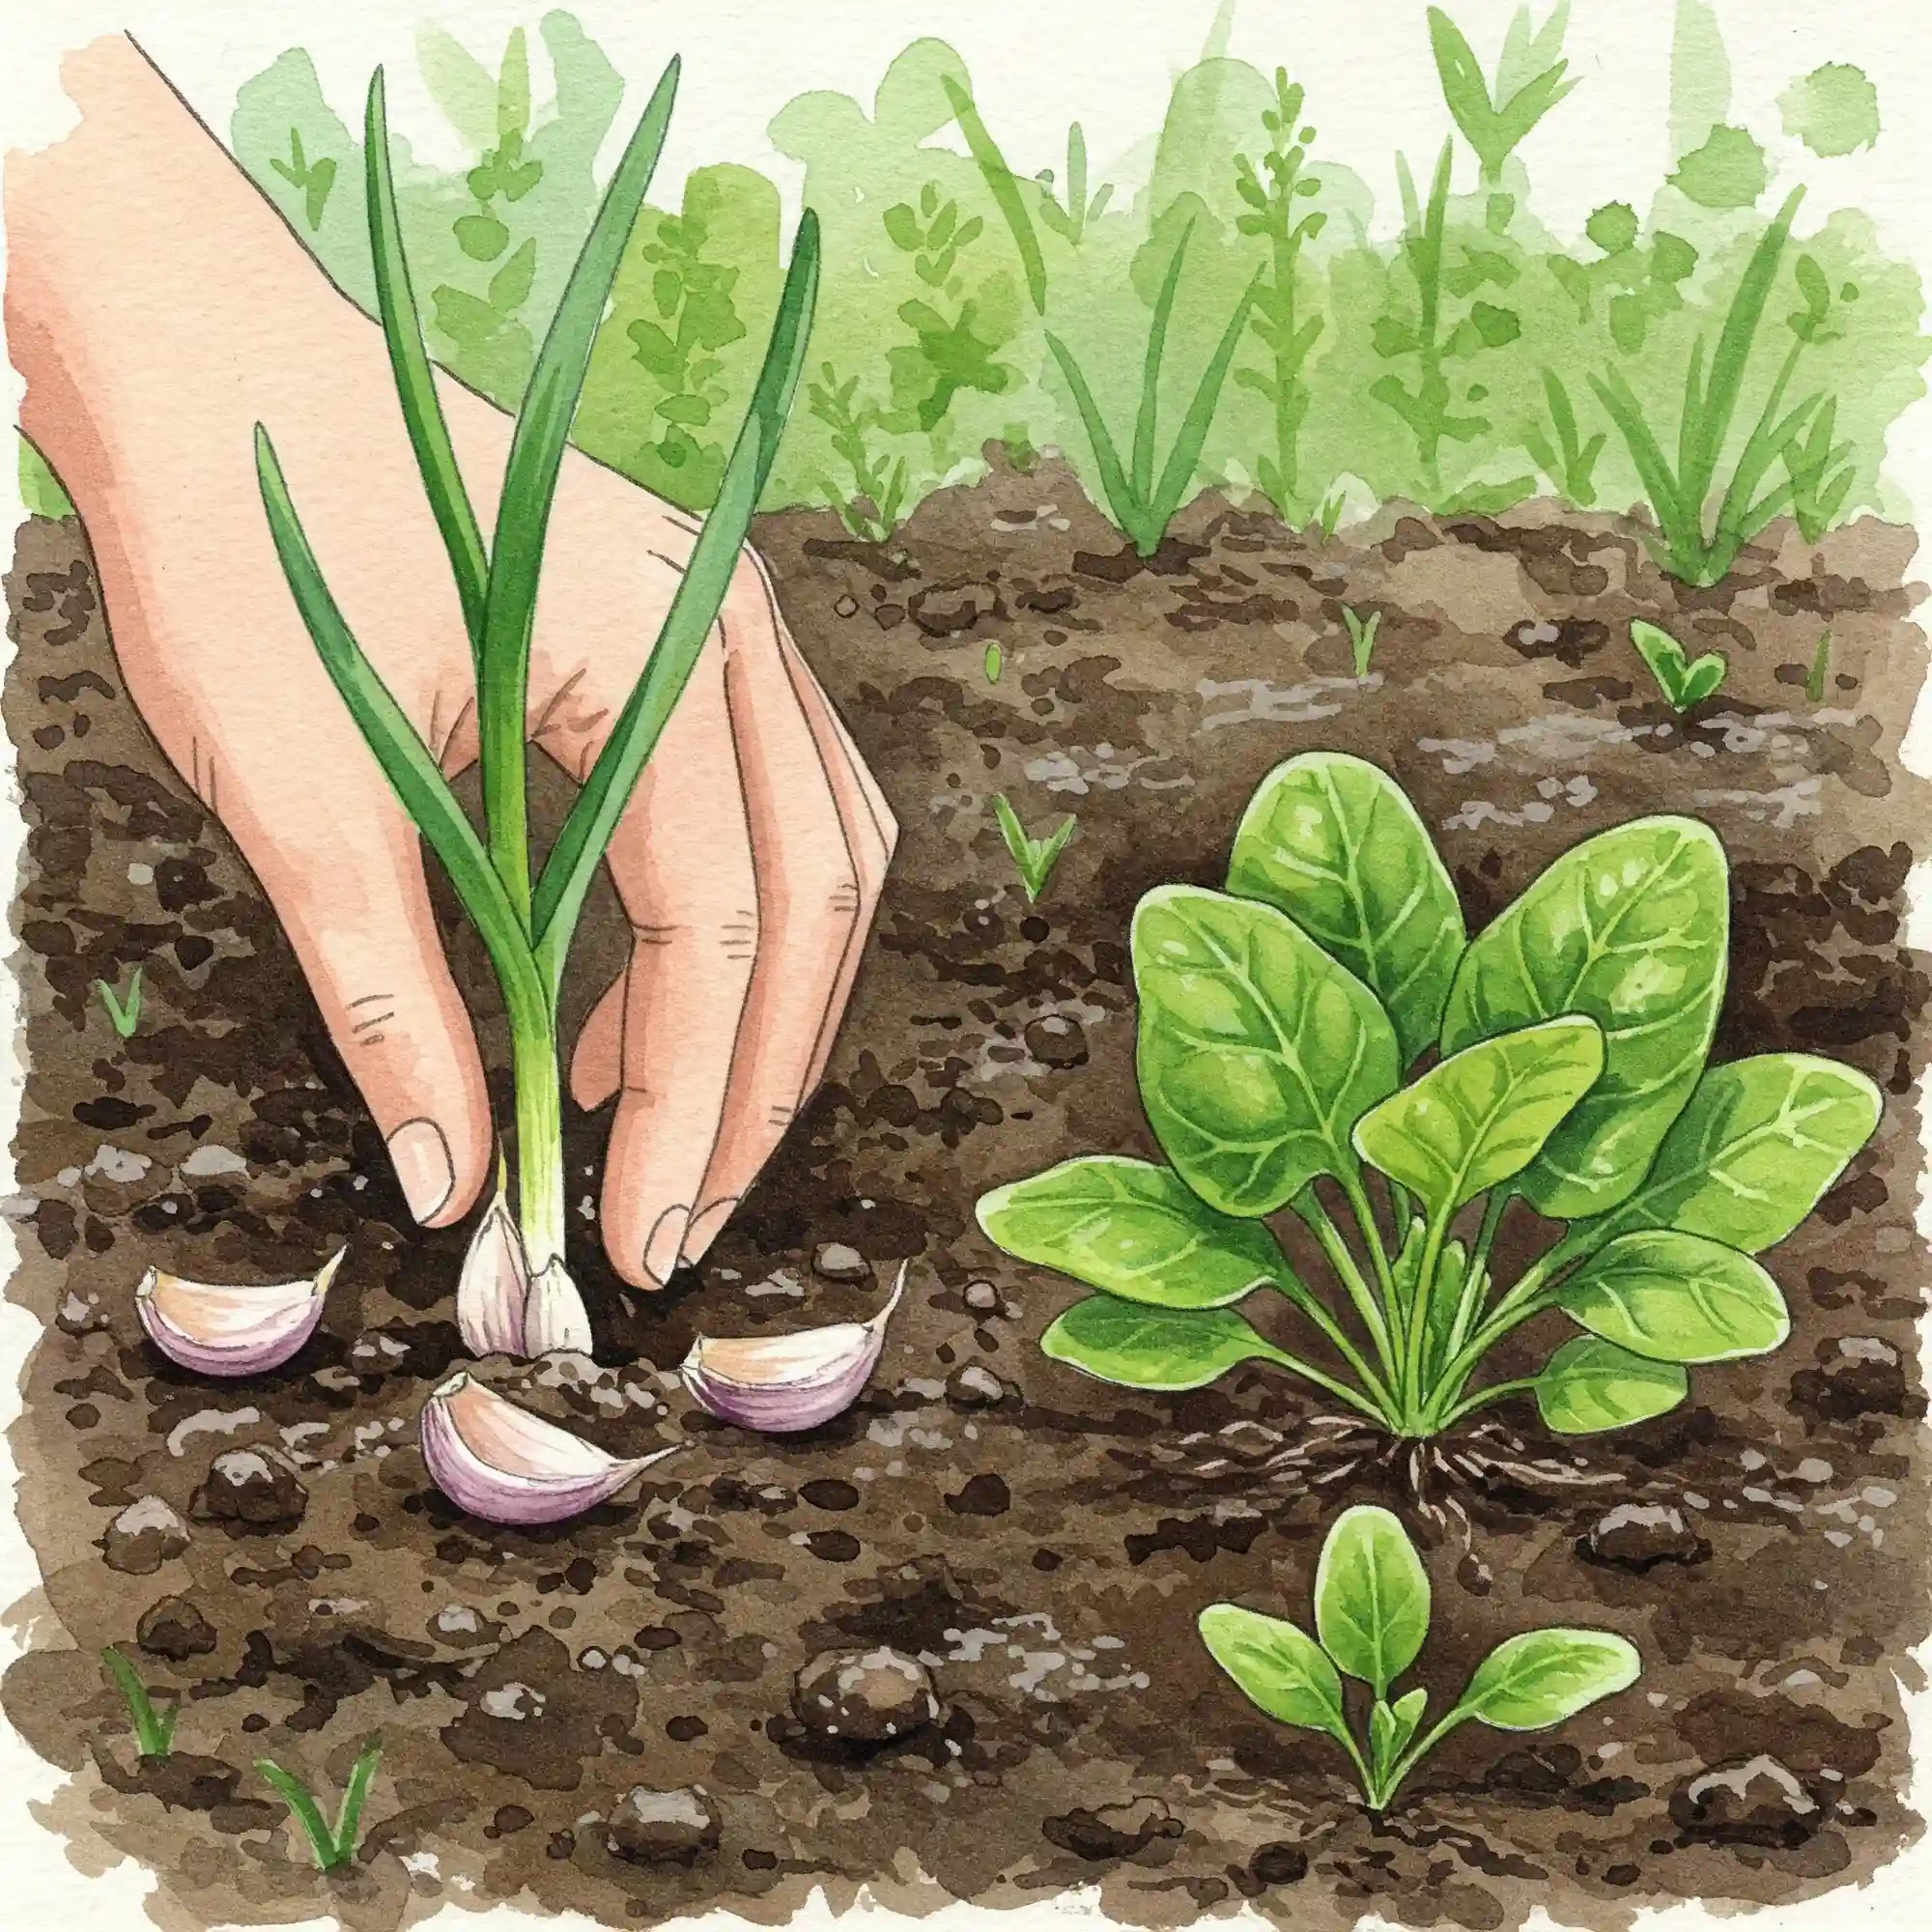
7. Garlic & Spinach: A Robust Spring Defense

Garlic and spinach make a formidable pair in the spring garden, offering mutual benefits and enhancing the overall health and productivity of your garden.
The Benefits of This Dynamic Duo
- Pest Deterrence: Garlic is a natural insect repellent, and its pungent odor can help to deter aphids and other pests that can damage spinach leaves. The presence of garlic can create a less hospitable environment for these pests, protecting your spinach crop.
- Nutrient Enhancement: Garlic and spinach have different nutrient requirements. Garlic is a heavy feeder of phosphorus, while spinach requires more nitrogen. By planting them together, you can create a balanced nutrient uptake and prevent nutrient depletion in the soil.
- Improved Soil Health: As garlic decomposes, it adds organic matter to the soil, improving its structure, aeration, and water retention. This benefits both garlic and spinach, promoting healthy root growth and nutrient uptake.
Planting Garlic and Spinach in Spring
- Timing: Plant garlic cloves in the fall for spring harvest. Spinach can be sown directly in the garden as soon as the soil can be worked in early spring.
- Spacing: Plant garlic cloves about 4-6 inches apart. Sow spinach seeds thinly in rows about 12-18 inches apart.
- Soil Preparation: Prepare the soil by loosening it to a depth of about 8-10 inches. Incorporate compost or well-rotted manure to improve soil fertility and drainage.
- Planting Technique: Plant garlic cloves about 2-3 inches deep, pointed end up. Sow spinach seeds thinly and cover them lightly with soil.
- Mulching: Apply a layer of mulch around the plants to conserve moisture and suppress weeds.
Caring for Your Garlic and Spinach Patch
- Watering: Keep the soil consistently moist but not waterlogged. Both garlic and spinach require regular watering, especially during dry periods.
- Weeding: Keep the area around the plants free of weeds to prevent competition for water and nutrients.
- Harvesting: Garlic can be harvested in late spring or early summer. Spinach can be harvested as soon as the leaves are large enough, typically within 4-6 weeks of planting.
Tips for Success:
- Variety Selection: Choose garlic varieties that are well-suited for your climate and growing season. Select spinach varieties that are tolerant of cool temperatures and have good bolting resistance.
- Soil pH: Both garlic and spinach prefer slightly acidic soil with a pH between 6.0 and 7.0.
- Pest and Disease Monitoring: Regularly inspect your plants for signs of pests or diseases. If you notice any problems, address them promptly.
By following these tips and understanding the benefits of this robust duo, you can successfully grow garlic and spinach together in your spring garden. This simple companion planting strategy can help you protect your spinach crop, improve soil health, and enjoy a bountiful harvest of these delicious and nutritious vegetables.
8. Nasturtiums & Cabbage: Spring’s Trap Crop

Nasturtiums and cabbage form an interesting and effective companion planting combination in the spring garden. Nasturtiums, with their vibrant flowers and peppery leaves, act as a trap crop for certain pests, protecting your cabbage plants from damage.
The Benefits of This Dynamic Duo
- Pest Deterrence: Nasturtiums are known to attract aphids, a common pest that can infest cabbage plants. By planting nasturtiums near your cabbage, you can lure aphids away from your cabbage and onto the nasturtiums, effectively protecting your cabbage crop.
- Improved Pollination: Nasturtiums are attractive to pollinators such as bees and butterflies. By planting them near your cabbage, you can increase the number of pollinators visiting your garden, which can improve the pollination of both crops.
- Visual Appeal: Nasturtiums add a splash of color and beauty to your spring garden with their vibrant flowers. They can also be used as edible flowers, adding a peppery flavor to salads and other dishes.
Planting Nasturtiums and Cabbage in Spring
- Timing: Plant cabbage seedlings or seeds after the last frost has passed. Sow nasturtium seeds directly in the garden a few weeks before or after planting your cabbage.
- Spacing: Plant cabbage seedlings or seeds about 12-18 inches apart. Sow nasturtium seeds thinly around the base of the cabbage plants or in between rows.
- Soil Preparation: Prepare the soil by loosening it to a depth of about 8-10 inches. Incorporate compost or well-rotted manure to improve soil fertility and drainage.
- Planting Technique: Plant cabbage seedlings or seeds at the appropriate depth according to the package instructions. Sow nasturtium seeds thinly and cover them lightly with soil.
- Mulching: Apply a layer of mulch around the plants to conserve moisture and suppress weeds.
Caring for Your Nasturtium and Cabbage Patch
- Watering: Keep the soil consistently moist but not waterlogged. Both nasturtiums and cabbage require regular watering, especially during dry periods.
- Weeding: Keep the area around the plants free of weeds to prevent competition for water and nutrients.
- Harvesting: Nasturtium leaves and flowers can be harvested throughout the growing season for culinary use. Cabbage can be harvested when the heads are firm and mature.
- Pest and Disease Monitoring: Regularly inspect your plants for signs of pests or diseases. If you notice any problems, address them promptly.
Tips for Success:
- Variety Selection: Choose cabbage varieties that are suitable for your climate and growing season. Select nasturtium varieties with different flower colors to add visual interest to your garden.
- Succession Planting: Sow nasturtium seeds throughout the growing season to ensure a continuous supply of flowers to attract pests away from your cabbage.
- Companion Planting Combinations: Nasturtiums can also be planted near other brassica crops, such as broccoli, cauliflower, and kale, to protect them from pests.
By following these tips and understanding the benefits of this dynamic duo, you can successfully grow nasturtiums and cabbage together in your spring garden. This simple companion planting strategy can help you protect your cabbage crop from pests, enhance pollination, and add beauty and flavor to your garden.
Remember, companion planting is a natural and sustainable way to enhance your garden’s productivity and resilience. By understanding the relationships between different plants, you can create a thriving garden ecosystem that benefits both you and the environment.
FAQ

What are the key benefits of companion planting spring vegetables?
Companion planting offers several advantages for your spring vegetable garden. By strategically pairing plants, you can:
- Enhance Pollination: Many companion plants attract beneficial insects like bees and butterflies, which are essential for pollinating your vegetables. This can lead to increased fruit and seed set.
- Improve Soil Health: Some companion plants, such as legumes, fix nitrogen in the soil, enriching it for other plants. Others, like marigolds, can help to improve soil structure and aeration.
- Deter Pests: Many plants have natural pest-repelling properties. By planting these plants near your vegetables, you can deter harmful insects and protect your crops from damage.
- Increase Yield: Certain plant combinations can create a more favorable growing environment, leading to increased yields of both plants. For example, the presence of basil can enhance the flavor and yield of tomatoes.
Which flowers are ideal for companion planting in spring gardens?
Several flowers are excellent choices for companion planting in spring gardens due to their ability to attract pollinators and deter pests:
- Marigolds: These vibrant flowers repel a wide range of pests, including nematodes, aphids, and whiteflies.
- Nasturtiums: Nasturtiums attract aphids away from other plants, protecting them from damage.
- Borage: Borage attracts pollinators like bees and butterflies and can also deter some pests.
- Calendula: Calendula attracts beneficial insects like ladybugs and lacewings, which prey on aphids and other pests.
- Yarrow: Yarrow can help to deter Japanese beetles and other pests.
How to plan a successful companion garden in early spring?
Planning a successful companion garden in early spring involves careful consideration and strategic planning:
- Research: Research the specific needs and characteristics of the plants you want to grow. Identify compatible plant pairings that offer mutual benefits.
- Garden Layout: Plan your garden layout, taking into account the size and spacing requirements of each plant. Consider the sun and shade patterns in your garden to ensure that each plant receives the appropriate amount of sunlight.
- Soil Preparation: Prepare the soil by loosening it and incorporating compost or other organic matter to improve fertility and drainage.
- Seed Starting: Start seeds indoors for plants that require a longer growing season, such as tomatoes and peppers. This will give them a head start and ensure they are ready to transplant outdoors after the last frost.
- Planting: Plant your seeds or seedlings according to the recommended spacing and depth. Water them thoroughly and keep the soil consistently moist.
- Monitoring and Maintenance: Regularly monitor your garden for signs of pests or diseases. Water your plants as needed and keep the area around them free of weeds.
Best vegetable companion planting combinations for spring gardens?
Some of the best vegetable companion planting combinations for spring gardens include:
- Tomatoes and Basil: Basil repels pests and enhances the flavor of tomatoes.
- Carrots and Onions: Onions deter carrot flies.
- Lettuce and Radishes: Radishes act as a trap crop for flea beetles, protecting lettuce.
- Peas and Carrots: Peas fix nitrogen in the soil, benefiting carrots.
- Spinach and Garlic: Garlic deters aphids and other pests that can damage spinach.
Natural pest control methods using companion plants in spring.
Companion planting can be a highly effective natural pest control method. By strategically pairing plants, you can deter pests and attract beneficial insects:
- Marigolds: Repel nematodes, aphids, and other pests.
- Nasturtiums: Attract aphids away from other plants.
- Basil: Repels tomato hornworms and whiteflies.
- Garlic: Deters aphids and other pests that can damage spinach.
- Borage: Attracts pollinators and can deter some pests.
Companion planting guide for beginners starting spring garden seeds.
If you’re new to companion planting, here are some tips to get you started:
- Start Small: Begin with a few simple companion planting combinations to gain experience.
- Choose Easy-to-Grow Plants: Select plants that are easy to grow and maintain, such as lettuce, radishes, and marigolds.
- Research and Plan: Research the specific needs and characteristics of the plants you want to grow. Identify compatible plant pairings and plan your garden layout accordingly.
- Observe and Adjust: Monitor your garden regularly and make adjustments as needed. Observe how your plants are growing and interacting with each other.
- Have Fun and Experiment: Don’t be afraid to experiment with different plant combinations and discover what works best in your garden.
By following these tips, you can successfully incorporate companion planting into your spring garden and enjoy the benefits of this natural and sustainable gardening practice.
Effective companion planting strategies for raised beds in spring.
Raised beds offer several advantages for companion planting:
- Improved Drainage: Raised beds provide excellent drainage, which is important for many plants.
- Warmth: Raised beds warm up more quickly in the spring, allowing you to start planting earlier.
- Efficient Space Utilization: Raised beds allow you to maximize your garden space by planting vertically and using trellises for vining plants.
Here are some effective companion planting strategies for raised beds in spring:
- Vertical Gardening: Utilize trellises or cages to grow vining plants like peas and beans vertically, maximizing space and allowing you to plant other crops underneath.
- Intercropping: Plant fast-growing crops like radishes and lettuce between slower-growing crops like cabbage and broccoli.
- Succession Planting: Plant fast-maturing crops like lettuce and radishes early in the spring, and then follow them with slower-maturing crops like tomatoes and peppers.
Organic companion planting techniques to improve spring garden yields.
Organic companion planting techniques can help to improve the overall health and productivity of your spring garden:
- Choose Organic Seeds and Plants: Select organic seeds and plants that are free from synthetic pesticides and fertilizers.
- Use Organic Fertilizers and Pest Control Methods: Utilize organic fertilizers like compost and manure to enrich the soil. Use natural pest control methods, such as introducing beneficial insects or using insecticidal soap.
- Avoid Synthetic Pesticides and Herbicides: Avoid using synthetic pesticides and herbicides, which can harm beneficial insects and pollinator.
Conclusion

Companion planting is a simple yet powerful technique that can transform your spring garden. By understanding the relationships between different plants and applying these principles strategically, you can create a more productive, resilient, and beautiful garden.
Remember, companion planting is an ongoing learning process. Experiment with different plant combinations, observe the results, and adjust your strategies as needed. The key is to have fun, embrace the natural interactions between plants, and enjoy the rewards of a thriving spring garden.
I encourage you to explore the world of companion planting and discover the endless possibilities that await you. Happy gardening!
Additional Tips for Companion Planting Success:
- Research and Experiment: Continue to research and learn about new companion planting combinations. Experiment with different plants and observe their interactions in your garden.
- Observe Your Garden: Pay close attention to your plants and note any positive or negative interactions. This will help you refine your companion planting strategies for future seasons.
- Share Your Knowledge: Share your knowledge and experiences with other gardeners. By sharing information and ideas, we can all create more successful and sustainable gardens.
By embracing the principles of companion planting, you can create a thriving and productive spring garden that is not only beautiful but also beneficial to the environment. Happy gardening!


