
Are you dreaming of a vibrant spring garden but dreading the potential cost? I understand the frustration of wanting beautiful blooms and fresh vegetables without emptying your wallet. You see those stunning garden displays in magazines and think, “How can I achieve that without spending a fortune?” The anxiety of overspending can take the joy out of gardening. But, what if I told you that you can have a thriving spring garden on a budget? I’m here to show you how. Dive into these 10 smart ways for budget-friendly spring gardening and discover how to grow beautiful flowers and delicious vegetables while keeping your expenses low. We’ll cover everything from seed starting to DIY solutions, ensuring your spring garden is both bountiful and affordable.
1. Start with Seed Starting: Save Big on Seedlings

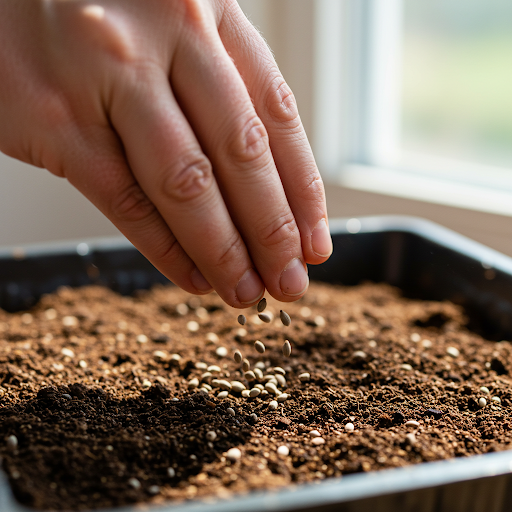
How to grow your garden without spending a fortune? Skip the pricey nursery seedlings. I’ve found that starting my own seeds indoors is the most cost-effective way to get a jump start on my spring garden. You can use recycled containers like egg cartons or yogurt cups, and purchase seeds in bulk for better savings. This simple act not only saves you money but also gives you a sense of accomplishment as you watch your plants grow from tiny seeds.
- Tips for successful seed starting:
- Choose seeds suitable for your climate and spring planting. For example, if you live in a colder region, you might start cool-season vegetables like lettuce and peas indoors several weeks before the last frost.
- Use a good quality seed starting mix. This mix is lighter and better aerated than regular potting soil, promoting better root development.
- Provide adequate light and warmth for germination. I use grow lights to ensure my seedlings get enough light, especially during the early spring when natural light is limited. A heat mat can also help maintain a consistent temperature for optimal germination.
Why Seed Starting Saves You Money:
- Cost Savings: Seed packets are significantly cheaper than buying established seedlings. A single packet of seeds can yield dozens of plants. For example, a single packet of tomato seeds can easily produce 10 or more seedlings, while a single tomato seedling at a nursery can cost several dollars.
- Variety: You have a wider selection of plant varieties available from seed catalogs and online retailers compared to local nurseries. Seed catalogs often offer heirloom varieties, unique cultivars, and a wider range of colors and flavors that may not be readily available at your local nursery.
- Control: You have complete control over the growing process, from seed to seedling, ensuring healthier plants. By starting your own seeds, you can carefully monitor their growth, ensure they receive adequate light and water, and avoid any potential issues that may arise from nursery-grown seedlings.
Practical Examples:
- Recycled Containers: I’ve used egg cartons, yogurt cups, and even toilet paper rolls as seed starting containers. These are readily available and cost nothing. By repurposing these items, you’re not only saving money but also reducing waste.
- Seed Swaps: Participate in local seed swaps or gardening clubs where you can exchange seeds with other gardeners. This is a fantastic way to try new varieties, expand your collection, and connect with other gardening enthusiasts.
- Bulk Seeds: Purchasing seeds in bulk, especially for commonly grown vegetables like tomatoes and peppers, can significantly reduce your costs. Many online retailers offer discounts for bulk seed purchases, allowing you to stock up on your favorites and save money in the long run.
Case Study:
A local community garden in my area conducted a study on the cost savings of seed starting versus buying seedlings. They found that gardeners who started their own seeds saved an average of 60% on plant costs compared to those who purchased seedlings from nurseries. This not only provided significant financial benefits but also fostered a sense of community and knowledge sharing.
Data Insight:
According to a survey by the National Gardening Association, the average cost of a seedling from a nursery is $3 to $5, while a packet of seeds typically costs $2 to $3 and yields multiple plants. This data highlights the substantial cost savings of seed starting.
The Process of Seed Starting:
- Prepare Your Containers: Clean and prepare your containers with drainage holes. This will prevent your seedlings from becoming waterlogged and rotting.
- Fill with Seed Starting Mix: Fill the containers with a high-quality seed starting mix. This specialized mix is lighter and better aerated than regular potting soil, providing optimal conditions for root development.
- Sow the Seeds: Follow the instructions on the seed packet for planting depth and spacing. Some seeds require barely any soil cover, while others need to be planted deeper.
- Water Gently: Moisten the soil thoroughly but gently to avoid disturbing the seeds. Use a fine mist sprayer or a watering can with a gentle stream.
- Provide Light and Warmth: Place the containers in a warm location with adequate light. A sunny windowsill can work well, but you may need to supplement with grow lights, especially during the early spring when natural light is limited. A heat mat placed under the containers can also help maintain a consistent temperature for optimal germination.
- Monitor and Water: Keep the soil consistently moist until the seedlings emerge. Avoid overwatering, as this can lead to damping off, a fungal disease that can kill young seedlings.
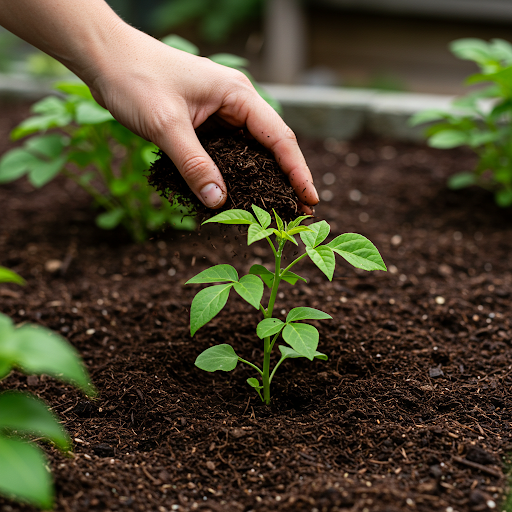
- Transplant: Once the seedlings have developed their first true leaves, transplant them into larger pots or directly into the garden. This will give them more space to grow and develop strong root systems.
By starting your own seeds, you’re not just saving money; you’re also taking an active role in the growth and development of your garden. I’ve found that the satisfaction of watching my seedlings grow from tiny seeds into thriving plants is truly rewarding. It’s a connection to the natural world that you can’t quite replicate with store-bought seedlings.
2. Embrace DIY Composting: Free Fertilizer for Your Garden

How to improve your soil and save money? Make your own compost. I’ve discovered that DIY composting is an incredibly effective way to create nutrient-rich fertilizer for my garden, and it’s practically free. Composting transforms kitchen scraps and yard waste into a valuable soil amendment, reducing waste and enriching your garden. This method is a sustainable and budget-friendly way to enrich your soil, promoting healthy plant growth.
The Science of Composting:
Composting is a natural biological process where microorganisms, such as bacteria and fungi, break down organic matter into humus, a dark, crumbly material rich in nutrients. This process requires a balance of carbon (brown materials) and nitrogen (green materials), along with adequate moisture and oxygen.
Easy Composting Tips:
- Maintain a Balance of “Greens” (Nitrogen) and “Browns” (Carbon):
- “Greens” include kitchen scraps like vegetable peels, fruit cores, and coffee grounds, as well as fresh yard waste like grass clippings.
- “Browns” consist of dry leaves, shredded paper, cardboard, and wood chips.
- A good rule of thumb is to use a 2:1 ratio of browns to greens. This ensures proper aeration and prevents the compost from becoming too wet or smelly.
- Turn Your Compost Regularly to Aerate It:
- Aeration is essential for the microorganisms to thrive. Turning the compost pile every few days or weekly introduces oxygen, speeding up the decomposition process.
- I use a garden fork or a compost turner to mix the materials thoroughly.
- Use Finished Compost as a Soil Amendment Before Planting:
- Finished compost is dark, crumbly, and has a pleasant earthy smell.
- Incorporate it into your garden soil before planting to improve soil structure, water retention, and nutrient availability.
- I personally like to add a 2-3 inch layer of finished compost to the top of my garden beds and mix it into the top 6 inches of soil.
Benefits of DIY Composting:
- Cost Savings: Eliminates the need to purchase expensive commercial fertilizers.
- Environmental Sustainability: Reduces waste by diverting organic materials from landfills.
- Soil Improvement: Enhances soil structure, water retention, and nutrient availability.
- Plant Health: Provides essential nutrients for healthy plant growth.
Practical Applications:
- Compost Bins: I’ve found that a simple compost bin made from recycled materials, like an old plastic container or wooden pallets, works perfectly well.
- Compost Tumblers: If you prefer a faster composting process, consider using a compost tumbler, which makes turning the compost easier.
- Worm Composting (Vermicomposting): For those with limited space, worm composting is an excellent option. Worms break down organic matter quickly and produce nutrient-rich castings.
Case Study:
A local community garden implemented a composting program, providing residents with compost bins and educational workshops. The program resulted in a significant reduction in waste and improved soil health in community gardens. Gardeners reported increased yields and healthier plants, demonstrating the effectiveness of DIY composting.
Data Insight:
According to the Environmental Protection Agency (EPA), food scraps and yard waste make up a significant portion of municipal solid waste. Composting these materials can divert them from landfills, reducing greenhouse gas emissions and creating valuable soil amendments.
Composting Do’s and Don’ts:
| Do’s | Don’ts |
| Use a balanced mix of greens and browns | Avoid adding meat, dairy, or oily foods |
| Turn the compost regularly | Don’t add diseased plants |
| Keep the compost moist | Avoid adding pet waste |
| Shred large materials to speed up decomposition | Don’t add treated wood or coal ash |
Troubleshooting Composting Issues:
- Smelly Compost: If your compost smells bad, it likely lacks oxygen. Turn it more frequently and add more brown materials.
- Slow Decomposition: If your compost is decomposing slowly, ensure it has adequate moisture and a balanced mix of greens and browns.
- Pest Problems: To avoid pests, bury food scraps in the center of the pile and cover them with a layer of browns.
By embracing DIY composting, you’re not only saving money but also contributing to a healthier environment and a more productive garden. I’ve found that the satisfaction of creating my own fertilizer is truly rewarding, and it’s a sustainable practice that benefits both my garden and the planet.
3. Upcycle and Reuse: Creative and Cheap Garden Containers

How to plant your garden without buying expensive pots? Get creative with upcycled materials. Old tin cans, plastic bottles, and wooden crates can be transformed into charming and functional planters. This not only saves money but also adds a unique touch to your garden. Upcycling not only reduces waste but also adds a personal touch to your garden decor.
- Ideas for Upcycled Containers:
- Tin Cans: Clean and rinse thoroughly. Decorate with paint, twine, or even decoupage. Consider drilling drainage holes in the bottom.
- Plastic Bottles: Cut the tops off plastic bottles and use the bottom halves as small planters. Get creative with paint or add colorful stones for decoration.
- Wooden Crates: These can be used as raised beds or individual planters. Add a layer of plastic sheeting to the bottom for drainage.
- Old Boots: Fill old boots with potting soil and plant colorful flowers for a whimsical touch.
- Teacups and Saucers: Perfect for small succulents and herbs.
- Tips for Using Upcycled Containers:
- Drainage: Ensure proper drainage by drilling holes in the bottom of metal or plastic containers.
- Soil: Use a well-draining potting mix to prevent root rot.
- Plant Selection: Choose plants that are suitable for container gardening, such as herbs, succulents, and trailing plants.
- Benefits of Upcycling:
- Cost Savings: Saves money by repurposing items that would otherwise be discarded.
- Environmental Friendliness: Reduces waste and promotes sustainability.
- Creativity: Encourages creativity and allows you to express your personal style.
- Unique Garden Decor: Adds a unique and charming touch to your garden.
- Practical Applications:
- Vertical Gardening: Upcycled containers can be easily hung or stacked to create vertical gardens, maximizing space in small gardens or balconies.
- Theme Gardens: Create themed gardens using upcycled containers. For example, use old teacups and saucers for a whimsical fairy garden.
- Community Projects: Organize community upcycling events where people can bring their unwanted items to be repurposed into garden containers.
By embracing upcycling, you can create a beautiful and budget-friendly garden while minimizing your environmental impact. So, get creative, explore your options, and let your imagination run wild. You’ll be amazed at the unique and charming planters you can create from everyday items.
4. Choose Affordable Plants: Focus on Easy-to-Grow Varieties

What are the most budget-friendly flowers to plant in spring? Select plants that are easy to grow and readily available. Vegetables like lettuce, peas, and radishes, and flowers like marigolds and petunias, are excellent choices for budget-conscious gardeners.
- Tips for Choosing Affordable Plants:
- Look for Seeds and Seedlings at Local Farmers’ Markets or Community Gardens: These sources often offer a wider variety of plants at lower prices than big-box stores. You can also support local growers and build relationships with other gardening enthusiasts.
- Consider Growing Plants from Cuttings or Divisions: Many plants can be propagated from cuttings or divisions, allowing you to expand your garden for free. This is a great way to obtain new plants without spending any money.
- Focus on Varieties that are Known to Thrive in Your Region: Choosing plants that are well-suited to your local climate will reduce the risk of failure and the need for costly interventions.
- Benefits of Choosing Affordable Plants:
- Cost Savings: You can save money by selecting less expensive plant varieties or by growing your own plants from seed.
- Variety: You can explore a wider range of plants and discover new favorites without breaking the bank.
- Sustainability: Growing easy-to-grow varieties reduces the need for additional inputs, such as fertilizers and pesticides, making your garden more sustainable.
- Practical Examples:
- Vegetables: Lettuce, radishes, peas, spinach, and carrots are all relatively inexpensive to grow and can be harvested quickly.
- Flowers: Marigolds, petunias, and zinnias are colorful, easy-to-grow flowers that attract pollinators to your garden.
- Herbs: Basil, cilantro, and mint are easy to grow from seed and can be harvested throughout the growing season.
- Case Study:
- A study conducted by the University of Illinois found that gardeners who grew their own vegetables saved an average of 40% on their grocery bills compared to those who purchased all their produce from the store. This demonstrates the significant financial benefits of growing your own food.
- Data Insight:
- According to the National Gardening Association, the average cost of a vegetable seedling at a nursery is $3 to $5, while a packet of seeds can cost as little as $1 and produce multiple plants. This data highlights the cost-effectiveness of growing your own plants from seed.
By carefully selecting affordable and easy-to-grow varieties, you can create a beautiful and productive garden without breaking the bank. Remember, the goal is to enjoy the process and reap the rewards of your labor.
5. Smart Watering Techniques: Conserve Water and Save Money

How to save money gardening in spring? Use water wisely. I’ve learned that implementing water-saving techniques is crucial for both your budget and the environment. By watering efficiently, you can conserve water, reduce your utility bills, and ensure your plants receive the moisture they need to thrive.
- Water-Saving Tips:
- Water Early in the Morning or Late in the Evening: Watering during these cooler times minimizes evaporation, allowing the water to penetrate the soil more effectively and reach the plant roots.
- Use Rain Barrels to Collect Rainwater: Rain barrels are an excellent way to collect rainwater for your garden. This free and natural water source can significantly reduce your reliance on municipal water.
- Install a Drip Irrigation System: Drip irrigation systems deliver water directly to the plant roots, minimizing water loss through evaporation and runoff. They are more efficient than traditional sprinklers and can save you both water and money.
- Mulch Around Your Plants: Mulching helps to retain soil moisture by reducing evaporation and suppressing weeds. Organic mulches, such as wood chips, straw, and compost, also add valuable nutrients to the soil as they decompose.
- Water Deeply but Infrequently: Encourage deep root growth by watering thoroughly but less frequently. This helps plants develop strong root systems that can reach deeper into the soil for moisture.
- Benefits of Water Conservation:
- Reduced Water Bills: Conserving water can lead to significant savings on your water bills.
- Environmental Sustainability: Reduces water usage and helps to conserve this precious resource.
- Healthy Plant Growth: Proper watering techniques promote healthy plant growth and development.
- Reduced Runoff: Minimizes water runoff, which can lead to soil erosion and pollution.
- Practical Applications:
- Water Wisely: Use a watering can or a hose with a nozzle to control the flow of water and avoid overwatering.
- Monitor Soil Moisture: Check soil moisture regularly by inserting your finger into the soil. Water only when the top few inches of soil feel dry.
- Group Plants Together: Group plants with similar watering needs together to make watering more efficient.
- Case Study:
- A study by the University of California found that using drip irrigation systems can reduce water usage by up to 50% compared to traditional sprinkler systems. This demonstrates the significant water savings that can be achieved through efficient irrigation practices.
- Data Insight:
- According to the Environmental Protection Agency (EPA), outdoor water use accounts for a significant portion of residential water consumption. By implementing water-saving techniques, you can significantly reduce your water footprint.
By implementing these smart watering techniques, you can conserve water, save money, and ensure your garden thrives. Remember, every drop counts, and by making conscious choices about how you water your garden, you can make a positive impact on both your budget and the environment.
6. DIY Pest Control: Natural and Low-Cost Solutions

How to control pests in my garden in a budget-friendly way? Avoid expensive chemical pesticides. I’ve found that natural pest control methods are not only effective but also safer for the environment and beneficial insects. By using natural and low-cost solutions, you can protect your plants while minimizing your impact on the ecosystem.
- DIY Pest Control Methods:
- Homemade Soap Spray: Mix a few drops of liquid soap with water and spray it on affected plants. This can be effective against aphids, mites, and other soft-bodied insects.
- Neem Oil: Neem oil is a natural plant-based oil that is effective against a wide range of pests, including aphids, caterpillars, and fungal diseases. Dilute neem oil according to the product instructions and spray it on your plants.
- Insecticidal Soap: Insecticidal soap is a ready-to-use solution that disrupts the cell membranes of insects, causing them to dehydrate and die. It is safe for use on most plants and is effective against many common garden pests.
- Diatomaceous Earth: Diatomaceous earth is a natural, non-toxic powder made from fossilized diatoms. It works by piercing the exoskeletons of insects, causing them to dehydrate and die. Sprinkle diatomaceous earth around the base of plants or on the leaves to control pests.
- Benefits of Natural Pest Control:
- Safety: Natural pest control methods are generally safer for humans, pets, and beneficial insects like bees and butterflies.
- Environmental Friendliness: Avoids the use of harmful chemicals that can contaminate soil and water.
- Cost-Effectiveness: Many natural pest control methods are inexpensive or can be made at home.
- Practical Applications:
- Companion Planting: Plant pest-repelling plants like marigolds, garlic, and onions near your vegetables to deter pests naturally.
- Attract Beneficial Insects: Encourage beneficial insects like ladybugs, lacewings, and praying mantises to your garden by providing them with habitat and food sources.
- Handpicking: Regularly inspect your plants for pests and handpick them off as needed.
- Case Study:
- A study conducted by the University of California found that using a combination of natural pest control methods, such as beneficial insects and handpicking, can effectively control pests in home gardens while minimizing the use of synthetic pesticides.
- Data Insight:
- The use of synthetic pesticides has declined in recent years, as gardeners are becoming more aware of the environmental and health risks associated with these chemicals. This shift towards natural pest control methods is beneficial for both gardeners and the environment.
By embracing natural and low-cost pest control methods, you can protect your plants from pests while creating a healthier and more sustainable garden ecosystem. Remember, prevention is key. Regularly inspect your plants for pests and take action early to minimize damage.
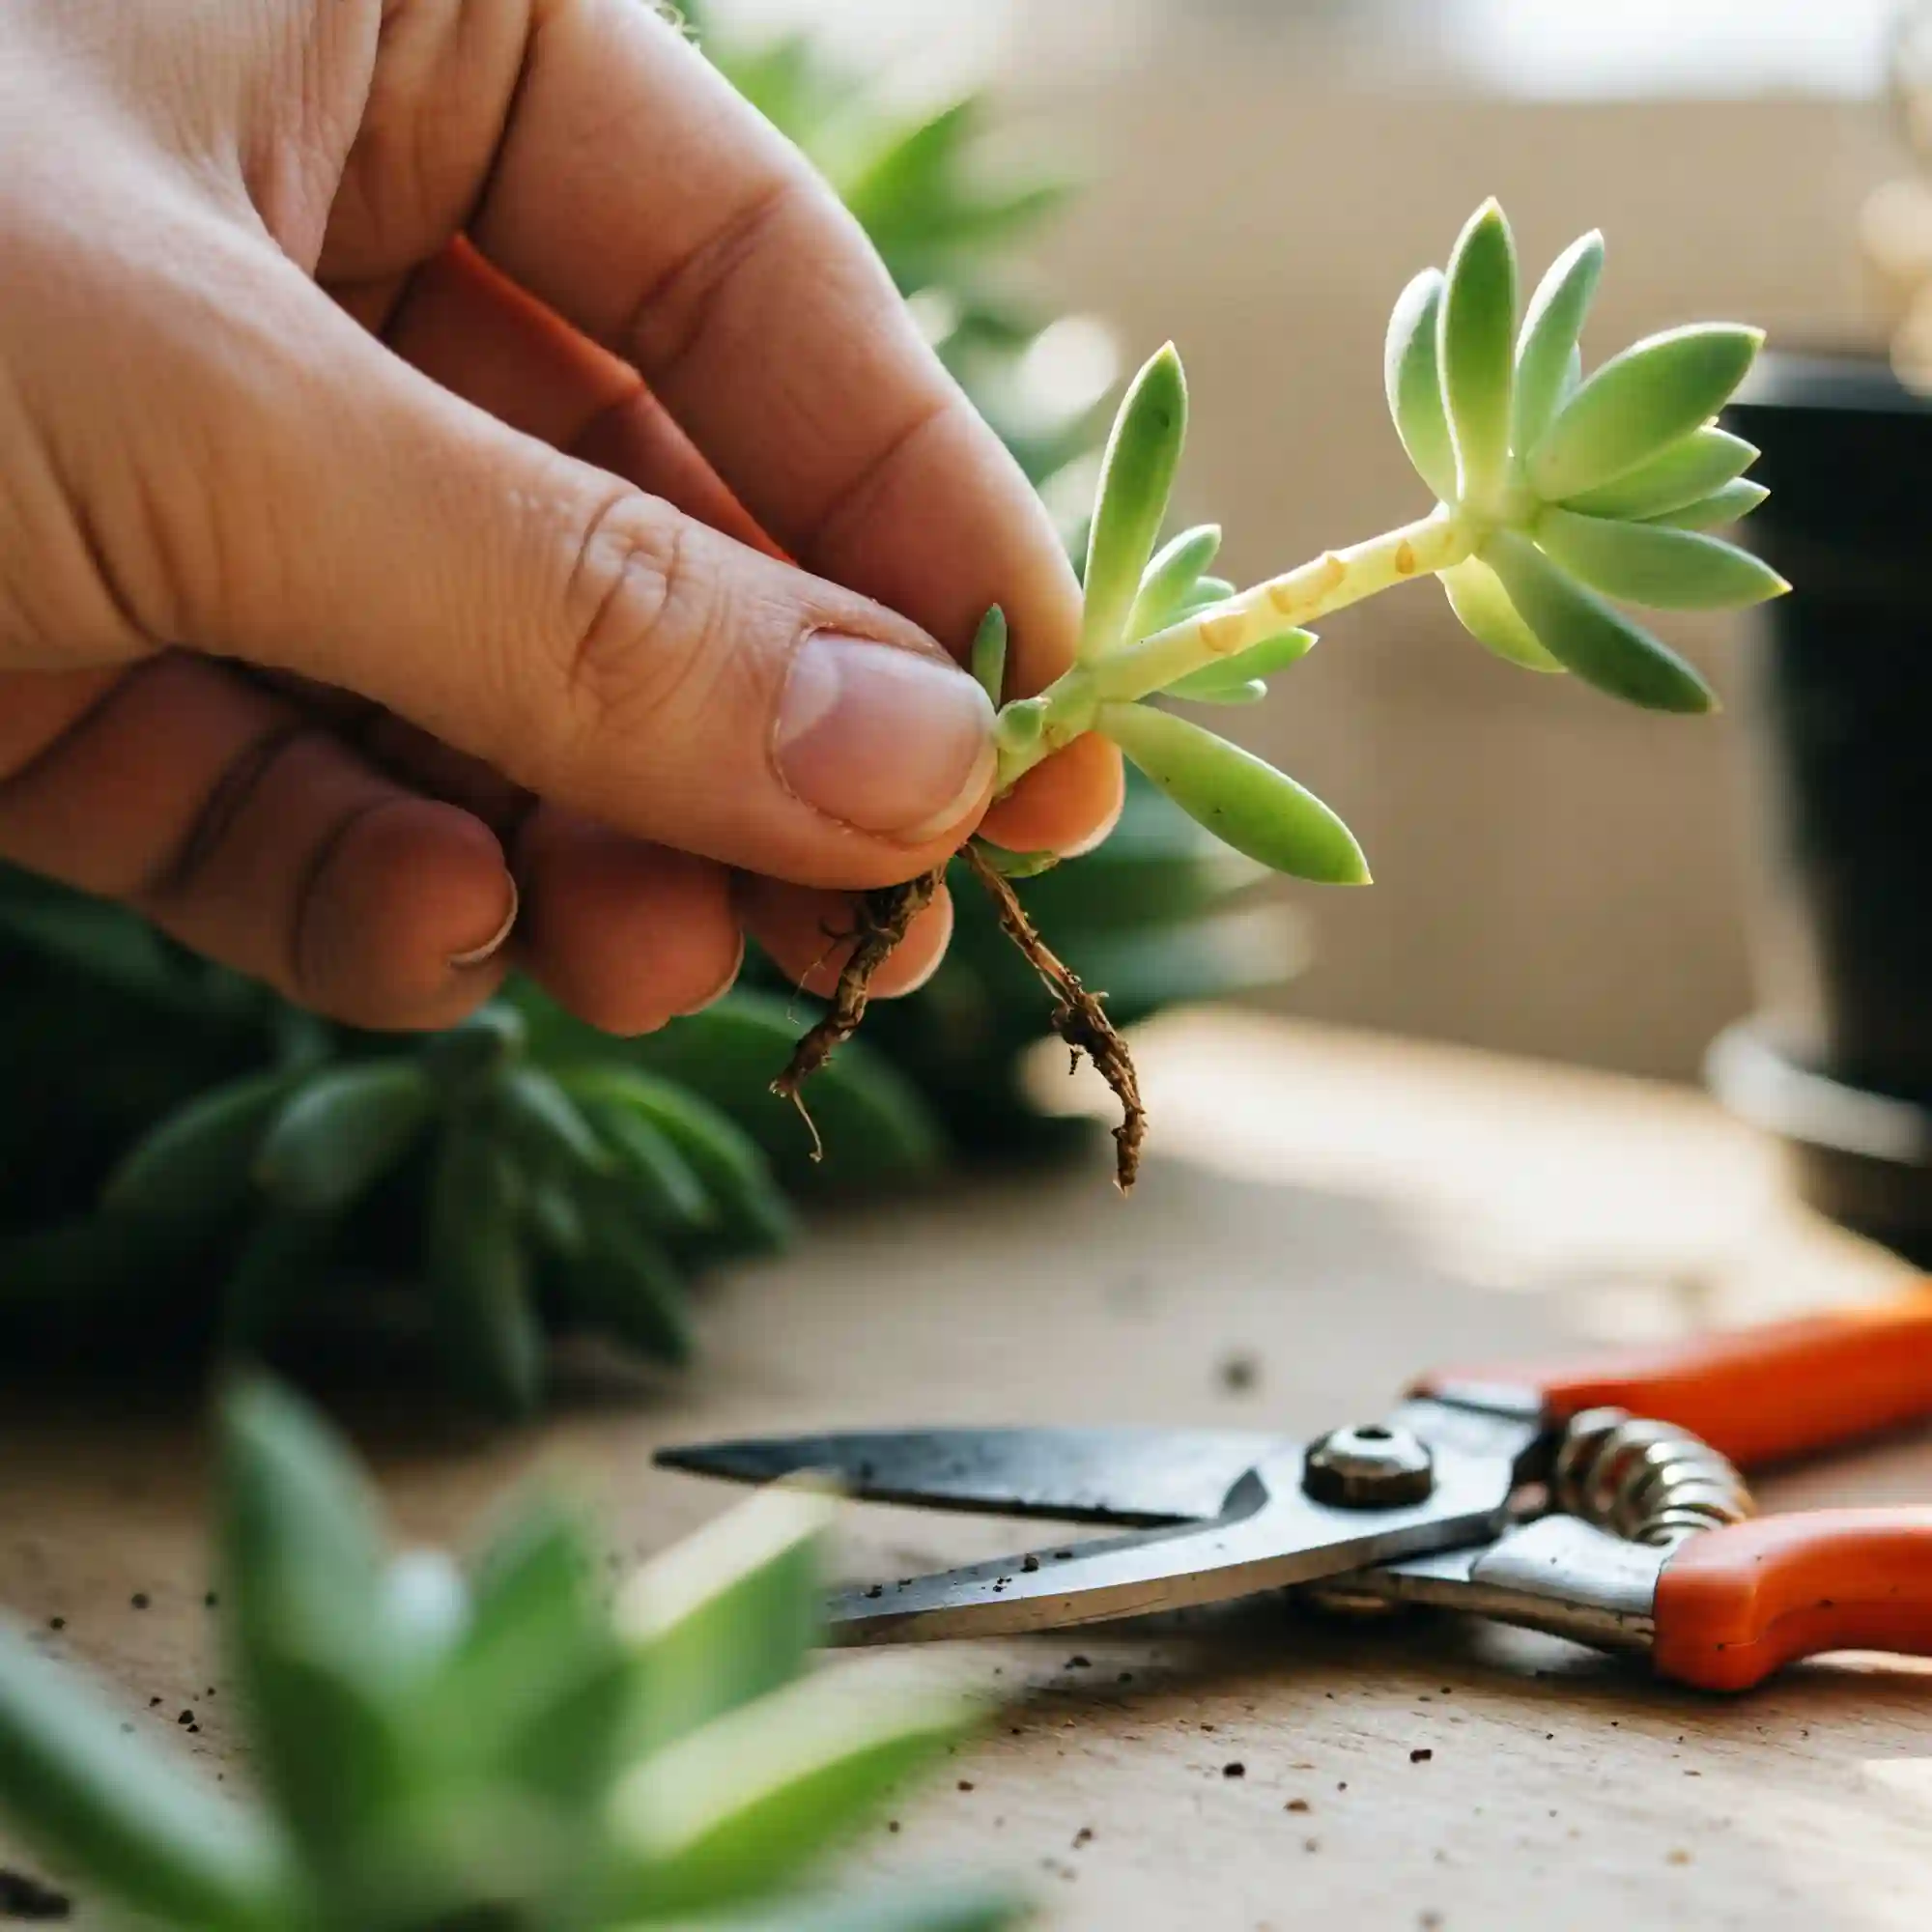
7. Propagate Your Plants: Multiply Your Garden for Free

How to propagate your plant in spring? Propagating plants from cuttings or divisions is a fantastic way to expand your garden without spending money. This technique is especially effective for herbs, succulents, and many flowering plants. Propagation allows you to create new plants from existing ones, effectively multiplying your garden at no cost.
- Tips for Successful Propagation:
- Choose Healthy Plants: Select healthy, vigorous plants that are free from diseases and pests.
- Timing: Take cuttings during the spring or summer when plants are actively growing.
- Sterilize Your Tools: Clean your cutting tools (scissors or shears) with rubbing alcohol to prevent the spread of diseases.
- Rooting Hormone: Dip the cuttings in rooting hormone to encourage root development. Rooting hormone is a powdered or liquid substance that stimulates root growth.
- Provide Proper Care: Plant the cuttings in a well-draining potting mix and keep them moist but not soggy. Provide adequate light and warmth.
- Types of Propagation:
- Stem Cuttings: Take cuttings from the stems of plants, typically below a node (the point where leaves or branches grow).
- Leaf Cuttings: Some plants, such as succulents and African violets, can be propagated from leaf cuttings.
- Root Cuttings: Certain plants, like horseradish and blackberry, can be propagated from root cuttings.
- Division: Divide established plants into smaller sections, each with its own roots and shoots. This is a common method for propagating perennials.
- Benefits of Plant Propagation:
- Cost Savings: No need to purchase new plants, saving you money.
- Variety Preservation: Allows you to preserve the unique characteristics of your favorite plants.
- Increased Plant Stock: Quickly increase the number of plants in your garden.
- Sense of Accomplishment: The process of propagating plants is rewarding and can be a fun and educational experience.
- Practical Applications:
- Herbs: Many herbs, such as mint, basil, and rosemary, are easy to propagate from stem cuttings.
- Succulents: Succulents are excellent candidates for propagation from leaf or stem cuttings.
- Perennials: Divide established perennials like hostas, daylilies, and irises to rejuvenate them and increase your plant stock.
- Case Study:
- A home gardener successfully propagated several varieties of herbs from cuttings, creating a thriving herb garden without spending a dime. She was able to share her propagated plants with friends and neighbors, further spreading the joy of gardening.
- Data Insight:
- A study by the Royal Horticultural Society found that home gardeners who propagate their own plants report higher levels of satisfaction and a greater connection to their gardens.
By learning how to propagate your plants, you can expand your garden, save money, and gain a deeper appreciation for the wonders of plant life. It’s a rewarding experience that allows you to connect with nature and create something beautiful with your own hands.
8. Utilize Mulch: Weed Control and Moisture Retention
How to improve spring garden soil without spending money? Mulching is a simple and effective way to suppress weeds, retain soil moisture, and regulate soil temperature. I’ve found that using mulch in my garden has significantly reduced my need for frequent watering and weeding, saving me time and money. You can use organic materials like shredded leaves, wood chips, or straw as mulch.
- Benefits of Mulching:
- Weed Control: A thick layer of mulch can effectively suppress weed growth, reducing the need for weeding and saving you time and effort.
- Moisture Retention: Mulch helps to retain soil moisture by reducing evaporation. This is especially beneficial during dry periods, as it helps your plants stay hydrated and reduces the need for frequent watering.
- Soil Temperature Regulation: Mulch helps to moderate soil temperature, protecting plant roots from extreme heat and cold.
- Soil Improvement: Organic mulches, such as wood chips and compost, add valuable nutrients to the soil as they decompose.
- Aesthetics: Mulch can also add a neat and finished look to your garden.
- Types of Mulch:
- Organic Mulches:
- Wood Chips: A readily available and affordable option.
- Shredded Leaves: A free and readily available resource.
- Straw: Effective for weed control and moisture retention.
- Compost: Enriches the soil as it decomposes.
- Inorganic Mulches:
- Plastic Mulch: Can be effective for weed control but can be less aesthetically pleasing and may not improve soil health.
- Landscape Fabric: Allows water and nutrients to penetrate while preventing weed growth.
- Organic Mulches:
- Tips for Applying Mulch:
- Prepare the Soil: Clear the area around your plants of weeds and debris before applying mulch.
- Apply a Thick Layer: Apply a layer of mulch 2-3 inches deep around your plants, being careful not to pile it up against the stems.
- Water Before Mulching: Water your plants thoroughly before applying mulch to prevent soil moisture from becoming trapped.
- Reapply Mulch as Needed: Mulch will decompose over time, so you may need to reapply it periodically.
- Case Study:
- A study by the University of California found that using mulch around vegetable gardens can reduce water usage by up to 50% and significantly suppress weed growth. This demonstrates the significant benefits of mulching for both water conservation and reduced maintenance.
- Data Insight:
- According to the National Gardening Association, mulching is one of the most effective and cost-effective ways to improve soil health and reduce water usage in home gardens.
By utilizing mulch in your garden, you can create a more efficient and sustainable gardening system. Mulching not only saves you time and money but also benefits your plants and the environment.
9. Shop Smart: Look for Discounts and Sales

Where to buy cheap spring garden supplies? I’ve learned that keeping an eye out for seasonal sales and discounts at local garden centers and nurseries can significantly reduce your gardening expenses. Buying seeds and supplies in bulk or at the end of the season can also lead to significant savings.
- Tips for Smart Shopping:
- Compare Prices: Before making a purchase, compare prices at different stores, including local nurseries, garden centers, and online retailers. You might be surprised at the price differences for the same products.
- Join Gardening Clubs or Online Forums: Many gardening clubs and online forums offer exclusive deals and discounts to their members. These groups often have access to special offers and promotions from local businesses.
- Consider Buying in Bulk: Buying seeds and supplies in bulk can often result in significant cost savings. Look for bulk discounts or purchase items in larger quantities when possible.
- Shop at the End of the Season: At the end of the gardening season, many nurseries and garden centers offer significant discounts on leftover plants and supplies. This is a great opportunity to stock up on discounted items for the following season.
- Look for Clearance Sales: Keep an eye out for clearance sales and special promotions throughout the year. Many retailers offer discounts on seasonal items or clearance items to make room for new inventory.
- Utilize Coupons and Promo Codes: Search for online coupons and promo codes for your favorite gardening retailers. Many websites offer discounts and special offers to their customers.
- Benefits of Smart Shopping:
- Cost Savings: You can save money on plants, seeds, tools, and other gardening supplies.
- Access to Exclusive Deals: Gain access to exclusive discounts and promotions not available to the general public.
- Support Local Businesses: Shopping at local nurseries and garden centers supports your local economy.
- Practical Applications:
- Create a Budget: Set a budget for your gardening expenses and stick to it. This will help you make informed purchasing decisions and avoid overspending.
- Make a List: Before heading to the store, make a list of the items you need to avoid impulse purchases.
- Compare Prices: Take advantage of online resources and price comparison tools to find the best deals.
- Case Study:
- A local community garden organized a group buy for a large quantity of compost. By purchasing in bulk, they were able to secure a significant discount and share the savings among the garden members.
- Data Insight:
- A study by the National Gardening Association found that gardeners who plan their purchases and take advantage of discounts and sales can save an average of 20% on their annual gardening expenses.
By implementing these smart shopping strategies, you can save money and make the most of your gardening budget. Remember, every dollar saved can be invested in other aspects of your garden, such as improving your soil, purchasing new tools, or expanding your plant collection.
10. Plan Your Garden: Avoid Impulsive Purchases
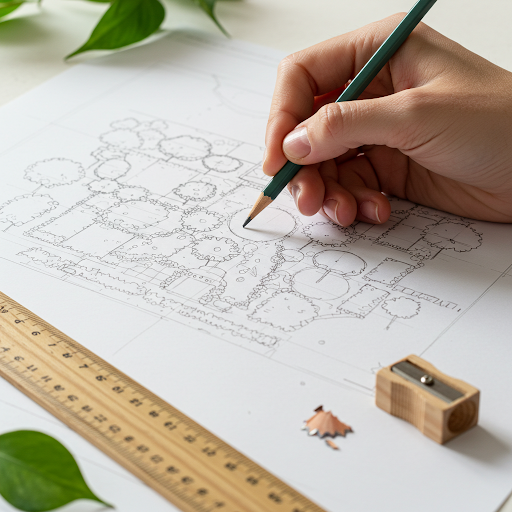
How to prepare a spring garden cheaply? Planning your garden layout and plant choices in advance helps you avoid impulsive purchases. I’ve found that creating a garden plan before I start shopping helps me stay focused and avoid unnecessary expenses. By carefully considering your needs and making a list of what you need, you can stick to your budget and avoid impulse buys that can quickly derail your financial plan.
- Tips for Garden Planning:
- Sketch Out Your Garden Layout: Create a simple diagram of your garden space, taking into account factors like sunlight, soil type, and water access. This will help you determine the best locations for different types of plants.
- Research Plant Requirements: Research the specific needs of the plants you want to grow, including sunlight requirements, soil preferences, and spacing needs. This information will help you choose the right plants for your garden and avoid costly mistakes.
- Create a Budget: Set a budget for your garden and stick to it. This will help you make informed decisions about your plant purchases and avoid overspending.
- Prioritize Your Purchases: Decide which plants are most important to you and prioritize your purchases accordingly. Consider starting with a few key plants and gradually expanding your garden over time.
- Consider Plant Spacing: Plan for the mature size of your plants to avoid overcrowding and ensure they have enough space to grow.
- Benefits of Garden Planning:
- Cost Savings: Avoids impulsive purchases and helps you stay within your budget.
- Increased Success: Ensures that you choose the right plants for your garden and that they have the space and resources they need to thrive.
- Reduced Waste: Minimizes the risk of purchasing plants that are not suitable for your garden or that you don’t have space for.
- Improved Garden Design: Helps you create a visually appealing and functional garden layout.
- Practical Applications:
- Use Garden Planning Software: There are many online and mobile apps available that can help you design your garden layout and create plant lists.
- Consult with Local Garden Experts: Visit your local nursery or garden center for advice on plant selection and garden design.
- Join a Gardening Club: Connect with other gardeners and learn from their experiences and insights.
- Case Study:
- A group of friends decided to create a community garden. They spent several weeks planning the garden layout, researching plant varieties, and creating a budget. This careful planning ensured that the garden was successful and that they stayed within their budget.
- Data Insight:
- A study by the National Gardening Association found that gardeners who plan their gardens carefully are more likely to be successful and to enjoy their gardening experience more.
By planning your garden carefully, you can avoid impulsive purchases, ensure your garden’s success, and make the most of your gardening budget. Remember, a well-planned garden is a successful garden, and it all starts with a little bit of planning and forethought.
FAQ:

This section addresses some of the most common questions I’ve encountered regarding budget-friendly spring gardening. I hope these answers provide helpful guidance and inspire you to embark on your own gardening journey.
- How to start a budget-friendly spring vegetable garden?
Begin by selecting easy-to-grow, cool-season vegetables like lettuce, radishes, and spinach. These vegetables are relatively inexpensive to start from seed and can be harvested quickly. Consider starting your seeds indoors to get a head start on the growing season and avoid the cost of purchasing seedlings. Utilize DIY composting to create your own nutrient-rich soil for free.
- What are the most budget-friendly flowers to plant in spring?
Marigolds, petunias, and zinnias are excellent choices for budget-conscious gardeners. These colorful flowers are easy to grow from seed, attract pollinators to your garden, and can add a vibrant touch to any space.
- How to save money gardening in spring?
Start your own seeds, use upcycled containers, and implement smart watering techniques. By embracing these practices, you can significantly reduce your gardening expenses.
- Where to find cheap seedlings for spring flower planting?
Consider visiting local farmers’ markets, community gardens, or even swapping seedlings with fellow gardeners. These sources often offer a wider variety of plants at lower prices than big-box stores.
- How to improve spring garden soil without spending money?
Create your own compost using kitchen scraps and yard waste. This will provide you with a free and natural way to enrich your soil and improve its structure. Additionally, you can collect fallen leaves and use them as mulch to suppress weeds and retain moisture.
- What are the best affordable and easy to grow vegetables for spring?
Lettuce, radishes, peas, spinach, and carrots are excellent choices for beginner gardeners. These vegetables are relatively easy to grow, require minimal care, and can be harvested quickly.
- How to use upcycled materials for budget-friendly spring planters?
Repurpose old tin cans, plastic bottles, wooden crates, and other items as creative and functional planters. This not only saves money but also adds a unique touch to your garden.
Conclusion:

By implementing these 10 smart ways, you can create a beautiful and productive spring garden without breaking the bank. Remember, gardening is about more than just the end result; it’s about the journey, the connection with nature, and the satisfaction of growing your own food. Embrace the process, experiment with different techniques, and don’t be afraid to try new things. The beauty of gardening lies in its ability to adapt and evolve, just as your garden itself will change and grow throughout the seasons.
I encourage you to share your gardening experiences and tips with others. Connect with fellow gardeners, join local clubs, and participate in community gardening projects. By sharing knowledge and resources, we can all create more beautiful and sustainable gardens.
Happy gardening!


