
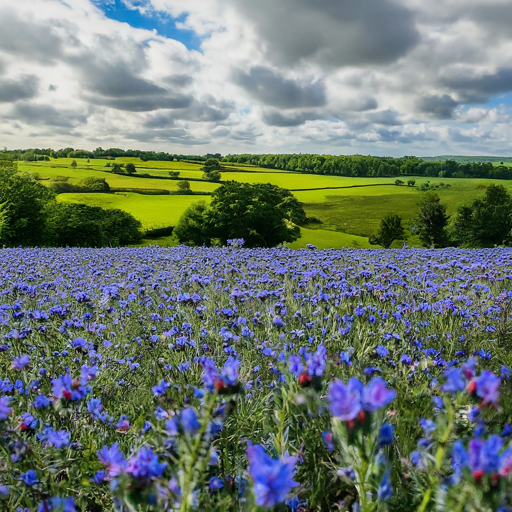
Bugloss flowers, with their stunning clusters of sapphire blooms and extended flowering season, are a captivating addition to any garden. These low-maintenance beauties come in various cultivars, offering a range of colors and growth habits to suit your preferences. Whether you’re a seasoned gardener or just starting your floral journey, cultivating bugloss is an achievable and rewarding endeavor. This comprehensive guide will equip you with all the necessary knowledge to successfully grow bugloss flowers in your own backyard.
Unveiling the Bugloss: Varieties and Their Allure
Bugloss, encompassing a diverse group of flowering plants within the Boraginaceae family, boasts over 100 identified species. The two most commonly cultivated varieties for garden settings are Viper’s Bugloss (Echium vulgare) and Siberian Bugloss (Brunnera macrophylla).
The Sun-Kissed Charmer: Viper’s Bugloss
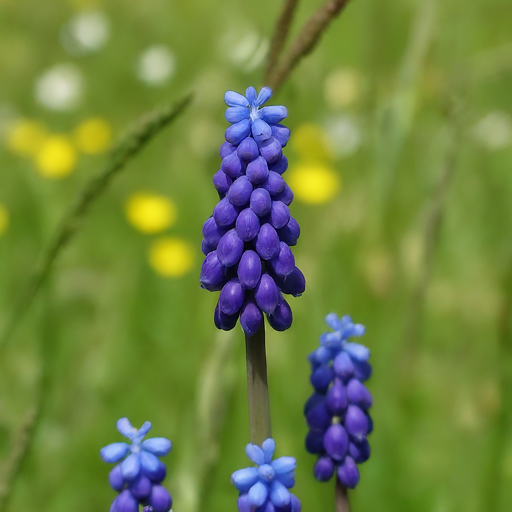
Viper’s Bugloss, also known as Ox-tongue, thrives in full sun locations. This architectural wonder can reach heights of up to 3 feet, with stunning borage-like flowers that unfurl in vibrant shades of blue, purple, and even pink. Viper’s Bugloss is a biennial plant, meaning it completes its lifecycle in two years. In the first year, it produces a rosette of basal foliage. The following year, it produces a flowering stalk that culminates in a spectacular display of blooms.
The Shade-Loving Grace: Siberian Bugloss
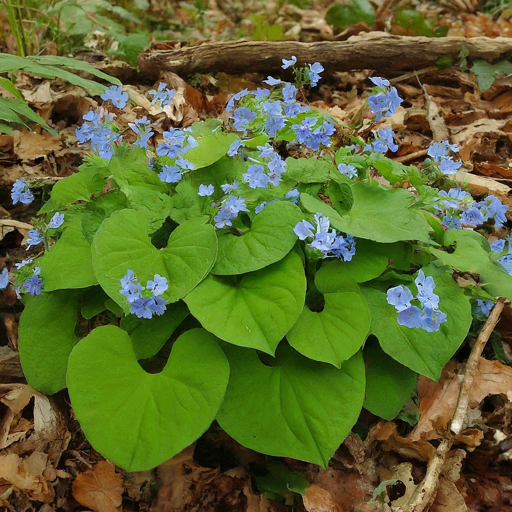
Siberian Bugloss, also known as False Forget-Me-Not, flourishes in shady or partially shaded areas. This perennial gem forms a clump of heart-shaped, evergreen foliage that provides year-round visual interest. Delicate sprays of tiny blue flowers, reminiscent of forget-me-nots, grace the plant in the late spring or early summer. Siberian Bugloss is a low-growing variety, typically reaching heights of 12 to 18 inches, making it an ideal choice for borders and edging.
Cultivating Success: Choosing the Perfect Location and Soil
The foundation for thriving bugloss flowers lies in selecting the appropriate planting location and preparing the soil for optimal growth.
Location, Location, Location: Sun or Shade?
As mentioned earlier, the two primary bugloss varieties have distinct light requirements. Viper’s Bugloss requires a minimum of 6-8 hours of direct sunlight daily to thrive. Siberian Bugloss, on the other hand, prefers the dappled light of a partially shaded location. When choosing a planting site, consider the surrounding sunlight conditions throughout the day to ensure you provide your bugloss with its preferred light exposure.
Soil Preparation: The Foundation for Flourishing Flowers
Bugloss flowers favor well-drained soil with good aeration and organic matter content. Here’s how to prepare your soil for planting success:
- Conduct a Soil Test: Understanding your soil’s existing pH and nutrient levels is crucial. A soil test, readily available at most garden centers, will provide this valuable information.
- Amending the Soil: If your soil is heavy clay, improve drainage by incorporating organic matter such as compost, aged manure, or composted bark. For sandy soil, enhance moisture retention by adding compost or other organic materials.
- Adjusting pH: Bugloss prefers slightly alkaline soil with a pH range of 6.5 to 7.5. If your soil test reveals a different pH level, you can adjust it accordingly. Adding lime will raise the pH, while sulfur will lower it.
Common Soil Amendments and Their Benefits
| Amendment | Benefit |
| Compost | Enhances drainage, improves aeration, and adds nutrients |
| Aged Manure | Increases organic matter content, promotes water retention, and provides slow-release nutrients |
| Composted Bark | Improves drainage and aeration in heavy clay soils |
| Lime | Raises soil pH |
| Sulfur | Lowers soil pH |
Sowing Seeds or Planting Transplants: The Art of Germination and Establishment
Bugloss can be propagated through two primary methods: sowing seeds directly outdoors or planting established transplants.
The Joys of Seed Sowing: Witnessing the Miracle of Growth
Direct seeding bugloss seeds allows you to witness the entire growth cycle of these captivating flowers. Here’s a step-by-step guide for successful seed sowing:
- Timing is Key: Sow Viper’s Bugloss seeds in late fall or early spring, approximately 6-8 weeks before the last frost date in your area. Siberian Bugloss seeds can be sown in early spring or even fall.
- Preparing the Seedbed: Choose a well-lit location for Viper’s Bugloss and a partially shaded area for Siberian Bugloss. Rake the soil to create a fine, loose seedbed free of weeds and debris.
- Sowing the Seeds: Scatter the seeds thinly over the prepared soil surface. For Viper’s Bugloss, lightly press the seeds into the soil. Siberian Bugloss seeds prefer to be left uncovered.
- Watering Gently: Water the seeded area gently with a fine mist spray to avoid disturbing the seeds. Maintain consistent moisture levels throughout the germination period.
- Germination Magic: Bugloss seeds typically germinate within 14-21 days. Once seedlings emerge, thin them to ensure proper spacing. For Viper’s Bugloss, aim for a spacing of 12-18 inches between plants. Siberian Bugloss prefers a spacing of 10-12 inches.
The Convenience of Transplants: A Head Start for Beautiful Blooms
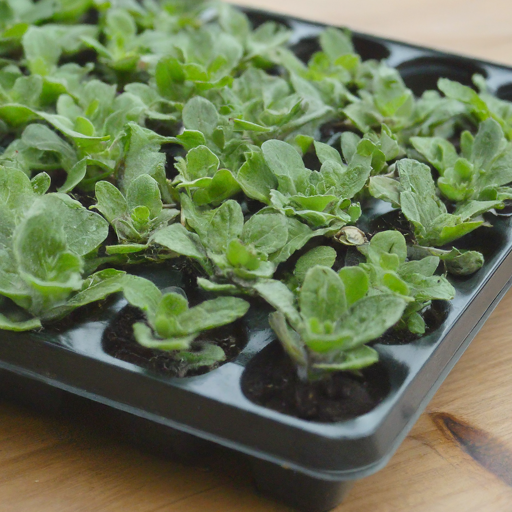
Planting established bugloss transplants offers a faster path to enjoying these vibrant blooms in your garden. Transplants can be readily purchased from nurseries or garden centers.
- Choosing Healthy Transplants: Select transplants that appear healthy and vigorous. Look for plants with sturdy stems, bright green foliage, and no signs of disease or pests.
- Preparing the Planting Hole: Dig a planting hole slightly larger than the root ball of the transplant. Loosen the surrounding soil to encourage root growth.
- Transplanting with Care: Gently remove the transplant from its container. Place it in the prepared planting hole, ensuring the root crown sits level with the surrounding soil surface.
- Backfilling and Watering: Backfill the hole with soil, gently firming it around the base of the plant. Water thoroughly to settle the soil and hydrate the roots.
Nurturing Your Bugloss: Essential Care Practices
Once your bugloss is established, providing proper care will ensure it thrives and rewards you with a dazzling display of blooms.
Watering Wisely: Keeping Your Bugloss Hydrated
Bugloss flowers have moderate watering needs. Here’s a watering guide to keep your plants happy:
- During Establishment: Water newly planted bugloss regularly, especially during hot and dry periods. Aim to keep the soil consistently moist but not waterlogged.
- Established Plants: Once established, bugloss can tolerate short periods of drought. Water deeply when the top inch of soil feels dry to the touch.
- Siberian Bugloss: As a shade-loving variety, Siberian Bugloss may require slightly more frequent watering, particularly during hot weather.
Feeding for Flourishing Blooms: Optional Fertilization
Bugloss is not a heavy feeder and can thrive in most gardens without additional fertilization. However, if your soil is particularly poor in nutrients, you can provide a light feeding during the spring growing season. A balanced, organic fertilizer diluted according to package instructions is ideal.
Deadheading for Extended Beauty: Encouraging Continued Blooms
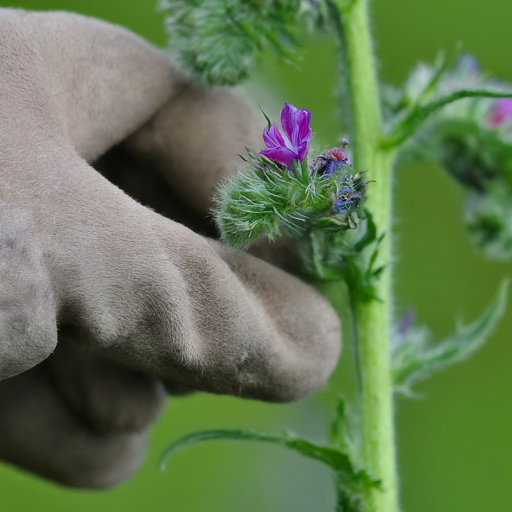
Deadheading, the practice of removing spent flowers, is a simple yet effective technique to promote continuous blooming in bugloss. Here’s how to deadhead your bugloss:
- Identify Spent Blooms: Spent bugloss flowers will begin to wilt and lose their vibrant color.
- Snip and Repeat: Using sharp pruners or shears, snip off the spent flower head at the base of the stem. This will encourage the plant to produce new flower buds.
- Benefits Beyond Beauty: Regular deadheading not only extends the flowering season but also directs the plant’s energy towards producing more blooms instead of seed production.
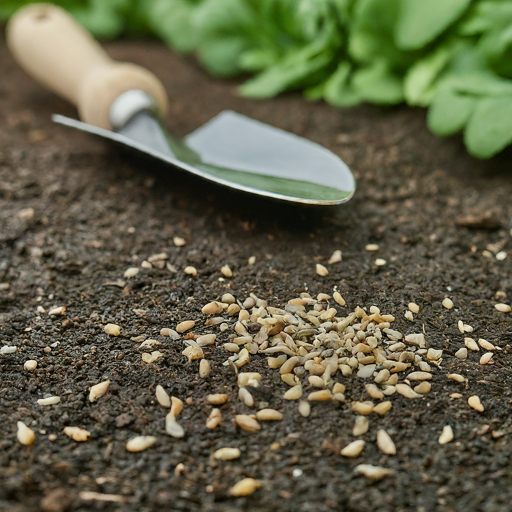
Harvesting Bugloss Seeds: Saving for Future Seasons
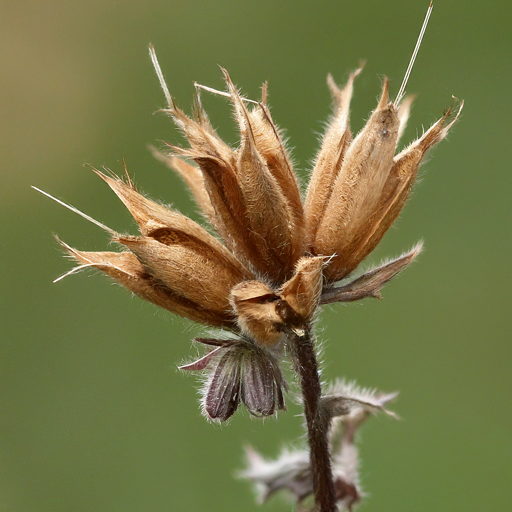
If you’d like to extend your bugloss bounty and propagate them for future seasons, harvesting the seeds is a rewarding option. Here’s a guide to successful seed collection:
- Identifying Seed Maturity: Bugloss seeds are ready for harvest when the flower heads have dried and turned brown. The seed capsules will also begin to split open, revealing the mature seeds inside.
- Cutting the Flower Stalk: Carefully cut the flower stalk with sharp pruners or shears. Place the stalk in a paper bag with the opening facing down.
- Drying and Separating Seeds: Hang the paper bag in a cool, dry, and well-ventilated location out of direct sunlight. Allow the seeds to dry completely for several weeks.
- Extracting the Seeds: Once fully dry, gently shake the paper bag to release the seeds from the capsules. Store the seeds in an airtight container in a cool, dark location for up to two years.
Potential Challenges and Solutions: Keeping Your Bugloss Healthy
Bugloss flowers are generally low-maintenance and pest-resistant. However, a few potential challenges can arise. Here’s how to identify and address them:
Overwatering Woes: Signs and Solutions
Overwatering is the most common threat to bugloss health. Symptoms of overwatering include wilting leaves, yellowing foliage, and stunted growth. If you suspect overwatering, allow the soil to dry completely between waterings. In severe cases, you may need to repot the plant into fresh, well-draining soil.
Uninvited Guests: Identifying and Controlling Pests
While uncommon, bugloss can be susceptible to a few pests, such as slugs, snails, and aphids. Here are some control methods:
- Handpicking: For small infestations, handpicking and removing the pests is an effective solution.
- Insecticidal Soap Spray: For larger infestations, an organic insecticidal soap spray can be used according to label instructions.
- Natural Predators: Encourage beneficial insects, such as ladybugs and lacewings, in your garden. These natural predators can help control pest populations.
Conclusion: The Enduring Beauty of Bugloss Flowers
Bugloss flowers, with their captivating blooms and low-maintenance needs, are a welcome addition to any garden. By following the guidance in this comprehensive guide, you can successfully cultivate these beautiful plants and enjoy their vibrant presence in your outdoor haven for seasons to come. Remember, with proper care and a little TLC, your bugloss will flourish and reward you with a dazzling display of color throughout the summer months.
Bugloss Care at a Glance
| Task | Viper’s Bugloss | Siberian Bugloss |
| Light Requirement | Full Sun (6-8 hours daily) | Partial Shade |
| Sowing Seeds Outdoors | Late Fall or Early Spring | Early Spring or Fall |
| Seed Spacing | 12-18 inches | 10-12 inches |
| Watering Needs | Moderate | Slightly More Frequent |
| Deadheading | Recommended for continuous blooms | Recommended for continuous blooms |


