

Are you tired of bland, store-bought greens that lack that fresh, vibrant taste? You crave the satisfaction of growing your own food, but maybe you’re unsure where to start when spring arrives. You’ve tried gardening before, only to be met with wilting seedlings and disappointing harvests. The thought of investing time and effort only to see your plants struggle is frustrating, isn’t it? Imagine harvesting crisp lettuce, peppery arugula, and sweet peas right from your own garden. I’m here to guide you through the process of growing ten fantastic edible spring garden plants that thrive in the cool spring weather, ensuring a bountiful and delicious harvest. Let’s make this spring garden delicious and rewarding.
1. Lettuce: The Spring Salad Staple
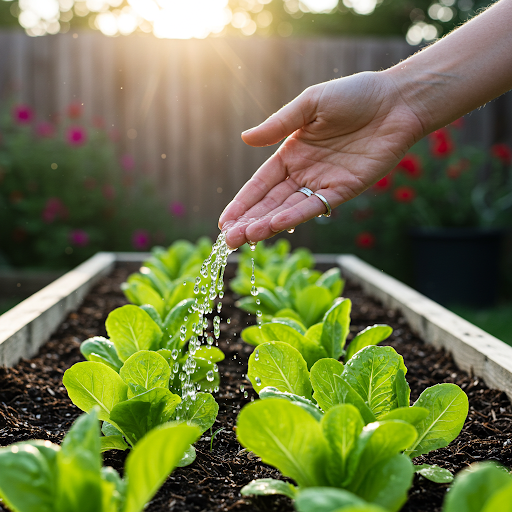
When it comes to spring gardening, lettuce is an absolute must-have. You, like many gardeners, appreciate the simplicity and versatility of fresh lettuce. It is one of the most rewarding edible spring garden plants you can grow. Picture this: you step out into your garden, snip a few leaves, and within minutes, you have a fresh, crisp salad. Growing lettuce in spring allows you to enjoy a continuous harvest of fresh greens before the summer heat sets in.
How to Grow Crisp Lettuce Varieties
The key to growing crisp lettuce varieties that flourish in early spring lies in understanding their needs. Lettuce thrives in cool weather, with ideal temperatures ranging between 45°F and 75°F (7°C and 24°C). You’ll find that planting lettuce seeds or seedlings a few weeks before the last expected frost is a great way to get a head start. I’ve found that direct sowing works well for loose-leaf varieties, while starting head lettuce indoors and transplanting them later helps me manage the early growth.
- Soil Preparation: Lettuce prefers well-draining, fertile soil. Incorporating compost or well-rotted manure into the soil before planting will provide essential nutrients.
- Sunlight: Lettuce requires at least six hours of sunlight per day. Choose a sunny spot in your garden for optimal growth.
- Watering: Consistent moisture is crucial for lettuce growth. Water your plants regularly, especially during dry spells, to prevent them from wilting.
- Spacing: Proper spacing is essential to prevent overcrowding. Space your lettuce plants according to the variety, typically 6 to 12 inches apart.
Tips for Planting Lettuce in Containers or Raised Beds
If you have limited garden space, growing lettuce in containers or raised beds is an excellent option. I personally love the convenience of having fresh lettuce right outside my kitchen door. Here are a few tips to consider:
- Container Selection: Choose containers with good drainage holes. Use a high-quality potting mix that retains moisture but drains well.
- Raised Beds: Raised beds offer excellent drainage and allow you to control the soil quality. They also warm up faster in the spring, which benefits lettuce growth.
- Vertical Gardening: Consider using vertical planters or trellises to maximize space in small gardens.
- Succession Planting: Plant new lettuce seeds every two to three weeks to ensure a continuous harvest throughout the spring.
Understanding the Different Types of Lettuce for Spring Gardens
There’s a wide variety of lettuce types to choose from, each with its own unique flavor and texture. For spring gardens, I recommend these:
- Loose-Leaf Lettuce: These varieties, such as ‘Black Seeded Simpson’ and ‘Oakleaf,’ are easy to grow and offer a continuous harvest.
- Romaine Lettuce: ‘Paris Island Cos’ and ‘Little Gem’ are popular romaine varieties that provide crisp, upright leaves.
- Butterhead Lettuce: ‘Buttercrunch’ and ‘Tom Thumb’ are known for their tender, buttery leaves and compact growth.
- Crisphead Lettuce: ‘Great Lakes’ and ‘Ithaca’ are classic crisphead varieties that form tight heads.
Preventing Bolting in Your Spring Lettuce Crops
Bolting, or premature flowering, is a common issue with lettuce in warmer weather. To prevent bolting, you can:
- Choose Bolt-Resistant Varieties: Select lettuce varieties that are bred for their resistance to bolting.
- Plant at the Right Time: Plant lettuce in early spring, when temperatures are still cool.
- Provide Shade: In warmer climates, provide some shade during the hottest part of the day.
- Harvest Regularly: Harvesting leaves regularly encourages the plant to produce more foliage and delays bolting.
Benefits of Growing Lettuce:
- Rich in vitamins A and K.
- High in fiber.
- Low in calories.
- Hydrating due to high water content.
Lettuce Varieties Table
| Variety | Type | Characteristics |
| Black Seeded Simpson | Loose-Leaf | Light green, tender leaves |
| Paris Island Cos | Romaine | Crisp, upright leaves |
| Buttercrunch | Butterhead | Tender, buttery leaves |
| Great Lakes | Crisphead | Tight, crisp heads |
By following these tips, you can enjoy a bountiful harvest of fresh, homegrown lettuce throughout the spring. You’ll find that the taste and satisfaction of growing your own greens are truly rewarding.
2. Spinach: Nutrient-Packed Spring Greens
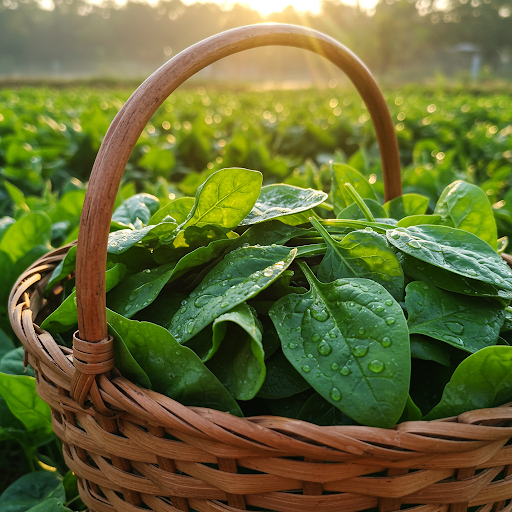
Spinach is a true powerhouse of nutrition, and it’s a joy to grow in the cool spring weather. You’ll find that it adds a vibrant green touch to your salads and is a versatile ingredient in many dishes. As a gardener, you’ll appreciate its quick growth and the satisfaction of harvesting a bounty of fresh, leafy greens.
Why Spinach is a Must-Have for Your Spring Garden
Beyond its culinary uses, spinach offers a wealth of health benefits. It’s packed with vitamins, minerals, and antioxidants, making it a valuable addition to any diet.
- Rich in Nutrients: Spinach is an excellent source of vitamin K, vitamin A (in the form of beta-carotene), vitamin C, and folate. It also provides a good source of iron, calcium, and magnesium.
- Antioxidant Power: Spinach contains high levels of antioxidants, such as lutein and zeaxanthin, which are beneficial for eye health.
- Versatile in the Kitchen: Spinach can be enjoyed raw in salads, cooked in soups and stews, or even blended into smoothies.
Step-by-Step Guide to Planting and Caring for Spinach in Spring
Spinach is a cool-season crop that thrives in spring temperatures. Here’s a step-by-step guide to growing healthy spinach plants:
- Soil Preparation: Spinach prefers well-drained, fertile soil. Amend the soil with compost or well-rotted manure to improve its quality.
- Planting: Sow spinach seeds directly into the garden about two weeks before the last expected frost. Space the seeds about 1/2 inch deep and 1 inch apart.
- Sunlight: Spinach thrives in full sun to partial shade. Choose a location that receives at least six hours of sunlight per day.
- Watering: Keep the soil consistently moist, but avoid overwatering, which can lead to root rot.
- Thinning: Once the seedlings have a few true leaves, thin them out to a spacing of 4-6 inches.
- Harvesting: Begin harvesting spinach when the leaves are young and tender. You can harvest individual leaves or cut the entire plant at ground level.
How to Grow Spinach that Resists Common Spring Pests
While spinach is generally a relatively pest-free crop, some common pests can affect it. Here are a few tips to protect your spinach plants:
- Row Covers: Use row covers to protect your spinach seedlings from flea beetles and other early-season pests.
- Companion Planting: Plant strong-scented herbs like garlic or onions near your spinach to deter pests.
- Handpicking: Regularly inspect your plants for pests and remove them by hand if necessary.
Best Ways to Harvest and Enjoy Your Spring Spinach Harvest
- Harvesting: Harvest spinach leaves regularly to encourage continued growth. You can harvest individual leaves or cut the entire plant at ground level.
- Storage: Store fresh spinach in the refrigerator in a plastic bag or airtight container for up to a week.
- Cooking: Spinach can be enjoyed raw in salads, cooked in soups and stews, or even blended into smoothies.
By following these tips, you can grow a bountiful harvest of nutrient-rich spinach in your spring garden. Enjoy the satisfaction of harvesting your own greens and incorporating them into delicious and healthy meals.
3. Radishes: Quick and Crunchy Spring Delights
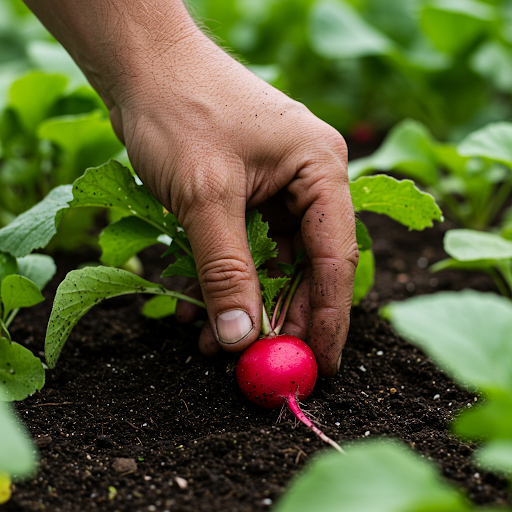
Radishes are the ultimate fast-growing spring vegetable, perfect for impatient gardeners like us! You’ll love the instant gratification of planting seeds and harvesting crisp, peppery radishes in just a few weeks. Their vibrant colors and crunchy texture make them a delightful addition to salads, sandwiches, and snacks.
How to Plant Radishes for a Fast Spring Harvest
Radishes are incredibly easy to grow, making them ideal for beginners and experienced gardeners alike. Here’s how to ensure a successful radish harvest:
- Timing: Plant radish seeds directly into the garden as soon as the soil can be worked in early spring. They thrive in cool temperatures and can tolerate light frosts.
- Soil Preparation: Radishes prefer loose, well-drained soil. Amend the soil with compost to improve fertility and drainage.
- Sowing: Sow seeds about 1/2 inch deep and 1 inch apart in rows. Space rows about 12 inches apart.
- Watering: Keep the soil consistently moist, especially during germination and early growth.
- Thinning: Once the seedlings have a few true leaves, thin them out to a spacing of 2-3 inches. This will allow the remaining radishes to develop fully.
- Sunlight: Radishes prefer full sun, but they can tolerate partial shade.
Tips for Preventing Radishes from Becoming Too Spicy
While the peppery flavor of radishes is part of their appeal, they can become overly spicy if they are not harvested at the right time or if they are stressed. Here are a few tips to prevent overly spicy radishes:
- Harvest Early: Harvest radishes when they are young and tender. Mature radishes tend to be spicier.
- Consistent Watering: Irregular watering can stress radishes and make them spicier. Keep the soil consistently moist.
- Choose Mild Varieties: Some radish varieties are naturally milder than others. Consider growing varieties like ‘Cherry Belle’ or ‘French Breakfast.’
- Avoid Hot Weather: Radishes grown in hot weather tend to be spicier. Plant them in early spring or late fall to avoid the heat.
Growing Different Radish Varieties for Diverse Spring Flavors
There are many radish varieties to choose from, each with its own unique flavor, color, and shape. Here are a few popular varieties:
- Cherry Belle: A classic round red radish with a crisp, mild flavor.
- French Breakfast: An elongated red radish with white tips and a slightly peppery flavor.
- White Icicle: A long, white radish with a mild, sweet flavor.
- Watermelon Radish: A large, round radish with a green skin and a pink interior.
Companion Planting Ideas for Radishes in Your Spring Garden
Companion planting can help improve the health and yield of your radish plants. Here are a few companion planting ideas:
- Lettuce: Radishes and lettuce are excellent companions. Radishes help deter pests that can affect lettuce, and lettuce provides shade for radishes in warmer weather.
- Carrots: Radishes can help break up the soil for carrots and mark the rows for slow-growing carrots.
- Nasturtiums: Nasturtiums attract aphids, which can help protect radishes from these pests.
- Beans and Peas: These can help to fix nitrogen in the soil.
Benefits of Radishes:
- Rich in vitamin C and fiber.
- Low in calories.
- Contain antioxidants.
- Fast-growing and easy to harvest.
By following these tips, you can enjoy a bountiful harvest of crisp, flavorful radishes in your spring garden. You’ll find that their quick growth and vibrant colors make them a delightful addition to your garden and your meals.
4. Peas: Sweet Spring Pods of Goodness
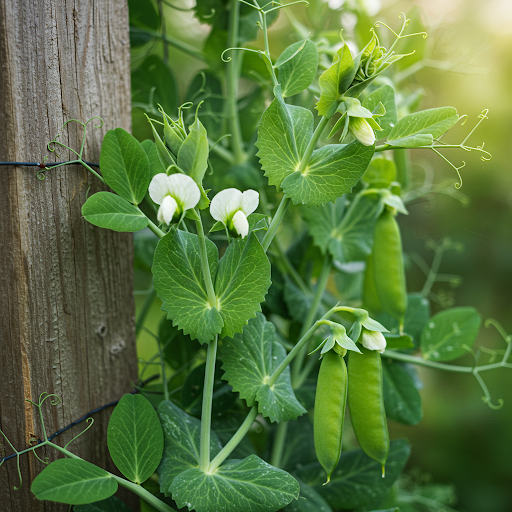
Peas are a quintessential spring garden vegetable, offering a delightful combination of sweetness and crunch. Whether you prefer the classic snap peas, the delicate snow peas, or the larger shelling peas, growing peas in your spring garden is a rewarding experience.
How to Grow Snap Peas, Snow Peas, and Shelling Peas in Spring
Peas are cool-season crops that thrive in spring temperatures. Here’s a guide to growing different types of peas:
- Snap Peas: These are the most common type of pea, with tender pods that are eaten whole, including the seeds.
- Snow Peas: These have flat pods and small, sweet peas inside. Both the pods and the peas are edible.
- Shelling Peas: These have larger pods that contain multiple round peas. The peas are shelled and eaten, while the pods are discarded.
Choosing the Right Pea Varieties for Your Spring Climate
When selecting pea varieties, consider your local climate and the specific type of pea you want to grow. Some popular varieties include:
- Sugar Snap Peas: ‘Sugar Snap’ and ‘Oregon Sugar Pod II’ are popular varieties known for their sweet flavor and tender pods.
- Snow Peas: ‘Oregon Sugar Pod’ and ‘Cascade’ are excellent choices for snow peas.
- Shelling Peas: ‘Early Peas’ and ‘Wando’ are reliable shelling pea varieties.
Support Systems for Growing Healthy Spring Pea Vines
Peas are vining plants that require support to grow properly. Here are some effective support systems:
- Trellis: Construct a simple trellis using wooden stakes and twine.
- Pea Teepees: Create teepees using long stakes and tie the tops together.
- Fencing: Utilize existing fences or garden fencing as a support structure.
Harvesting and Using Fresh Spring Peas in Your Cooking
- Harvesting: Harvest snap peas and snow peas when the pods are young and tender. Shelling peas should be harvested when the pods are full but still slightly firm.
- Using Fresh Peas: Enjoy fresh peas in salads, stir-fries, soups, and stews. You can also blanch and freeze them for use later in the year.
By following these tips, you can enjoy a bountiful harvest of fresh, sweet peas from your spring garden. Remember to choose the right varieties for your climate, provide adequate support, and harvest them at their peak for the best flavor.
5. Arugula: Peppery Spring Greens for Zest
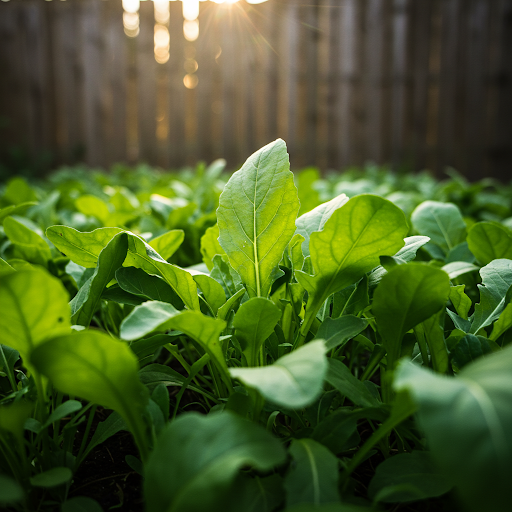
Arugula, with its distinctive peppery bite, is a delightful addition to any spring garden. You’ll find that it adds a zesty kick to salads, sandwiches, and even pizzas. Its quick growth and ease of cultivation make it a favorite among gardeners seeking fresh, flavorful greens.
Why Arugula is Perfect for Adding a Peppery Kick to Spring Salads
Arugula’s unique flavor profile sets it apart from other leafy greens. Its peppery, slightly bitter taste adds depth and complexity to salads, making them more interesting and flavorful.
- Flavor Profile: Arugula’s peppery flavor intensifies as it matures. Harvest young leaves for a milder taste.
- Nutritional Benefits: Arugula is rich in vitamins A, C, and K, as well as folate and calcium.
- Versatility: Beyond salads, arugula can be used in pesto, soups, and as a topping for pizzas and sandwiches.
How to Plant and Care for Arugula in Cool Spring Weather
Arugula thrives in cool spring weather, making it an ideal choice for early-season gardens. Here’s how to plant and care for arugula:
- Timing: Sow arugula seeds directly into the garden as soon as the soil can be worked in early spring.
- Soil Preparation: Arugula prefers well-drained, fertile soil. Amend the soil with compost to improve its quality.
- Sowing: Sow seeds about 1/4 inch deep and 1 inch apart in rows. Space rows about 12 inches apart.
- Watering: Keep the soil consistently moist, especially during germination and early growth.
- Thinning: Once the seedlings have a few true leaves, thin them out to a spacing of 4-6 inches.
- Sunlight: Arugula prefers full sun, but it can tolerate partial shade.
Tips for Growing Arugula in Containers for a Spring Balcony Garden
If you have limited garden space, growing arugula in containers is an excellent option. Here are a few tips:
- Container Selection: Choose containers with good drainage holes.
- Potting Mix: Use a high-quality potting mix that retains moisture but drains well.
- Sunlight: Place containers in a sunny location that receives at least six hours of sunlight per day.
- Watering: Water regularly, especially during dry spells.
Preventing Common Arugula Problems in Your Spring Garden
While arugula is relatively easy to grow, some common problems can arise. Here are a few tips to prevent them:
- Bolting: Arugula can bolt, or go to seed, in hot weather. Plant it in early spring or late fall to avoid the heat.
- Pests: Flea beetles can be a problem for arugula. Use row covers to protect your plants.
- Disease: Overwatering can lead to root rot. Ensure good drainage and water only when necessary.
Benefits of Arugula:
- Rich in vitamins and minerals.
- High in antioxidants.
- Adds a peppery flavor to dishes.
- Fast-growing and easy to harvest.
By following these tips, you can enjoy a bountiful harvest of fresh, peppery arugula in your spring garden. Its unique flavor and ease of cultivation make it a valuable addition to any garden.
6. Spring Onions: Fresh Flavor from the Garden
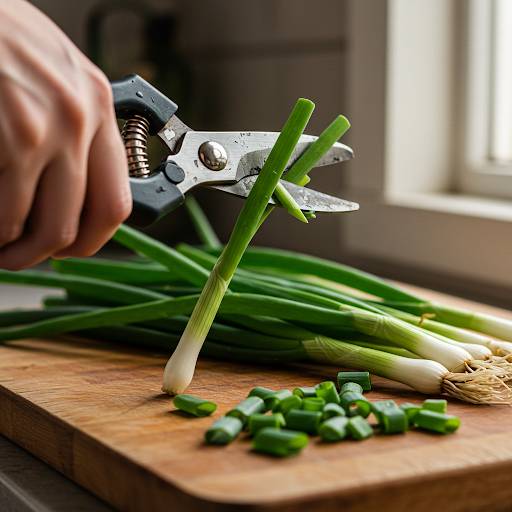
Spring onions, also known as scallions, are a versatile and easy-to-grow addition to your spring garden. Their mild onion flavor adds a fresh and zesty touch to salads, soups, and stir-fries. You’ll enjoy the convenience of having a continuous supply of fresh, homegrown onions right at your fingertips.
How to Grow Spring Onions for a Continuous Supply of Fresh Flavor
Spring onions are cool-season crops that thrive in spring temperatures. Here’s how to grow them successfully:
- Timing: Sow spring onion seeds directly into the garden as soon as the soil can be worked in early spring.
- Soil Preparation: Spring onions prefer well-drained, fertile soil. Amend the soil with compost or well-rotted manure to improve its quality.
- Sowing: Sow seeds about 1/4 inch deep and 1 inch apart in rows. Space rows about 12 inches apart.
- Watering: Keep the soil consistently moist, especially during germination and early growth.
- Thinning: Once the seedlings have a few true leaves, thin them out to a spacing of 2-3 inches.
Planting and Harvesting Tips for Spring Onions in Your Garden
- Succession Planting: To ensure a continuous harvest, sow seeds every two to three weeks throughout the spring.
- Harvesting: Harvest spring onions when they reach the desired size. You can harvest individual onions or cut the entire clump at ground level.
- Storage: Store harvested spring onions in the refrigerator for up to a week.
Using Spring Onions in Your Spring Cooking and Recipes
Spring onions are incredibly versatile in the kitchen. Here are a few ideas:
- Salads: Add chopped spring onions to salads for a fresh, zesty flavor.
- Soups and Stews: Use spring onions as a flavor enhancer in soups and stews.
- Stir-fries: Spring onions are a classic ingredient in stir-fries.
- Omelets and Scrambled Eggs: Chop spring onions and add them to omelets and scrambled eggs for extra flavor.
- Garnishes: Use chopped spring onions as a garnish for various dishes.
How to Propagate Spring Onions for More Plants
Spring onions can be easily propagated from seed or by dividing clumps. Here are a few tips:
- Seed Propagation: Sow spring onion seeds directly into the garden or start them indoors in seed trays.
- Dividing Clumps: If you have existing spring onion plants, you can divide the clumps in the fall or spring.
By following these tips, you can enjoy a continuous supply of fresh, homegrown spring onions throughout the season. Their mild onion flavor and versatility make them a valuable addition to any spring garden.
7. Kale: Hardy Greens for Spring Resilience

Kale is a true champion of the spring garden, known for its hardiness and nutritional power. Its deeply colored, ruffled leaves not only add a vibrant touch to your garden but also provide a wealth of health benefits. You’ll find that kale is a versatile ingredient in salads, smoothies, and even chips.
Why Kale is a Resilient and Nutritious Addition to Your Spring Garden
Kale is often called a “superfood” due to its high concentration of vitamins, minerals, and antioxidants.
- Nutritional Powerhouse: Kale is an excellent source of vitamins A, C, and K. It’s also a good source of calcium, iron, and fiber.
- Antioxidant Rich: Kale is packed with antioxidants, including beta-carotene, lutein, and zeaxanthin, which help protect your cells from damage.
- Versatility in the Kitchen: Kale can be enjoyed raw in salads, cooked in soups and stews, or even baked into kale chips.
How to Plant and Care for Kale in the Early Spring
Kale is a cool-season crop that can withstand light frosts. Here’s how to grow healthy kale plants in your spring garden:
- Timing: Sow kale seeds directly into the garden about two weeks before the last expected frost.
- Soil Preparation: Kale prefers well-drained, fertile soil. Amend the soil with compost or well-rotted manure to improve its quality.
- Sowing: Sow seeds about 1/4 inch deep and 1 inch apart in rows. Space rows about 18 inches apart.
- Watering: Keep the soil consistently moist, especially during germination and early growth.
- Thinning: Once the seedlings have a few true leaves, thin them out to a spacing of 12-18 inches.
- Sunlight: Kale prefers full sun but can tolerate partial shade.
Tips for Growing Different Kale Varieties for Spring Harvests
There are many different varieties of kale to choose from, each with its own unique flavor and appearance. Here are a few popular varieties:
- Curly Kale: This classic variety has deeply curled, blue-green leaves with a slightly bitter flavor.
- Lacinato Kale (Dinosaur Kale): This variety has long, dark green, ruffled leaves with a milder flavor than curly kale.
- Red Russian Kale: This variety has burgundy-colored leaves with a slightly sweet flavor.
Protecting Kale from Spring Pests and Diseases
Kale is generally a pest-resistant crop, but some common problems can arise. Here are a few tips to protect your kale plants:
- Pests: Aphids and cabbage worms can sometimes be a problem. Use row covers to protect your plants from these pests.
- Diseases: Overwatering can lead to fungal diseases. Ensure good drainage and water only when necessary.
Benefits of Kale:
- Rich in vitamins, minerals, and antioxidants.
- Promotes heart health.
- Supports bone health.
- May help reduce the risk of certain cancers.
By following these tips, you can grow a bountiful harvest of nutritious kale in your spring garden. Enjoy the satisfaction of harvesting your own greens and incorporating them into delicious and healthy meals.
8. Chard: Colorful and Nutritious Spring Leaves
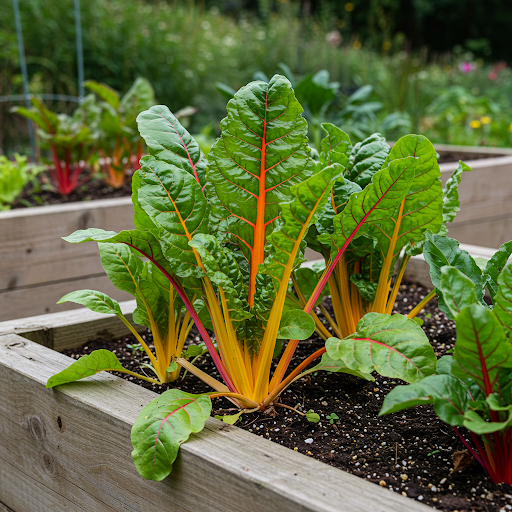
Chard, with its vibrant stems and colorful leaves, is a beautiful and nutritious addition to your spring garden. You’ll find that its versatility in the kitchen makes it a favorite among gardeners seeking both culinary delight and nutritional benefits.
How to Grow Colorful Chard in Your Spring Garden
Chard is a cool-season crop that thrives in spring temperatures. Here’s how to grow healthy chard plants:
- Timing: Sow chard seeds directly into the garden as soon as the soil can be worked in early spring.
- Soil Preparation: Chard prefers well-drained, fertile soil. Amend the soil with compost or well-rotted manure to improve its quality.
- Sowing: Sow seeds about 1/4 inch deep and 1 inch apart in rows. Space rows about 18 inches apart.
- Watering: Keep the soil consistently moist, especially during germination and early growth.
- Thinning: Once the seedlings have a few true leaves, thin them out to a spacing of 12-18 inches.
- Sunlight: Chard prefers full sun but can tolerate partial shade.
Tips for Planting and Harvesting Chard for a Continuous Spring Harvest
- Succession Planting: To ensure a continuous harvest, sow seeds every two to three weeks throughout the spring.
- Harvesting: Harvest chard leaves as needed. You can cut individual leaves or harvest the entire plant at ground level.
Using Chard in Your Spring Cooking for Vibrant and Healthy Meals
Chard’s vibrant leaves and stalks add color and nutrition to a variety of dishes. Here are a few ideas:
- Sautéed Chard: Sauté chard with garlic and olive oil for a simple and delicious side dish.
- Chard Stems: The stems of chard can be peeled and cooked like asparagus.
- Smoothies: Add chard leaves to smoothies for an extra boost of nutrients.
- Quiches and Frittatas: Incorporate chopped chard into quiches and frittatas for a flavorful and nutritious addition.
Plant Care for Spring Chard
- Watering: Keep the soil consistently moist, especially during dry periods.
- Fertilizing: Fertilize chard with a balanced fertilizer once or twice during the growing season.
- Pests: Monitor for aphids and caterpillars, and remove them if necessary.
By following these tips, you can enjoy a bountiful harvest of colorful and nutritious chard in your spring garden. Its versatility in the kitchen and its vibrant appearance make it a delightful addition to any garden.
9. Asparagus: A Spring Delicacy from Your Garden
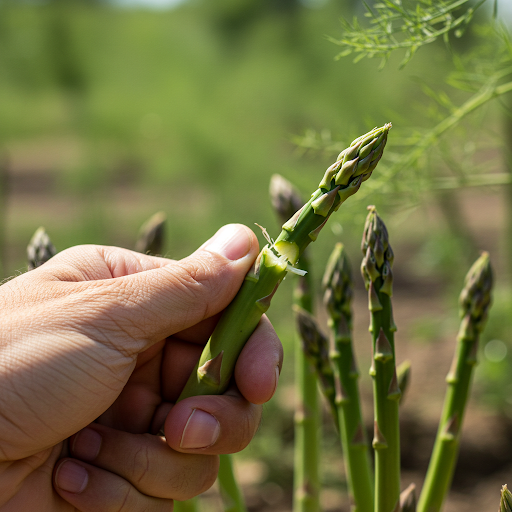
Asparagus is a perennial vegetable that rewards patient gardeners with a delicious spring harvest. While it takes a few years for asparagus crowns to establish themselves, the wait is well worth it. You’ll enjoy the satisfaction of harvesting succulent spears each spring for years to come.
How to Plant and Establish Asparagus for a Long-Term Spring Harvest
Asparagus is best started from crowns, which are dormant roots. Here’s how to plant and establish asparagus in your garden:
- Timing: Plant asparagus crowns in early spring, as soon as the soil can be worked.
- Soil Preparation: Asparagus prefers well-drained, fertile soil. Amend the soil with compost or well-rotted manure to improve its quality.
- Planting: Dig a trench about 6 inches deep and 18 inches wide. Place the asparagus crowns in the trench, spacing them about 12 inches apart. Cover the crowns with a few inches of soil.
- Watering: Water the crowns thoroughly after planting.
- Fertilizing: Fertilize asparagus plants in early spring with a balanced fertilizer.
Tips for Caring for Asparagus in the Early Spring
- Weed Control: Keep the area around your asparagus plants weed-free to prevent competition for nutrients and water.
- Watering: Water asparagus plants regularly during dry periods, especially during the spring growing season.
- Harvesting: Harvest asparagus spears when they are young and tender, typically in the spring.
Harvesting Asparagus Spears at Their Peak in the Spring
- Timing: Harvest asparagus spears when they are 6-8 inches tall.
- Harvesting: Use a sharp knife to cut the spears at ground level.
- Storage: Store harvested asparagus spears in the refrigerator for up to a week.
How to Grow Asparagus
- Patience is Key: It takes two to three years for asparagus crowns to establish themselves and produce a significant harvest.
- Long-Term Investment: Asparagus is a long-lived perennial that can continue to produce for many years with proper care.
By following these tips, you can establish a productive asparagus bed in your garden and enjoy delicious spring harvests for years to come. Remember that patience is key, but the rewards of growing your own asparagus are well worth the wait.
10. Spring Herbs: Flavor Boosters for Your Garden
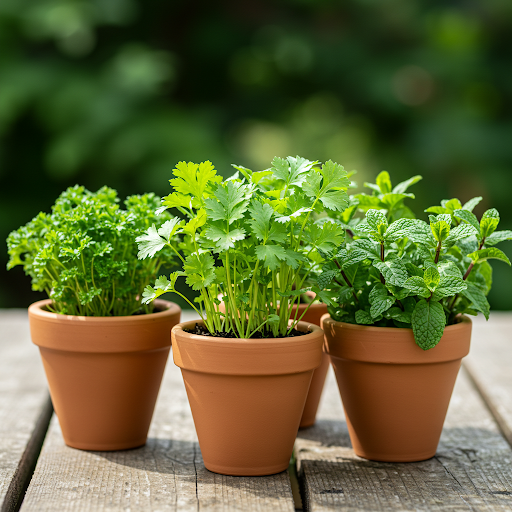
Fresh herbs are the secret ingredient to elevating any dish. Growing your own herbs in the spring garden provides an endless supply of aromatic flavor for your culinary creations. From parsley and cilantro to mint and chives, these fragrant plants are easy to grow and add a burst of freshness to every meal.
Essential Herbs to Plant in Your Spring Garden for Fresh Flavors
Here are a few essential herbs to consider planting in your spring garden:
- Parsley: This versatile herb is a staple in many kitchens. It adds a bright, fresh flavor to salads, soups, and stews.
- Cilantro: With its distinctive citrusy flavor, cilantro is a key ingredient in Mexican, Indian, and Asian cuisines.
- Mint: Mint is a fragrant herb that adds a refreshing flavor to teas, cocktails, and desserts.
- Chives: These delicate herbs have a mild onion flavor and can be used to garnish dishes or add flavor to soups and salads.
- Dill: Dill adds a subtle anise flavor to dishes and is often used with fish and potatoes.
- Basil: Basil is a beloved herb with a sweet, slightly spicy flavor. It is a key ingredient in pesto and is often used in Italian cuisine.
How to Plant and Care for Spring Herbs in Containers or Garden Beds
Herbs are relatively easy to grow and can be planted in containers or directly in the garden. Here are a few tips:
- Soil Preparation: Herbs prefer well-drained, fertile soil. Amend the soil with compost or well-rotted manure to improve its quality.
- Planting: Sow seeds directly into the garden or start them indoors in seed trays.
- Spacing: Space plants according to their mature size.
- Watering: Keep the soil consistently moist, but avoid overwatering.
- Sunlight: Most herbs prefer full sun, but some, like mint, can tolerate partial shade.
Using Fresh Spring Herbs in Your Cooking and Recipes
Fresh herbs can elevate the flavor of any dish. Here are a few ideas:
- Salads: Add chopped herbs like parsley, cilantro, and mint to salads for a burst of flavor.
- Soups and Stews: Herbs like thyme, rosemary, and oregano add depth and complexity to soups and stews.
- Stir-fries: Fresh herbs like basil, cilantro, and mint complement stir-fries perfectly.
- Garnishes: Use chopped herbs like chives and parsley to garnish dishes for a touch of color and flavor.
- Infused Oils and Vinegars: Infuse olive oil or vinegar with herbs like rosemary, garlic, and thyme for a flavorful addition to salads and marinades.
Tips for Preserving Your Spring Herbs
- Drying: Dry herbs by hanging them upside down in a cool, dark, and well-ventilated area.
- Freezing: Freeze herbs in ice cube trays filled with water or olive oil.
- Infusing Oil or Vinegar: Infuse herbs in oil or vinegar to preserve their flavor.
By following these tips, you can enjoy a bountiful harvest of fresh herbs from your spring garden. These flavorful additions will elevate your culinary creations and provide a constant source of inspiration in the kitchen.
FAQ:
Q: What are the best edible spring garden plants for beginners in containers?
A: Radishes, lettuce, spinach, and spring onions are excellent choices for container gardening, as they are relatively easy to grow and require minimal space. Their compact growth habit makes them well-suited for smaller containers, and they can thrive even on balconies or patios.
Q: How to prepare soil for edible spring garden plants in raised beds?
A: Raised beds offer several advantages for growing spring edibles, including improved drainage and easier access. To prepare the soil in your raised beds, start by adding a layer of compost or well-rotted manure. This will enrich the soil with nutrients and improve its structure. Next, mix the compost into the existing soil using a garden fork or tiller. Ensure the soil is evenly mixed and free of large clumps. You can also add a layer of mulch to help retain moisture and suppress weeds.
Q: When to plant edible spring garden plants in my local area?
A: The optimal planting time for spring edibles varies depending on your local climate. A good rule of thumb is to plant cool-season crops, such as lettuce, spinach, and peas, a few weeks before the last expected frost. You can consult your local gardening cooperative or extension office for specific planting dates in your area.
Q: What are the fastest growing edible spring garden plants?
A: Radishes and arugula are known for their rapid growth and quick turnaround. You can typically harvest radishes within a few weeks of planting, and arugula is ready to eat in just a few weeks as well. These fast-growing options provide a sense of satisfaction and encourage you to continue exploring the joys of spring gardening.
Q: How to protect edible spring garden plants from late spring frosts?
A: Late spring frosts can damage tender seedlings. To protect your plants, consider using row covers or cold frames. These protective coverings create a microclimate that shields your plants from the cold. You can also mulch around the base of your plants to help insulate the soil and protect the roots.
Q: Organic edible spring garden plants that are frost tolerant?
A: Several edible spring garden plants are naturally frost-tolerant. These include kale, spinach, and certain varieties of lettuce. By choosing organic seeds and avoiding the use of synthetic pesticides and fertilizers, you can ensure that your spring garden is both productive and environmentally friendly.
Q: Companion planting guide for edible spring garden plants and herbs?
A: Companion planting involves growing certain plants together to benefit from their symbiotic relationships. Here are a few examples of companion planting for spring edibles:
- Radishes and Lettuce: Radishes can help deter pests that affect lettuce.
- Chives and Carrots: Chives can help repel carrot flies.
- Nasturtiums and Various Crops: Nasturtiums attract aphids, which can help protect other plants from these pests.
Q: Nutrient rich edible spring garden plants for healthy eating?
A: Spinach, kale, and chard are all excellent sources of vitamins, minerals, and antioxidants. Incorporating these nutrient-rich greens into your spring garden ensures a steady supply of healthy, homegrown produce.
Q: Where to buy seedlings for edible spring garden plants online?
A: There are several reputable online retailers that offer a wide variety of vegetable seedlings. Some popular options include Burpee, Johnny’s Selected Seeds, and Proven Winners. Many local nurseries also offer online ordering and shipping options.
Q: Easy to grow edible spring garden plants for salads?
A: Lettuce, spinach, arugula, and radishes are all easy to grow and make excellent additions to spring salads. Their quick growth and minimal care requirements make them ideal for beginner gardeners.
Conclusion:
Spring gardening is a rewarding experience, and these ten edible plants offer a fantastic starting point for your own culinary adventures. By following the tips and techniques outlined in this guide, you can cultivate a thriving spring garden and enjoy a bountiful harvest of fresh, homegrown produce. Remember to start with the basics, choose the right varieties for your climate, and provide proper care to your plants. Most importantly, have fun and enjoy the process of nurturing your garden and watching it come to life. Happy gardening!


