

Gardening enthusiasts often face the challenge of planting bulbs efficiently and effectively. The process can be time-consuming and physically demanding, especially for those with larger gardens or less experience. This is where bulb planters come into play. These tools are designed to make the task of planting bulbs easier, quicker, and more precise. However, with so many types and brands available, choosing the right bulb planter can be overwhelming.
In this comprehensive guide, we will delve into everything you need to know about bulb planters. From understanding what they are and why you should use them, to exploring the different types available and how to choose the right one for your needs. We will also provide practical tips on how to use and maintain your bulb planter, ensuring you get the most out of this essential gardening tool.
What is a Bulb Planter?
A bulb planter is a specialized gardening tool designed to make the process of planting bulbs easier and more efficient. It typically consists of a cylindrical tube with a handle, which is used to create holes in the soil for planting bulbs. The tool helps ensure that bulbs are planted at the correct depth and spacing, which is crucial for their growth and development.
Types of Bulb Planters
There are several types of bulb planters available, each designed to suit different gardening needs and preferences. Here are the main types:
- Handheld Bulb Planters: These are small, manual tools that are ideal for planting bulbs in small gardens or containers. They are easy to use and provide precise control over planting depth and spacing.
- Long-Handle Bulb Planters: These tools have a long handle, allowing gardeners to plant bulbs without bending over. They are perfect for larger gardens and for those who want to reduce strain on their back and knees.
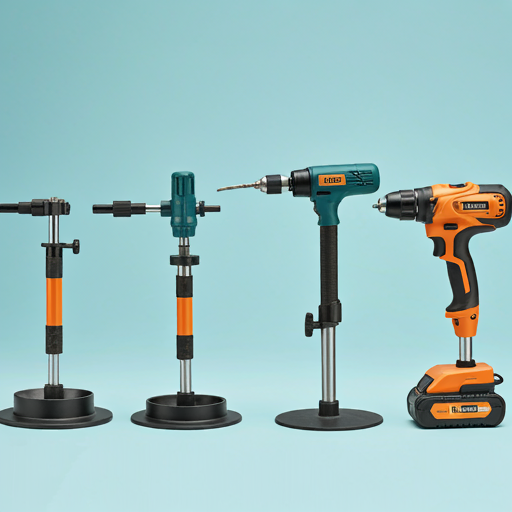
- Drill-Powered Bulb Planters: These are attachments that can be fitted onto a power drill. They are highly efficient and can quickly create holes in the soil, making them ideal for planting large numbers of bulbs or for use in hard soil.
- Automatic Bulb Planters: These are advanced tools that can automatically create holes, plant bulbs, and cover them with soil. They are best suited for commercial use or for gardeners with very large planting areas.
Why Use a Bulb Planter?
Using a bulb planter offers several benefits that can significantly improve your gardening experience. Here are some of the key advantages:
- Saves Time and Effort: Planting bulbs manually can be a time-consuming and labor-intensive task. A bulb planter speeds up the process, allowing you to plant more bulbs in less time and with less effort.
- Ensures Proper Planting Depth: Planting bulbs at the correct depth is crucial for their growth and development. A bulb planter helps ensure that bulbs are planted at the right depth, which can improve their chances of thriving.
- Reduces Physical Strain: Bending over to plant bulbs can put a strain on your back and knees. A long-handle bulb planter allows you to plant bulbs without bending, reducing the risk of injury and making the task more comfortable.
- Improves Planting Precision: A bulb planter provides precise control over planting depth and spacing, which can help ensure that your bulbs are planted in the optimal conditions for growth.
Types of Bulb Planters
Handheld Bulb Planters
Handheld bulb planters are small, manual tools that are ideal for planting bulbs in small gardens or containers. They typically consist of a cylindrical tube with a handle, which is used to create holes in the soil for planting bulbs. Here are some of the key features and benefits of handheld bulb planters:
- Features: Handheld bulb planters are usually made of durable materials such as stainless steel or aluminum. They have a comfortable handle that provides a good grip, and some models come with a depth gauge to help ensure that bulbs are planted at the correct depth.
- Benefits: Handheld bulb planters are easy to use and provide precise control over planting depth and spacing. They are lightweight and portable, making them ideal for small gardens or for planting bulbs in containers.
Long-Handle Bulb Planters
Long-handle bulb planters are designed to allow gardeners to plant bulbs without bending over. They have a long handle that provides leverage, making it easier to create holes in the soil. Here are some of the key features and benefits of long-handle bulb planters:
- Features: Long-handle bulb planters are typically made of durable materials such as stainless steel or aluminum. They have a long handle that provides leverage, and some models come with a footrest to help apply pressure when creating holes in the soil.
- Benefits: Long-handle bulb planters are ideal for larger gardens and for those who want to reduce strain on their back and knees. They provide precise control over planting depth and spacing, and they can be used to plant bulbs in a variety of soil types.
Drill-Powered Bulb Planters
Drill-powered bulb planters are attachments that can be fitted onto a power drill. They are highly efficient and can quickly create holes in the soil, making them ideal for planting large numbers of bulbs or for use in hard soil. Here are some of the key features and benefits of drill-powered bulb planters:
- Features: Drill-powered bulb planters are typically made of durable materials such as stainless steel or aluminum. They have a cylindrical tube that can be fitted onto a power drill, and some models come with a depth gauge to help ensure that bulbs are planted at the correct depth.
- Benefits: Drill-powered bulb planters are highly efficient and can quickly create holes in the soil. They are ideal for planting large numbers of bulbs or for use in hard soil, and they provide precise control over planting depth and spacing.
Automatic Bulb Planters
Automatic bulb planters are advanced tools that can automatically create holes, plant bulbs, and cover them with soil. They are best suited for commercial use or for gardeners with very large planting areas. Here are some of the key features and benefits of automatic bulb planters:
- Features: Automatic bulb planters are typically made of durable materials such as stainless steel or aluminum. They have a motor that powers the tool, and some models come with a depth gauge to help ensure that bulbs are planted at the correct depth.
- Benefits: Automatic bulb planters are highly efficient and can quickly create holes, plant bulbs, and cover them with soil. They are ideal for commercial use or for gardeners with very large planting areas, and they provide precise control over planting depth and spacing.
How to Choose the Right Bulb Planter
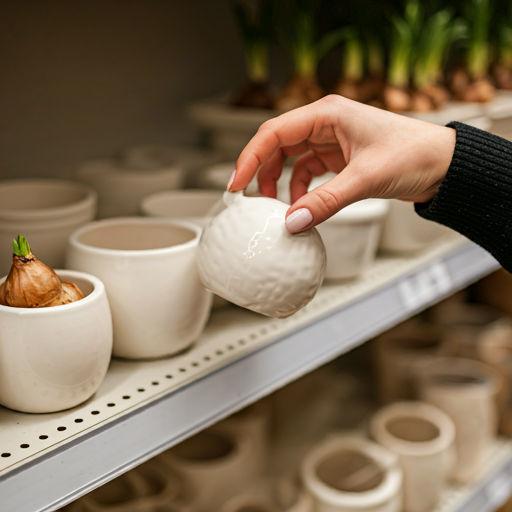
Choosing the right bulb planter can make a significant difference in your gardening experience. Here are some factors to consider when selecting a bulb planter:
- Garden Size: The size of your garden will determine the type of bulb planter you need. For small gardens or container planting, a handheld bulb planter may be sufficient. For larger gardens, a long-handle or drill-powered bulb planter may be more suitable.
- Soil Type: The type of soil in your garden will also influence your choice of bulb planter. For hard or compacted soil, a drill-powered bulb planter may be the best option. For softer soil, a handheld or long-handle bulb planter may be sufficient.
- Physical Comfort: Consider your physical comfort when choosing a bulb planter. If you have back or knee problems, a long-handle bulb planter can help reduce strain. If you prefer a more hands-on approach, a handheld bulb planter may be more suitable.
- Brand and Model: There are many brands and models of bulb planters available, each with its own features and benefits. Some popular brands include Fiskars, Edward Tools, and Yard Butler. Consider the features and benefits of each model to find the one that best suits your needs.
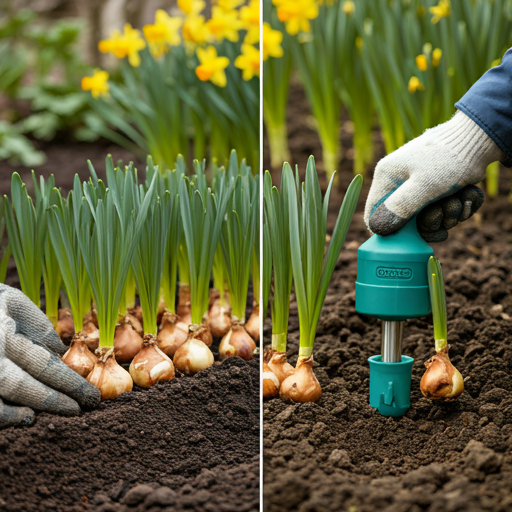
How to Use a Bulb Planter
Using a bulb planter is a straightforward process, but there are some tips and techniques that can help you get the best results. Here is a step-by-step guide to using different types of bulb planters:
Using a Handheld Bulb Planter
- Prepare the Soil: Before using a handheld bulb planter, prepare the soil by removing any weeds or debris. Loosen the soil with a garden fork or trowel to make it easier to create holes.
- Create the Hole: Insert the handheld bulb planter into the soil and twist it to create a hole. The depth of the hole should be approximately three times the height of the bulb.
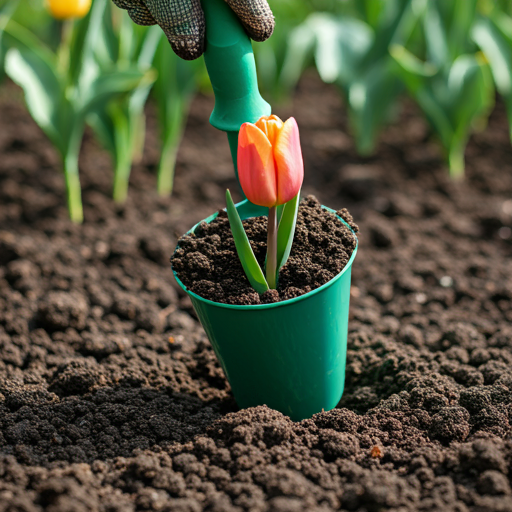
- Plant the Bulb: Place the bulb in the hole with the pointed end facing up. Cover the bulb with soil and gently press down to remove any air pockets.
- Water the Bulb: Water the bulb thoroughly to help it establish roots. Continue to water the bulb regularly, especially during dry periods.
Using a Long-Handle Bulb Planter
- Prepare the Soil: Before using a long-handle bulb planter, prepare the soil by removing any weeds or debris. Loosen the soil with a garden fork or trowel to make it easier to create holes.
- Create the Hole: Insert the long-handle bulb planter into the soil and press down with your foot to create a hole. The depth of the hole should be approximately three times the height of the bulb.
- Plant the Bulb: Place the bulb in the hole with the pointed end facing up. Cover the bulb with soil and gently press down to remove any air pockets.
- Water the Bulb: Water the bulb thoroughly to help it establish roots. Continue to water the bulb regularly, especially during dry periods.
Using a Drill-Powered Bulb Planter
- Prepare the Soil: Before using a drill-powered bulb planter, prepare the soil by removing any weeds or debris. Loosen the soil with a garden fork or trowel to make it easier to create holes.
- Attach the Planter: Attach the bulb planter to your power drill according to the manufacturer’s instructions. Ensure it is securely fastened.
- Create the Hole: Position the drill-powered bulb planter where you want to plant the bulb. Turn on the drill and press down gently to create a hole. The depth of the hole should be approximately three times the height of the bulb.
- Plant the Bulb: Place the bulb in the hole with the pointed end facing up. Cover the bulb with soil and gently press down to remove any air pockets.
- Water the Bulb: Water the bulb thoroughly to help it establish roots. Continue to water the bulb regularly, especially during dry periods.
Using an Automatic Bulb Planter
- Prepare the Soil: Before using an automatic bulb planter, prepare the soil by removing any weeds or debris. Loosen the soil with a garden fork or trowel to make it easier to create holes.
- Set Up the Planter: Follow the manufacturer’s instructions to set up the automatic bulb planter. Ensure all parts are securely assembled and the tool is ready for use.
- Create the Hole: Position the automatic bulb planter where you want to plant the bulb. Activate the tool to create a hole. The depth of the hole should be approximately three times the height of the bulb.
- Plant the Bulb: Place the bulb in the hole with the pointed end facing up. The automatic bulb planter may have a feature to cover the bulb with soil automatically. If not, cover the bulb with soil manually and gently press down to remove any air pockets.
- Water the Bulb: Water the bulb thoroughly to help it establish roots. Continue to water the bulb regularly, especially during dry periods.
Tips for Planting Bulbs with a Bulb Planter
Planting bulbs can be a rewarding experience, especially when you follow best practices to ensure their successful growth. Here are some tips to help you get the most out of your bulb planter:
- Choose the Right Bulbs: Select healthy, firm bulbs that are free from mold or damage. Different bulbs have different planting requirements, so choose bulbs that are suitable for your climate and soil type.
- Plant at the Right Time: The best time to plant bulbs depends on the type of bulb and your local climate. Generally, spring-flowering bulbs should be planted in the fall, while summer-flowering bulbs should be planted in the spring.
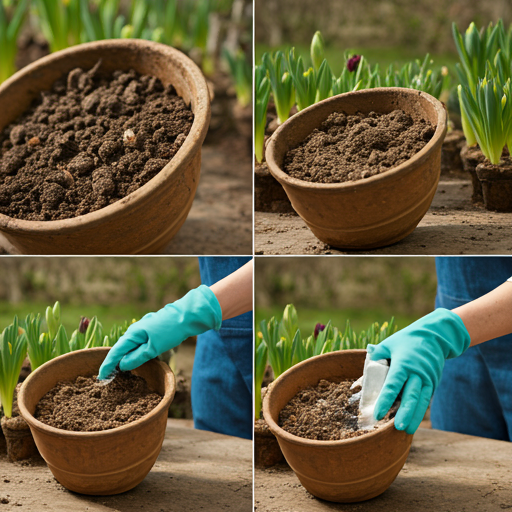
- Prepare the Soil: Good soil preparation is key to successful bulb planting. Remove any weeds or debris, and loosen the soil to a depth of at least 12 inches. Adding compost or organic matter can improve soil fertility and drainage.
- Follow Planting Depth Guidelines: Plant bulbs at a depth that is approximately three times their height. This ensures they have enough soil coverage to protect them from temperature fluctuations and pests.
- Space Bulbs Appropriately: Space bulbs according to the recommendations for each type. Crowding bulbs can lead to poor growth and increased susceptibility to disease.
- Water Thoroughly: After planting, water the bulbs thoroughly to help them establish roots. Continue to water regularly, especially during dry periods, but avoid overwatering as this can cause bulbs to rot.
- Mulch for Protection: Applying a layer of mulch can help retain soil moisture, regulate soil temperature, and suppress weeds. Use organic mulch such as straw, leaves, or wood chips.
- Monitor for Pests and Diseases: Keep an eye out for common pests such as squirrels, voles, and insects that may damage your bulbs. Use appropriate pest control measures if needed.
- Label Your Plantings: Use plant markers to label where you have planted different types of bulbs. This can help you remember their locations and care requirements.
- Rotate Plantings: To prevent soil depletion and reduce the risk of disease, rotate your bulb plantings each year. Avoid planting the same type of bulb in the same location year after year.
Maintaining Your Bulb Planter
Proper maintenance of your bulb planter is essential to ensure its longevity and effectiveness. Here are some tips for keeping your bulb planter in top condition:
- Clean After Use: After each use, clean your bulb planter to remove soil, debris, and plant residue. Use a brush or cloth to wipe down the tool, and rinse with water if necessary. Dry thoroughly to prevent rust.
- Sharpen Blades: If your bulb planter has blades, keep them sharp to ensure efficient cutting and digging. Use a sharpening stone or file to maintain a sharp edge.
- Lubricate Moving Parts: If your bulb planter has moving parts, such as a drill attachment or automatic mechanism, lubricate them regularly to ensure smooth operation. Use a light machine oil or silicone spray.
- Store Properly: Store your bulb planter in a dry, sheltered location to protect it from the elements. Hang it on a pegboard or store it in a toolbox to keep it organized and easily accessible.
- Inspect for Damage: Regularly inspect your bulb planter for signs of wear or damage. Check for cracks, bent parts, or loose handles. Repair or replace any damaged components to ensure safe and effective use.
- Follow Manufacturer’s Instructions: Always follow the manufacturer’s instructions for use and maintenance. This can help prevent damage and ensure the tool performs as intended.
Frequently Asked Questions
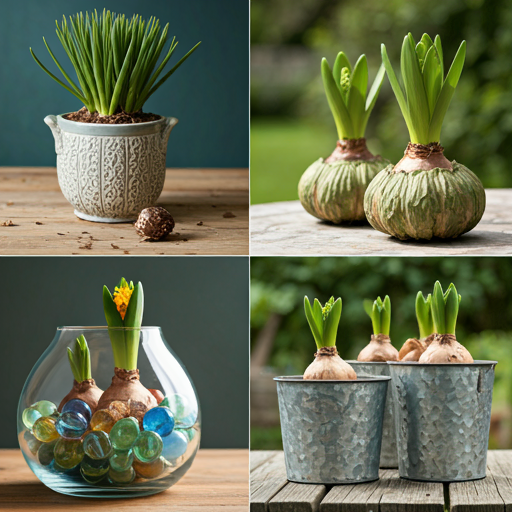
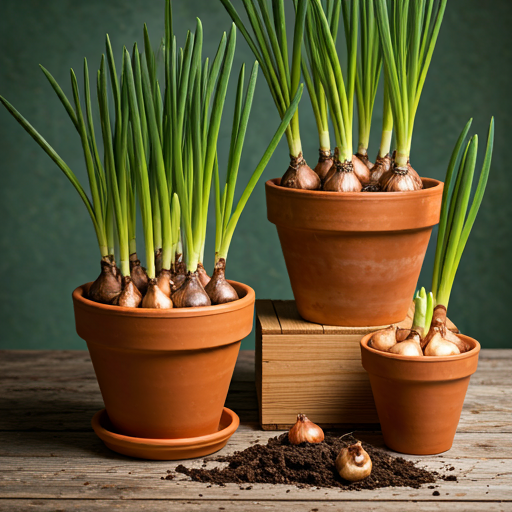
Can you grow bulbs in containers?
Yes, many types of bulbs can be grown successfully in containers. Container gardening with bulbs allows you to enjoy beautiful blooms even if you have limited garden space. Here are some tips for growing bulbs in containers:
- Choose the Right Container: Select a container with good drainage holes to prevent waterlogging. The container should be deep enough to accommodate the bulbs and allow for root growth.
- Use Quality Potting Mix: Use a well-draining potting mix that is rich in organic matter. Avoid using garden soil, as it can become compacted and hinder drainage.
- Plant at the Correct Depth: Plant bulbs at a depth that is approximately three times their height. Space the bulbs according to the recommendations for each type.
- Water Regularly: Water the bulbs thoroughly after planting and keep the soil consistently moist but not waterlogged. Reduce watering during the dormant period.
- Provide Adequate Light: Place the container in a location that receives adequate sunlight. Most bulbs require full sun to partial shade.
- Protect from Extreme Temperatures: If you live in an area with extreme temperatures, protect the container from freezing in winter and excessive heat in summer. Move the container to a sheltered location if necessary.
What is the best soil for planting bulbs?
The best soil for planting bulbs is well-draining, fertile soil that is rich in organic matter. Here are some tips for preparing the soil for bulb planting:
- Improve Drainage: Bulbs are susceptible to rot if they sit in waterlogged soil. Improve drainage by adding organic matter such as compost, peat moss, or well-rotted manure to the soil.
- Adjust Soil pH: Most bulbs prefer slightly acidic to neutral soil (pH 6.0 to 7.0). Test the soil pH and adjust if necessary by adding lime to raise the pH or sulfur to lower it.
- Loosen the Soil: Loosen the soil to a depth of at least 12 inches to allow for root growth and proper drainage. Use a garden fork or tiller to break up compacted soil.
- Add Nutrients: Incorporate a balanced fertilizer into the soil before planting to provide essential nutrients. Follow the manufacturer’s recommendations for application rates.
How deep should you plant bulbs?
The planting depth for bulbs depends on the size of the bulb. As a general rule, plant bulbs at a depth that is approximately three times their height. Here are some guidelines for common types of bulbs:
- Small Bulbs (e.g., crocuses, snowdrops): Plant at a depth of 3 to 4 inches.
- Medium Bulbs (e.g., tulips, daffodils): Plant at a depth of 6 to 8 inches.
- Large Bulbs (e.g., lilies, alliums): Plant at a depth of 8 to 12 inches.
How to deal with pests and diseases in bulb planting?
Pests and diseases can affect the health and growth of your bulbs. Here are some common issues and how to address them:
- Squirrels and Rodents: These animals may dig up and eat bulbs. Protect bulbs by covering them with a layer of chicken wire or hardware cloth after planting. Remove the wire once the bulbs have sprouted.
- Insects: Aphids, slugs, and other insects can damage bulbs and foliage. Use insecticidal soap or neem oil to control infestations. Handpick slugs and snails or use slug bait.
- Fungal Diseases: Bulbs can be affected by fungal diseases such as botrytis and fusarium. Ensure good air circulation and avoid overwatering. Remove and destroy infected plants and bulbs.
- Nematodes: These microscopic worms can cause stunted growth and yellowing of foliage. Rotate plantings and avoid planting bulbs in the same location year after year. Use nematode-resistant varieties if available.
Conclusion
In conclusion, bulb planters are essential tools for any gardener looking to plant bulbs efficiently and effectively. By choosing the right type of bulb planter and following best practices for planting and maintaining bulbs, you can enjoy a beautiful and thriving garden. Whether you are a beginner or an experienced gardener, the right bulb planter can make the task of planting bulbs easier, more efficient, and more enjoyable.
Additional Resources
For those looking to further enhance their gardening knowledge and skills, here are some additional resources that can provide valuable information and tips:
- Gardening Books: There are many excellent books on gardening that cover a wide range of topics, from bulb planting to garden design. Some recommended titles include “The Flower Gardener’s Bible” by Lewis Hill and Nancy Hill, and “The Well-Tended Perennial Garden” by Tracy DiSabato-Aust.
- Online Gardening Communities: Joining online gardening communities can provide access to a wealth of knowledge and support from fellow gardeners. Websites like GardenWeb and Reddit’s gardening subreddit are great places to ask questions, share experiences, and learn from others.
- Gardening Workshops and Classes: Many local garden centers, botanical gardens, and community colleges offer workshops and classes on various gardening topics. These can be a great way to gain hands-on experience and learn from experts.
- Gardening Blogs and Websites: There are numerous gardening blogs and websites that offer tips, tutorials, and inspiration for gardeners of all levels. Some popular sites include Gardenista, Fine Gardening, and The Spruce.
- YouTube Channels: YouTube is a fantastic resource for visual learners. There are many gardening channels that provide step-by-step tutorials, product reviews, and garden tours. Some recommended channels include Garden Answer, Epic Gardening, and The Middle-Sized Garden.
By utilizing these resources, you can continue to expand your gardening knowledge and skills, ensuring that your garden remains beautiful and healthy for years to come.
Comparison of Bulb Planter Types
| Type of Bulb Planter | Features | Benefits | Best For |
| Handheld Bulb Planter | Small, manual tool | Precise control, easy to use | Small gardens, container planting |
| Long-Handle Bulb Planter | Long handle, footrest | Reduces strain, ideal for larger areas | Larger gardens, reducing physical strain |
| Drill-Powered Bulb Planter | Attachment for power drill | Highly efficient, quick hole creation | Large planting projects, hard soil |
| Automatic Bulb Planter | Motorized tool | Automatic planting, covers bulbs with soil | Commercial use, very large planting areas |
Planting Depth Guidelines for Common Bulbs
| Type of Bulb | Planting Depth (inches) | Spacing (inches) |
| Crocuses | 3-4 | 2-3 |
| Tulips | 6-8 | 4-6 |
| Daffodils | 6-8 | 4-6 |
| Lilies | 8-12 | 8-12 |
| Alliums | 8-12 | 6-8 |
List: Tips for Successful Bulb Planting
- Choose healthy, firm bulbs free from mold or damage.
- Plant bulbs at the correct depth, approximately three times their height.
- Space bulbs according to the recommendations for each type.
- Water bulbs thoroughly after planting and keep the soil consistently moist.
- Apply a layer of mulch to retain soil moisture and suppress weeds.
- Monitor for pests and diseases and take appropriate control measures.
- Rotate bulb plantings each year to prevent soil depletion and reduce disease risk.
By following these tips and utilizing the right tools and techniques, you can create a beautiful and thriving garden filled with vibrant blooms. Happy gardening!


