
Imagine stepping into your garden, greeted by the gentle hum of bees and the intoxicating aroma of purple blooms. This idyllic scene can be your reality with the captivating beauty of lavender. This versatile herb not only graces your landscape with elegance but boasts a multitude of uses, from soothing fragrances to culinary delights. However, cultivating these fragrant wonders requires specific knowledge. Fear not, fellow gardening enthusiasts! This comprehensive guide unveils the secrets to growing luscious lavender, transforming your garden into a haven of sensory delight.

Finding the Perfect Location: Sunshine and Drainage are Key
Lavender thrives under the warm embrace of the sun. Ideally, select a location receiving at least 6-8 hours of direct sunlight daily. This ensures optimal flower production and healthy plant growth. Remember, happy lavender is fragrant lavender!
Equally important is well-draining soil. Lavender abhors soggy conditions, and poorly draining soil can lead to root rot. If your existing soil is heavy clay, consider amending it with sand or perlite to improve drainage. Raised beds are also a fantastic option, offering excellent drainage and control over soil composition.
Tip: Perform a simple drainage test by digging a hole about 12 inches deep and filling it with water. Observe how quickly the water drains. Slow drainage indicates a need for amendments or raised beds.
Choosing Your Lavender Champion: Seedlings or Seeds?
Having secured the perfect sunny spot with excellent drainage, it’s time to choose your lavender champion! This charming herb comes in a delightful variety, each boasting unique characteristics. Here’s a breakdown of two common starting points:
1. Seedlings:
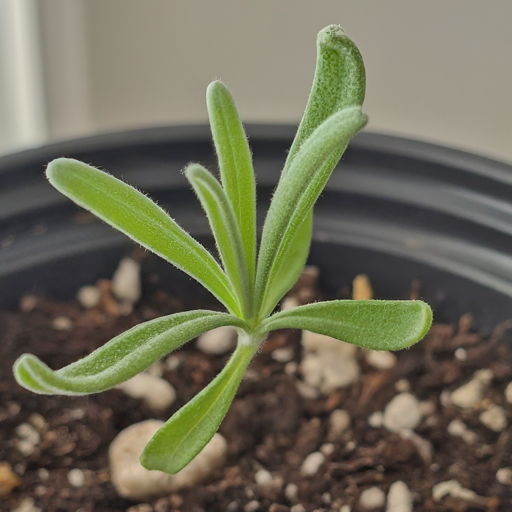
- Pros: Seedlings offer a faster path to blooms, often flowering in their first year. They’re readily available at nurseries and garden centers, allowing you to select specific varieties.
- Cons: Seedlings can be more expensive than seeds, and variety selection might be limited compared to online retailers.
2. Seeds:

- Pros: Seeds offer a wider variety of lavender cultivars to choose from, potentially including rare or heirloom varieties. They’re also generally more cost-effective than seedlings.
- Cons: Growing lavender from seeds requires patience, as it can take up to two years for them to flower. Seed germination rates can vary depending on the variety and storage conditions.
Ultimately, the choice between seedlings and seeds depends on your personal preference and gardening goals. If you crave instant gratification and a specific variety, seedlings are the way to go. For adventurous gardeners seeking a wider selection and cost-effective approach, seeds offer an exciting avenue.
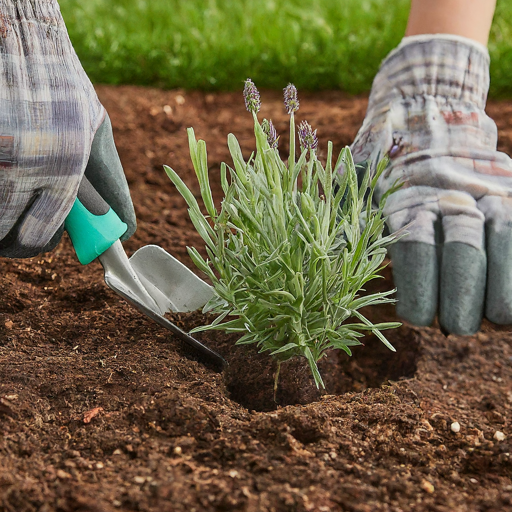
Planting Like a Pro: Spacing and Timing
With your lavender champion chosen, it’s time to translate your plans into action! Planting lavender correctly sets the stage for future success. Here’s a breakdown of key considerations:
Planting Time:
The ideal time for planting lavender depends on your climate. In warmer climates with mild winters, plant lavender in fall (around 6-8 weeks before the first frost). This allows the roots to establish before winter dormancy. For colder climates, plant lavender in early spring after the danger of frost has passed.
Spacing:
Proper spacing ensures optimal airflow and prevents overcrowding, which can lead to disease issues. Here’s a general guide for common lavender varieties:
- English Lavender (Lavandula angustifolia): Space plants 18-24 inches (45-60 cm) apart.
- French Lavender (Lavandula dentata): Space plants 24-36 inches (60-90 cm) apart.
- Lavandin (Lavandula x intermedia): Space plants 36-48 inches (90-120 cm) apart.
Planting Technique:
- Dig a hole slightly larger than the root ball of your lavender plant.
- Gently loosen the root ball to encourage root growth.
- Place the plant in the hole, ensuring the crown (the point where the stems meet the roots) sits slightly above the soil level.
- Backfill the hole with soil, gently tamping it down to remove air pockets.
- Water thoroughly to settle the soil around the roots.
Tip: Consider creating a planting bed specifically for lavender. This allows for easier control of soil composition and drainage.
By following these planting guidelines, you’ll provide your lavender with the foundation it needs to thrive and reward you with years of fragrant blooms.
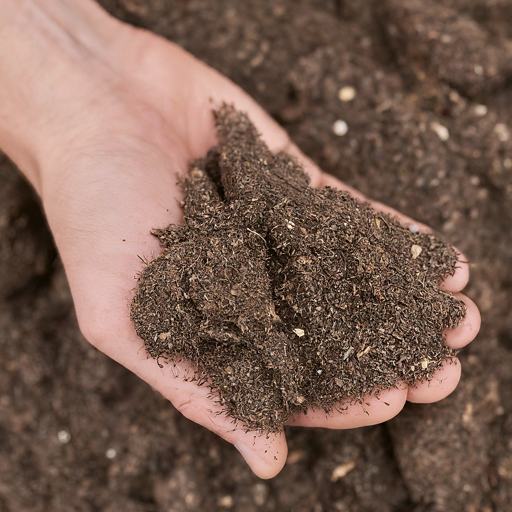
Crafting the Dream Soil: Sandy and Slightly Alkaline
Happy lavender thrives in a specific soil environment. Imagine a well-aerated, slightly sandy haven bathed in sunshine. Here’s how to create the dream soil for your fragrant friends:
Soil Composition:
- Sand: Lavender prefers well-draining soil. Amending existing soil with sand helps improve drainage and provide proper aeration for the roots.
- Compost: A small amount of composted organic matter can be beneficial, particularly in sandy soils. Compost helps retain moisture without compromising drainage.
- Ph Level: While lavender tolerates a wider range than some plants, it generally prefers slightly alkaline soil (pH 7.0-7.8). A simple soil test kit can help determine your soil’s pH level. If needed, you can raise the pH by adding lime or wood ash (avoid using fresh ashes).
Tip: Avoid using garden soil or potting mixes rich in organic matter, as these can retain too much moisture for lavender’s liking.
By providing your lavender with the ideal soil composition, you’ll be nurturing a healthy foundation for vibrant growth and abundant blooms. In the next section, we’ll delve into the art of watering lavender, ensuring you strike the perfect balance to keep your fragrant plants thriving.
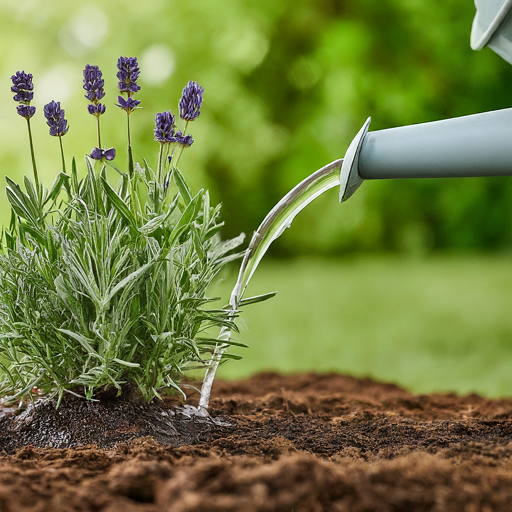
Watering Wisely: Don’t Drown Your Beauty
Just like any living thing, lavender requires water to survive and flourish. However, overwatering is a common pitfall for new lavender enthusiasts. Remember, lavender hails from sunny, well-drained regions and thrives with moderate moisture. Here’s a guide to watering your lavender wisely:
Frequency:
- Newly planted lavender: Water deeply and consistently during the first few weeks after planting, allowing the top inch of soil to dry slightly between waterings.
- Established lavender: Once established (typically after the first year), lavender is quite drought tolerant. Water deeply when the top 2-3 inches of soil feel dry to the touch. During extended dry periods, you may need to water more frequently.
Signs of Overwatering:
- Wilting leaves (may seem counterintuitive, but overwatering can stress the plant)
- Yellowing leaves
- Mushy stems
- Root rot (severe cases)
Watering Technique:
- Deep watering encourages the roots to grow deep into the soil, promoting overall plant health.
- Avoid shallow watering, which only wets the surface and doesn’t reach the roots effectively.
- Water directly at the base of the plant, minimizing water spray on the leaves to reduce the risk of fungal diseases.
Tip: A moisture meter can be a helpful tool, especially for new gardeners, to gauge soil moisture levels and avoid overwatering.
By following these watering guidelines, you’ll ensure your lavender receives the hydration it needs without succumbing to the perils of overwatering. In the next section, we’ll explore the art of pruning lavender, a practice that not only enhances its shape but also promotes bushier growth and even more blooms.
Pruning for Perfection: Shape and Encourage Growth
Pruning your lavender is not just about aesthetics; it’s a strategic practice that benefits the plant’s overall health and flower production. Think of it as a gentle nudge, encouraging bushier growth and more blooms for your fragrant enjoyment. Here’s a breakdown of when and how to prune lavender:
Timing:
- Main Pruning: The ideal time for the main pruning is typically in late winter or early spring (just before new growth appears). This allows the plant to focus its energy on producing new shoots and flowers throughout the growing season.
- Light Trimming: Throughout the growing season, you can perform light trimming to remove spent flowers and maintain a desired shape.
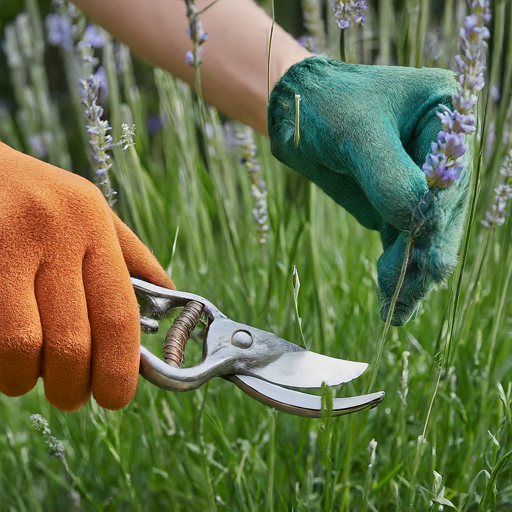
Pruning Techniques:
- Use sharp pruning shears or secateurs for clean cuts.
- For established lavender plants, aim to prune about one-third of the total stem length. This encourages bushier growth and stimulates new flower production.
- Avoid cutting into old, woody stems. Focus on pruning new growth for optimal results.
- When removing spent flowers, cut the stem back to a healthy set of leaves below the flower head. This encourages new growth and prevents the plant from setting seed, which can reduce flower production in the following season.
Benefits of Pruning:
- Promotes bushier, more compact growth.
- Encourages more flower production.
- Improves air circulation, reducing the risk of fungal diseases.
- Maintains the desired shape and size of your lavender plants.
Tip: Don’t be afraid to prune! Lavender is a resilient herb and will readily bounce back from proper pruning.
By incorporating these pruning techniques into your lavender care routine, you’ll not only maintain a beautiful shape but also encourage your plants to produce an abundance of fragrant blooms for seasons to come. In the next section, we’ll explore the topic of fertilization, ensuring your lavender has the necessary nutrients to thrive.
Keeping it Nutritious: But Not Overly Fertilized
Lavender thrives with minimal pampering when it comes to fertilization. In fact, overfertilizing can be detrimental, promoting excessive foliage growth at the expense of flowers. Here’s a look at fertilizing lavender for optimal results:
Less is More:
- Established lavender plants generally require little to no additional fertilizer, particularly if planted in soil amended with compost.
- Excessive fertilizer can lead to leggy, floppy growth with fewer flowers.
Signs Your Lavender Might Need Fertilizer:
- Stunted growth
- Pale leaves
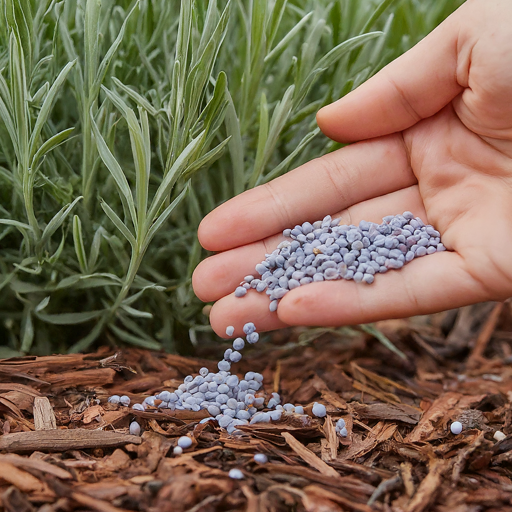
Fertilizing Tips:
- If needed, a light application of a balanced, organic fertilizer in early spring can be beneficial. Opt for a fertilizer formulated for flowering plants with a low nitrogen content (e.g., 5-10-10 NPK ratio).
- Alternatively, you can topdress your lavender plants with a thin layer of aged compost in early spring.
- Always follow the application instructions on the fertilizer label and avoid over-application.
Tip: A healthy soil teeming with beneficial microbes is the foundation for optimal lavender growth. Consider practices that promote soil health, such as mulching and cover cropping, to create a thriving ecosystem for your lavender.
By following these fertilization guidelines, you’ll ensure your lavender receives the essential nutrients it needs to flourish without the drawbacks of excessive fertilization. In the next section, we’ll explore strategies for protecting your lavender plants during harsh winter conditions (if applicable to your climate).
Winter Woes? Not Anymore: Protecting Your Lavender
For gardeners in colder climates, winter can present a challenge for tender plants. However, with a little preparation, you can ensure your lavender survives the winter chill and returns to grace your garden with fragrant blooms come spring. Here’s a breakdown of winter protection strategies for lavender:
Climate Considerations:
- USDA Hardiness Zones: Lavender varieties generally fall within USDA hardiness zones 5-10. Knowing your specific zone will help determine the level of winter protection needed for your lavender.
- Winter Severity: Factors like the frequency and duration of freezing temperatures, as well as snow cover, will influence your winter protection approach.
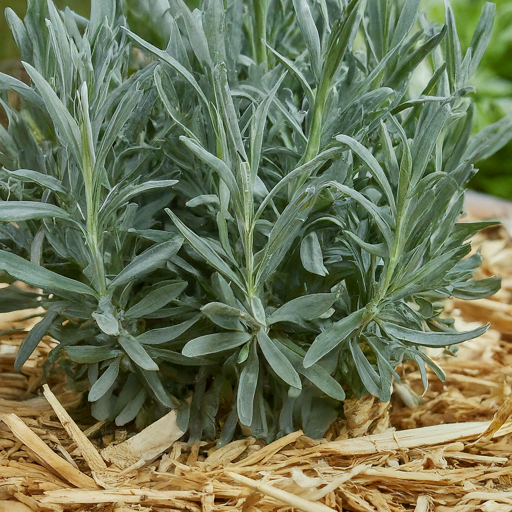
Winter Protection Techniques:
- Mulching: Apply a 2-3 inch layer of organic mulch (such as shredded bark, compost, or straw) around the base of your lavender plants in late fall. Mulch helps insulate the roots and protect them from freezing temperatures.
- Mounding Soil: In colder zones, you can create a temporary mound of soil around the base of your lavender plants in late fall. This additional layer of soil provides further insulation for the roots.
- Row Covers: In very cold climates, consider using a breathable row cover to protect your lavender from harsh winter winds and excessive drying.
Tip: Avoid using plastic sheeting for winter protection, as it can trap moisture and create ideal conditions for fungal diseases. Opt for breathable materials like burlap or row covers.
By implementing these winter protection measures, you’ll provide your lavender with the security it needs to weather the winter and emerge vibrant and healthy in the spring. In the next section, we’ll delve into the exciting world of harvesting lavender, guiding you through the process of reaping the fragrant rewards of your gardening efforts.
Harvesting Heaven: When and How to Reap the Rewards
The culmination of your lavender-growing journey arrives with harvest time! Witnessing those beautiful purple blooms swaying in the breeze signifies the moment to capture their captivating fragrance and essence. Here’s a guide to harvesting lavender for optimal results:
Timing is Key:
- The ideal time to harvest lavender is typically just as the flowers begin to open, but before they are fully bloomed. This ensures the highest concentration of essential oils, responsible for the plant’s potent fragrance.
- Look for a few florets at the tip of the bloom to have opened, with the rest still remaining in bud form.
Harvesting Techniques:
- Use sharp pruning shears or secateurs for clean cuts.
- Cut the stem back to a healthy set of leaves just below the flower head.
- Consider harvesting individual flower stalks or larger bundles, depending on your intended use.
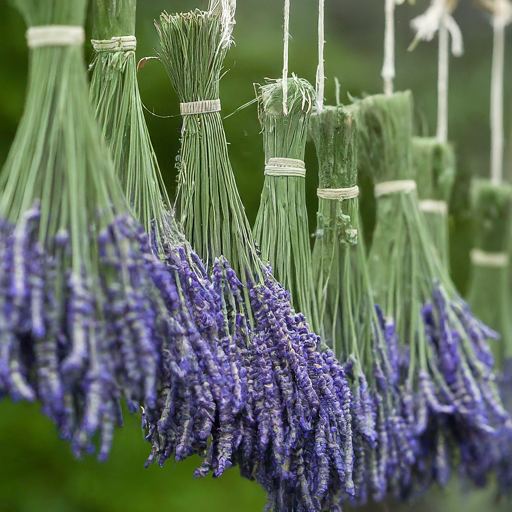
Drying Your Lavender Bounty:
- After harvesting, tie the lavender stems together loosely in small bundles.
- Hang the bundles upside down in a cool, dark, well-ventilated area out of direct sunlight. An attic, shed, or garage can be suitable locations.
- Allow the lavender to dry for 2-3 weeks, or until the flowers feel crumbly and the stems become brittle.
Tip: Once dried, store your lavender in airtight containers in a cool, dark location. This preserves the fragrance and quality for up to a year.
By harvesting your lavender at the peak of its fragrance and following proper drying techniques, you’ll be rewarded with a bounty of beautiful and aromatic lavender buds to enjoy throughout the year. In the next and final section, we’ll explore the numerous ways to utilize your homegrown lavender, transforming it from fragrant blooms into delightful treasures.
Beyond the Blooms: Drying and Using Your Lavender
The journey of your lavender doesn’t end at harvest. The dried flowers unlock a world of possibilities, allowing you to incorporate their beauty and fragrance into your everyday life. Here’s a glimpse into the diverse ways to use your homegrown lavender:
Culinary Delights:
- Lavender-infused honey: Add a touch of elegance to your tea or desserts with lavender-infused honey. Simply place a few sprigs of dried lavender in a jar of honey and let it infuse for several weeks.
- Lavender shortbread cookies: Delicate and fragrant, lavender shortbread cookies are a delightful treat. A subtle hint of lavender elevates the buttery taste of these classic cookies.
- Herb blends: Dried lavender can be incorporated into custom herb blends for poultry, fish, or vegetables. Experiment with different combinations to discover your favorite flavor profiles.
Soothing Scents:
- Sachets: Fill small fabric bags with dried lavender to create fragrant sachets. Tuck them into drawers, closets, or your car for a lasting lavender aroma.
- Potpourri: Combine dried lavender with other fragrant elements like rose petals or orange peels to create a beautiful and aromatic potpourri for your home.
- Essential oil: While extracting essential oil requires specialized equipment, it’s the ultimate expression of lavender’s fragrance. Distilled lavender essential oil can be used in aromatherapy or DIY beauty products.
Creative Crafts:
- Lavender wreaths: Dried lavender adds a touch of rustic charm to wreaths. Combine it with other dried flowers, herbs, or ribbons for a unique decorative piece.
- Soap making: Incorporate dried lavender buds or lavender essential oil into homemade soap for a luxurious and fragrant bathing experience.
- Lavender linen spray: Create a refreshing linen spray using water, witch hazel, and a few drops of lavender essential oil. This homemade spray adds a touch of fragrance to bedding, towels, or upholstery.
Tip: The versatility of lavender is limited only by your imagination! Explore online resources and experiment with different ways to incorporate this fragrant herb into your life.
With a little creativity, your homegrown lavender can transform into a multitude of delightful treasures. From culinary delights to soothing scents and creative crafts, the possibilities are endless. So, embark on your lavender-growing journey today and cultivate a fragrant haven filled with beauty and endless uses!
Conclusion: A Symphony of Fragrance and Beauty Awaits
Your lavender-growing adventure promises a symphony of fragrance and beauty for your senses. By following the practical guidance outlined in this comprehensive guide, you’ll be well-equipped to cultivate thriving lavender plants that reward you with years of enjoyment.
Imagine waking each morning to the gentle hum of bees amidst a vibrant lavender landscape. Picture the calming aroma of lavender sachets gracing your home and the delightful taste of lavender-infused treats. The possibilities are as vast and captivating as the lavender fields themselves.
So, embrace the joy of gardening and embark on this fragrant adventure. With a little planning, dedication, and the knowledge gleaned from this guide, you’ll be well on your way to cultivating a haven of serenity and beauty filled with the intoxicating aroma of homegrown lavender.

Remember, gardening is a journey of exploration and discovery. Don’t be afraid to experiment, embrace happy accidents, and most importantly, revel in the beauty and fragrance that your lavender oasis brings to your life.


