
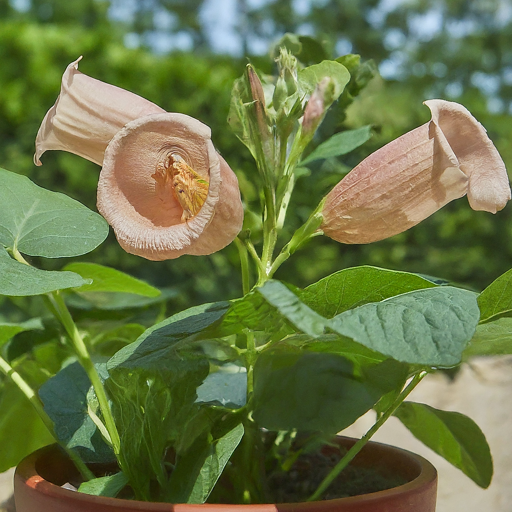
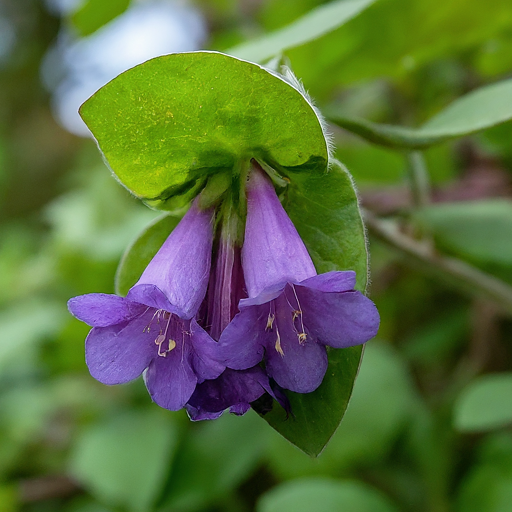
The Hogbean, with its captivating trumpet-shaped flowers and unique foliage, adds a touch of drama and elegance to any garden. Despite its undeniable beauty, its reputation as a slightly finicky flower can deter some gardeners. But fear not! This comprehensive guide will unveil the secrets to successfully cultivating Hogbeans, ensuring a flourish of these captivating blooms in your own backyard.

We’ll delve into everything you need to know about growing Hogbeans, from selecting the perfect seeds and fostering ideal germination conditions to providing ongoing care for healthy, thriving plants. Whether you’re a seasoned gardener or just starting your floral adventure, this guide will equip you with the knowledge and confidence to cultivate stunning Hogbeans.
Preparing for Success: Essential Supplies for Growing Hogbeans
Before embarking on your Hogbean-growing journey, it’s crucial to gather the necessary supplies. Here’s a list to ensure you have everything on hand:
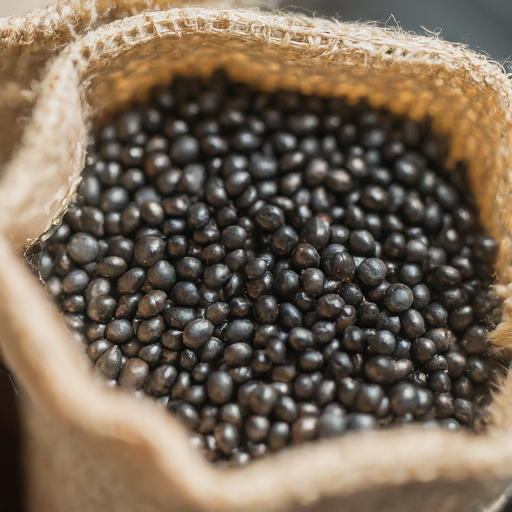
- Hogbean Seeds: The foundation of your floral display! Opt for fresh, high-quality seeds from a reputable source.
- Potting Mix: A well-draining potting mix is essential for optimal growth. Look for one specifically formulated for flowers or cacti.
- Pots: Select pots with drainage holes to prevent waterlogging. Choose the size based on your desired mature plant size.
- Sunny Location: Hogbeans thrive in ample sunlight. However, in particularly hot climates, partial shade during the afternoon is beneficial.
- Watering Can: Regular watering is vital for Hogbeans, so a reliable watering can is a must-have.
- Gloves (Optional): While not essential, gloves can be helpful when handling Hogbeans, as some people experience mild skin irritation.
Sowing the Seeds: Cultivating a Thriving Hogbean Starter
Planting Hogbean seeds is a straightforward process, but specific steps ensure successful germination:
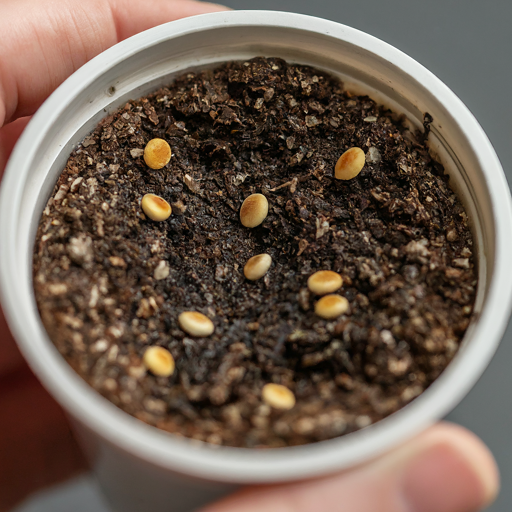
- Timing is Key: Sow seeds directly in pots during early spring or late fall. This timing allows for ideal germination temperatures.
- Seeding Depth: Plant seeds about ½ inch deep in the well-draining potting mix.
- Maintaining Moisture: Water the pots consistently to maintain evenly moist soil, but avoid overwatering, which can lead to rot.
- Warmth and Indirect Sunlight: Place the pots in a warm location (ideally between 65-75°F) with indirect sunlight. This fosters ideal germination conditions.
- Promoting Germination: Cover the pots loosely with plastic wrap to retain moisture and create a mini greenhouse effect. Ensure some air circulation by poking a few holes in the plastic wrap.
Witnessing the Magic: Germination and Seedling Care
Within 14-21 days, you should witness the magic of germination as your Hogbean seeds sprout! Here’s how to nurture these delicate seedlings:
- Patience is Rewarded: Once you see sprouts, gradually remove the plastic wrap to acclimate the seedlings to the surrounding environment.
- Introducing Direct Sunlight: Gradually introduce the seedlings to direct sunlight over a few days to prevent shock.
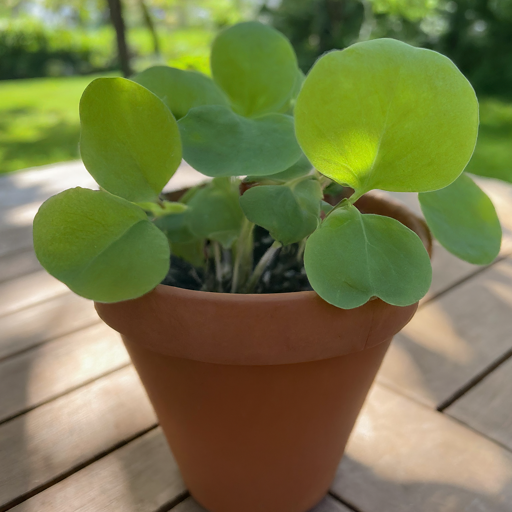
- Thinning for Strength: Once seedlings reach 2-3 inches tall, thin them to the strongest one per pot. This allows for optimal growth of the chosen seedling.
Transplanting to Brilliance (Optional): Establishing Hogbeans in the Garden
While Hogbeans flourish in containers, you can also transplant them to your garden bed for a touch of floral enchantment outdoors. Here’s how to ensure a smooth transition:
- The Hardening Process: Before transplanting, harden off your Hogbean seedlings by gradually exposing them to outdoor conditions for a week. This allows them to adapt to the new environment.
- Choosing the Perfect Spot: Select a well-draining location in your garden that receives partial shade, particularly in hot afternoons.
- Spacing for Success: When planting, space your Hogbean seedlings according to their mature size. Generally, a spacing of 12-18 inches between plants is recommended.
Nurturing Your Hogbeans: A Guide to Ongoing Care
Once your Hogbeans are established, whether in containers or your garden bed, providing proper ongoing care is essential for vibrant blooms and healthy plants. Here’s a breakdown of the key aspects:
- Watering: Hogbeans require consistent watering to maintain evenly moist soil. However, avoid overwatering, which can lead to root rot. Water deeply when the top inch of soil feels dry to the touch.
- Fertilization: During the growing season (typically spring and summer), fertilize your Hogbeans monthly with a balanced fertilizer diluted according to package instructions. Opt for a water-soluble fertilizer for easier application.
- Deadheading: To encourage continuous blooming, deadhead spent Hogbean flowers by pinching or cutting them off just below the flower head. This redirects the plant’s energy towards producing new blooms.
Light Fantastic: Understanding Hogbean’s Light Requirements
Hogbeans are sun-worshippers, basking in ample sunlight for optimal growth and flower production. However, in scorching climates, some afternoon shade can be beneficial to prevent the leaves from scorching. Here’s a breakdown of Hogbean’s light preferences:
Full Sun (6+ hours of direct sunlight): Ideal scenario for most climates, promoting abundant blooms and healthy foliage growth.
Partial Shade (3-6 hours of direct sunlight): In particularly hot climates or during the peak heat of summer, partial shade in the afternoon can be helpful to prevent scorching.
Full Shade (Less than 3 hours of direct sunlight): Not recommended for Hogbeans, as they require ample sunlight for flowering.
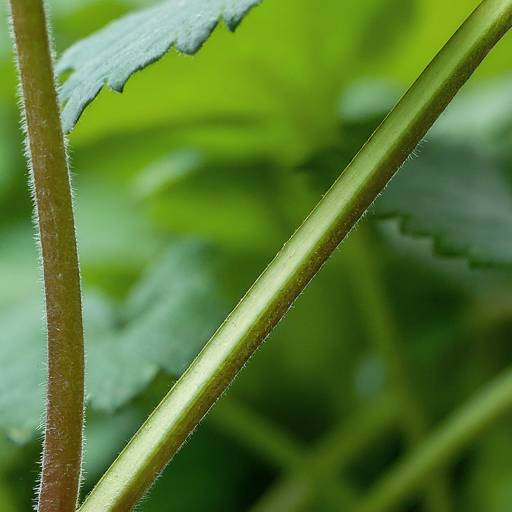
Fostering a Flourishing Habitat: Ideal Soil Conditions for Hogbeans
Hogbeans thrive in well-draining soil that allows for proper aeration and prevents waterlogging. Here’s a closer look at the ideal soil conditions:
- Drainage is Key: Hogbeans are susceptible to root rot in soggy conditions. Choose a potting mix specifically formulated for cacti or succulents, which prioritize drainage.
- Amending for Success: If your existing soil is heavy clay, amend it with perlite or sand to improve drainage. Aim for a light and airy soil texture.
- Maintaining Soil Quality: Over time, even well-draining soil can lose its aeration properties. Regularly repot your Hogbeans (every 1-2 years) in fresh potting mix to ensure optimal drainage and prevent soil compaction.
Conquering Common Challenges: Troubleshooting Hogbean Issues
While Hogbeans are generally low-maintenance plants, a few common issues can arise. Here’s a guide to identifying and resolving these challenges:
- Leggy or Stretched Plants: This indicates insufficient light. Move your Hogbeans to a sunnier location or provide supplemental light indoors.
- Yellowing Leaves: This can be caused by various factors, including overwatering, underwatering, or nutrient deficiency. Check the soil moisture and adjust your watering habits accordingly. If underwatering isn’t the culprit, consider fertilizing with a balanced fertilizer diluted according to package instructions.
- Lack of Blooms: The most likely reason for a lack of blooms is insufficient sunlight. Ensure your Hogbeans receive at least 6 hours of direct sunlight daily. Other factors like nutrient deficiency or incorrect temperatures can also play a role.
Enchanting Companions: Choosing the Perfect Plants to Pair with Hogbeans
Hogbeans, with their unique charm, can add a touch of drama to various garden settings. Here’s a guide to selecting the perfect companions to complement your Hogbeans and create a visually stunning display:
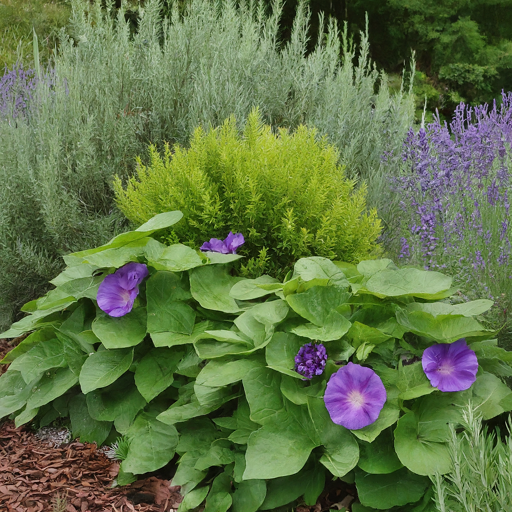
- Thriving in Similar Conditions: Consider plants that share similar sun and watering requirements as Hogbeans. Herbs like lavender, rosemary, and thyme, all basking in sunshine and thriving in well-draining soil, make excellent companions.
- A Symphony of Colors and Textures: Introduce contrasting colors and textures to create a visually captivating display. Ornamental grasses with their swaying plumes add a touch of movement, while low-growing perennials with vibrant blooms like blanket flowers or coreopsis provide a delightful color contrast.
- Beneficial Blooms: Attract pollinators like butterflies and bees by planting companion flowers rich in nectar. Yarrow, coneflowers, and borage are all excellent choices for attracting beneficial insects that will also aid in the pollination of your Hogbeans.
Propagating Your Enchantment: Multiplying Hogbeans Through Seeds or Cuttings
The captivating beauty of Hogbeans can be multiplied! Here’s a look at the two main methods for propagating these alluring plants:
Propagation by Seeds:
- Collecting Seeds: Allow your Hogbean flowers to mature and fully dry on the plant. Once the seed capsules turn brown and papery, extract the tiny black seeds within.
- Storing Seeds: Store seeds in a cool, dry place in an airtight container for future planting. Hogbean seeds can remain viable for several years when stored properly.

- Sowing for New Life: Follow the seed-sowing process outlined earlier (refer to “Sowing the Seeds: Cultivating a Thriving Hogbean Starter”) to germinate your collected seeds and cultivate new Hogbean plants.
Propagation by Cuttings (Optional):
- Selecting Stem Cuttings: Choose healthy, non-flowering stems from your Hogbean plant. Ideally, select stems that are around 4-6 inches long.
- Preparing the Cuttings: Make a clean cut just below a leaf node with a sharp knife or pruners. Remove the lower leaves from the cutting, leaving a few nodes exposed.
- Encouraging Root Growth: Dip the exposed node(s) of the cutting into a rooting hormone (optional but can improve success rate). Plant the cutting in a pot filled with well-draining potting mix, ensuring a node or two is buried beneath the soil surface.
- Providing Care: Water the pot lightly and maintain consistent moisture. Place the pot in a warm location with indirect sunlight. With proper care, roots should develop within a few weeks.
By following these propagation methods, you can create new Hogbean plants and expand your floral enchantment!
A Word of Caution: The Allure and Toxicity of Hogbeans
Hogbeans, despite their captivating beauty, possess a hidden danger. All parts of the Hogbean plant are considered toxic and can cause serious illness if ingested. Here’s a breakdown of the crucial information:
- Toxic to Humans and Animals: The alluring flowers, leaves, seeds, and even roots of the Hogbean plant contain toxins that can induce nausea, vomiting, hallucinations, and other severe health problems if ingested.
- Importance of Caution: Exercise extreme caution, especially around children and pets, who might be attracted to the plant’s appearance. Consider placing protective fencing around your Hogbeans if necessary.
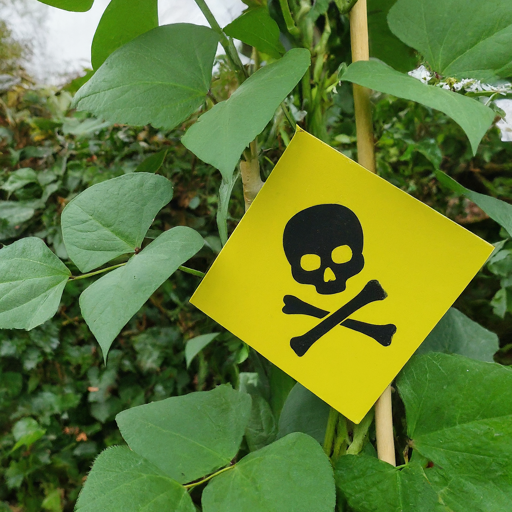
- Safe Gardening Practices: Always wear gloves when handling Hogbean plants, and wash your hands thoroughly afterwards.
By acknowledging the potential dangers and taking appropriate precautions, you can ensure the enjoyment of these stunning flowers without compromising safety.
Conclusion: Cultivating Confidence and Captivating Blooms with Hogbeans
Your Hogbean-growing adventure has now reached its conclusion! Equipped with the knowledge and essential steps, you’re well on your way to cultivating a flourish of these captivating blooms. Remember, with a touch of patience, proper care, and a keen eye for potential challenges, you can successfully cultivate stunning Hogbeans and add a touch of drama and intrigue to your garden.
Here’s a quick recap to solidify your Hogbean-growing knowledge:
- Sow seeds in early spring or late fall in well-draining pots with indirect sunlight and maintain consistent moisture.
- Harden off seedlings before transplanting outdoors (optional) to a location with partial shade, especially in hot climates.
- Provide regular watering to keep the soil evenly moist, avoiding overwatering.
- Deadhead spent flowers to encourage continuous blooming.
- Fertilize monthly during the growing season with a balanced fertilizer diluted according to package instructions.
While Hogbeans require some specific care considerations, the rewards are undeniably beautiful. Witnessing the unique trumpet-shaped flowers unfold and the captivating foliage flourish in your garden is a truly rewarding experience. So, embrace the challenge, cultivate your Hogbeans with confidence, and enjoy the captivating blooms they bring to your outdoor space!
Remember: Although Hogbeans are undeniably beautiful, prioritize safety by keeping them out of reach of children and pets. With responsible gardening practices, you can revel in the allure of these captivating flowers.


