

Gardening is a rewarding hobby, but it comes with its challenges. One of the most significant challenges gardeners face is managing water effectively. Overwatering or underwatering can lead to poor plant health, wasted resources, and frustration. Rain gauges are essential tools that can help gardeners monitor rainfall and make informed decisions about watering their plants. In this comprehensive guide, we’ll explore everything you need to know about rain gauges, from their types and benefits to installation and maintenance tips. Whether you’re a seasoned gardener or just starting, this guide will help you choose the right rain gauge for your garden and use it effectively.
What is a Rain Gauge?

Rain gauges are indispensable tools for gardeners, meteorologists, and hydrologists alike. They provide accurate measurements of rainfall, which is crucial for various applications, from weather forecasting to agricultural planning. But what exactly is a rain gauge, and how does it work?
Definition and Purpose
A rain gauge is a device used to collect and measure the amount of liquid precipitation over a set period. The primary purpose of a rain gauge is to provide accurate data on rainfall, which can be used for various purposes, including:
- Weather Forecasting: Meteorologists use rain gauges to monitor and predict weather patterns.
- Agriculture: Farmers and gardeners use rain gauges to manage irrigation and ensure optimal plant growth.
- Hydrology: Hydrologists use rain gauges to study water cycles and manage water resources.
Brief History and Evolution
The concept of measuring rainfall dates back to ancient civilizations. The earliest known rain gauge was invented in India around 400 BCE. However, it wasn’t until the 15th century that more sophisticated rain gauges were developed. One of the earliest modern rain gauges was created by Christopher Wren and Robert Hooke in the 17th century. Since then, rain gauges have evolved significantly, incorporating advanced technologies to improve accuracy and ease of use.
Importance in Gardening and Agriculture
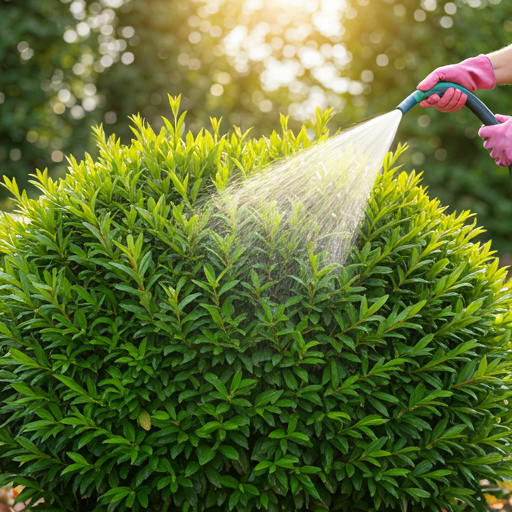
For gardeners, understanding rainfall is crucial for effective water management. Overwatering can lead to root rot and other plant diseases, while underwatering can cause plants to wilt and die. By using a rain gauge, gardeners can monitor rainfall and adjust their watering schedules accordingly. This not only helps maintain healthy plants but also conserves water and reduces utility bills.
Types of Rain Gauges
Rain gauges come in various types, each with its unique features and benefits. Understanding the different types of rain gauges can help you choose the one that best suits your gardening needs.
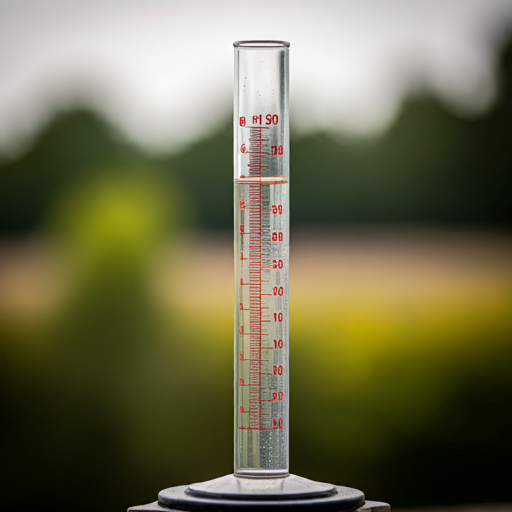
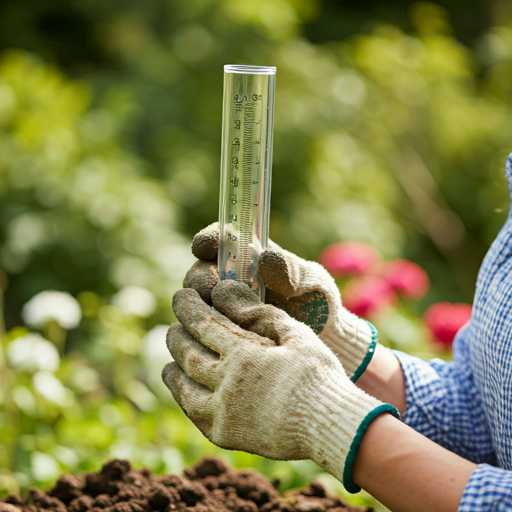
Standard Rain Gauge
The standard rain gauge, also known as a graduated cylinder rain gauge, is the most basic and widely used type. It consists of a cylindrical container with a funnel at the top to collect rainwater. The container is marked with a scale to measure the amount of rainfall.
- How It Works: Rainwater is collected in the container, and the amount of rainfall is measured by reading the scale.
- Pros: Simple to use, inexpensive, and reliable.
- Cons: Requires manual reading and emptying.
Tipping Bucket Rain Gauge
The tipping bucket rain gauge is a more advanced type that uses a tipping mechanism to measure rainfall. It consists of a funnel that directs rainwater into a small bucket. When the bucket fills to a certain level, it tips over, emptying the water and triggering a counter.
- How It Works: Each tip of the bucket represents a specific amount of rainfall, which is recorded by the counter.
- Pros: Provides continuous measurements and can be connected to data loggers for automated recording.
- Cons: More expensive than standard rain gauges and requires regular maintenance.
Weighing Precipitation Gauge
The weighing precipitation gauge measures rainfall by weighing the collected water. It consists of a container placed on a scale, which records the weight of the water.
- How It Works: The weight of the collected water is converted into a measurement of rainfall.
- Pros: Highly accurate and can measure all types of precipitation, including snow and hail.
- Cons: Expensive and requires regular calibration.
Optical Rain Gauge
The optical rain gauge uses light beams to measure rainfall. It consists of a sensor that emits light beams across a small gap. When raindrops pass through the gap, they interrupt the light beams, and the sensor records the interruptions.
- How It Works: The number and size of the interruptions are used to calculate the amount of rainfall.
- Pros: No moving parts, low maintenance, and can measure small amounts of rainfall accurately.
- Cons: Expensive and can be affected by dust and debris.
Acoustic Rain Gauge
The acoustic rain gauge uses sound waves to measure rainfall. It consists of a sensor that emits sound waves and measures the echoes produced by raindrops hitting a surface.
- How It Works: The intensity and frequency of the echoes are used to calculate the amount of rainfall.
- Pros: Can measure rainfall in real-time and is not affected by wind.
- Cons: Expensive and requires regular calibration.
How to Choose the Right Rain Gauge for Your Garden
Choosing the right rain gauge for your garden depends on several factors, including your garden size, budget, and specific needs. Here are some tips to help you make an informed decision.
Factors to Consider
- Garden Size: For small gardens, a standard rain gauge may be sufficient. For larger gardens, a tipping bucket or weighing precipitation gauge may be more appropriate.
- Budget: Standard rain gauges are the most affordable, while optical and acoustic rain gauges are more expensive.
- Accuracy: If accuracy is a priority, consider a weighing precipitation gauge or an optical rain gauge.
- Ease of Use: Standard rain gauges are simple to use, while tipping bucket and weighing precipitation gauges require more maintenance.
- Data Logging: If you want to record and analyze rainfall data, consider a rain gauge that can be connected to a data logger.
Comparison of Different Types
| Type of Rain Gauge | Accuracy | Ease of Use | Maintenance | Cost |
| Standard Rain Gauge | Moderate | Easy | Low | Low |
| Tipping Bucket Rain Gauge | High | Moderate | Moderate | Moderate |
| Weighing Precipitation | Very High | Moderate | High | High |
| Optical Rain Gauge | High | Easy | Low | High |
| Acoustic Rain Gauge | High | Easy | High | Very High |
Recommendations Based on Specific Gardening Needs
- For Beginners: A standard rain gauge is a great starting point. It’s affordable, easy to use, and provides reliable measurements.
- For Tech Enthusiasts: If you enjoy technology and want to automate your garden, consider a tipping bucket rain gauge with a data logger.
- For Large Gardens: A weighing precipitation gauge is ideal for large gardens where accurate measurements are crucial.
- For All-Weather Monitoring: An optical rain gauge is perfect for gardeners who want to measure all types of precipitation, including light rain and drizzle.
Benefits of Using a Rain Gauge
Using a rain gauge in your garden offers numerous benefits, from improved water management to cost savings. Here are some of the key advantages.
Improved Water Management
One of the primary benefits of using a rain gauge is improved water management. By accurately measuring rainfall, you can determine how much additional water your plants need. This helps prevent overwatering and underwatering, both of which can harm plant health.
- Overwatering: Overwatering can lead to root rot, fungal diseases, and nutrient leaching. By using a rain gauge, you can avoid overwatering by adjusting your irrigation schedule based on actual rainfall.
- Underwatering: Underwatering can cause plants to wilt, become stressed, and eventually die. A rain gauge helps you ensure your plants receive the right amount of water, promoting healthy growth.
Better Plant Health and Growth
Proper water management is essential for healthy plant growth. By using a rain gauge, you can provide your plants with the optimal amount of water, leading to:
- Stronger Roots: Adequate watering encourages deep root growth, making plants more resilient to drought and other stressors.
- Lush Foliage: Proper hydration promotes lush, green foliage and vibrant blooms.
- Disease Prevention: Avoiding overwatering helps prevent fungal diseases and root rot, keeping your plants healthy.
Cost Savings on Water Bills
Using a rain gauge can also lead to significant cost savings on your water bills. By accurately measuring rainfall and adjusting your irrigation schedule, you can reduce water waste and lower your utility costs.
- Efficient Irrigation: A rain gauge helps you avoid unnecessary watering, ensuring you only use the water your plants need.
- Water Conservation: By reducing water waste, you contribute to water conservation efforts, benefiting the environment and your community.
Environmental Benefits
In addition to cost savings, using a rain gauge offers several environmental benefits:
- Water Conservation: Efficient water use helps conserve water resources, which is especially important in areas prone to drought.
- Reduced Runoff: Proper watering reduces runoff, which can carry pollutants into local waterways. By using a rain gauge, you can minimize runoff and its environmental impact.
- Sustainable Gardening: Efficient water use supports sustainable gardening practices, promoting a healthier ecosystem.
How to Install a Rain Gauge
Installing a rain gauge correctly is crucial for obtaining accurate measurements. Here’s a step-by-step guide to help you set up your rain gauge in the best possible location.
Step-by-Step Installation Guide
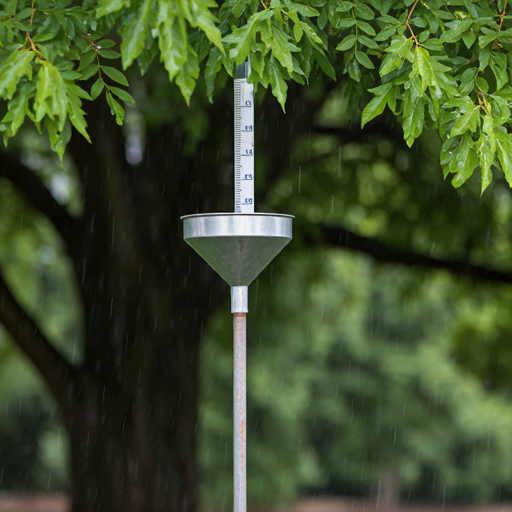
- Choose the Right Location: Select a location that is open and free from obstructions such as trees, buildings, and fences. The ideal spot is away from any structures that could block or divert rainfall.
- Mounting the Rain Gauge: Depending on the type of rain gauge, you may need to mount it on a post or place it on a flat surface. Ensure it is level to avoid inaccurate readings.
- Height Considerations: Install the rain gauge at a height of about 1.5 meters (5 feet) above the ground. This height helps prevent splashing from the ground and ensures accurate measurements.
- Secure the Gauge: Make sure the rain gauge is securely fastened to prevent it from tipping over or being blown away by strong winds.
- Check for Level: Use a spirit level to ensure the rain gauge is perfectly horizontal. An uneven gauge can lead to incorrect measurements.
Best Locations for Installing a Rain Gauge
- Open Areas: Place the rain gauge in an open area where it can collect rain without interference from nearby objects.
- Away from Trees and Buildings: Avoid placing the rain gauge near trees or buildings that can block rainfall or cause water to drip into the gauge.
- Stable Ground: Ensure the ground where the rain gauge is placed is stable and not prone to flooding or erosion.
Tips for Ensuring Accurate Measurements
- Regularly Check the Gauge: Inspect the rain gauge regularly to ensure it is clean and free from debris. Leaves, dirt, and insects can block the funnel and affect accuracy.
- Calibrate the Gauge: Periodically calibrate your rain gauge to ensure it provides accurate readings. Follow the manufacturer’s instructions for calibration.
- Avoid Windy Locations: Wind can cause rain to fall at an angle, leading to inaccurate measurements. Place the rain gauge in a sheltered location if possible.
Maintenance Tips for Rain Gauges
Proper maintenance is essential to keep your rain gauge functioning accurately and prolong its lifespan. Here are some tips to help you maintain your rain gauge effectively.
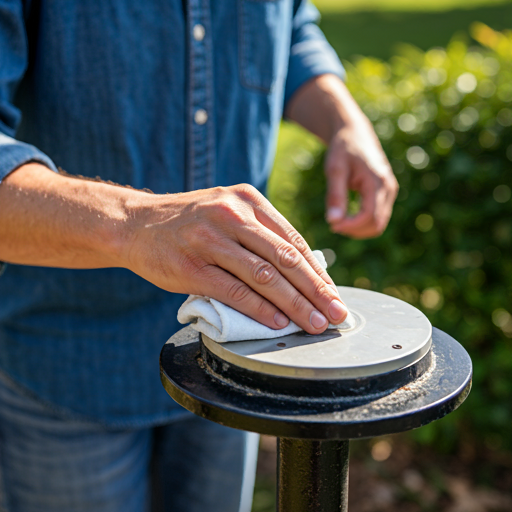
Regular Cleaning and Calibration
- Clean the Funnel and Container: Regularly clean the funnel and container to remove any debris, dirt, or algae that may accumulate. Use a mild detergent and water to clean the parts.
- Check for Blockages: Ensure there are no blockages in the funnel or measuring cylinder. Blockages can prevent rainwater from entering the gauge and lead to inaccurate readings.
- Calibrate the Gauge: Follow the manufacturer’s instructions to calibrate your rain gauge periodically. Calibration ensures the gauge provides accurate measurements.
Troubleshooting Common Issues
- Inaccurate Readings: If your rain gauge is providing inaccurate readings, check for blockages, ensure it is level, and calibrate it if necessary.
- Leaks: Inspect the rain gauge for any cracks or leaks. Replace any damaged parts to prevent water from escaping and affecting measurements.
- Battery Replacement: For digital rain gauges, regularly check and replace the batteries to ensure the device functions correctly.
Seasonal Maintenance Tips
- Winter Preparation: In colder climates, prepare your rain gauge for winter by removing it or ensuring it is protected from freezing temperatures. Freezing water can damage the gauge.
- Spring Cleaning: After winter, thoroughly clean and inspect your rain gauge before reinstalling it. Check for any damage that may have occurred during the winter months.
- Summer and Fall Maintenance: During the growing season, regularly check and clean your rain gauge to ensure it continues to provide accurate measurements.
Top-Rated Rain Gauges for Home Gardens
Choosing the right rain gauge can be overwhelming with so many options available. Here are some top-rated rain gauges that are highly recommended for home gardens.
Reviews of Popular Rain Gauges
- Davis Instruments 6250 Vantage Vue
- Features: Wireless, accurate, and durable. Includes a weather station with a rain gauge, anemometer, and temperature sensor.
- Pros: Comprehensive weather data, easy to install, reliable.
- Cons: Expensive, requires regular maintenance.
- AcuRite 00850A2 5-Inch Capacity Easy-Read Magnifying Rain Gauge
- Features: Simple design, easy to read, and affordable.
- Pros: Inexpensive, easy to install, large numbers for easy reading.
- Cons: Manual reading required, limited features.
- La Crosse Technology 724-1710 Wireless Rain Gauge
- Features: Wireless, digital display, self-emptying bucket.
- Pros: Easy to read, wireless transmission, self-emptying.
- Cons: Requires batteries, higher cost than manual gauges.
- Ambient Weather WS-2902C WiFi Smart Weather Station
- Features: WiFi connectivity, comprehensive weather data, compatible with smart home devices.
- Pros: Smart home integration, detailed weather data, easy to use.
- Cons: Expensive, complex setup.
Pros and Cons of Each Model
| Model | Pros | Cons |
| Davis Instruments 6250 Vantage Vue | Comprehensive weather data, reliable | Expensive, requires regular maintenance |
| AcuRite 00850A2 | Inexpensive, easy to install, large numbers | Manual reading required, limited features |
| La Crosse Technology 724-1710 | Easy to read, wireless transmission, self-emptying | Requires batteries, higher cost |
| Ambient Weather WS-2902C | Smart home integration, detailed weather data | Expensive, complex setup |
Where to Buy Them
- Online Retailers: Amazon, eBay, and Walmart offer a wide range of rain gauges with customer reviews and ratings.
- Specialty Stores: Weather instrument stores and garden centers often carry high-quality rain gauges.
- Manufacturer Websites: Purchasing directly from the manufacturer can ensure you get the latest models and warranty support.
DIY Rain Gauge: A Step-by-Step Guide
If you enjoy DIY projects, making your own rain gauge can be a fun and educational activity. Here’s a step-by-step guide to creating a simple and effective rain gauge using common household items.
Materials Needed
- A clear plastic bottle (2-liter soda bottle works well)
- A ruler or measuring tape
- A permanent marker
- Scissors or a utility knife
- Small stones or gravel
- Water
Step-by-Step Instructions
- Prepare the Bottle: Remove the label from the plastic bottle and clean it thoroughly. Cut off the top of the bottle just below the neck using scissors or a utility knife.
- Add Stones or Gravel: Place a small amount of stones or gravel in the bottom of the bottle to weigh it down and prevent it from tipping over.
- Mark the Measurements: Use a ruler or measuring tape to mark the side of the bottle in millimeters or inches. Start from the bottom and work your way up, marking every 5 or 10 millimeters (or 1/4 inch).
- Create the Funnel: Invert the top part of the bottle (the part you cut off) and place it inside the bottom part to act as a funnel. This will help direct rainwater into the bottle.
- Secure the Funnel: Use tape or glue to secure the funnel in place. Ensure it fits snugly and doesn’t move.
- Place the Rain Gauge: Find a suitable location in your garden to place the rain gauge. Ensure it is level and free from obstructions.
Tips for Ensuring Accuracy
- Level Surface: Place the rain gauge on a level surface to ensure accurate measurements.
- Regular Checks: Check the rain gauge regularly to ensure it is clean and free from debris.
- Record Data: Keep a record of the rainfall measurements to track patterns and make informed decisions about watering your garden.
Common Mistakes to Avoid When Using Rain Gauges
Using a rain gauge effectively requires attention to detail and proper maintenance. Here are some common mistakes to avoid to ensure you get accurate and reliable measurements.
Incorrect Placement
- Obstructions: Placing the rain gauge near trees, buildings, or other obstructions can block rainfall and lead to inaccurate measurements. Always place the gauge in an open area.
- Uneven Surface: An uneven surface can cause the rain gauge to tilt, leading to incorrect readings. Ensure the gauge is placed on a level surface.
Neglecting Maintenance
- Dirty Funnel: A dirty funnel can block rainwater from entering the gauge. Regularly clean the funnel and container to ensure accurate measurements.
- Calibration: Failing to calibrate the rain gauge can result in inaccurate readings. Follow the manufacturer’s instructions for calibration.
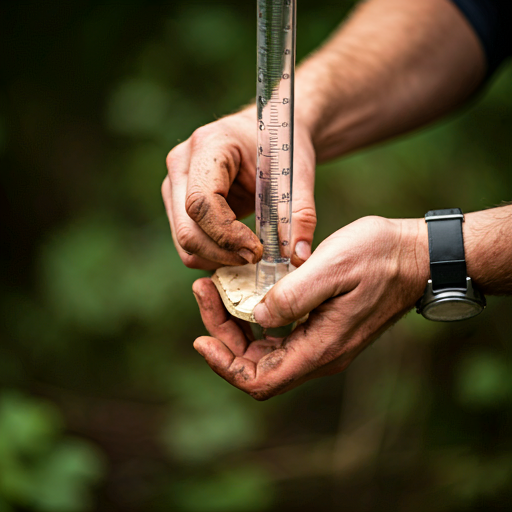
Misreading Measurements
- Incorrect Scale: Ensure you are reading the correct scale on the rain gauge. Some gauges have multiple scales for different units of measurement.
- Parallax Error: Read the measurement at eye level to avoid parallax error, which can occur when the gauge is read from angle, causing a misinterpretation of the measurement.
FAQs About Rain Gauges
Rain gauges are essential tools for gardeners, but many people have questions about their use and maintenance. Here are some frequently asked questions and their answers to help you get the most out of your rain gauge.
How Often Should I Check My Rain Gauge?
It’s best to check your rain gauge after each rainfall event to record the amount of precipitation accurately. Regular checks help you maintain an accurate record of rainfall and make informed decisions about watering your garden.
Can I Use a Rain Gauge in Winter?
Yes, you can use a rain gauge in winter, but it’s important to take precautions to prevent damage from freezing temperatures. Some rain gauges are designed to measure snow and other forms of precipitation. If your rain gauge is not designed for winter use, consider removing it during the cold months or ensuring it is protected from freezing.
How Do I Calibrate My Rain Gauge?
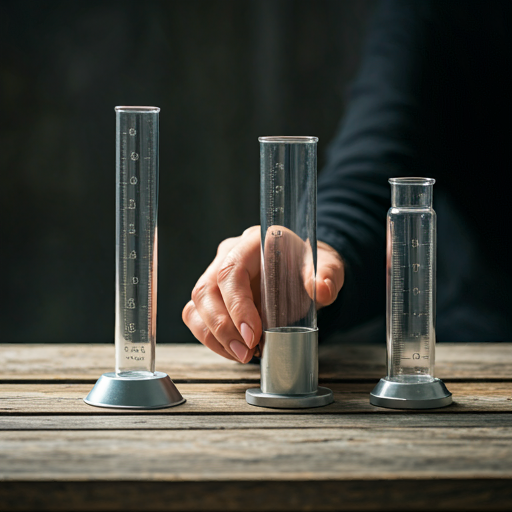
Calibration ensures your rain gauge provides accurate measurements. Follow these steps to calibrate your rain gauge:
- Fill a Measuring Cylinder: Use a measuring cylinder to fill your rain gauge with a known amount of water.
- Compare Readings: Compare the reading on your rain gauge with the known amount of water. If there is a discrepancy, adjust the gauge according to the manufacturer’s instructions.
- Repeat: Repeat the process to ensure accuracy.
What is the Most Accurate Type of Rain Gauge?
The most accurate type of rain gauge is the weighing precipitation gauge. It measures the weight of the collected water, providing highly accurate readings. However, it is also the most expensive and requires regular calibration.
How Do I Prevent My Rain Gauge from Tipping Over?
To prevent your rain gauge from tipping over, ensure it is securely fastened to a stable surface. Adding weight to the base, such as stones or gravel, can also help stabilize the gauge. Placing it in a sheltered location can reduce the impact of strong winds.
Conclusion
Rain gauges are invaluable tools for gardeners, providing essential data for effective water management and plant health. By understanding the different types of rain gauges, how to choose the right one, and how to install and maintain it, you can make informed decisions that benefit your garden. Whether you’re a beginner or an experienced gardener, using a rain gauge can help you achieve a lush, healthy garden while conserving water and reducing costs.
Investing in a quality rain gauge and following the tips and guidelines provided in this guide will ensure you get accurate and reliable measurements. Share your experiences and tips in the comments below, and happy gardening!
This concludes the comprehensive guide on rain gauges. If you have any further questions or need additional information, feel free to ask!


